Autoscoring Quickstart
Autoscoring provides you with automated, unbiased assessments of agent performance evaluations and customer surveys. Autoscoring can be used to prioritize interactions for validation and to achieve 100% compliance monitoring.
This tutorial explains how to create forms using areas and intents. Once configured, these forms can be used to assess agent interactions on assigned services.
Prerequisites
Autoscoring requires the interaction transcript. For chat services, transcripts are generated as part of the interaction, so no additional configuration is needed. For voice services, transcripts must be enabled with the following configurations:
- Call recordings are enabled for the service in either of the following ways:
- By enabling the global Quality Management setting Call Recording to record calls on all services.
- By enabling the service-specific property Record Calls on each service.
- Either historical or real-time transcription is enabled for the service:
Procedure
Follow these steps to configure an Autoscoring form and assign it to your services:
- Identify and Create Intents
- Create a New Form and Add Intents
- Configure Autoscoring for Desired Services
- (Optional) Past Process and Recalculate Interactions
- Create an Autoscoring Dashboard to Analyze Agent and Service Scores
- Review Scores on an Interaction
1. Identify and Create Intents
In an autoscoring form, intents are used instead of questions that would be asked in a normal survey or evaluation.
Before a form can be fully configured, you must identify the questions that will be asked (in a yes-or-no format) and then create the corresponding intents.
- If an intent is detected, the corresponding question on the form is answered "Yes"; otherwise, it is answered "No".
- To learn how to create intents, follow the steps outlined in the Intents Quickstart.
An example form might look like this:
FORM

  AREA A

    QUESTION (INTENT) 1

    QUESTION (INTENT) 2

  AREA B

    QUESTION (INTENT) 3

    QUESTION (INTENT) 4

    QUESTION (INTENT) 5

  AREA C

    QUESTION (INTENT) 6

    QUESTION (INTENT) 7

  AREA D

    QUESTION (INTENT) 8
2. Create a New Form and Add Intents
With your intents identified, the next step is to create the autoscoring form that will use them. Follow the Creating and Configuring a Form instructions to build your form and add the intents as scoring criteria.
3. Configure Autoscoring for Desired Services
Once finalized, assign your new form to one or more services to assess your agent performance or customer satisfaction on new interactions.
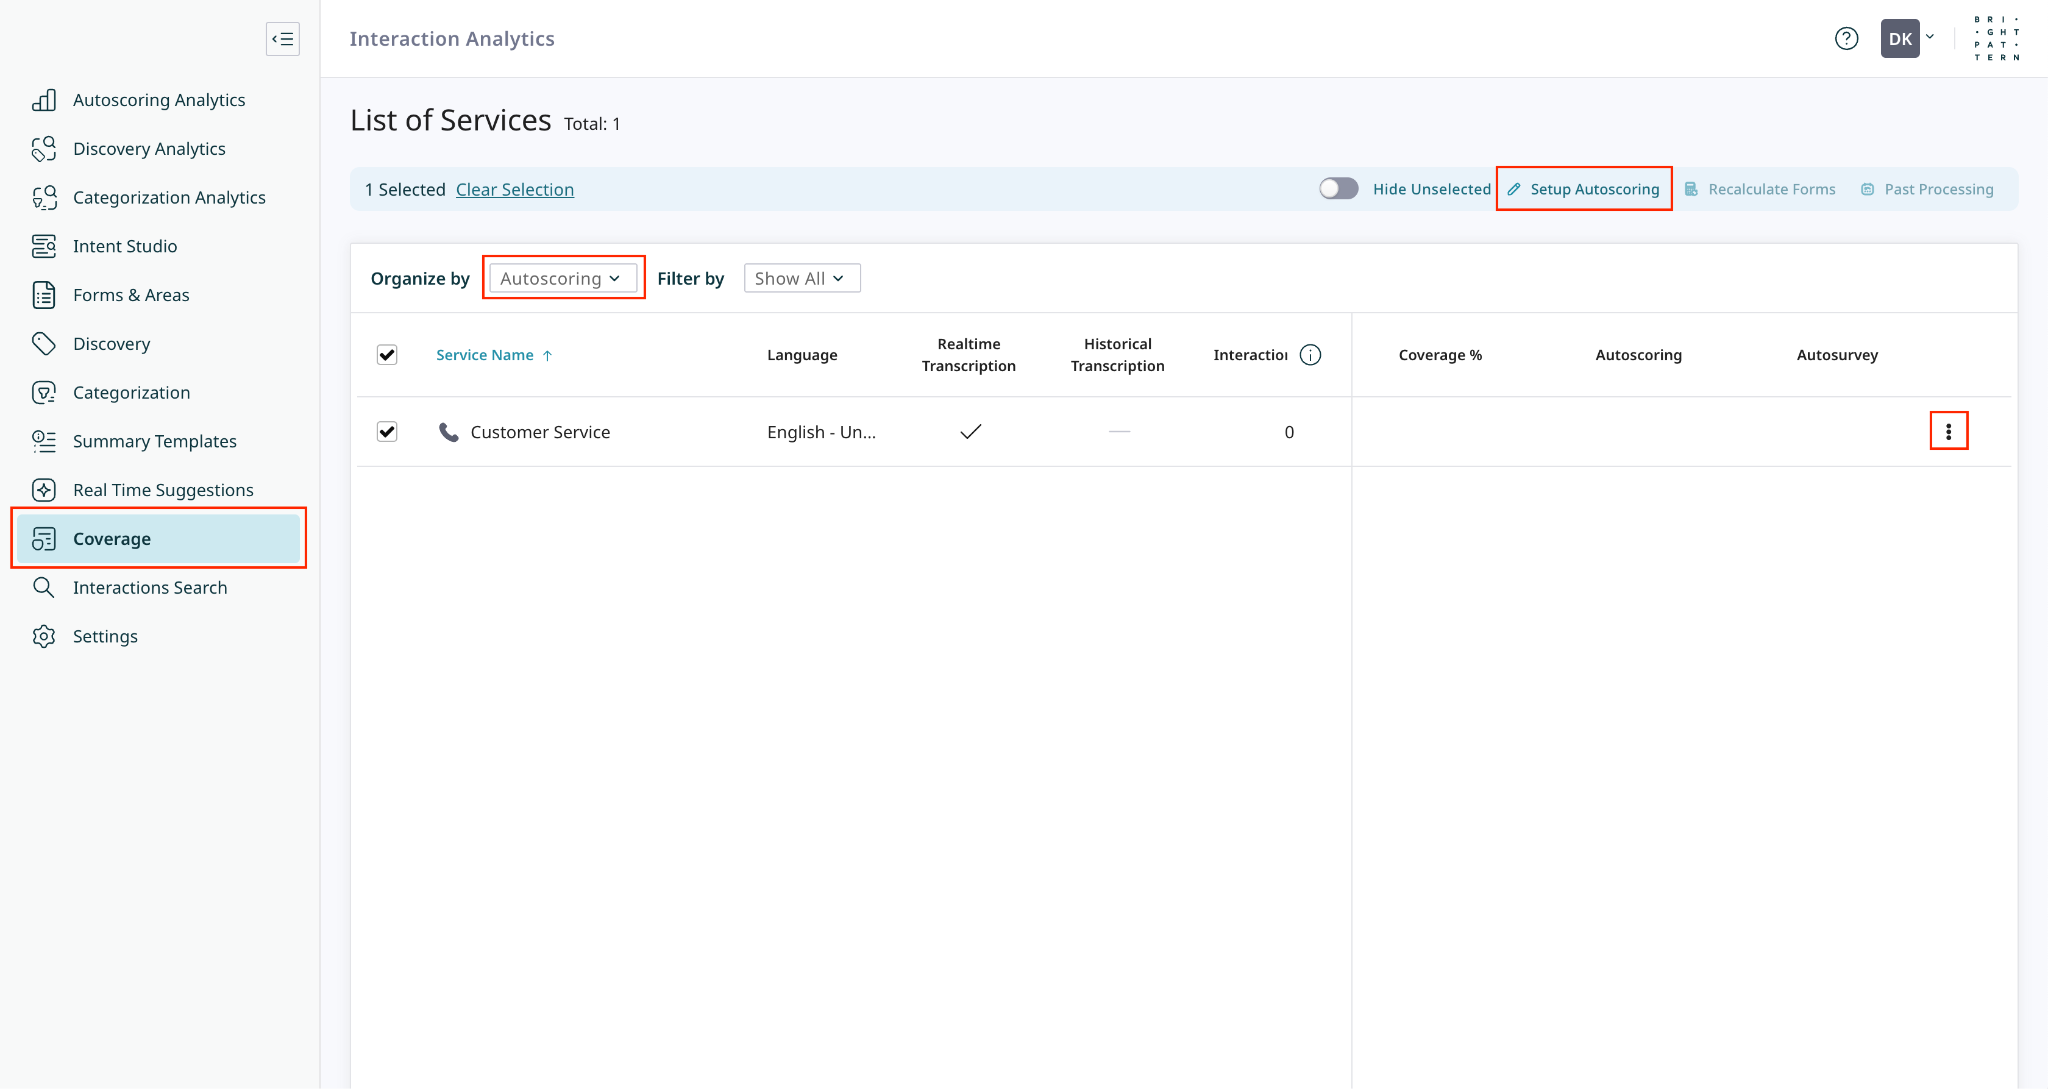
Navigate to the Coverage section, select Organize by: Autoscoring, and open Setup Autoscoring for the desired service(s).
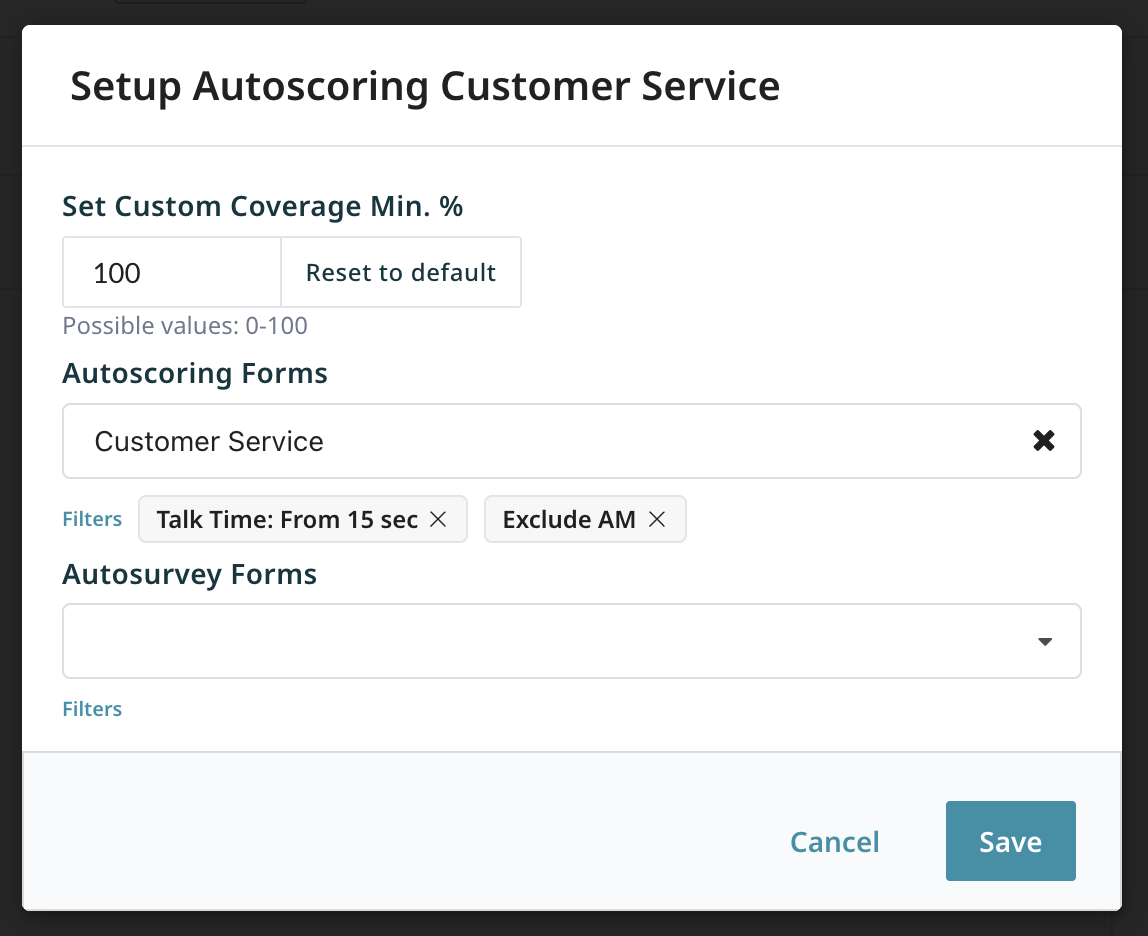
- From the Setup Autoscoring window, configure and set the Custom Coverage Min. %.
- The Custom Coverage Min. % sets the minimum percentage of new interactions to assess.
- From the Autoscoring Forms dropdown (or Autosurvey), select the template you created (e.g., "Customer Service").
4. (Optional) Past Process and Recalculate Interactions
Optionally, use Past Processing to assess agent performance or customer satisfaction for past interactions.
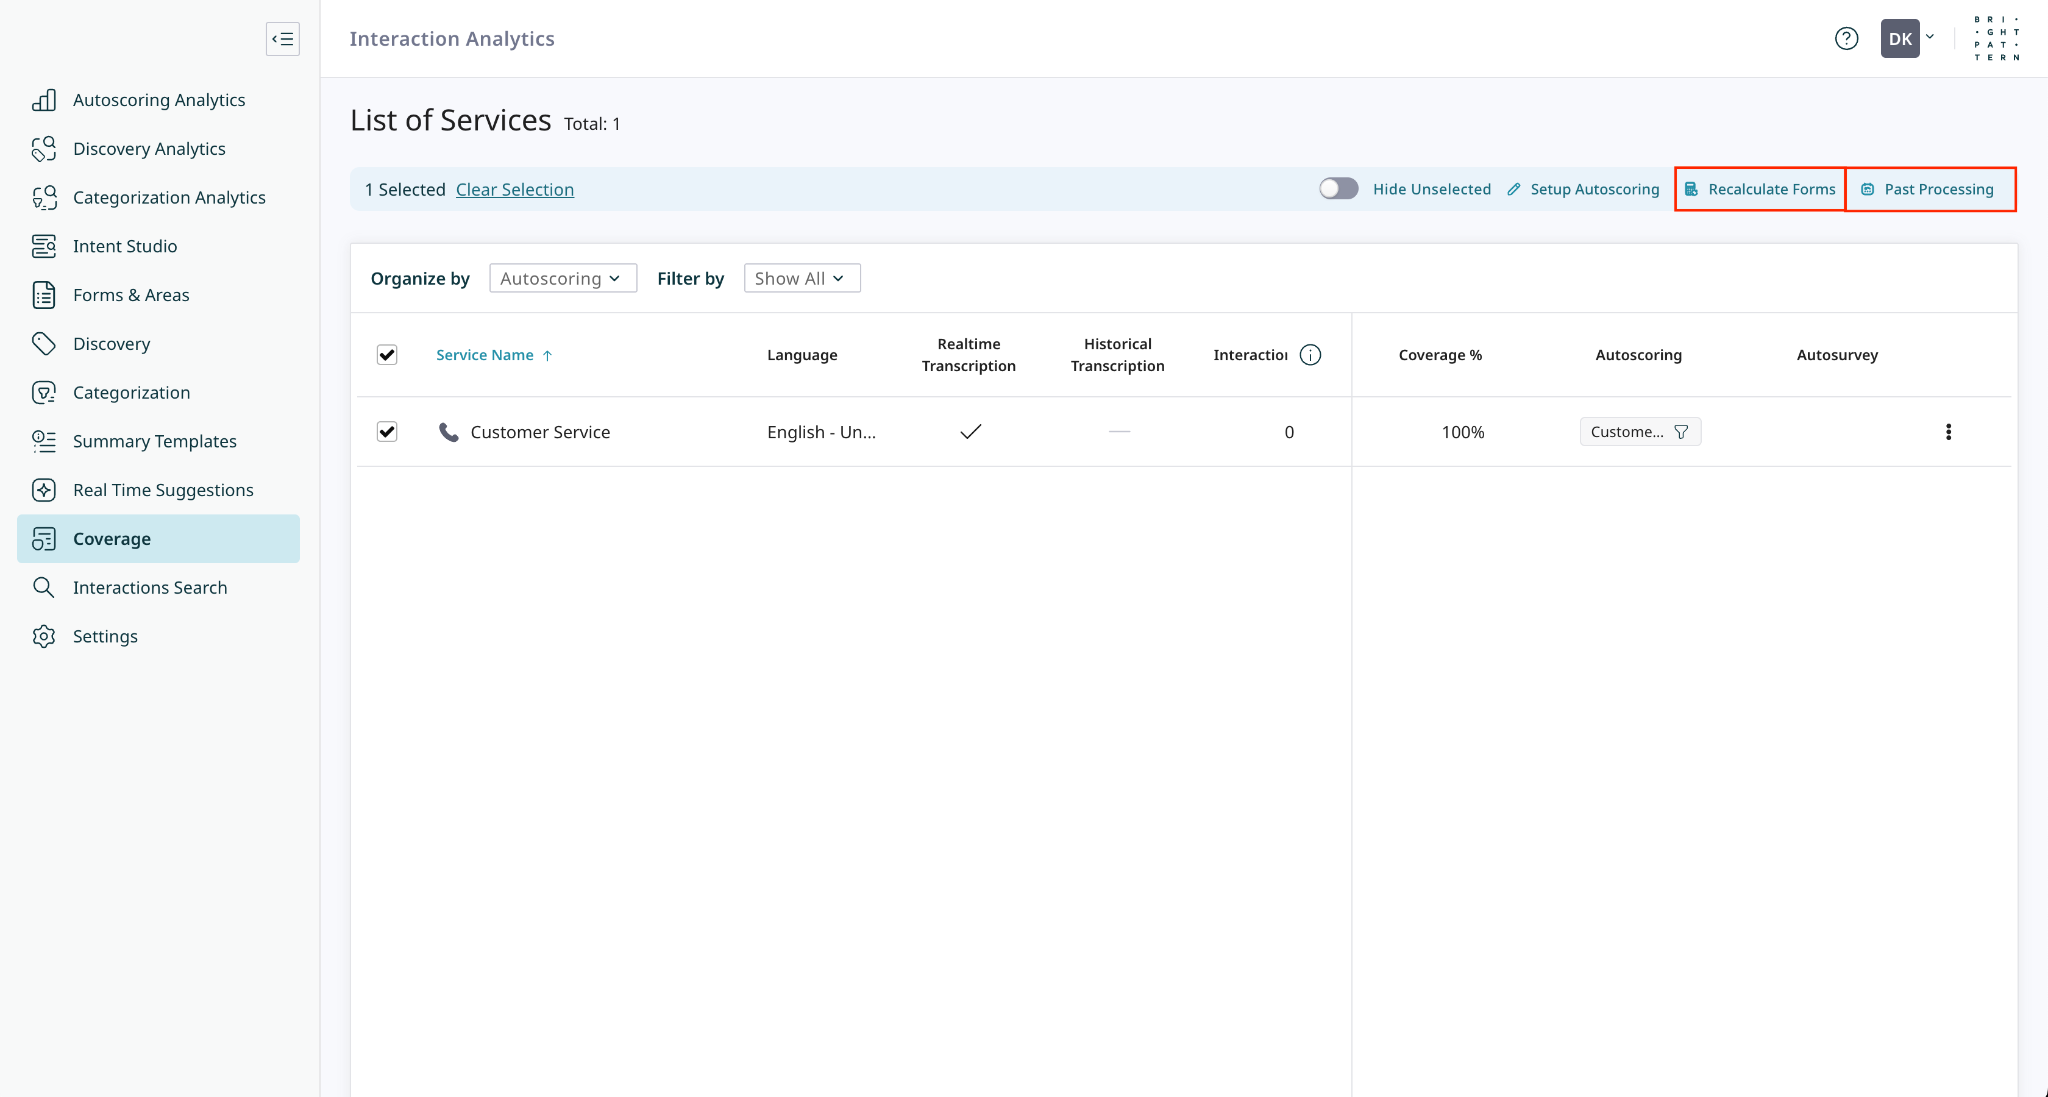
- Select the services to which the desired form is assigned, and then select the Past Processing button.
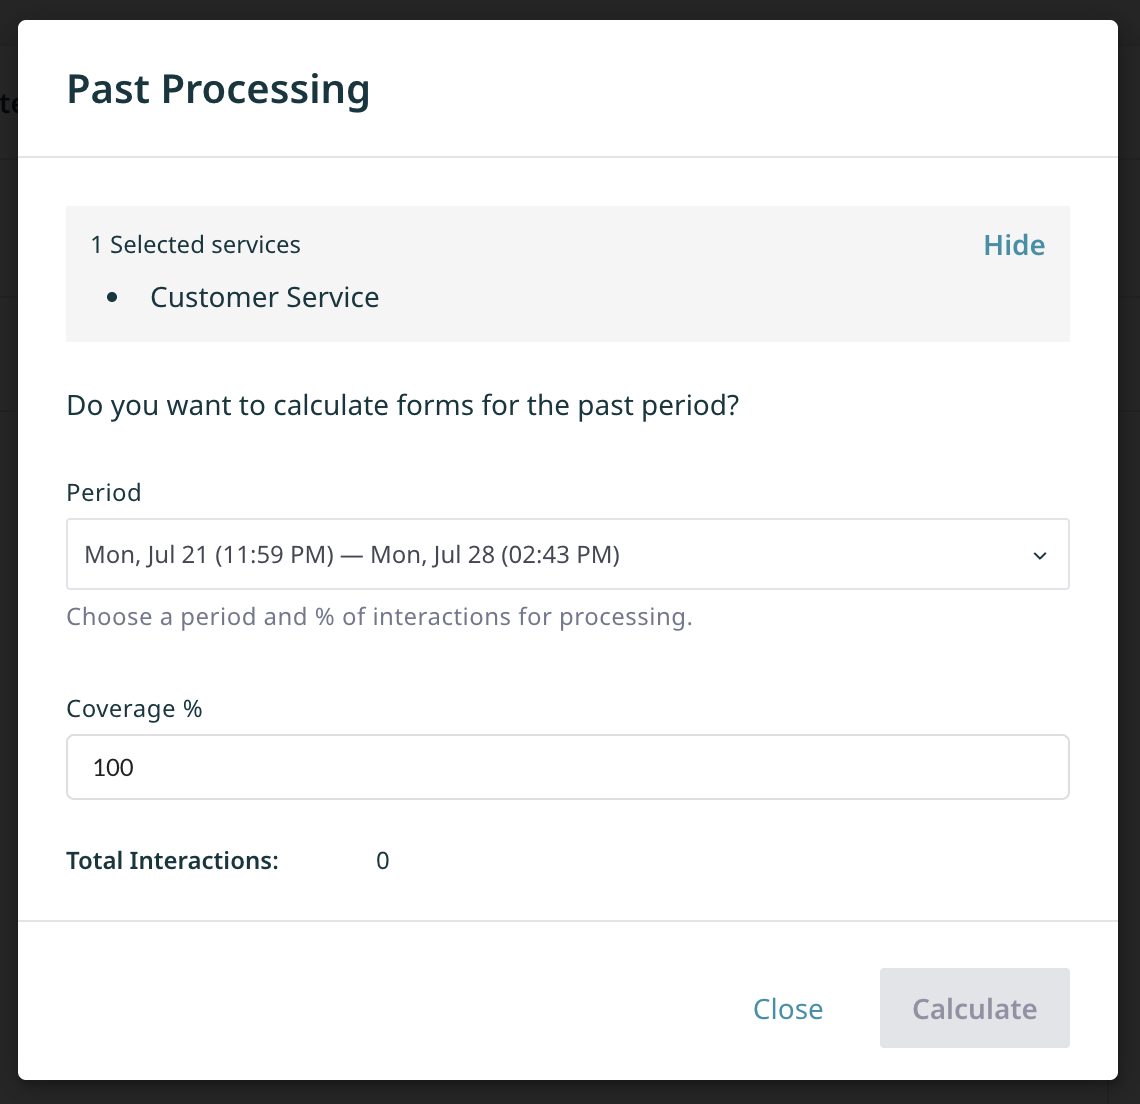
- In the Past Processing window, select a time period for which you would like to find interactions to assess.
- Set a Coverage % value to define the portion of interactions to assess from the time period.
- If changes were made to your Autoscoring forms, use Recalculate Forms to update the scores of previously assessed interactions with the latest version of the form.
5. Create a New Autoscoring Dashboard to Analyze Scoring Data
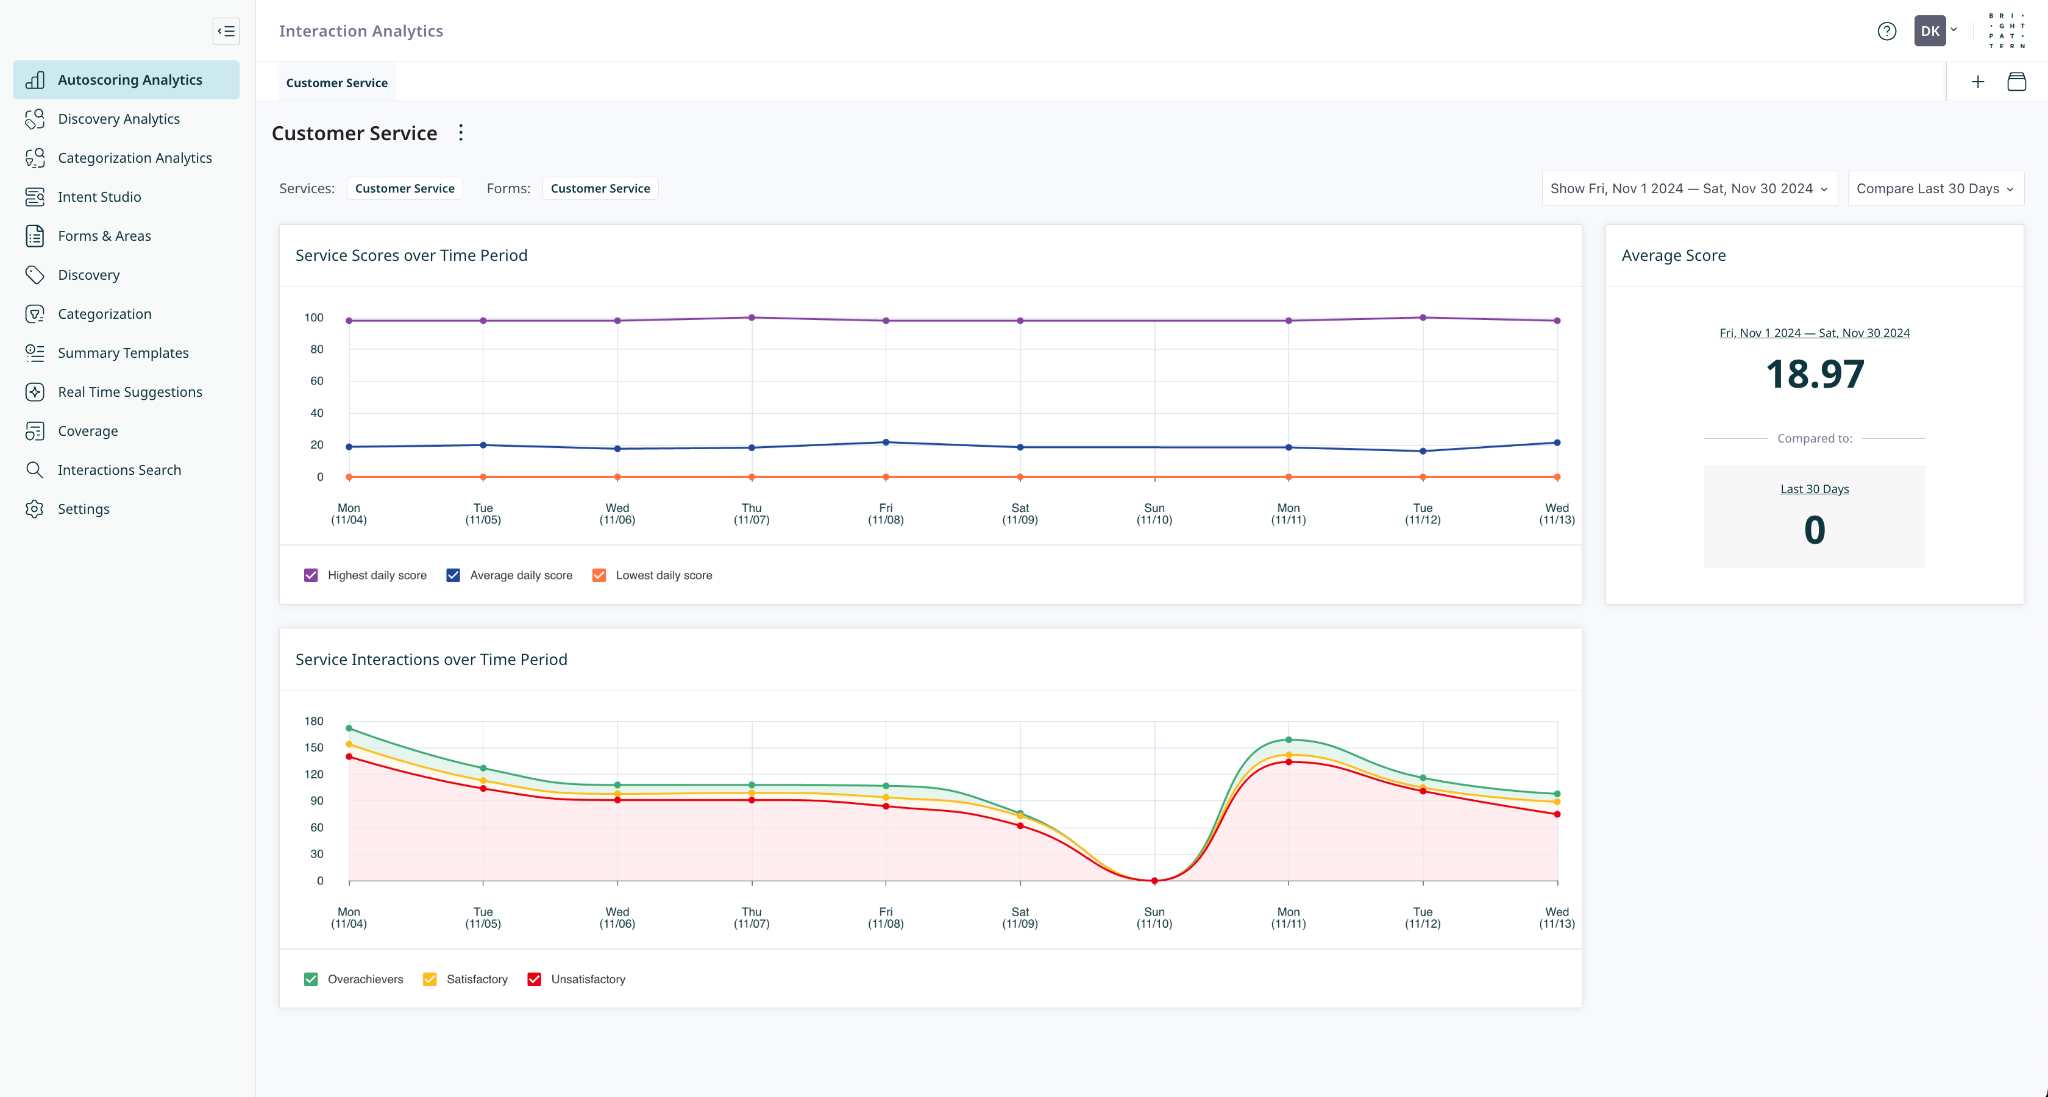
Analyze scoring data by creating Autoscoring Dashboards.
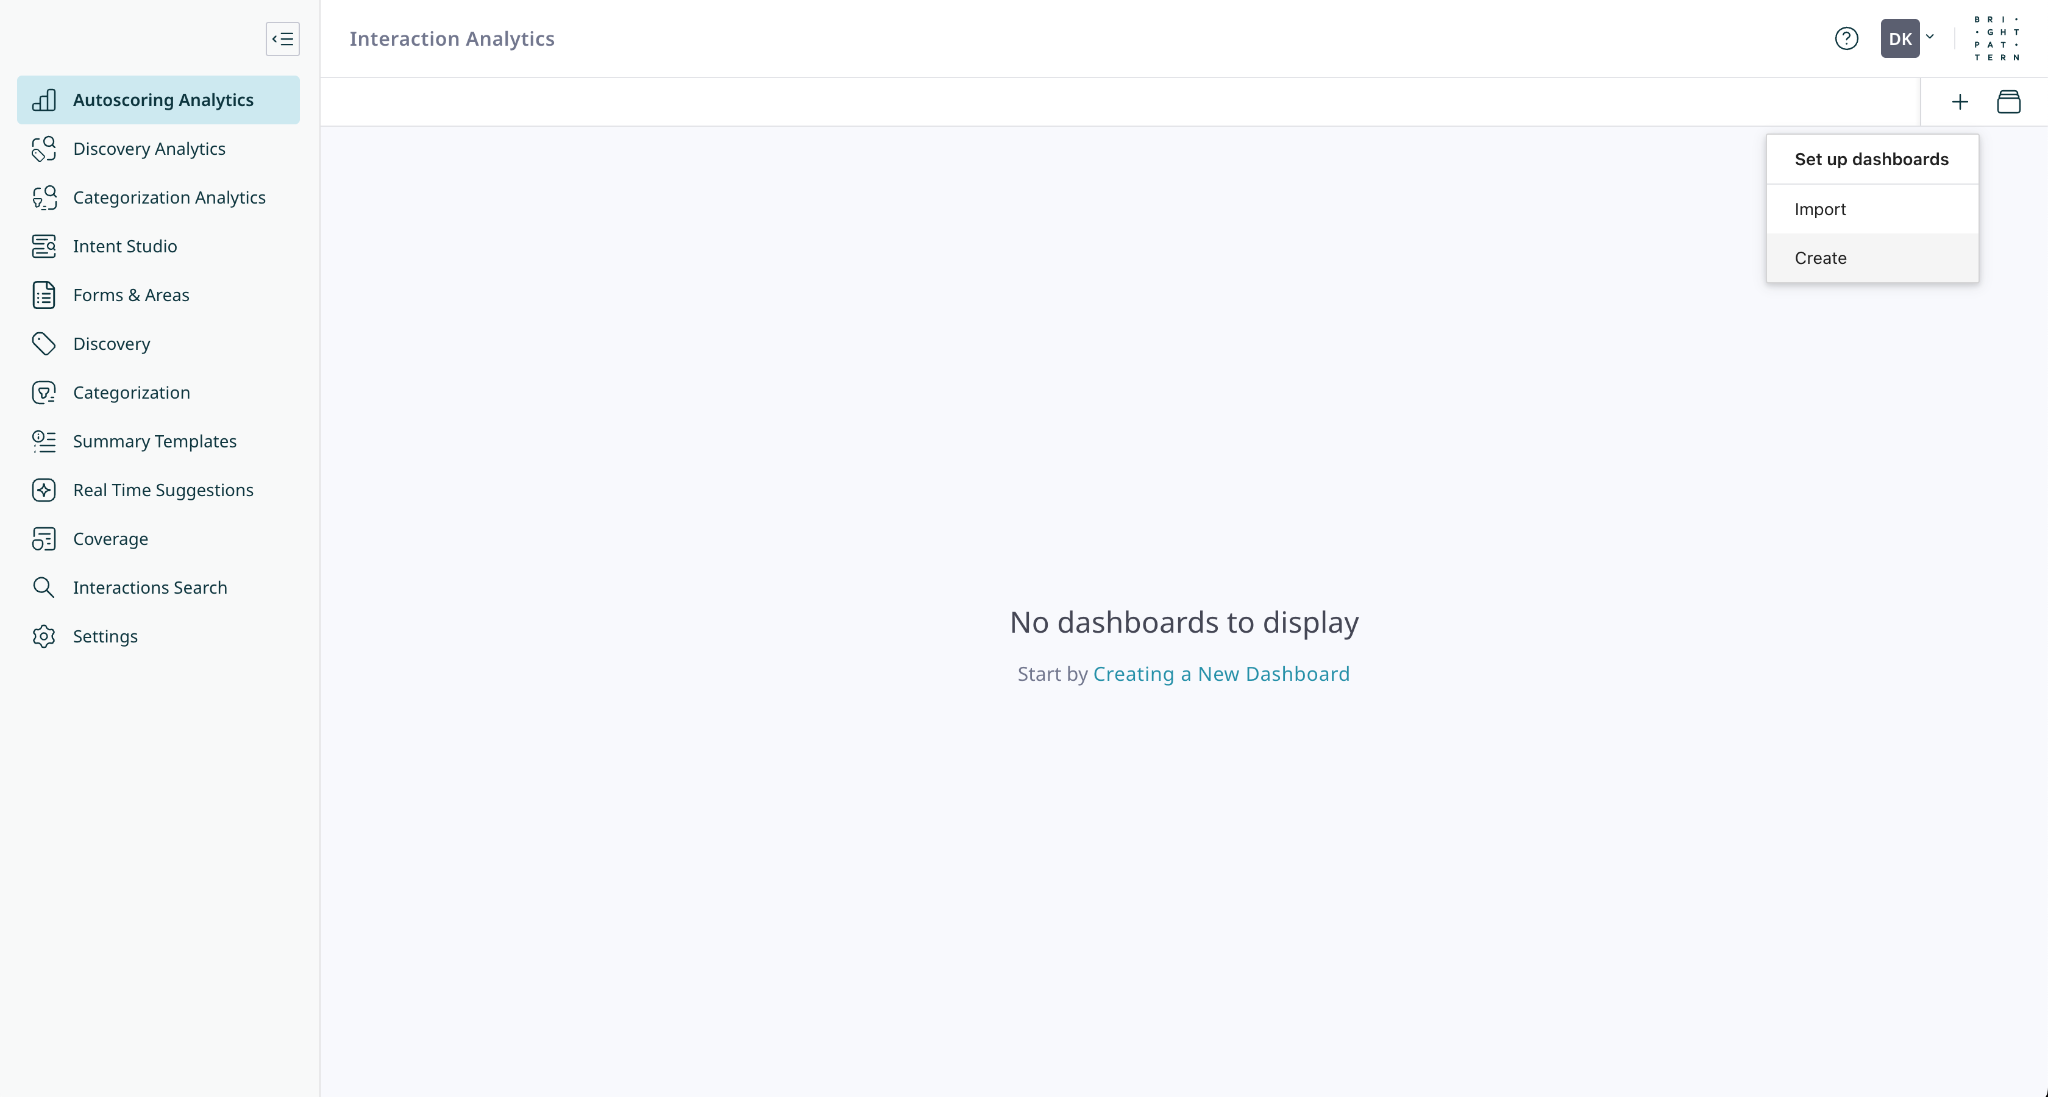
Navigate to the Autoscoring Analytics page, click the + icon, and select Create.
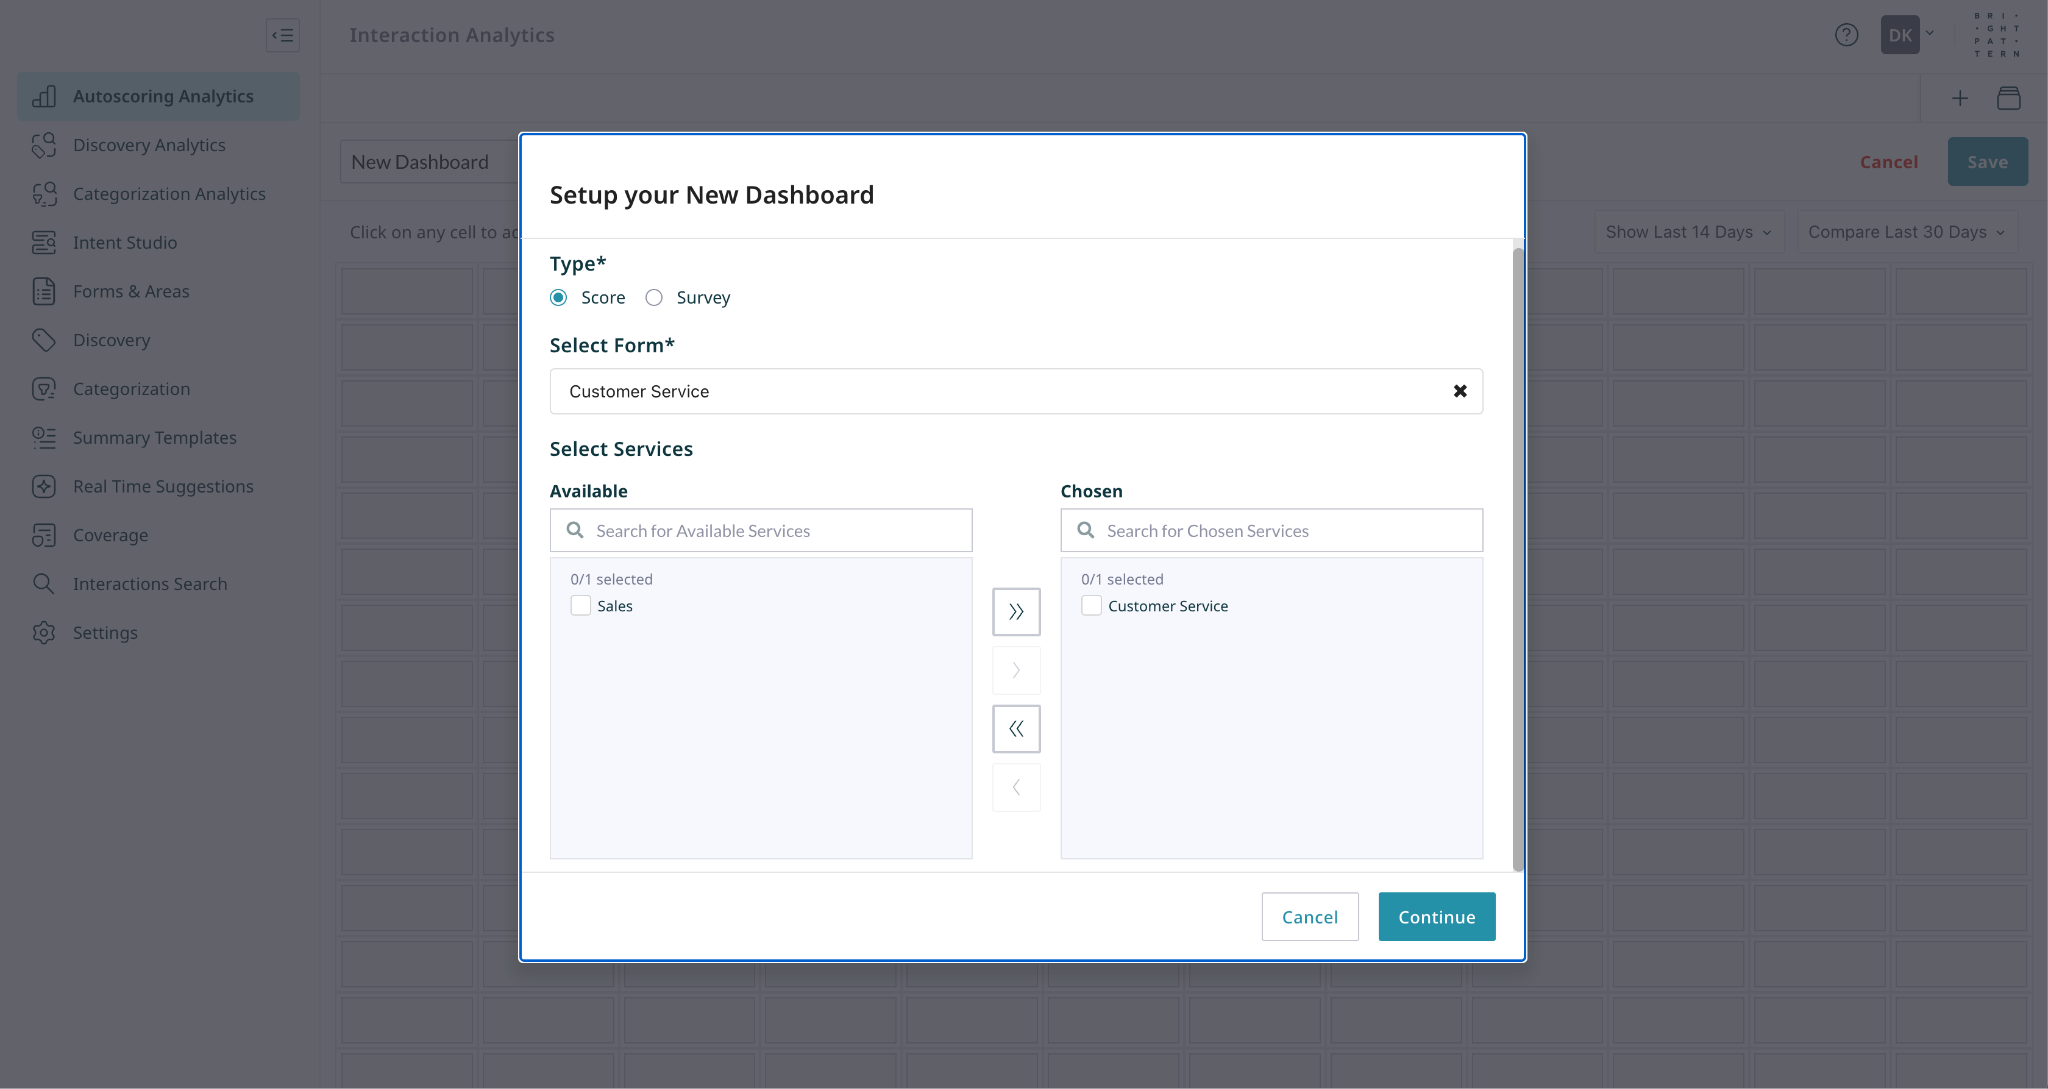
- Select the Autoscoring type, the form data you want to analyze, and the services you are interested in.
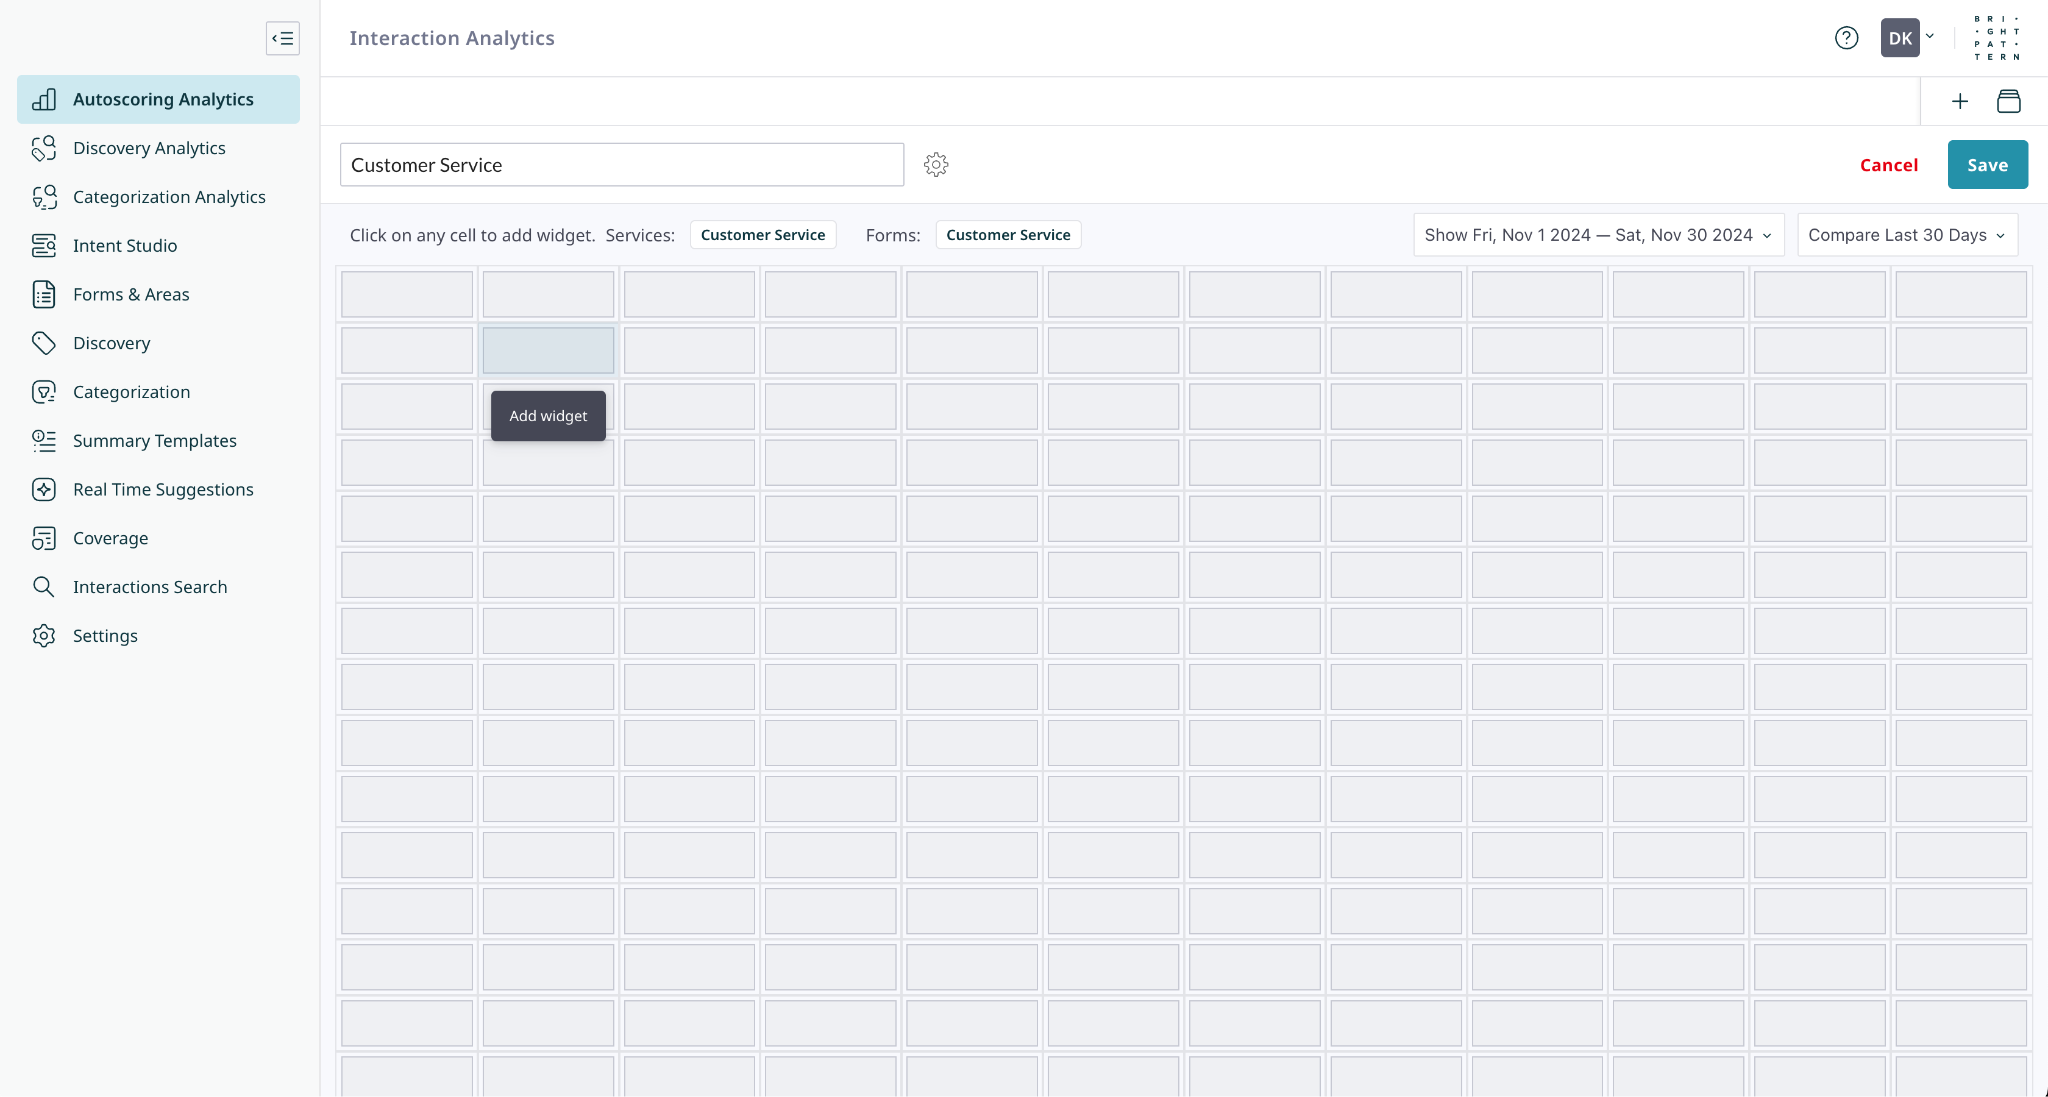
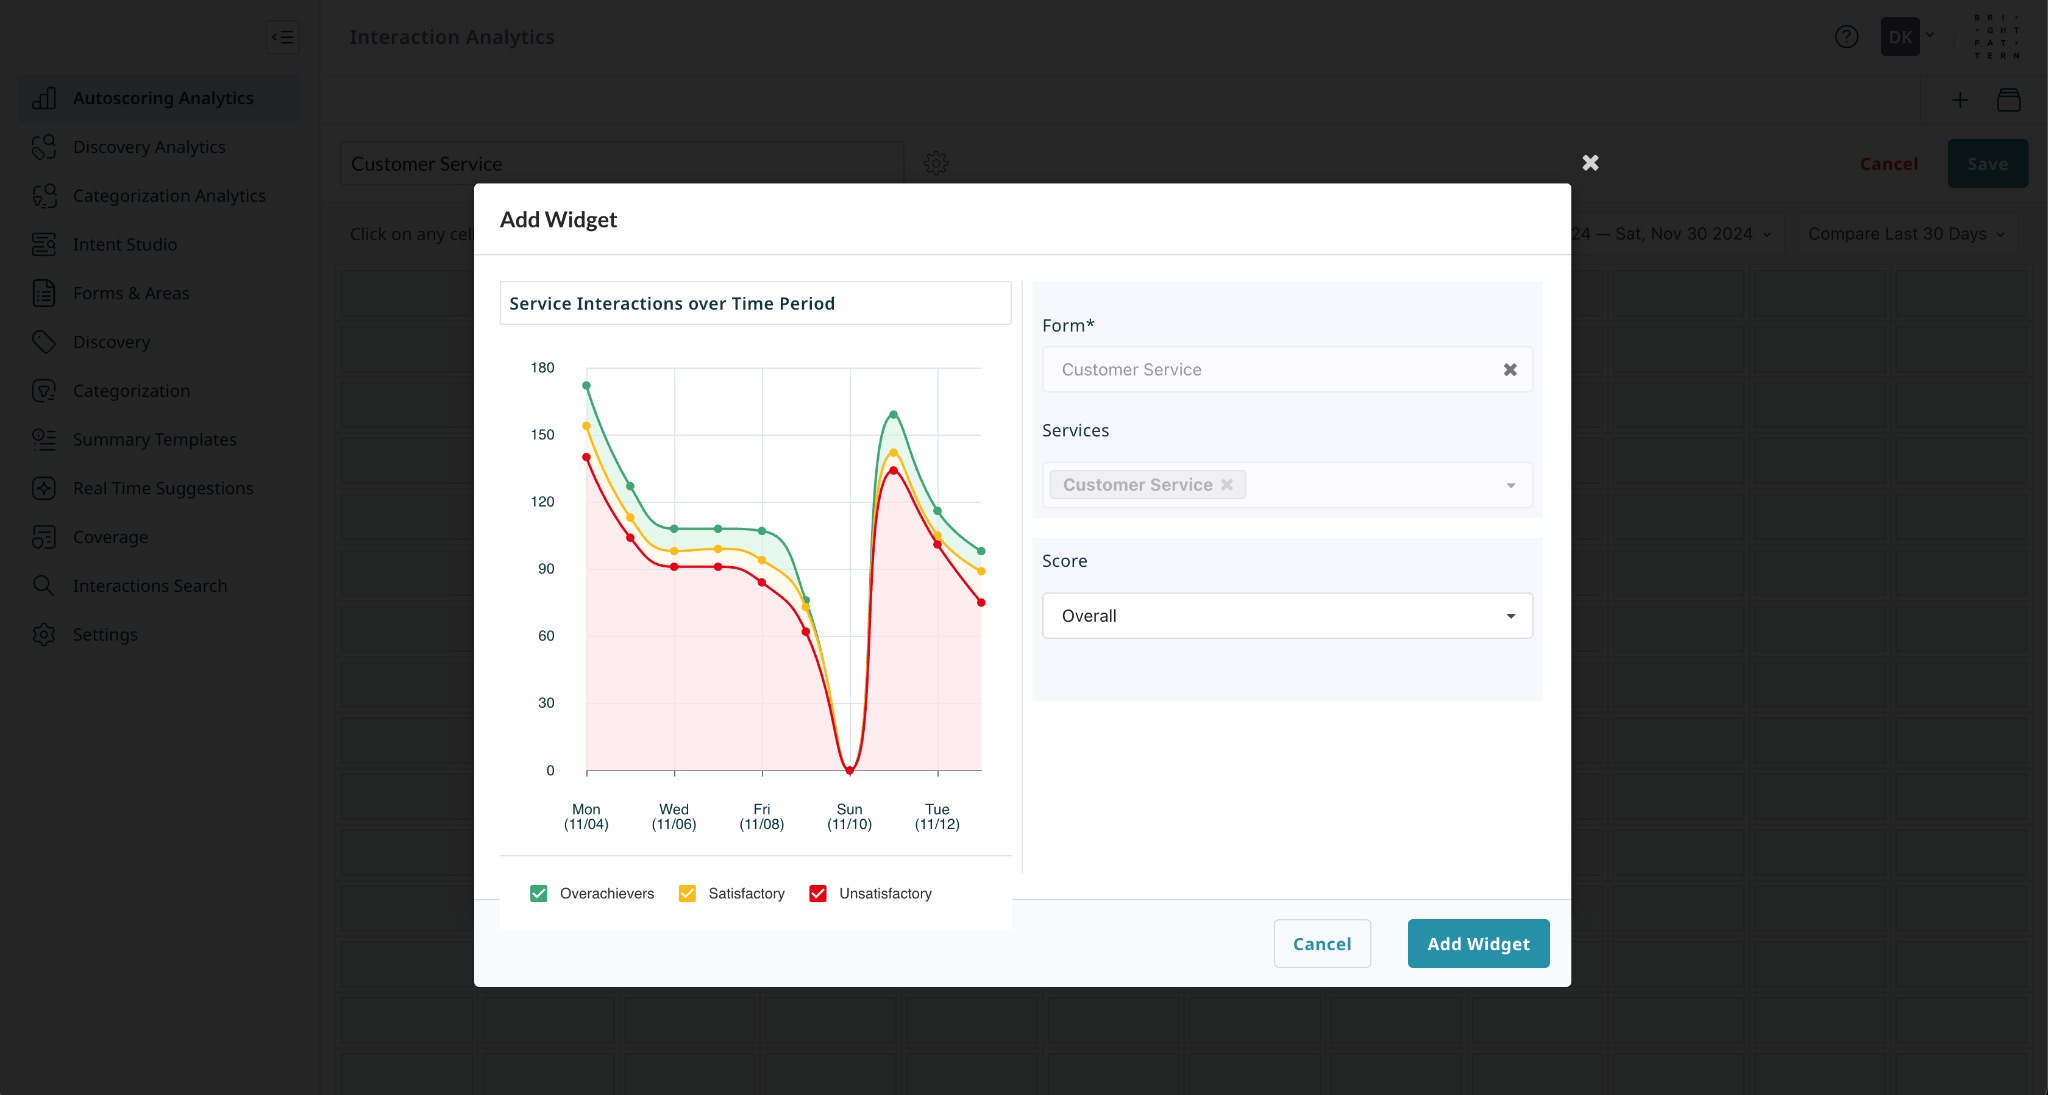
- Give the dashboard a name and select one of the cells to add a new widget.
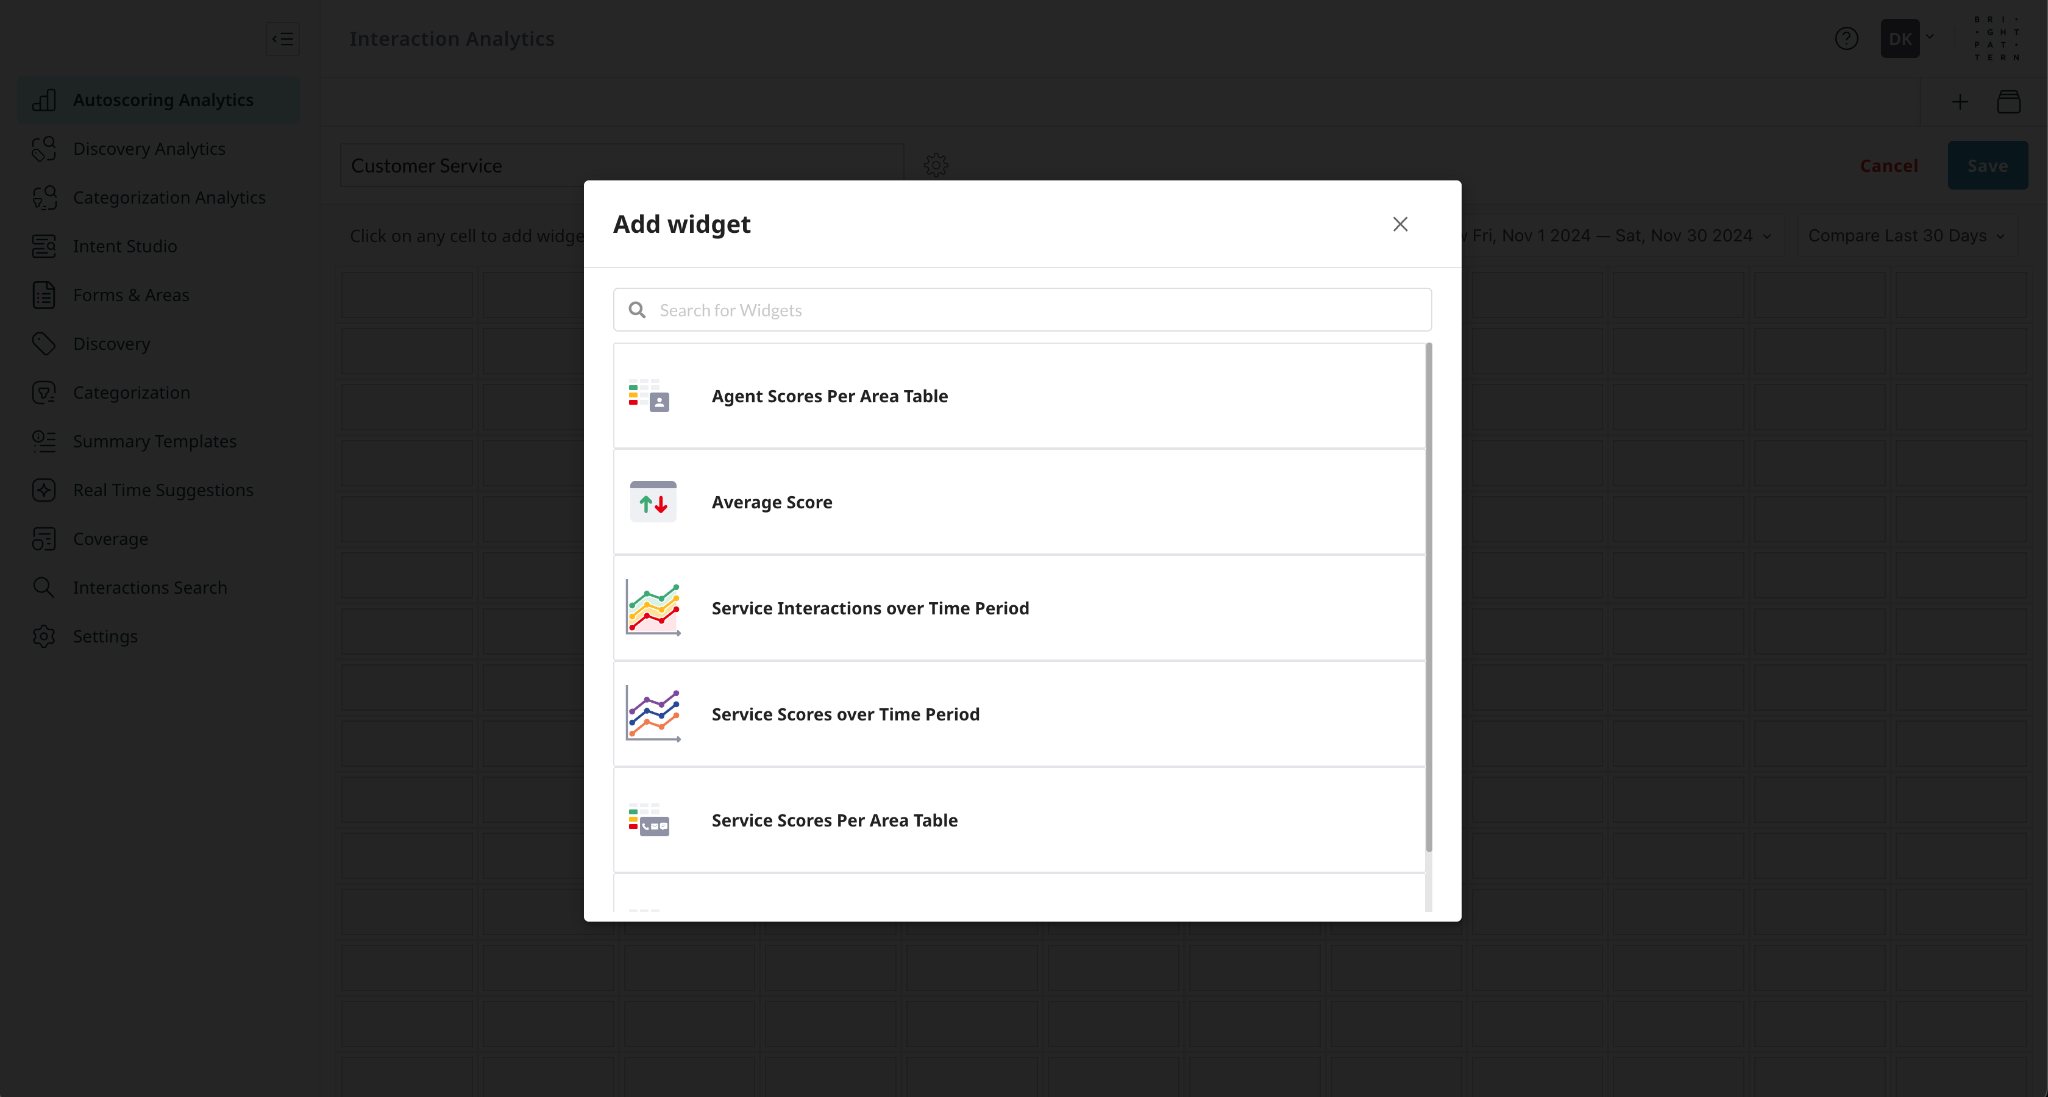
- Select a widget from a list of available autoscoring widgets.
- Configure the widget and give it a name.
- In the top-right corner, use the date selectors to set the time period for analysis. The left selector sets the primary range, and the right selector sets a comparison range.
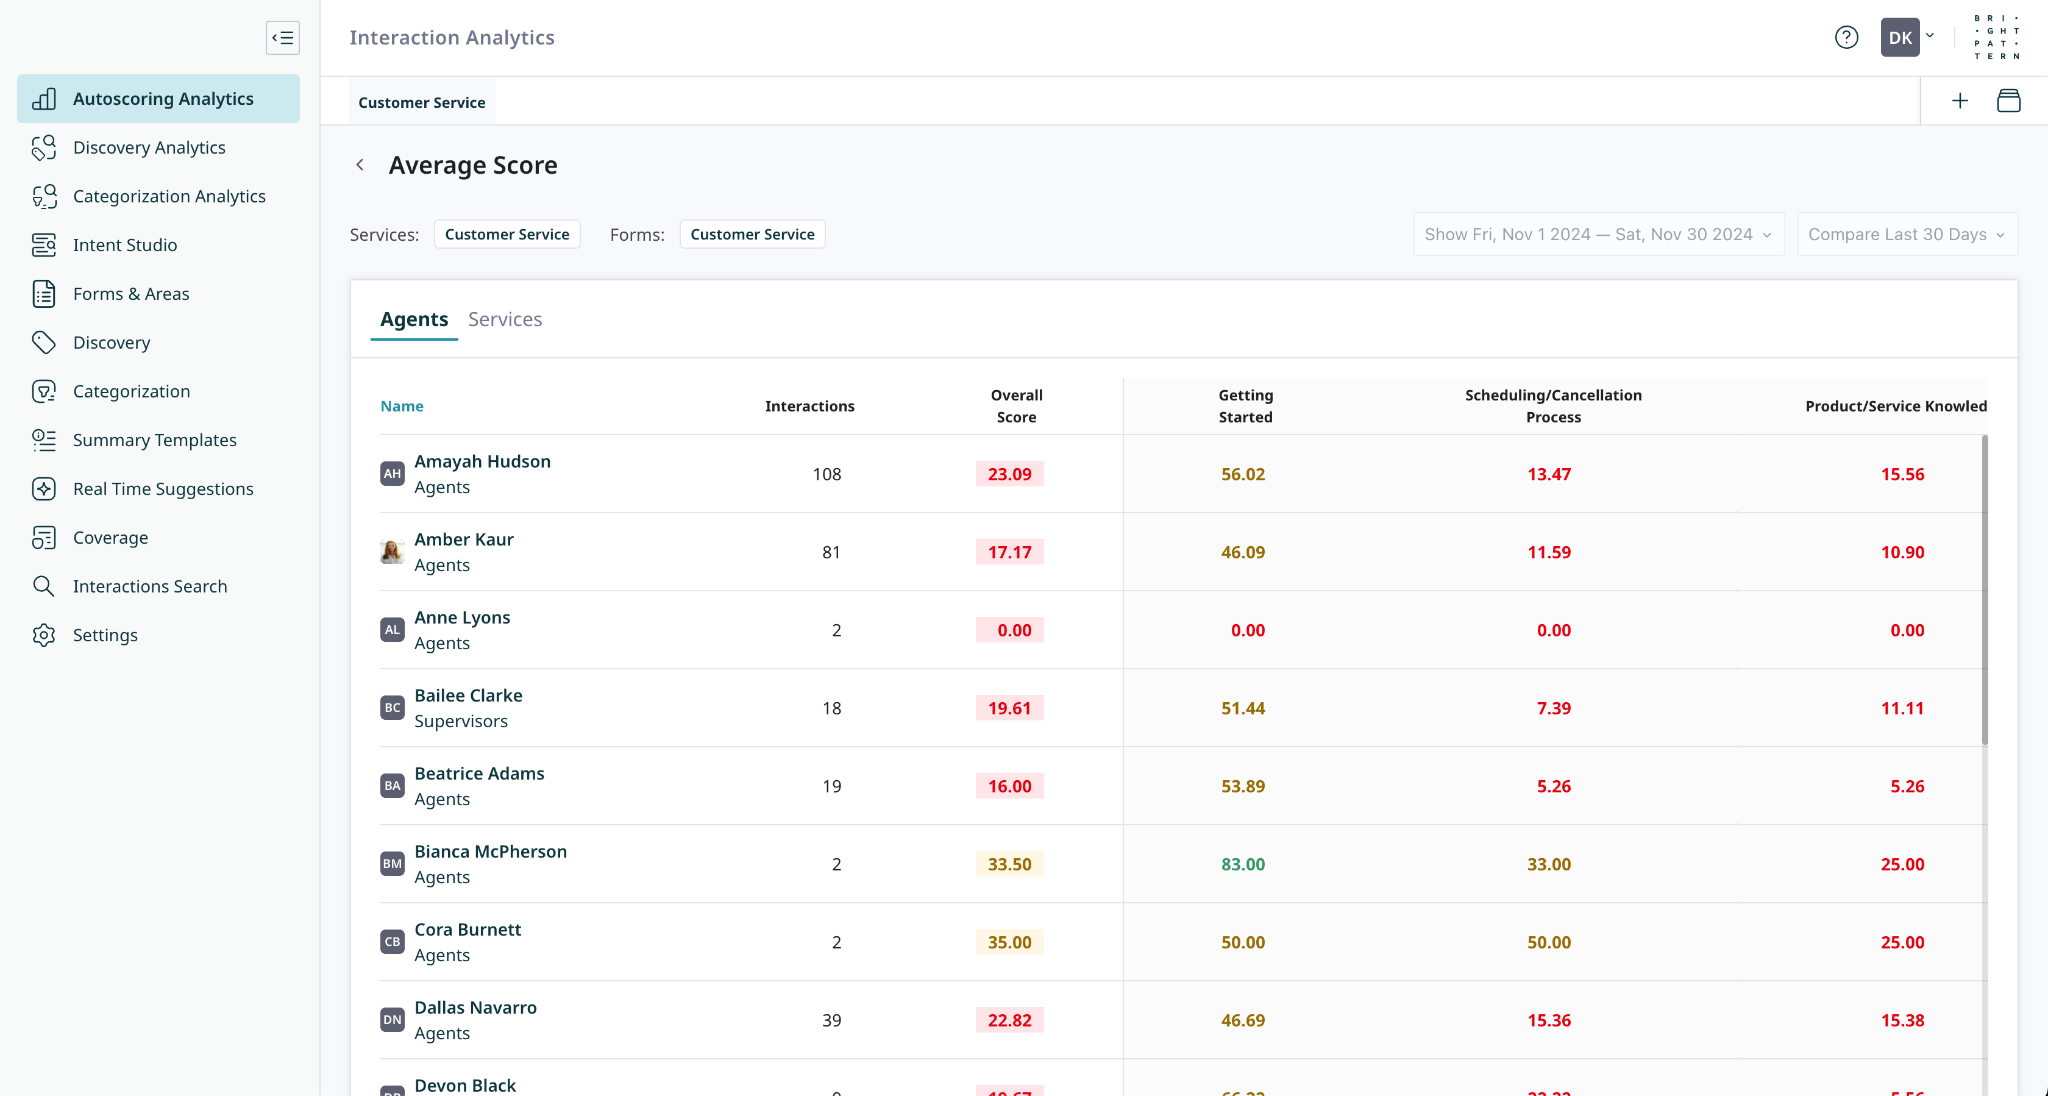
- Selecting a data point in a widget opens a table that breaks down scoring data by area, agent, and service.
- Selecting data from the table opens a filtered list of the corresponding interactions.
6. Review Scores on an Interaction
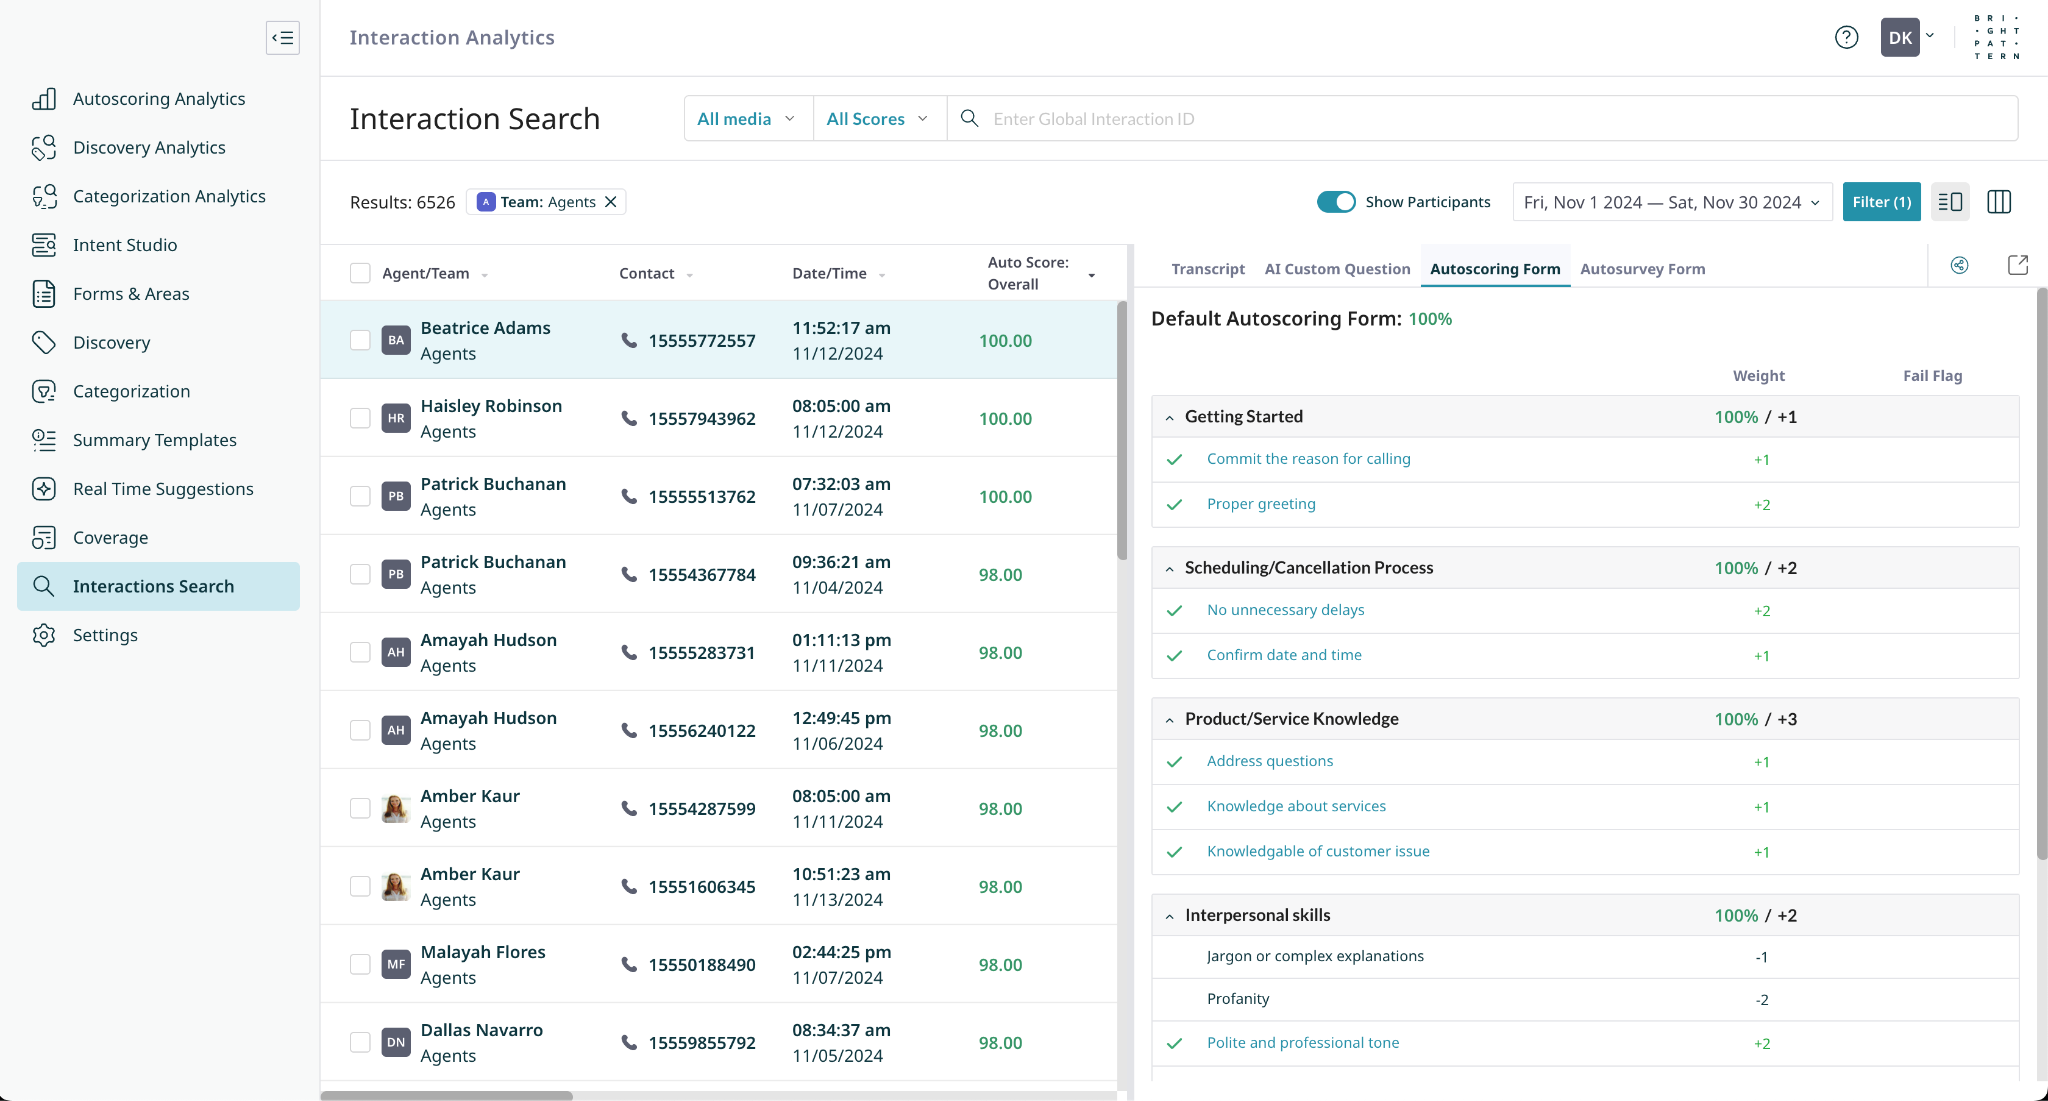
Navigate to the Interaction Search page to review the autoscores for your interactions.
- The list of interactions can be filtered by autoscoring forms and areas.
- Select any interaction to open its preview, then select the Autoscoring Form tab to view the completed form and its score breakdown.

