Categorization Quickstart
Use Categorization to track related topics (intents) across your interactions. You start by grouping related intents into Category Sets. These sets can then be assigned to services to detect topics of interest in your interactions. This approach offers the primary benefits of simplified management and powerful analytics. Using custom dashboards, you can track trends, compare topics, and visualize correlations between different types of intents (e.g., customer emotions vs. agent behaviors).
This tutorial explains how to create category sets, assign them to services, and analyze the resulting data.
Prerequisites
You must first create the intents that you want to group together. For instructions, see Creating and Testing Intents.
Procedure
Follow these steps to configure and use Categorization:
- Create a New Category Set
- Assign the Category Set to Services
- Create a New Categorization Dashboard to Analyze Data
- Review Detected Intents on Interactions
- (Optional) Process Past Interactions
1. Create a New Category Set
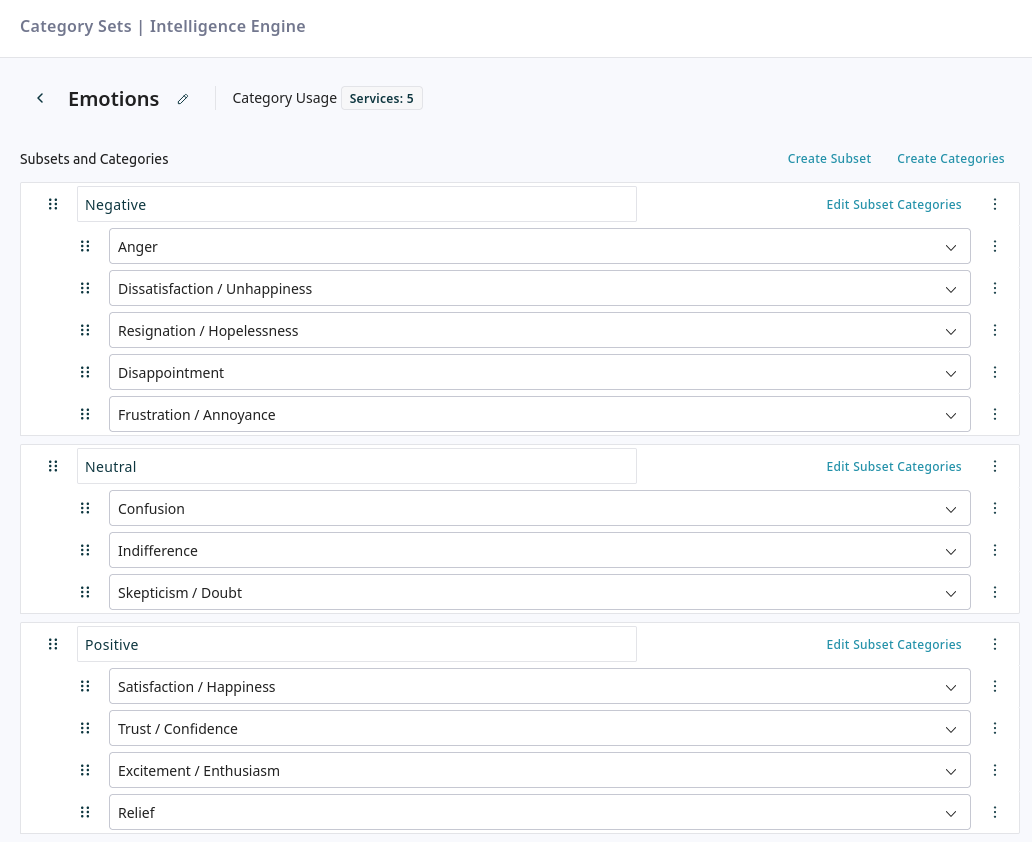
A Category Set is the main container for your grouped intents. A set is composed of Categories, each of which is associated with an intent. You may also include subsets, which are groups of categories.
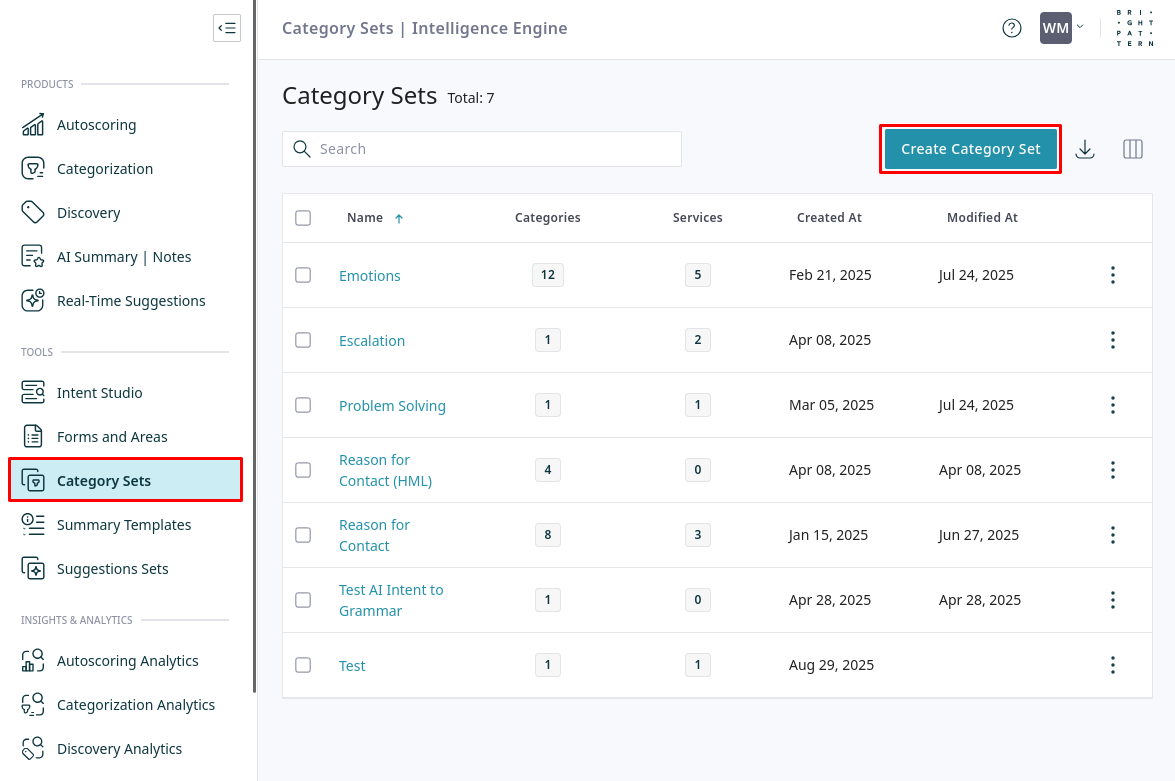
- Navigate to the Category Sets page and click Create Category Set.
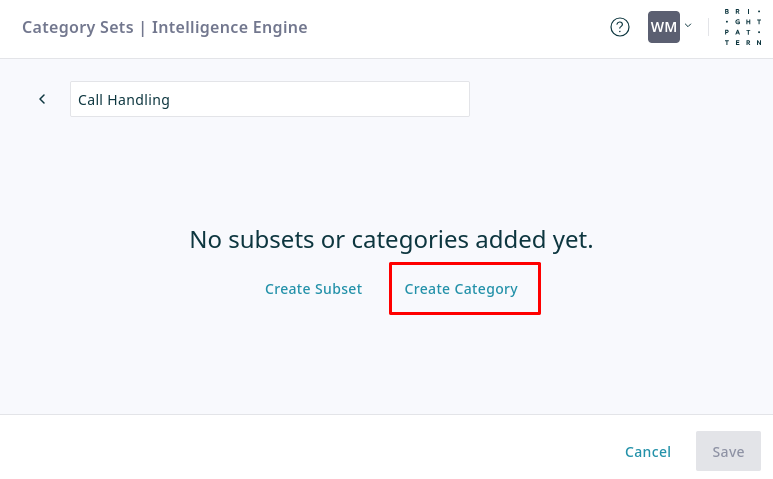
- Give the category set a descriptive name, for example, "Call Handling" or "Customer Emotions".
- Click Create a Category to open the Create Categories dialog.
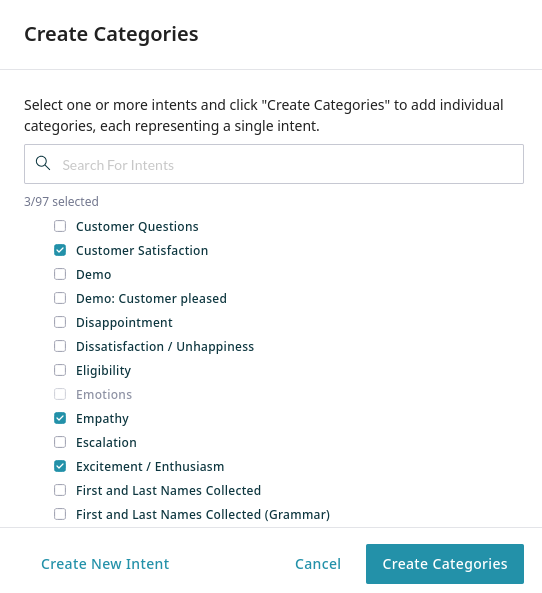
- From the Create Categories dialog, select the intents to add as categories, then click Create Categories.
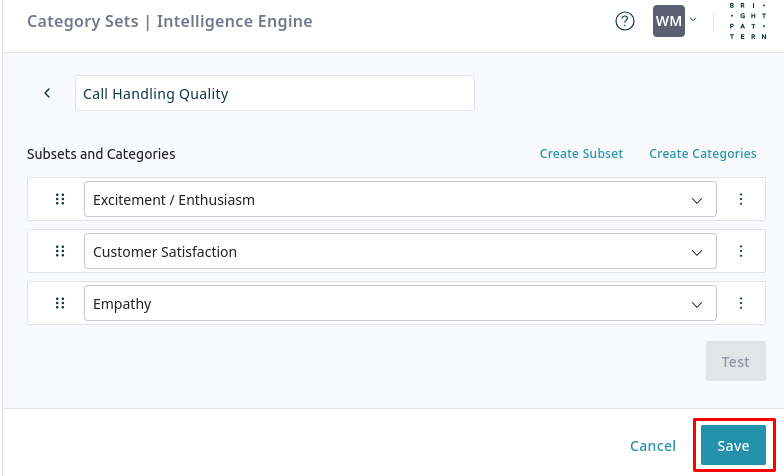
- Once you have organized your intents, click Save.
- Create subsets to group related categories within the set. Subsets are an organizational tool, but they are reflected in the Category Treemap widget, which groups categories by color according to their subset.
2. Assign the Category Set to Services
To start detecting the intents in your new category set, you must assign the set to one or more services.
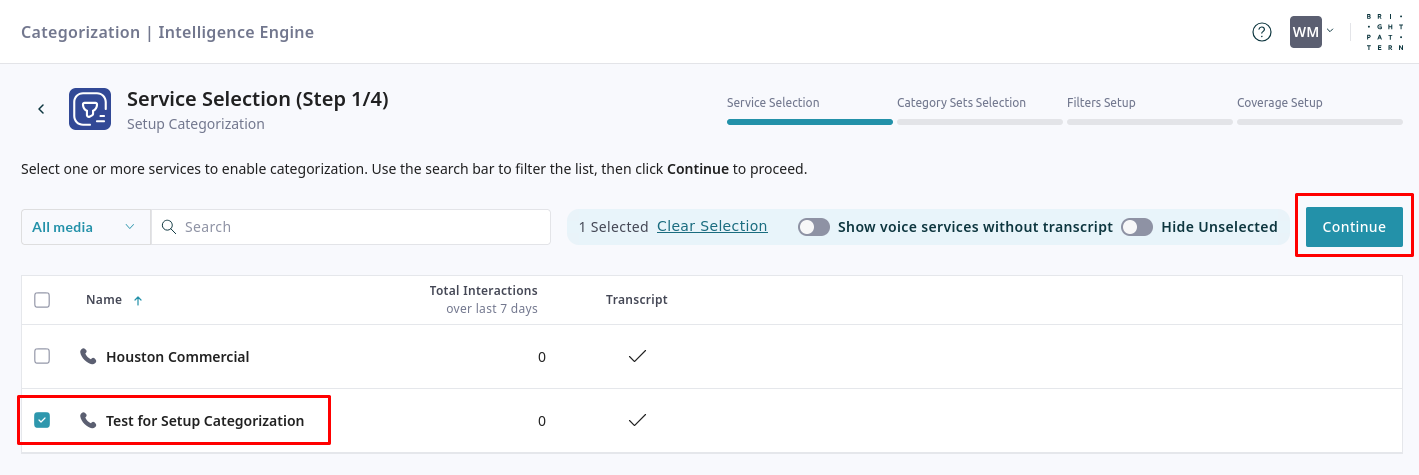
- Navigate to the Categorization page and click Setup New Categorization.
- Select the services for which you want to perform categorization, then click Continue.
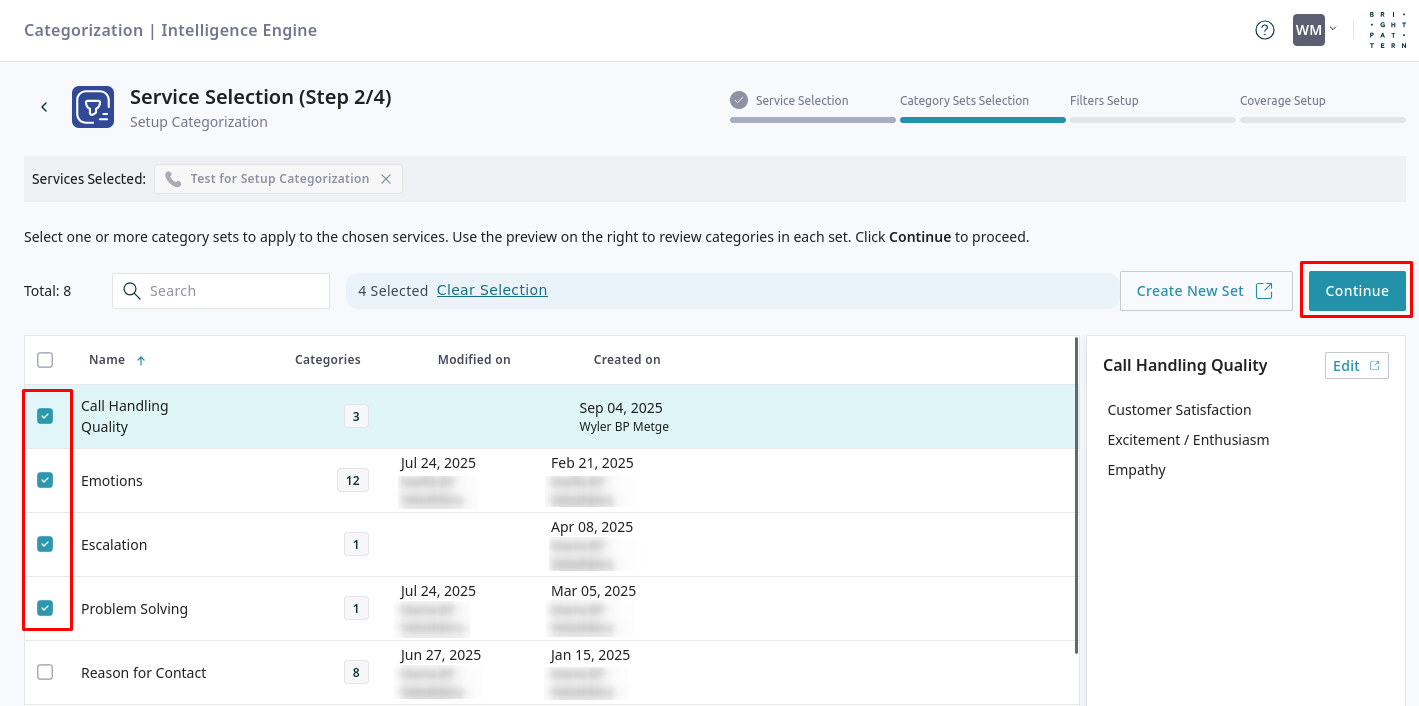
- Select one or more category sets to apply to the chosen services, then click Continue
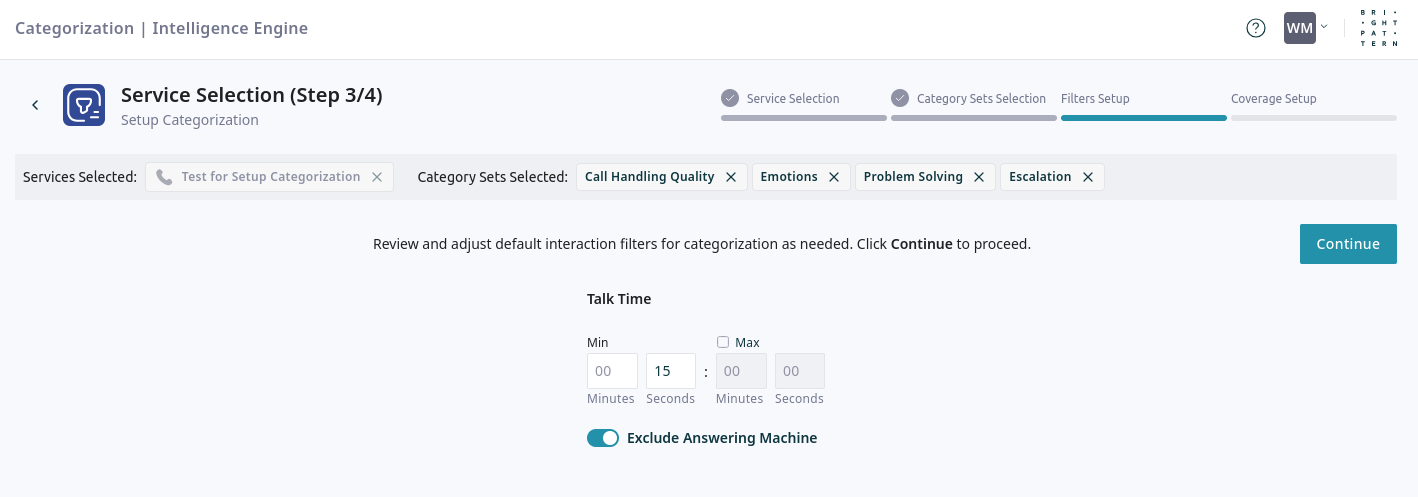
- Refine the scope of analysis by adjusting the interaction filters, then click Continue. Filter options are as follows:
- Talk Time: Analyze interactions only within a specific duration.
- Min: Set the minimum required talk time for an interaction to be analyzed.
- Max: Excludes interactions that are longer than the specified time.
- Exclude Answering Machine: Enable this option to omit voicemails from the analysis.
- Talk Time: Analyze interactions only within a specific duration.
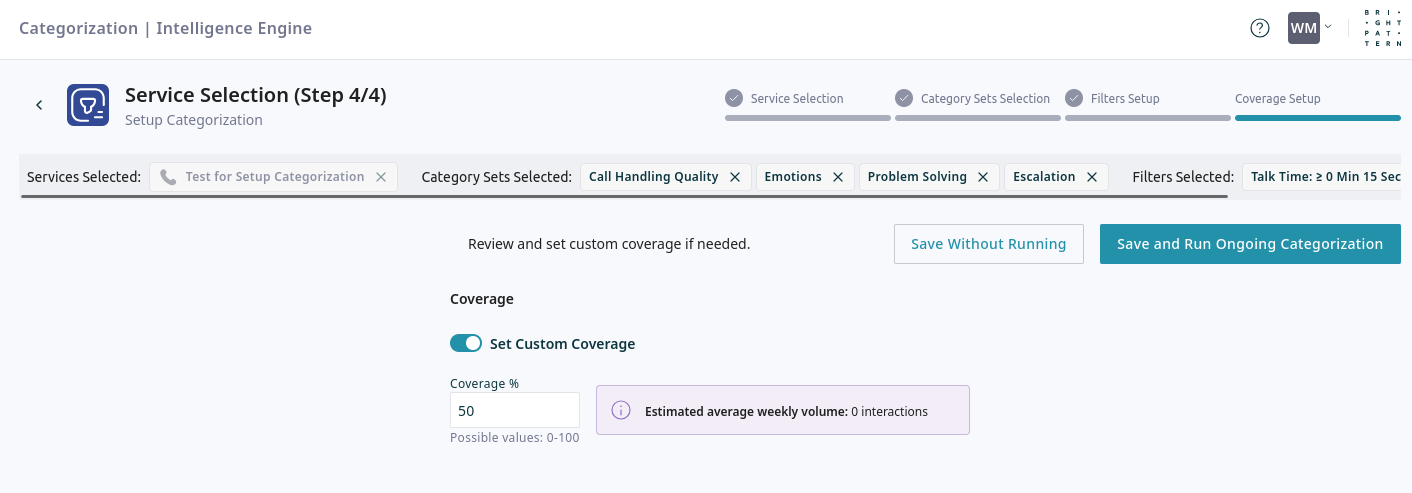
- Configure the coverage for ongoing analysis of new interactions. To analyze less than 100% of interactions, enable Set Custom Coverage and enter a Coverage % to specify the percentage of new interactions to analyze. The Estimated average weekly volume shows the number of interactions expected to be processed based on this percentage.
- Choose how to save your configuration:
- Save Without Running: Saves the setup without activating it. You can start the analysis later.
- Save and Run Ongoing Categorization: Saves the setup and immediately begins analyzing new interactions.
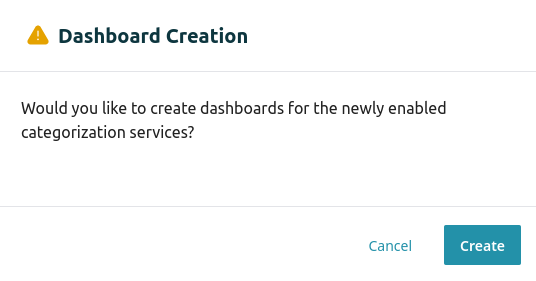
- After saving the categorization, you will have the option to create a dashboard. Click Create to get started.
3. Create a New Categorization Dashboard to Visualize Data
Visualize the data collected by your category sets in custom dashboards.
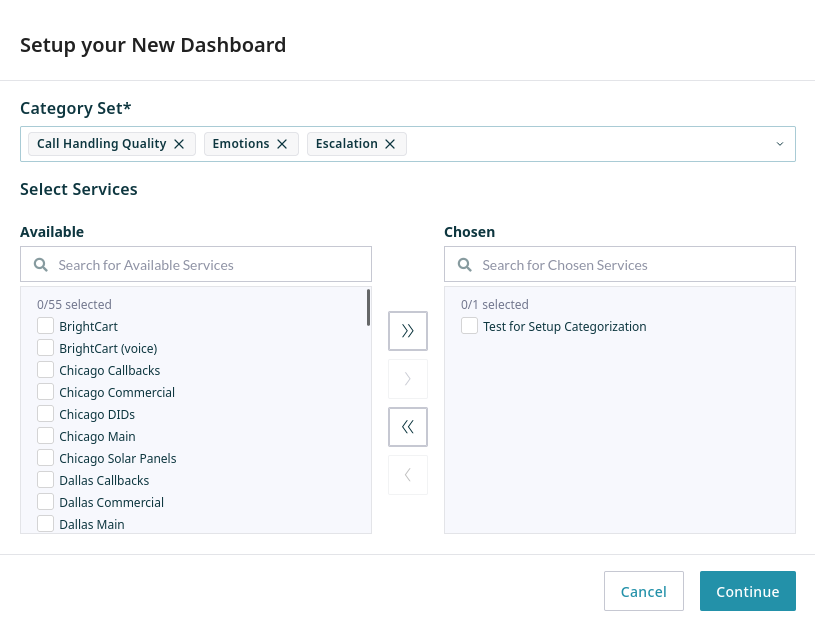
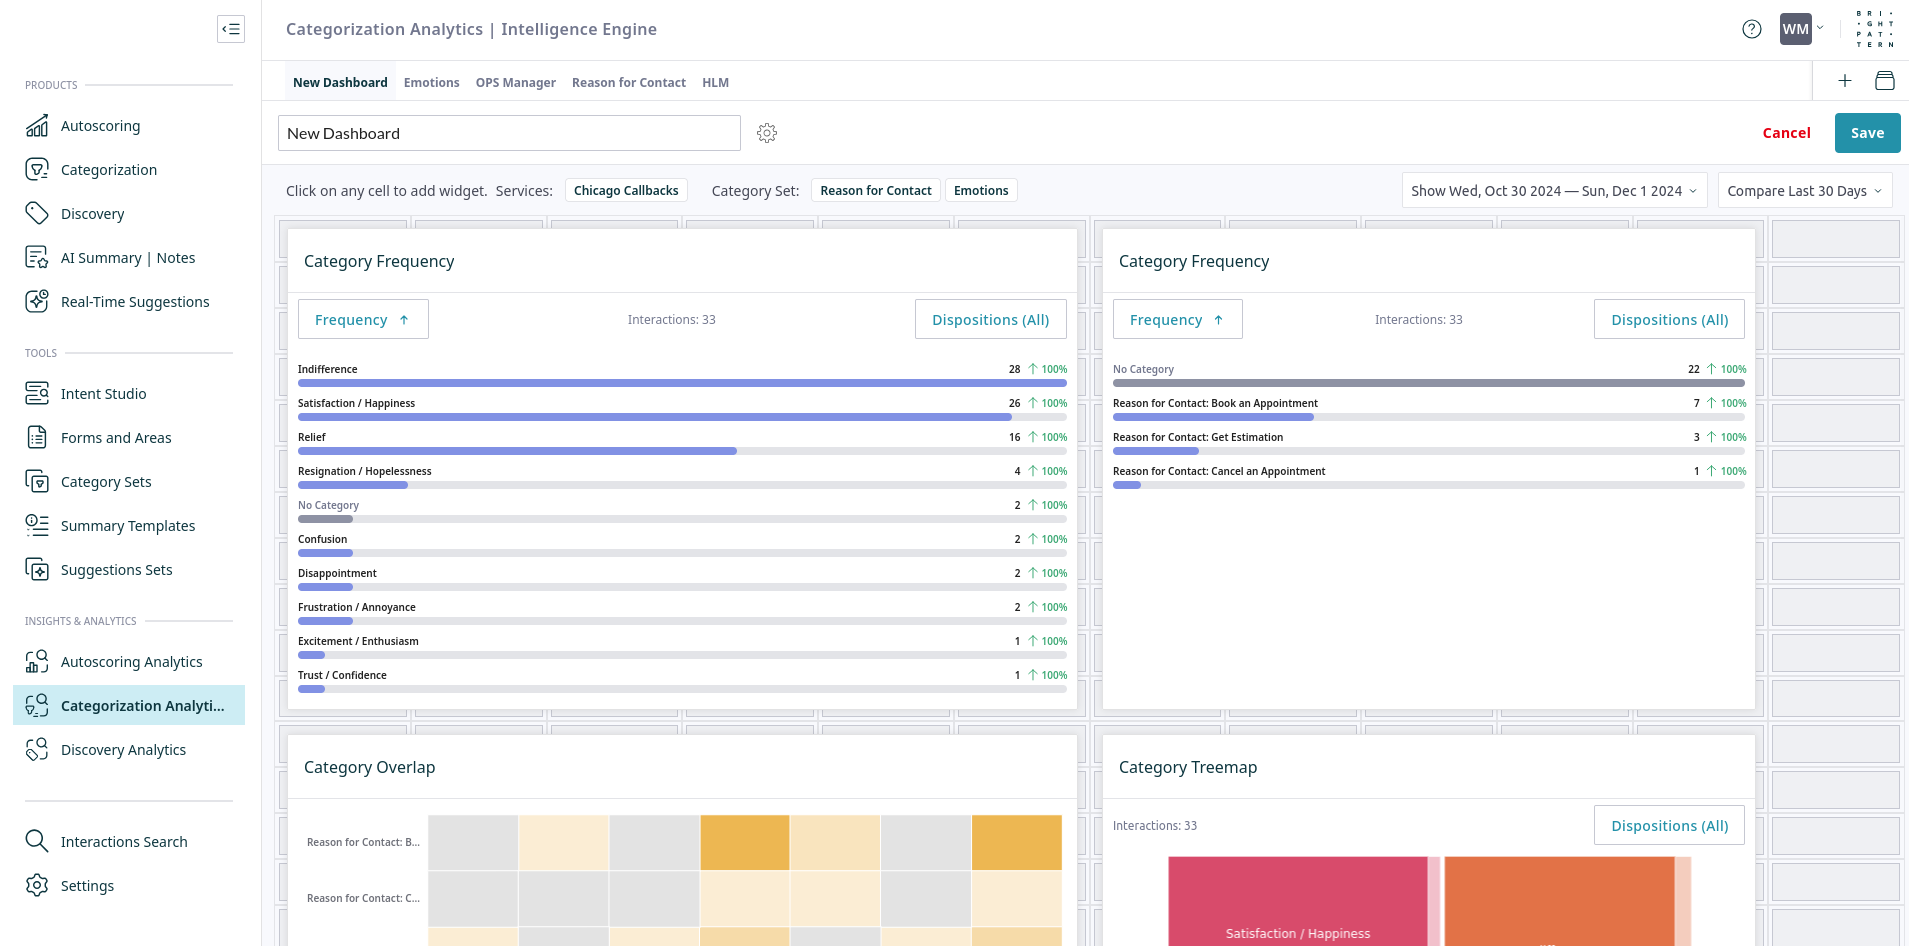
- In the Set up your New Dashboard window, select the Category Set(s) and Service(s) you want to analyze, then click Continue.
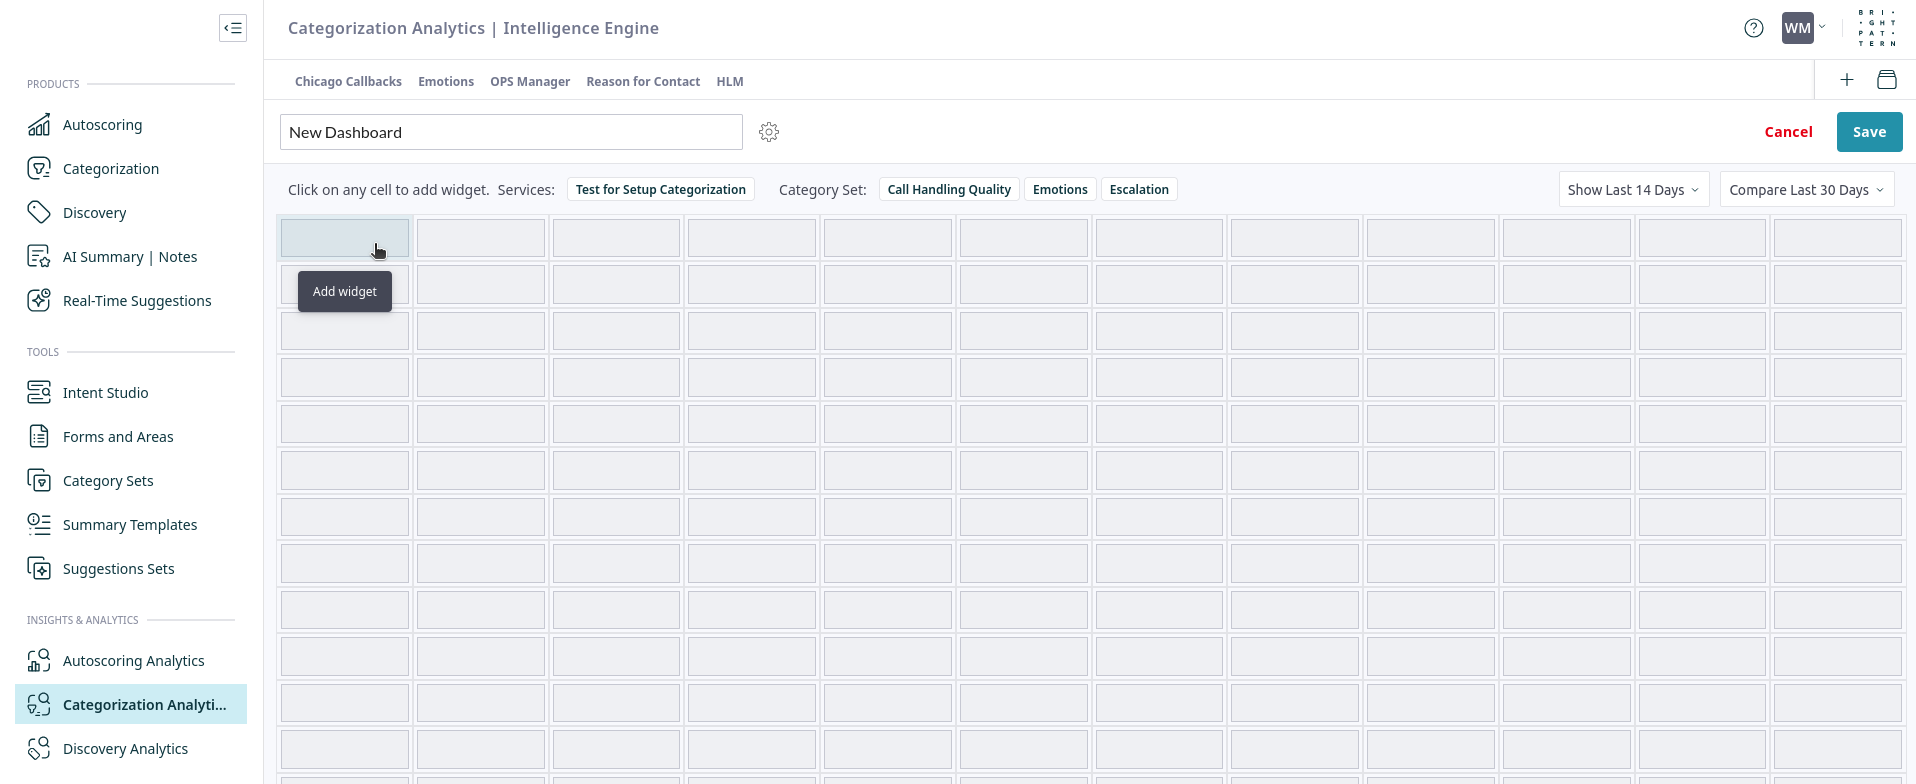
- Your new dashboard is created. Give the dashboard a name at the top of the page, then click any cell in the grid to add a widget.
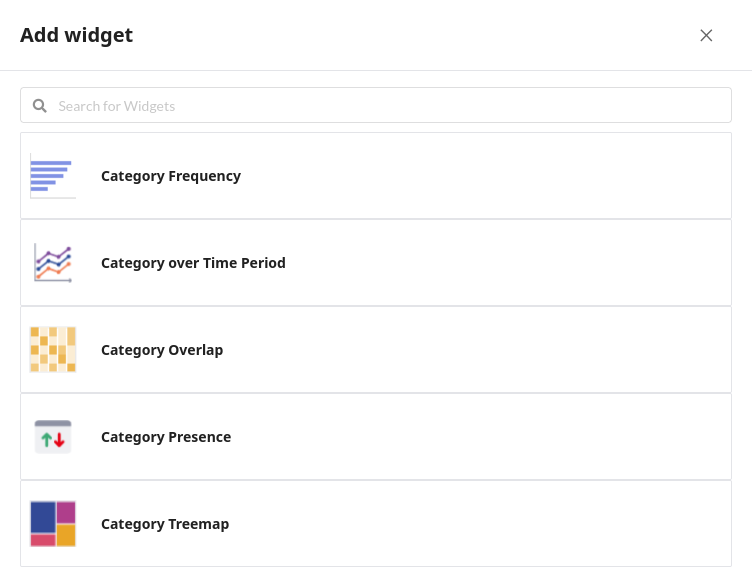
- From the Add widget list, select the type of widget you want to add. Available widgets include:
- Category Frequency: A bar chart showing the frequency of each category.
- Category over Time Period: A line chart that tracks the frequency of categories over time, which helps identify trends.
- Category Overlap: A correlation matrix that shows how often categories from two different category sets appear in the same interaction.
- Category Presence: Shows the percentage of interactions that contain at least one category from a selected set.
- Category Treemap: A map that displays categories grouped by subset, with the size of each block representing its frequency.
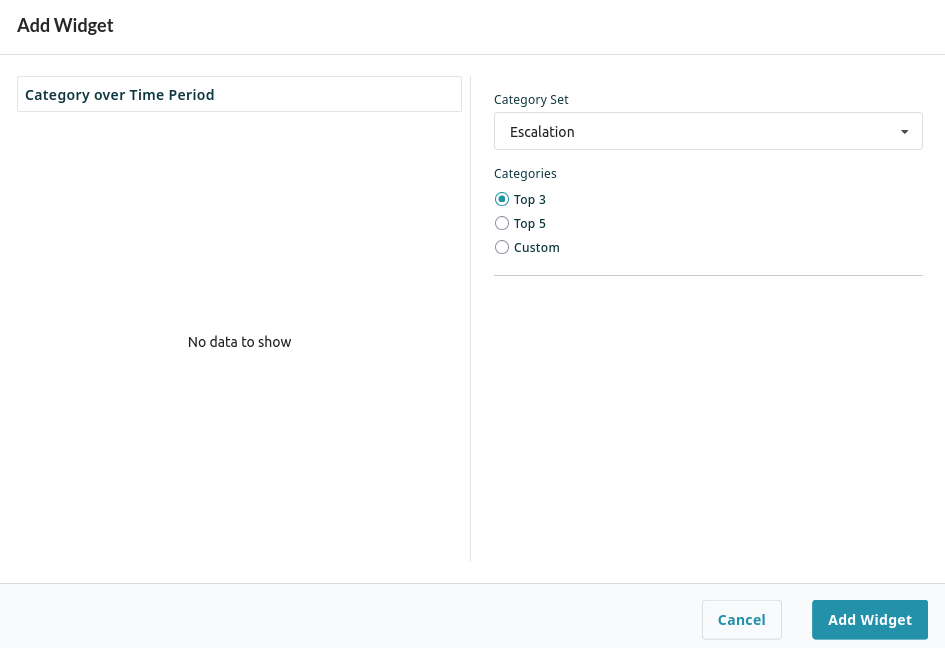
- Configure the widget's settings. For example, you may need to select a specific Category Set or choose which categories to display (e.g., Top 3, Top 5).
- Repeat these steps to add more widgets. When you are finished, click Save.
4. Review Detected Intents on Interactions
You can view the specific intents detected on any given interaction.
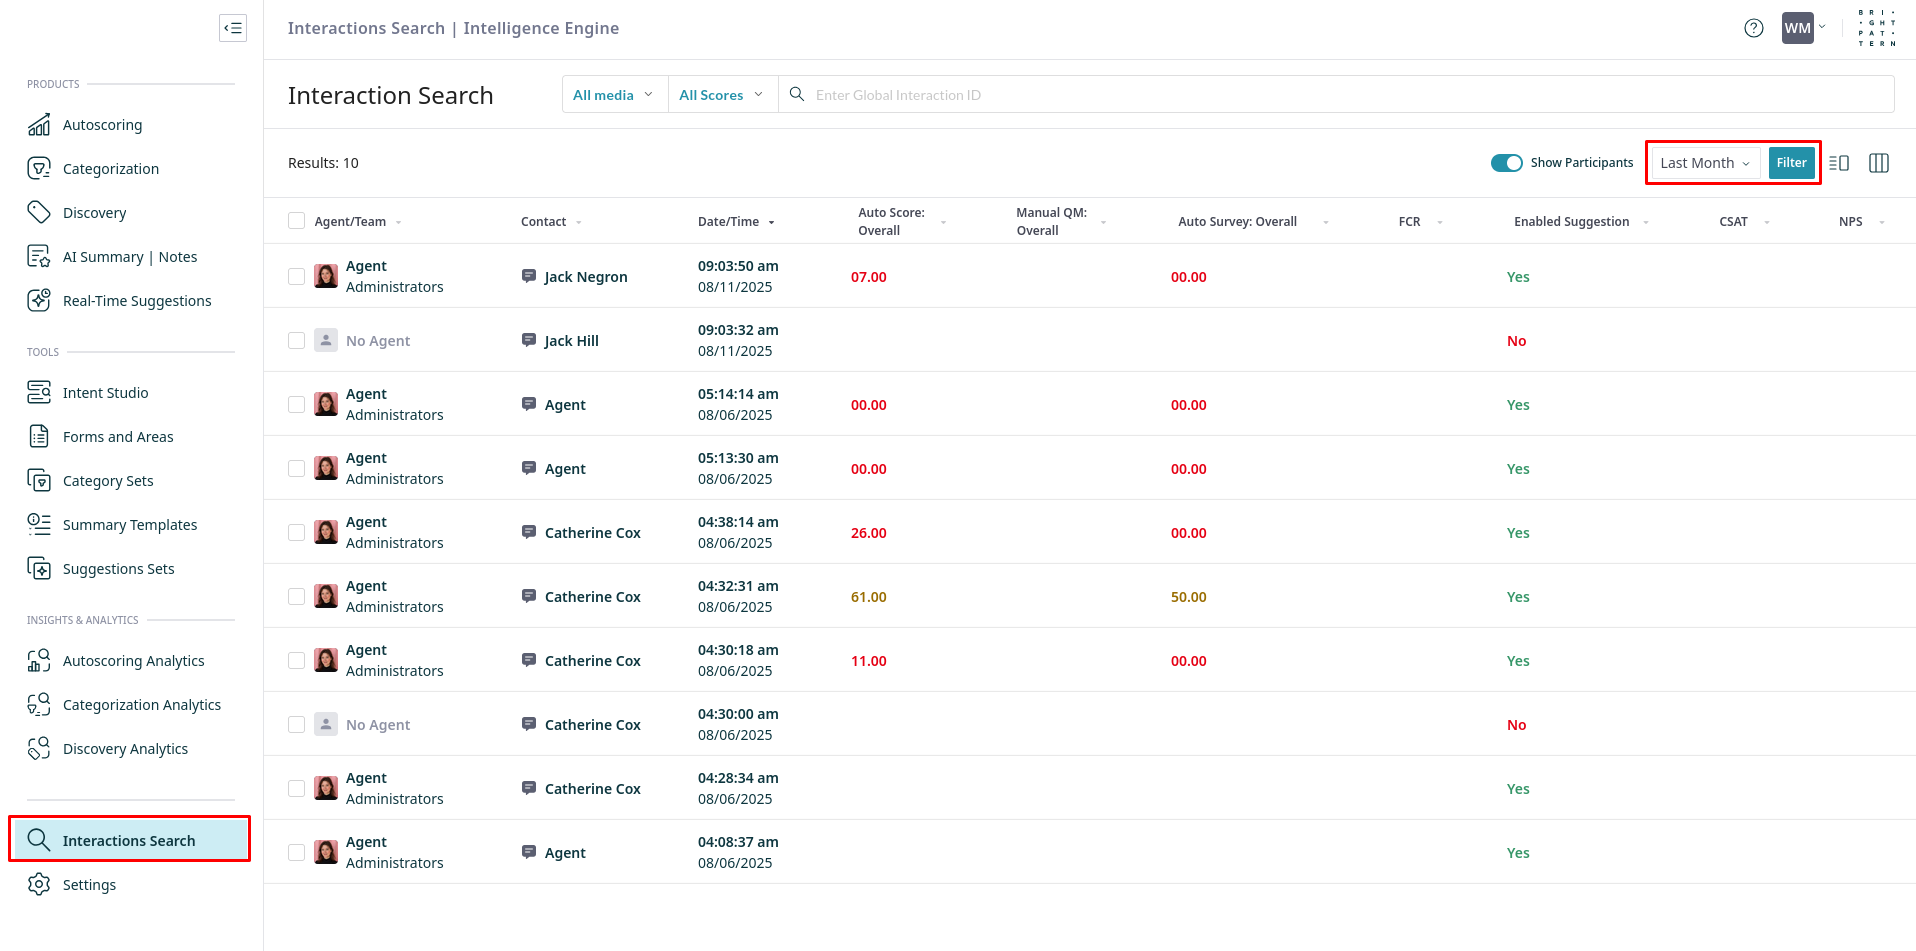
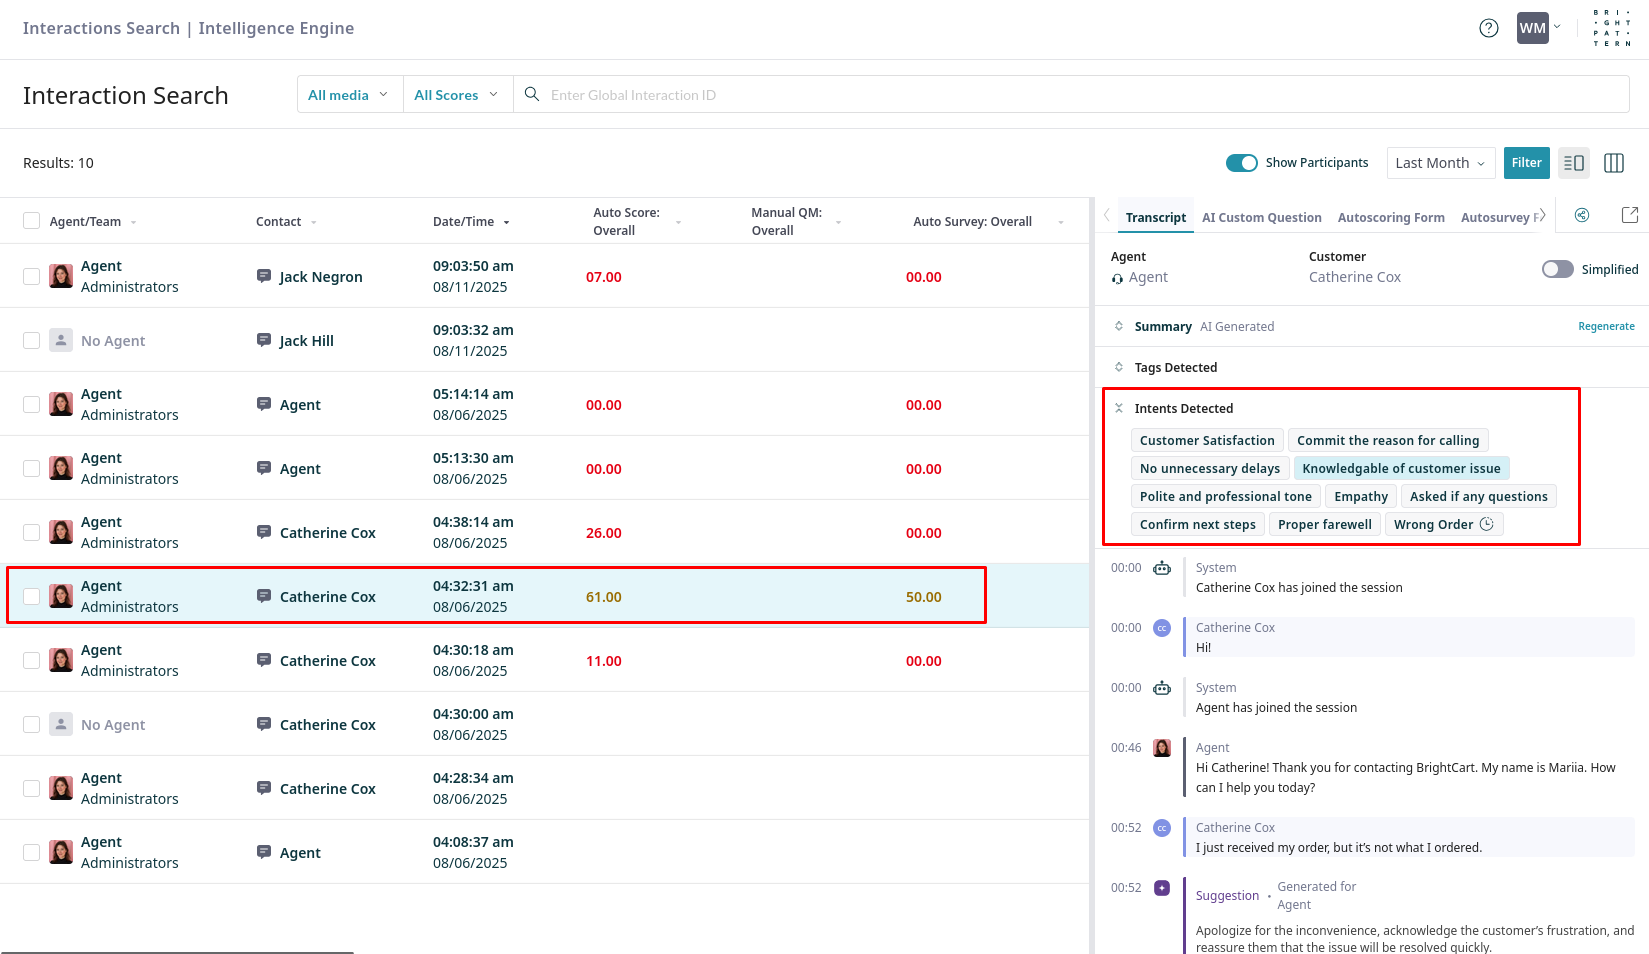
- Navigate to the Interaction Search page, choose a time period, and click Filter
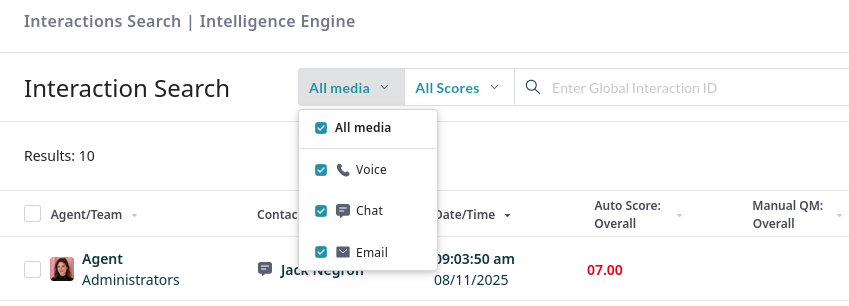
- You can also filter the list of interactions by media and overall score.
- Select an interaction to open its preview. The intents detected in the interaction are listed under Intents Detected.
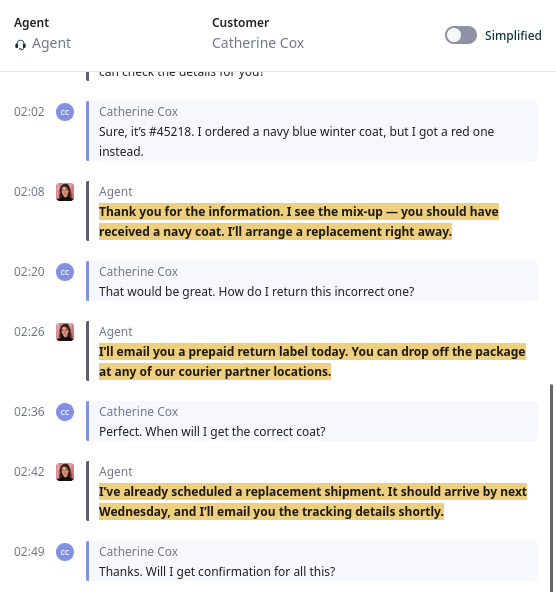
- Clicking a detected intent navigates to the point in the transcript where it was triggered, providing context for review and analysis.
5. (Optional) Process Past Interactions
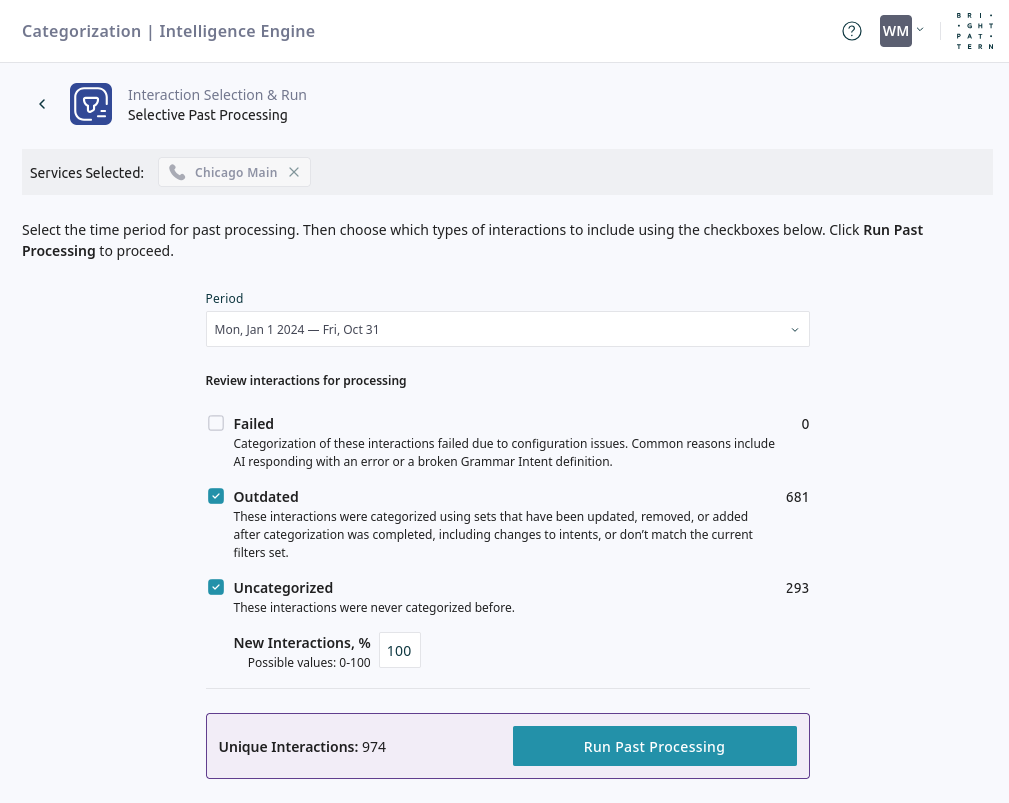
Use Past Processing to analyze historical interactions with your new category set. This is useful for populating your dashboards with data after creating a new category set or for reprocessing interactions after making changes to an existing set.
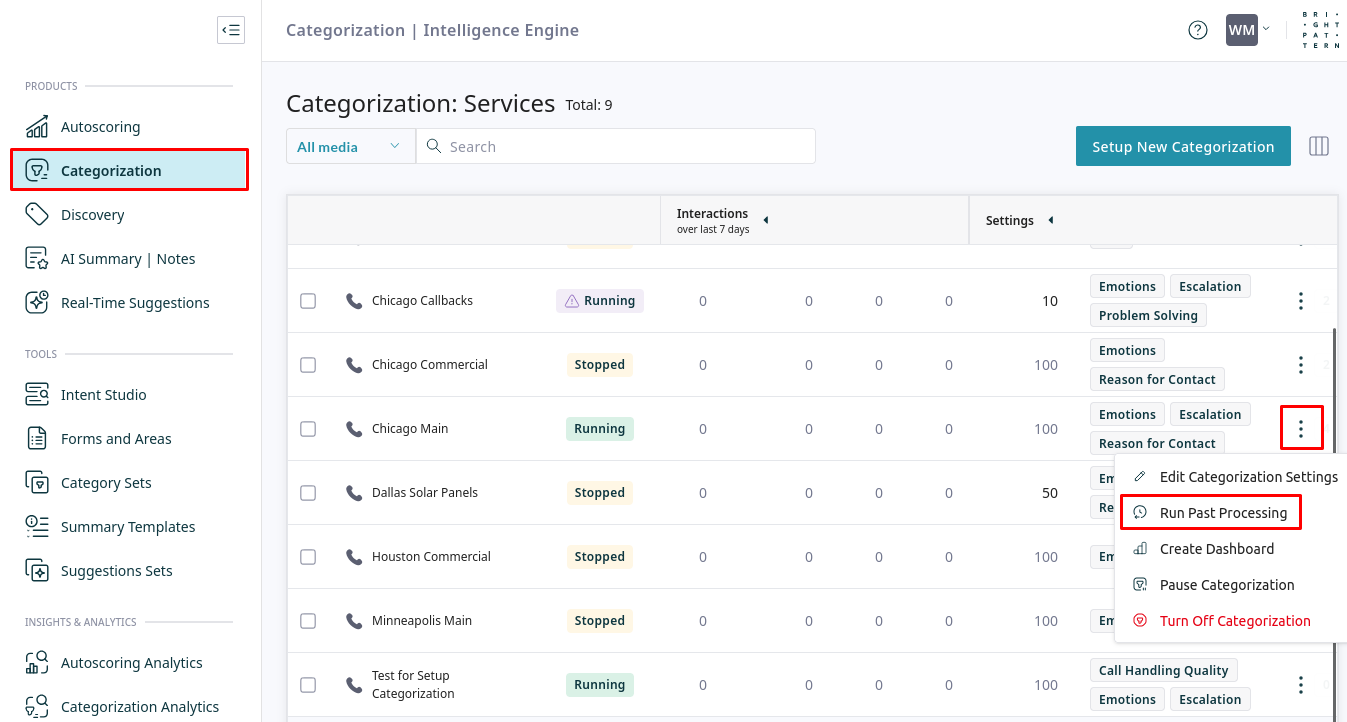
- From the Categorization page, find the service you want to process. Click the additional options menu (...) and select Run Past Processing.
- In the Selective Past Processing window, configure which interactions to process:
- Period: Select the date range for the historical interactions you want to analyze.
- Failed: Interactions that could not be categorized due to configuration errors.
- Outdated: Interactions that were categorized with previous versions of your category sets or filters. Reprocessing updates them with the latest changes.
- Uncategorized: Interactions that have never been categorized before.
- New Interactions, %: Specify the percentage of Uncategorized interactions to process.
- Click Run Past Processing to start the analysis.
< Previous | Next >

