Agent Desktop Helper Application Security Enhancements Overview
The Agent Desktop Helper Application Security Enhancement (ADHASE) prevents agents from accessing web pages/sites that are not secure (i.e., HTTP sites or sites with expired certificates). If the page is secure, but the domain is not in the predefined list, the ADHASE will check the list of custom allowed domains which is kept in Registry on Windows and in a flat file on Mac and Linux. If the domain is in the list of custom allowed domains, the ADHASE will proceed with the initialization as normal, but if the domain is not in the list, you will be prompted to confirm whether you wish to enable ADHASA from the site.
Tenant administrators can proactively deploy a custom list of allowed domains by pushing a registry update using Active Directory policy. In this case, users will never see the confirmation dialog.
Depending on a contact center administration's requirements, an agent may be allowed to add domains. The steps to do so are as follows:
Process
- Upgrade the ADHelper Extension
- Add an authorized domain
- Remove an authorized domain
Upgrade ADHelper Extension
The new ADHelper together with the new extension can work with any version of BrightPattern Servers (any earlier 5.3.0, 5.5.0 releases) and still provide security checks. This must be updated to receive the full benefits of the checks, as the old ADHelper will continue working with the new extension but cannot provide security checks until the extension scripts are updated. The ADHelper will still work with systems implementing the old extension but will skip the security checks. Note that AD can detect the old version of your extension and will prompt you to upgrade.
The prompt to upgrade the extension is a dialog, reading: “We detected an old version of Agent Desktop <Browser> Extension. We strongly urge you to upgrade to the latest to benefit from security improvements”.
Upgrade
- Uninstall the old Agent Desktop Helper Application (ADHA) from your computer.
- Log into Agent Desktop.
- When prompted, download and reinstall the updated version via the About option found in the Settings
menu.
Uninstallation and Reinstallation
The uninstaller for the ADHA will retain any existing per-user settings of previously allowed domains. Please note that a simple upgrade of the ADHA will not reset the customizations.
Authorizing Domains
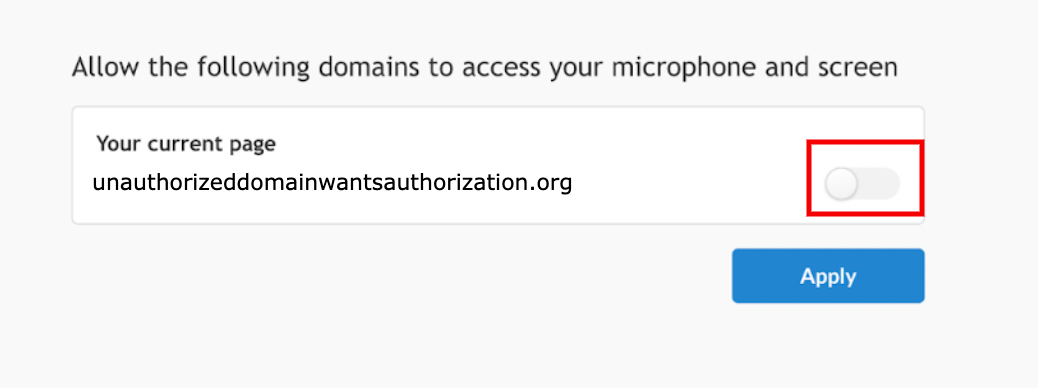
If Agent Desktop detects that your ADHelper is not authorized to work with the domain, you will be shown a banner with a clickable link that will encourage you to authorize the domain. Once you click on the banner, you will be brought to a page that will request permission to authorize the domain to access your microphone and screen.
Adding an Authorized Domain through Settings
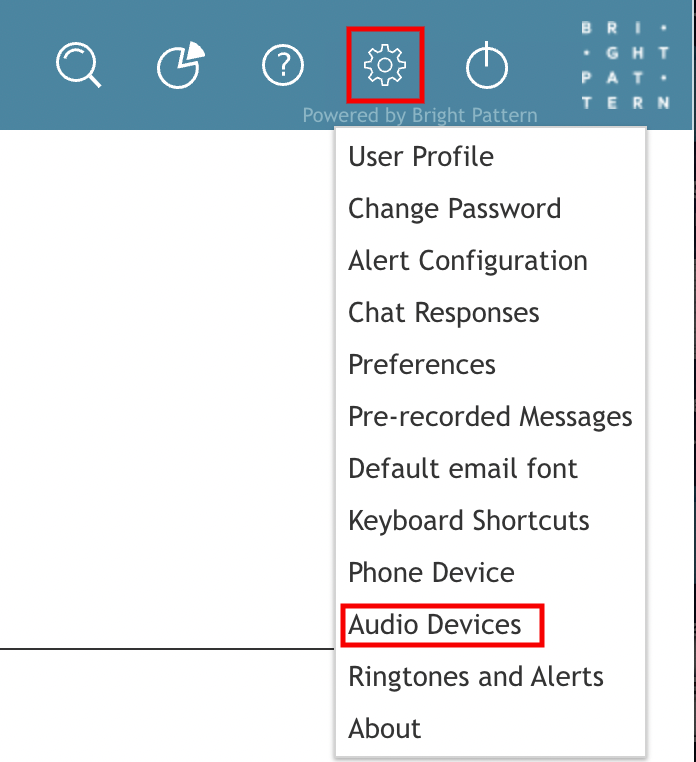
Providing that your contact center has given you permissions to authorize domains, you can easily whitelist domains once the ADHA has been updated through the AD settings icon.
- In Agent Desktop, go to Settings > Audio Devices.
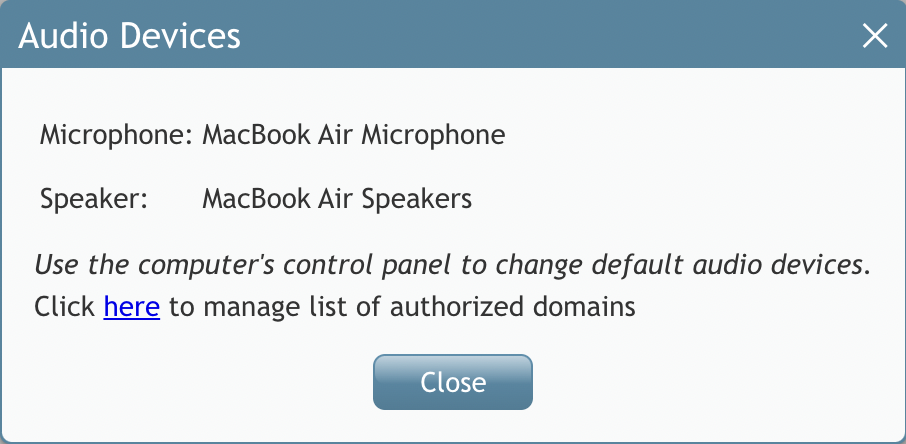
- The Audio Devices window will list your current audio devices beneath Microphone and Speaker.
- The Audio Devices window will also say, "Use the computer's control panel to change default audio devices. Click here to manage list of authorized domains."
- Click the "here" link.
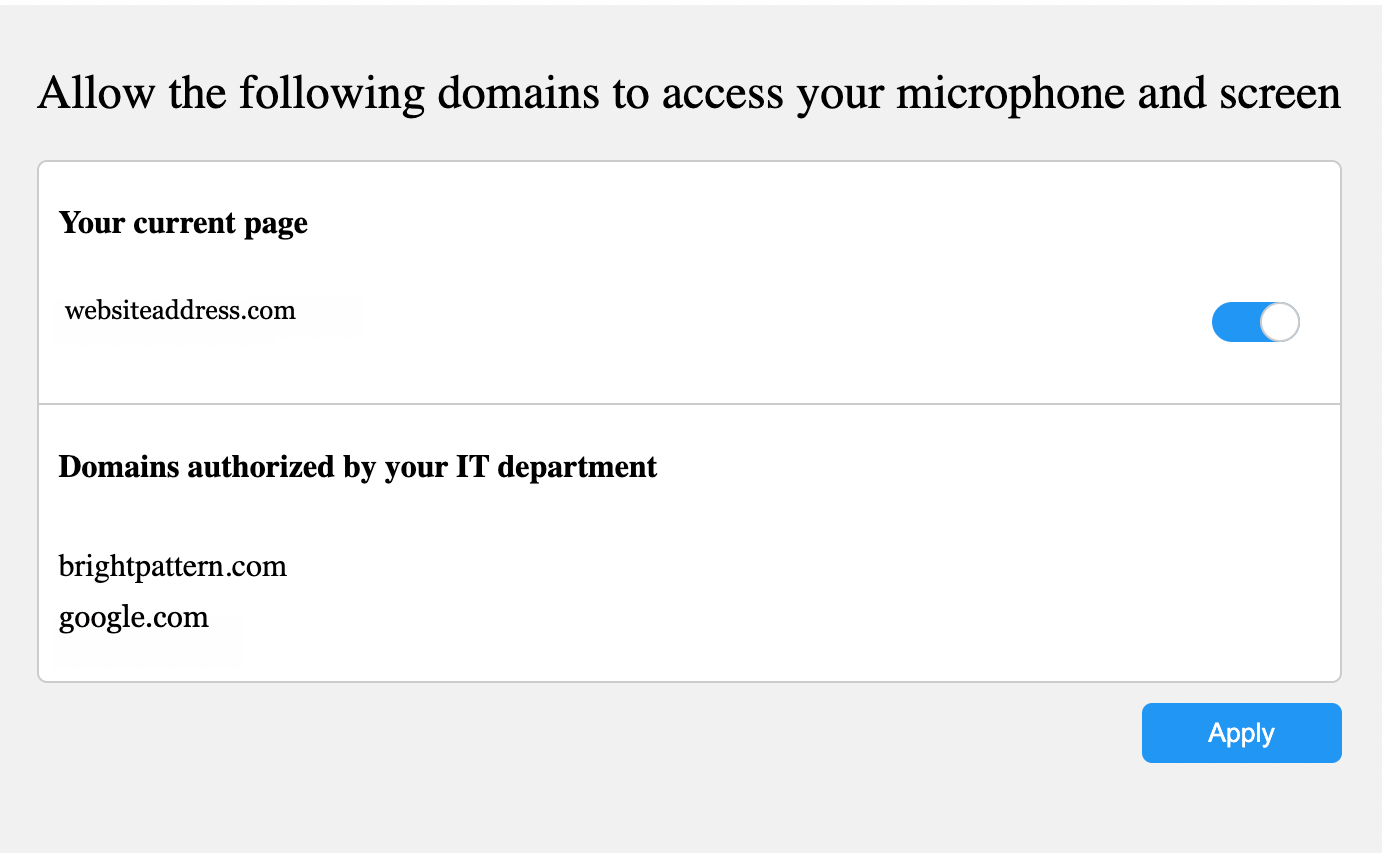
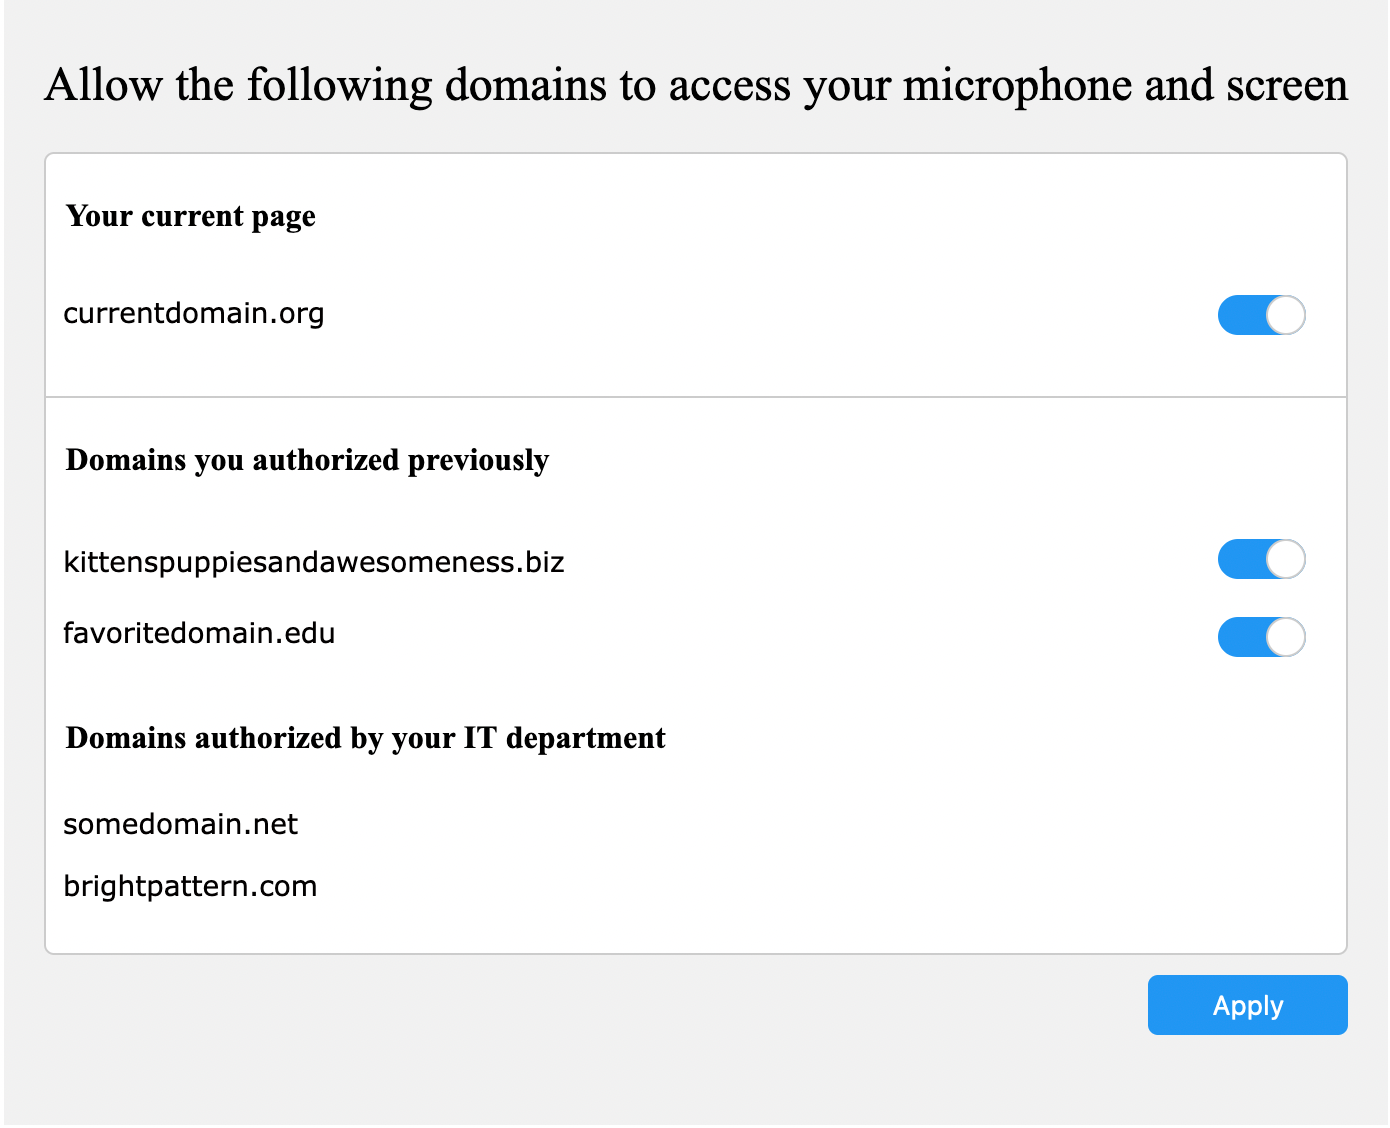
- A page will open: "Allow the following domains access to your microphone and screen".
Depending on if you have authorized a site before, you may see three sections: "Your current page", "Domains you have authorized previously", and "Domains authorized by your IT department".
(Note: If you have not previously authorized any domains, or if your administrators have not authorized any domains, all of these sections will not be visible.)
- Click the switch
 to add the current URL page to the authorized list.
 - Press the Apply
 button to accept the new domain into your domain whitelist.
Adding an Authorized Domain manually
After the installation of the Agent Helper application use the following URL in your browser to load a domain management page: http://localhost:9897/?domain=yourorg.com
after it loaded, enable the domain and apply the changes.
Removing an Authorized Domain
Providing that your contact center has given you permissions to authorize domains, it is possible for you to remove a previously authorized domain.
Note that only user-authorized domains can be deleted. The system authorized domains will not show the switch at all. Should you require a system-wide domain to be deleted, please contact your contact center's administrator.
- In Agent Desktop, go to Settings > Audio Devices.
- The Audio Devices window will list your current audio devices beneath Microphone and Speaker.
- The Audio Devices window will also say, "Use the computer's control panel to change default audio devices. Click here to manage list of authorized domains."
- Click the "here" link.
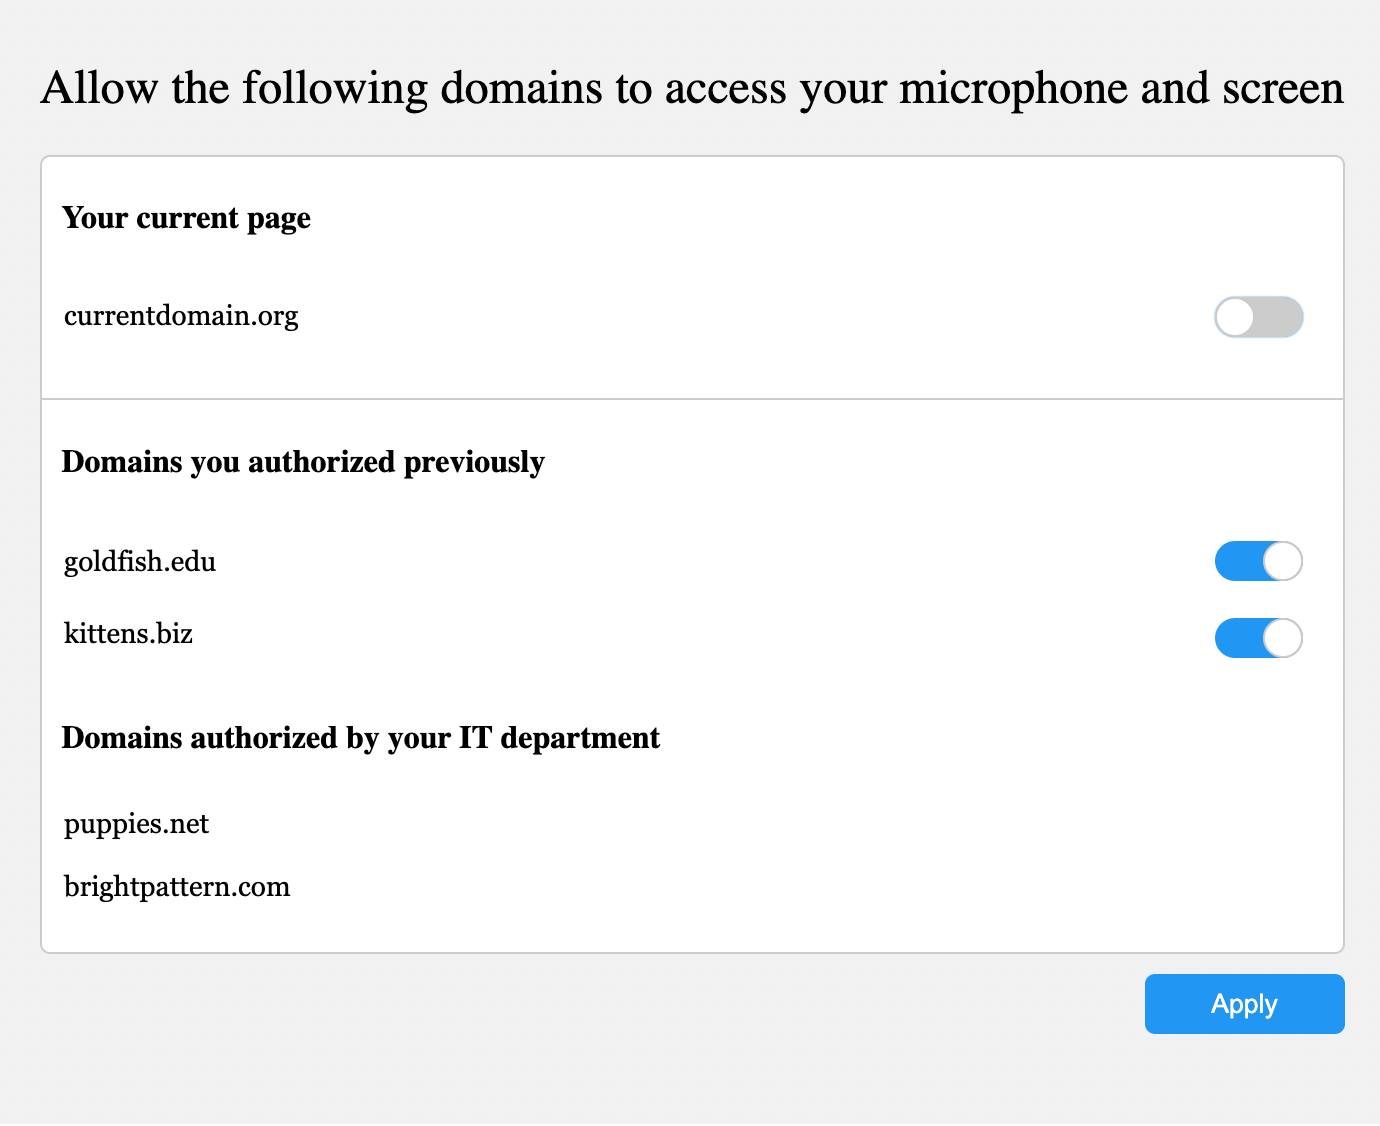
- A page will open: "Allow the following domains access to your microphone and screen".
- There may be three sections: "Your current page", "Domains you have authorized previously", and "Domains authorized by your IT department".
- Note the switches to the right of the domains listed.
- Click on the blue switch
 of a previously authorized domain.
 - It should turn gray.

- Press the Apply
 button.


