How To Set Call Priority Based on the Caller's Menu Selection in a Voice Scenario
There may be a time where you need to prioritize incoming calls based on the caller's selection in a voice menu - (e.g., you might wish to have your Platinum Member incoming calls prioritized over general callers, have Silver member callers receive an agent's attention at the regular rate, or slow down access to agents for Bronze Members.) If this is the case, you will need to set call priority.
The system routes calls based on a call's time in the queue (i.e., oldest calls will be delivered to an agent sooner than more recent calls). When a Set Priority block is defined, it multiplies the time in the queue by what number the priority is set at. Larger numbers are addressed first, lower numbers are considered to be more recent and thus have a lower priority, to be addressed later after the higher priority calls have been handled.
Note: Setting the priority doesn’t change reporting metrics, it is only helpful to organize the arrangement of calls.
Prerequisites
Already have your incoming services and campaigns set up to your satisfaction. This may or may not include specifying specific skill sets such as an agent's language or other varied auxiliary skills that can be set in the Request Skill or Service block (if desired).
Process
- Sign in to Bright Pattern's Contact Center Administrator and navigate to the Configuration tab at the top.
- On the left menu, navigate to Scenarios >> Voice.
- Click the Add Scenario
 + button at the bottom.
 - The Scenario Builder Graphical User Interface (GUI) will open in a new tab.
- Depending upon the desired interaction flow of your call, you can drag and drop various scenario blocks into the center pane's scenario flowchart.
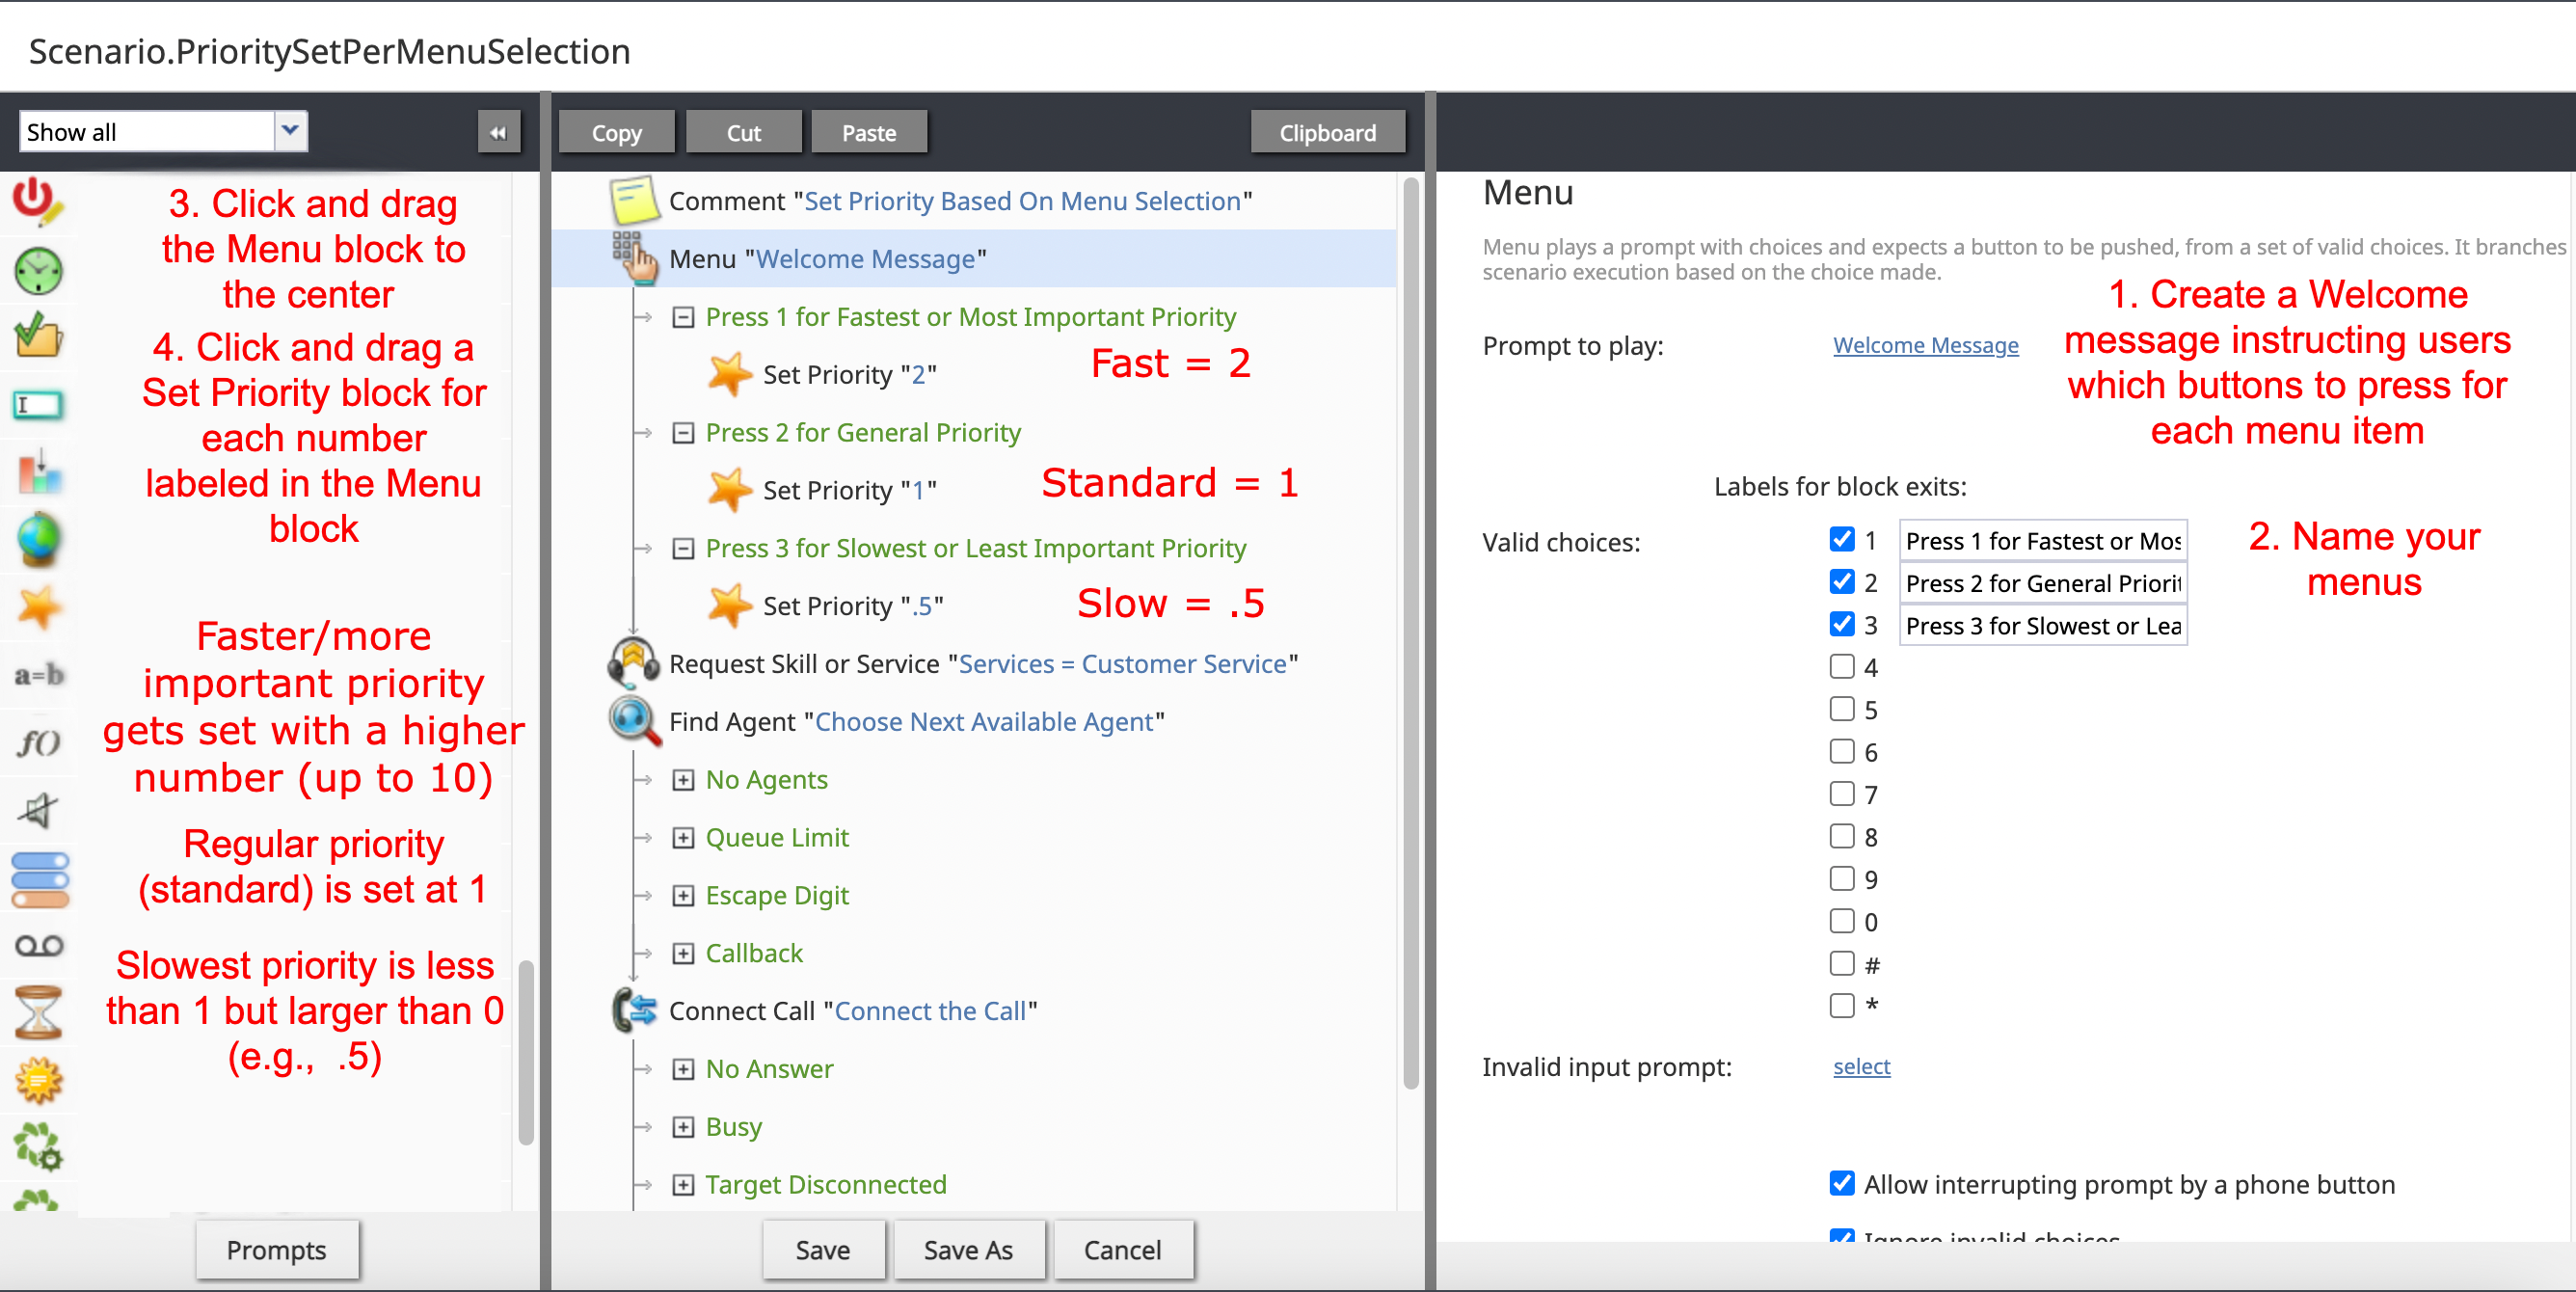
- In order to set the call priority based upon a caller's menu selection, you will need to make sure that the Menu block is part of the voice call scenario flow.
- Menu plays a prompt with choices. It expects a button to be pushed from a set of valid choices.
- Drag the Menu scenario block from the left pane into the center flowchart.
- On " Prompt to play" click "select".
- Create a voice prompt message that explains where each keypad entry will lead. (E.g., "Press 1 for Platinum Member Service", "Press 2 for Gold Member Service", ect.)
- Under "Valid choices" click and label the checkboxes that will be associated with each block exit or service. The keypad entries available are 0-9 as well as # and *.
- Continue filling out the Menu block as desired using this page as a guideline, if necessary.
- Drag and drop a Set Priority block beneath each green, labeled menu branch in the center pane's Menu Block. You use this block to specify the priority of a call relative to other calls.
- Click on each Set Priority block and determine the priority flow for each individual branch. The default call priority is "1".
- The maximum recommended priority value is 10. If priority is set too high, then the estimated wait time is inefficient and the system will not sufficiently offer virtual queue callbacks.
- If you wish a call to have a slower response time than the standard "1", you may choose a priority set number between "0" and "1" such as ".5" or ".25". This will drop the caller's priority below normal.
- Once you have defined the "Set Priority" blocks, continue creating the desired flow of your call interactions until you are satisfied with the scenario.
- Click "Save as" to save and name the voice scenario.
< Previous

