Configuration
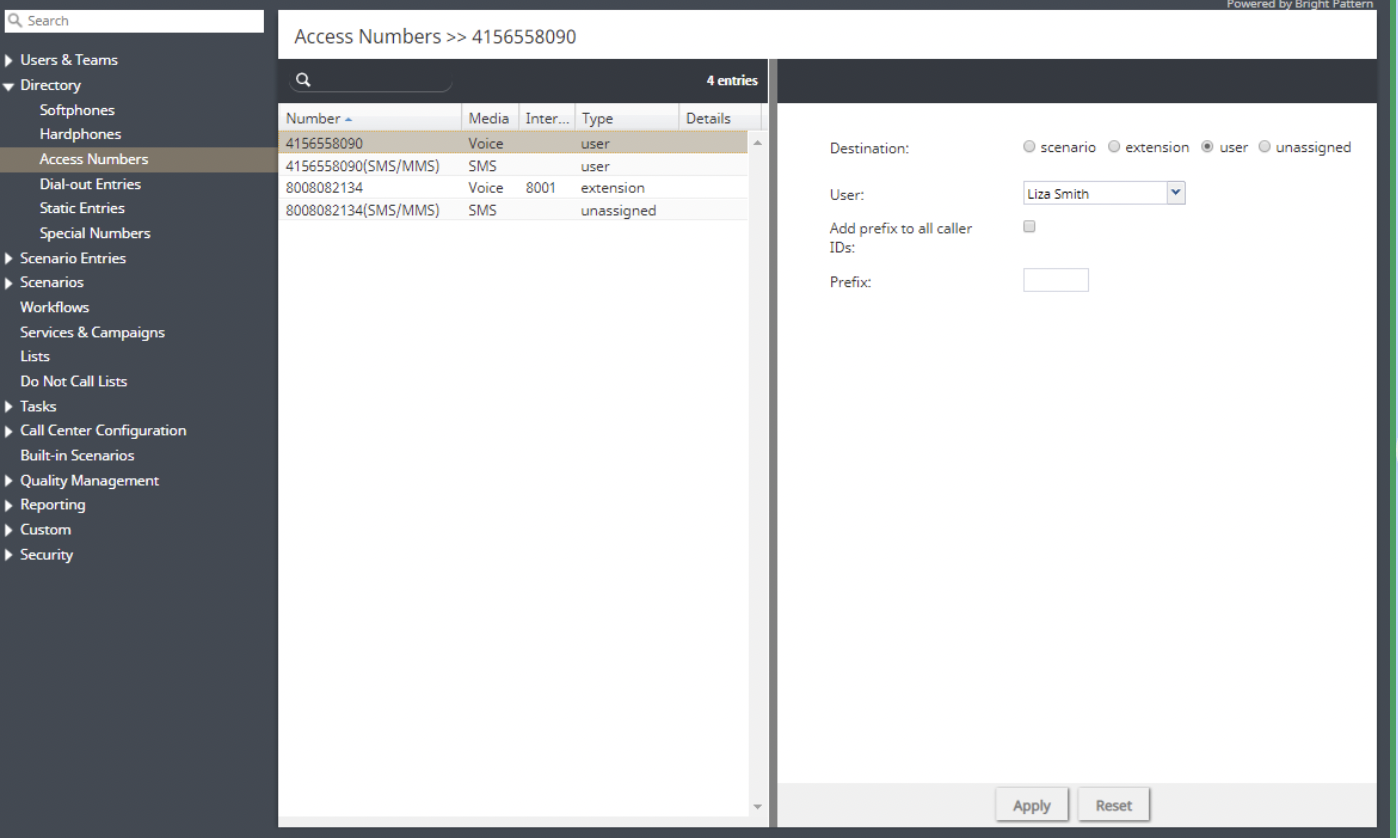
Configuring Omni DID for your contact center is done in the Contact Center Administrator application, section Directory > Access Numbers. Here, you will configure your access numbers to point to specific extensions or users. Once configured, voice or SMS interactions that are received by the DID access number are delivered to the specified voice extension or user directly. Similarly, users or extensions with Omni DID access numbers can make outbound voice or SMS interactions using the defined access numbers.
In this section we describe how to do the following:
- Configure Omni DID for incoming voice
- Configure Omni DID incoming SMS
- Configure custom scenarios for Omni DID (i.e., for identification or CRM activity history updates)
Prerequisites
In order to fully optimize Omni DID configuration for your contact center, note that your service provider must enable the features related to:
- Customizing built-in scenarios
- Allowing agents to select DID numbers for outbound calls
- Omni DID for Incoming Voice
- When configuring Omni DID for incoming voice, the destination may be set to extension or user.
Extension
To configure an extension as a destination for a voice-enabled access number, select the desired number, then select the Destination option extension.
Next, type in the extension number in the Extension Number field. Once entered, the system checks if there is a user with this extension configured and adds the user name link on the left, if found.
When you are finished, click Apply.
User
To configure a user as a destination for a voice-enabled access number, select the desired number, then select the Destination option user.
Next, select the user name from the User drop-down menu.
When you are finished, click Apply.
Omni DID for Incoming SMS
To configure a user as a destination for a SMS-enabled access number, select the desired number, then select the Destination option user.
Next, select the user name from the User drop-down menu.
When you are finished, click Apply.

