Configuration
To illustrate the process of quota configuration, consider the following example which uses an opinion poll with sampling by state and age group. In this example, you have a nation-wide list of potential respondents; however, for the purposes of this particular poll, you only need to get opinions from residents of California, Utah, and Arizona. Quotas are set proportionally to the state population.
Example Configuration
Note that even though the following steps for configuring outbound quotas use an example situation, the procedure remains the same. Follow the procedure for configuring outbound quotas, replacing the example fields and values with your own.
Step 1: Convert date of birth to age.
Before you import your calling list, convert the date of birth of each person to the person's current age. Various methods to do so exist. If you work with Excel, consider using the DATEDIF function with the start date referencing the date-of-birth cell and the end date set to TODAY().
Step 2: Import your calling list and specify screen properties.
- In the Contact Center Administrator application, navigate to Configuration > Services & Campaigns.
- Select the outbound voice service to be used for the campaign, and click the Lists tab.
- Click the Import list
 button and select the name of the list from the Add Calling List drop-down menu.
 - In the List Type tab, select the type of file you will be importing.
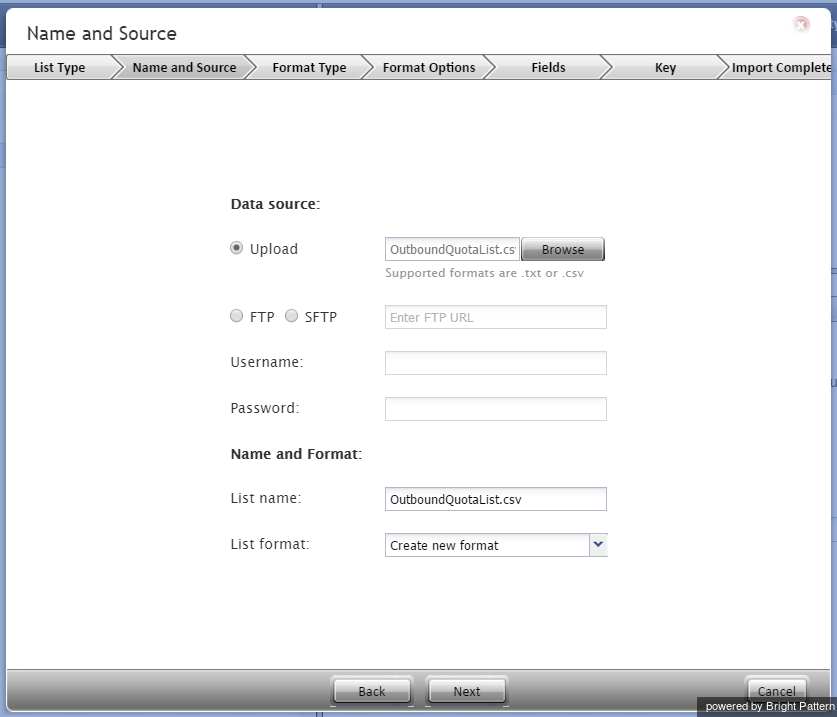
- In the Name and Source tab, browse for the file or specify where to get it, and import the calling list, being sure to name it and specify its list format.
- In the Format Type tab, and the Format Options tab, select the format of your list.
For complete descriptions of screen properties, see section Lists of this guide.
Step 3: Specify fields for the calling list.
- In the Fields tab screen properties, set the type of the Age column to Integer.
- Make sure the column with the state information is set to type State/Province.
Step 4: Follow outbound campaign configuration steps.
Follow step 2 through step 9 of the general outbound campaign configuration process to set up your campaign. When configuring dispositions, make sure you have at least one disposition of the success type (e.g., a disposition indicating that the respondent provided answers to all questions in the poll).
Step 5: Link your campaign to your calling list.
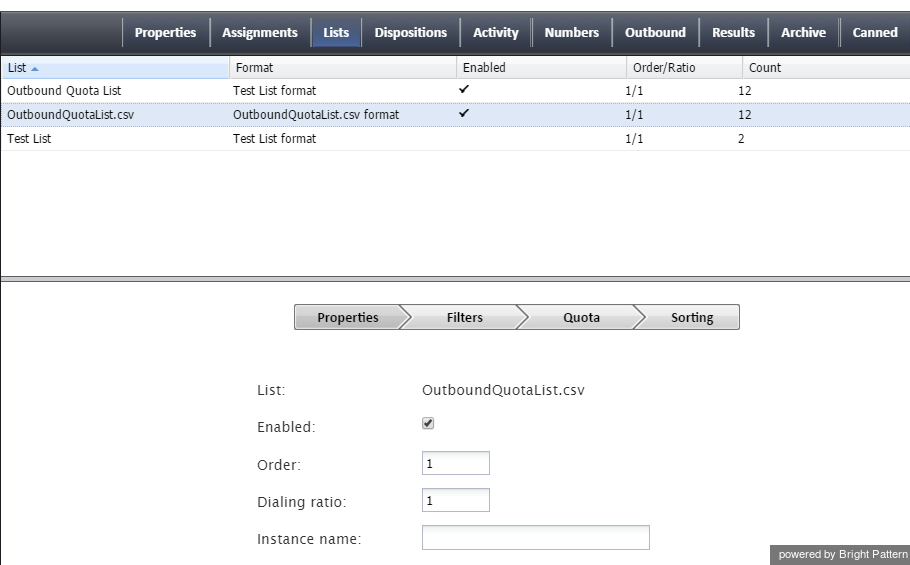
- Navigate to Services & Campaigns > Outbound Voice Service > Lists tab > Properties tab.
- In the Properties tab, you can associate your campaign with the imported calling list and enable it by selecting the enable checkbox.
- Skip all other settings in the Properties tab (a quota-based campaign can have only one list enabled within it at a time).
- Skip the Filters tab (a list used in a quota-based campaign cannot have any filters applied to it within the given campaign).
Step 6: Select quota values.
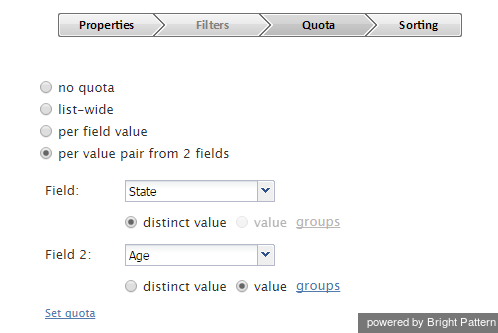
- Open the Quota tab and select the per value pair from 2 fields option.
- For the first field, select column State.
- For the second field, select column Age and the value groups radio button.
Step 7: Define age ranges.
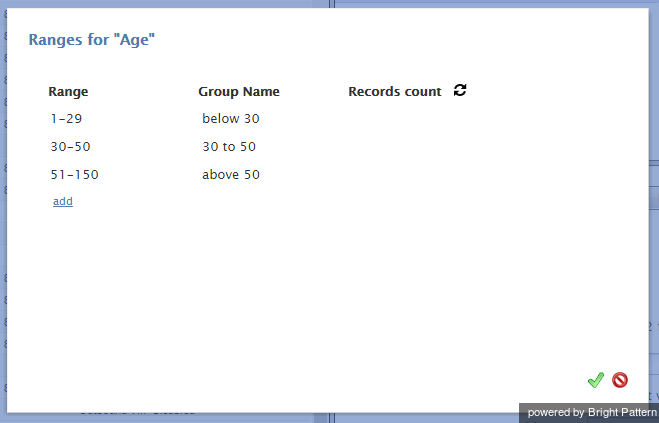
Click the groups link, and define the age ranges. Note that ranges cannot overlap. You can click the refresh icon next to Record count to see the total number of records in each age group that you have defined.
Step 8: Set a quota for the state/age-group combination of people to be contacted.
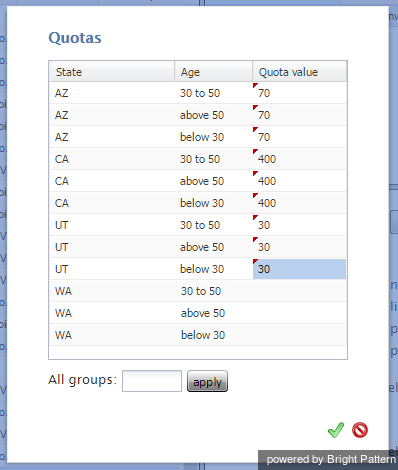
Click the set quota link. The dialog window will list all possible combinations of states and age groups in the calling list. Use the Quota value column to set a quota for each state/age-group combination that should be contacted during this campaign. Ignore all other combinations.
Step 9: Organize the records to be dialed.
If necessary, open the Sorting tab and review/change the order in which the records will be selected for dialing.
Step 10: Finish and enable the campaign.
Follow steps 11 through 18 of the general outbound campaign configuration process to finish configuration and to enable your campaign.
For detailed descriptions of all quota configuration settings, see the Contact Center Administrator Guide, section Lists Tab.

