チャット記録
チャット記録には、チャットがシステムに入った瞬間からのチャット対話のフルテキストと日付/時刻データが含まれています。この記録は、エージェントの評価、顧客満足度の分析、チャット詳細の共有、チャット詳細の記録などに役立ちます。
チャット記録へのアクセス
チャット記録を表示するには、 レコードで利用可能な 対話記録を検索しなければなりません (設定にいないことを確認してください)。
- コンタクトセンター管理者アプリケーションに管理者としてログインします。
- レポート > 対話記録 > 検索へ進みます。
- チャットのチェックボックスを選択し、表示したい記録の検索基準(例えば、日付範囲)を指定します。
- 変更を適用します。
- 検索ボタンをクリックします。
チャット記録の確認
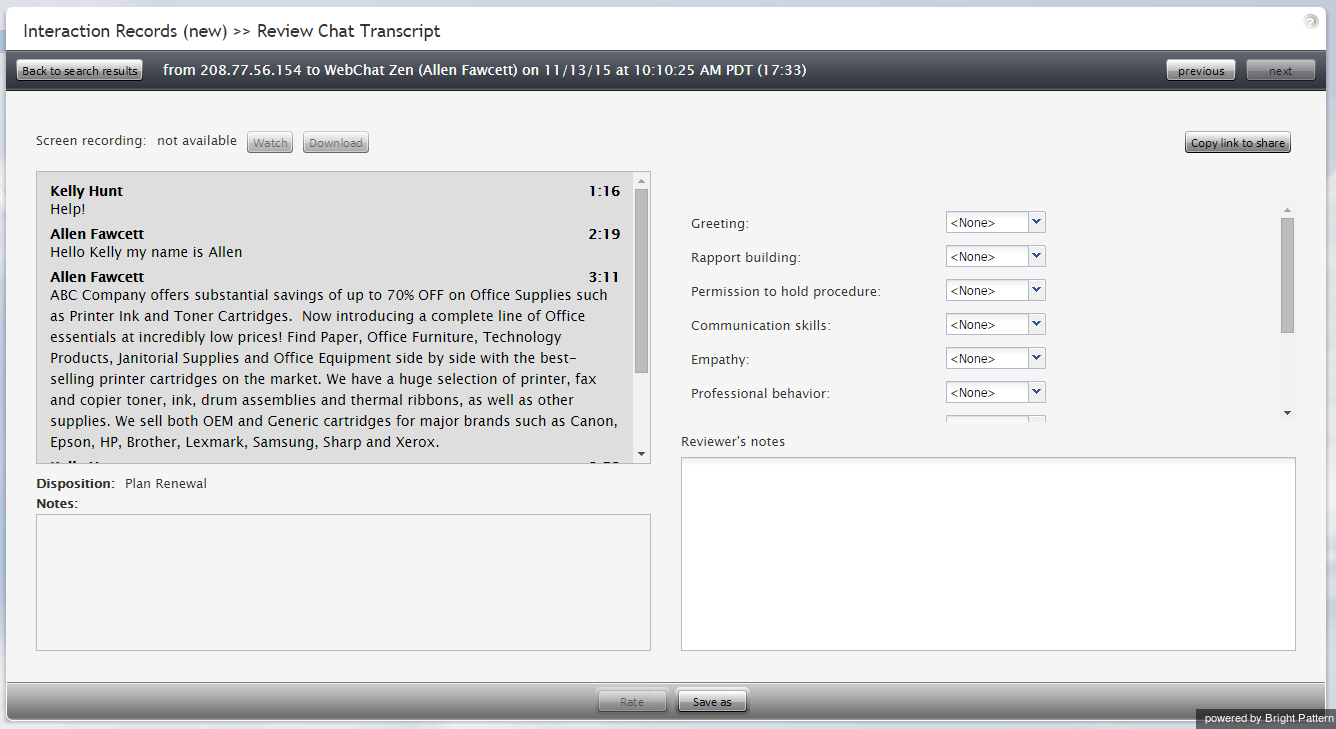
チャット記録を確認するには、対応する対話記録のメッセージ送信 アイコンをクリックします。チャット記録の確認ページには、完全なチャット記録と評価コントロールが表示されます。
コンタクトセンター設定でエージェントパフォーマンス評価のカテゴリが定義されている場合、それらのカテゴリのいずれかにおいて、選択したチャット対話中のエージェントパフォーマンスを1〜10で評価できます。この記録に関する自由形式のコメントを入力することもできます。
レートボタンをクリックし、入力したデータを保存します。このチャット対話の評価とコメントは保存され、他のユーザーは対応する通話記録を後で確認できます。
同じチャット記録がすべてのチャットセグメントに提供される一方、チャットを個別に処理した各エージェントのパフォーマンスの評価も可能です。セグメント間を移動するには、 次へおよび 前へボタンを使います。
チャット記録のエクスポート
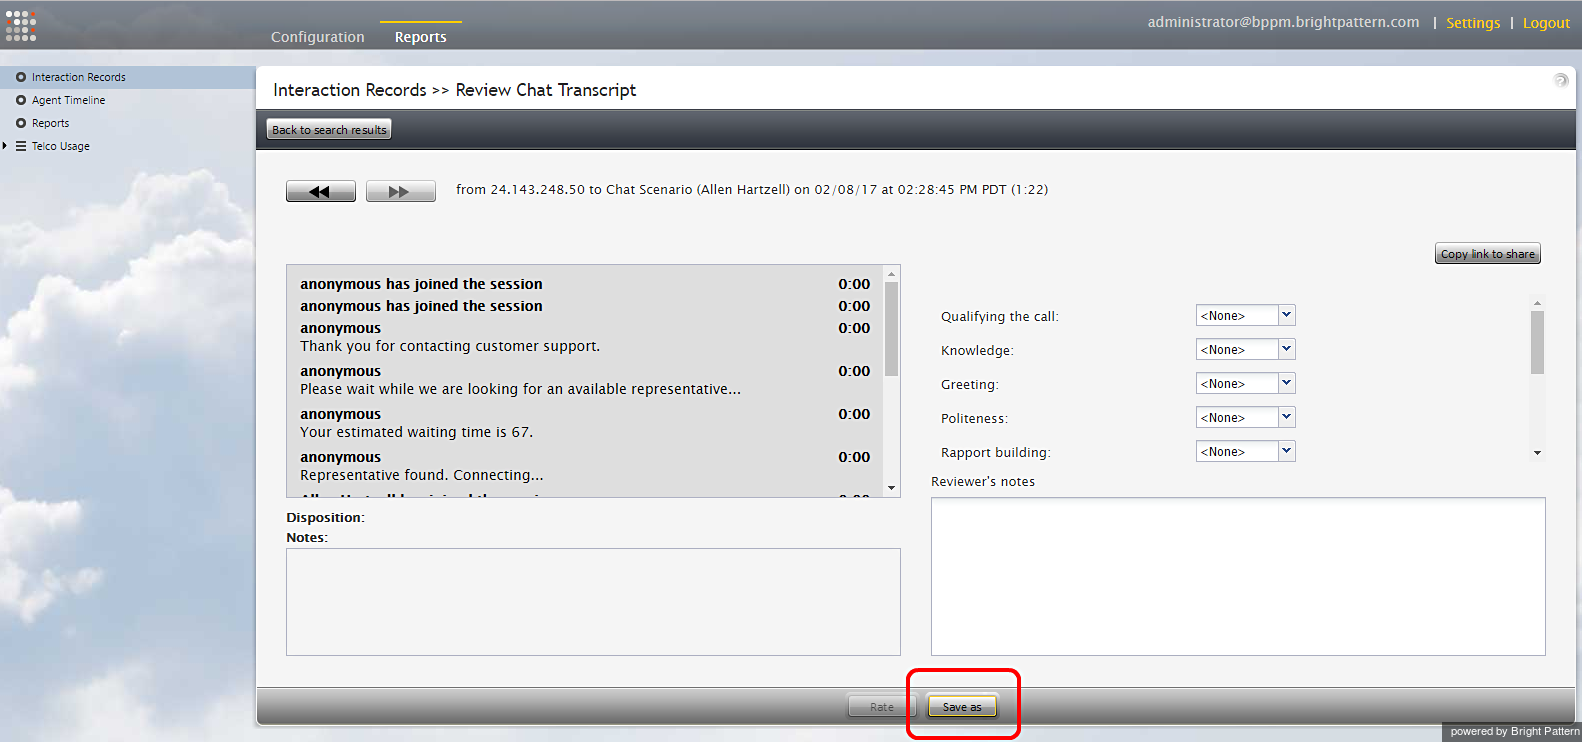
評価、レビュアーのコメント、記録をパソコンにダウンロードするには、名前を付けて保存アイコン ![]() をクリックします。
をクリックします。
チャット記録へのリンクを他のレビュアーと共有するには、リンクをコピーして共有する アイコン![]() をクリックします。このページへのリンクがクリップボードにコピーされます。その後、このリンクをメールまたはテキストメッセージに貼り付け、社内で共有できます。記録へアクセスするには、 通話記録とチャット記録の再生という権限が必要です。
をクリックします。このページへのリンクがクリップボードにコピーされます。その後、このリンクをメールまたはテキストメッセージに貼り付け、社内で共有できます。記録へアクセスするには、 通話記録とチャット記録の再生という権限が必要です。
チャット記録をメールでお客様へ送信
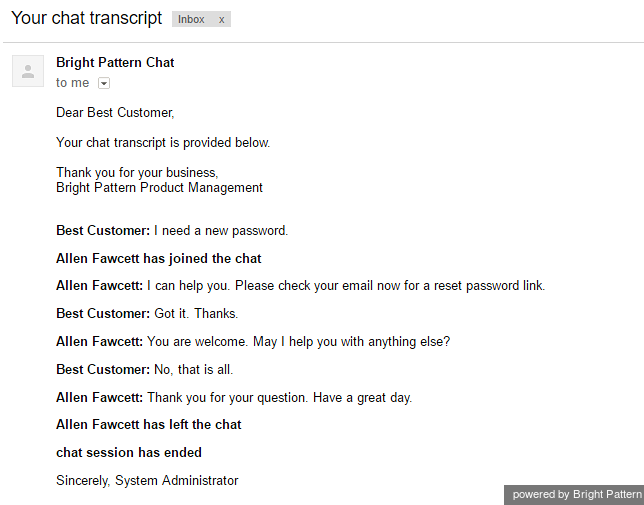
"人間が読める"形式でチャット記録をお客様にメールで送信するように、チャットシナリオを設定できます。この機能は、お客様が対話終了後に記録のコピーを要求し直接取得できるため、コンタクトセンター管理者アプリケーションで作業している管理者がアクセスできないチャット記録の利便性を高めます。この機能は $(item.transcript.text) 及び $(item.transcript.html)という変数を使って、シナリオビルダーアプリケーションで設定および管理されます。
チャットシナリオの設定方法
次の例では、チャットシナリオに次のアクションが含まれます:
- お客様はチャットを開始します。
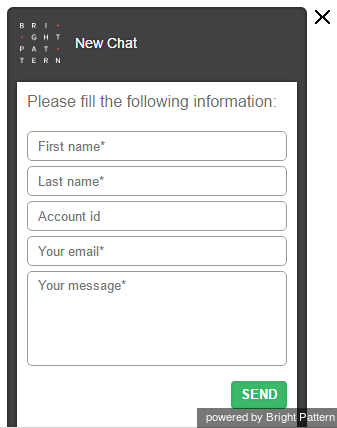
- お客様はリクエストの入力フォームに、姓、名、氏名、メールアドレス、メッセージ本文を入力します。
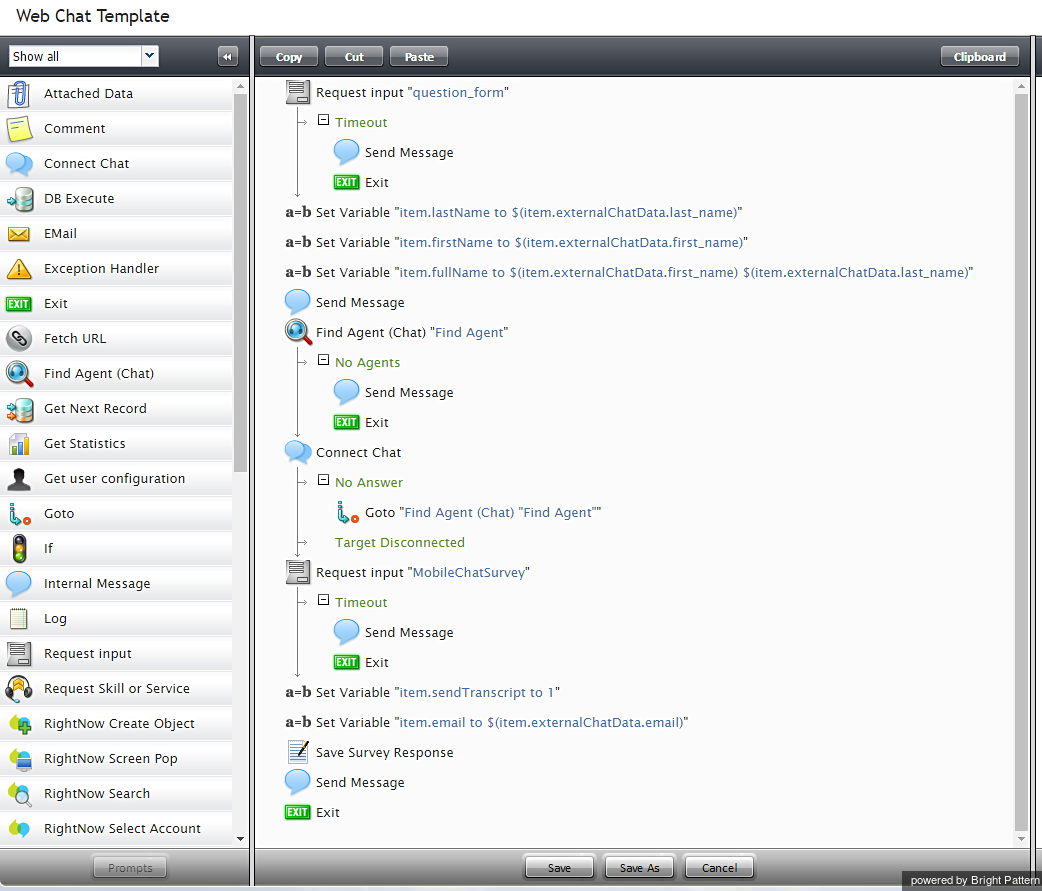
- エージェントの検索ブロックは展開されます。エージェントがチャットの受付をすると、チャットの接続ブロックが有効になり、会話が開始します。
- 会話が終了し、モバイルチャット調査ブロックが展開されます。この調査では、お客様がチャット記録のコピーをメールで送信することを希望する場合、メールアドレスの入力が求められます。
- チャットウィンドウが閉じます。
チャットシナリオを設定するには、次の手順を実行します。
ステップ 1: 編集するウェブチャットシナリオを選択します。
- 設定 > シナリオ > チャットへ進みます。
- 編集するウェブチャットシナリオを選択します。 ウェブチャットシナリオをまだ設定していない場合は、作成するか、テンプレートを使って作成します。 ウェブチャットシナリオは、モバイルチャットシナリオと同じものではないので、ご注意ください。
- 編集
 をクリックし、シナリオビルダーでシナリオを編集します。
ステップ 2: シナリオビルダーで、次のブロックを使ってシナリオを作成します。
シナリオビルダーが新しいタブまたはウィンドウで開き、ウェブチャットテンプレートシナリオが表示されます。設定中のシナリオを表示されているシナリオと一致させる必要があります。
- Notice that the scenario begins with a Request Input block that asks the customer to fill out a form with first name, last name, and first name plus last name. These fields are included on the form using three Set Variable blocks.
- Drag each Set Variable block onto the scenario and place them all underneath the Request Input block.
- When the customer initiates a chat, the customer will see the form in the chat window.
- Set the variable properties, filling in the fields for Variable name and Value.
- The properties should be set as follows:
| Variable name | Value | Description |
|---|---|---|
| item.lastName | $(item.externalChatData.last_name) | customer's last name |
| item.firstName | $(item.externalChatData.first_name) | customer's first name |
| item.fullName | $(item.externalChatData.first_name) $(item.externalChatData.last_name) | customer's full name |
Step 3: Add more variables.
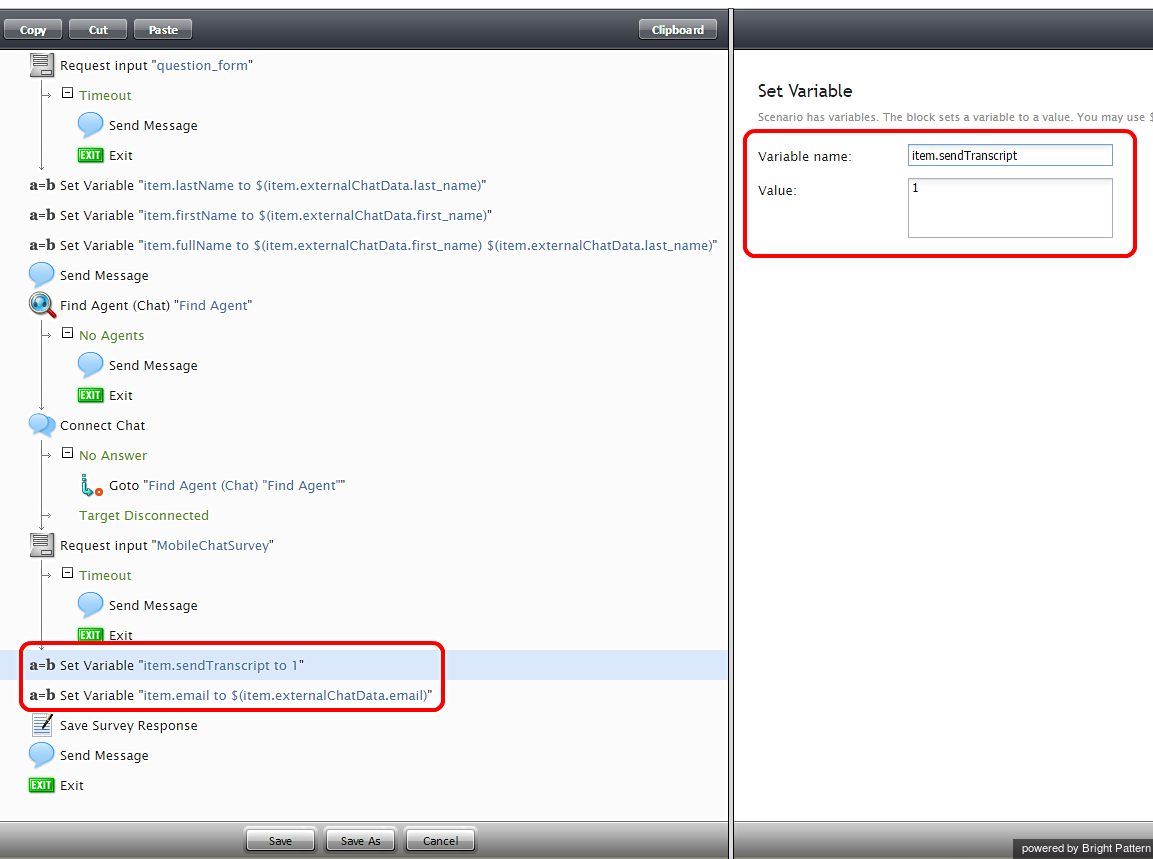
Drag two more Set Variable blocks onto the scenario underneath the last Request input block.
The properties should be set as follows:
| Variable name | Value | Description |
|---|---|---|
| item.sendTranscript | 1 | The functionality to send the chat transcript is turned on. |
| item.email | $(item.externalChatData.email) | customer's email address |
Note that $(item.sendTranscript) value must be set to 1 in the scenario for the chat transcript to be sent. If you set the value to zero or you leave it blank, the transcript will not be sent. Furthermore, the customer must provide an email address for the transcript to be sent.
- Save your changes. Close the Scenario Builder application.
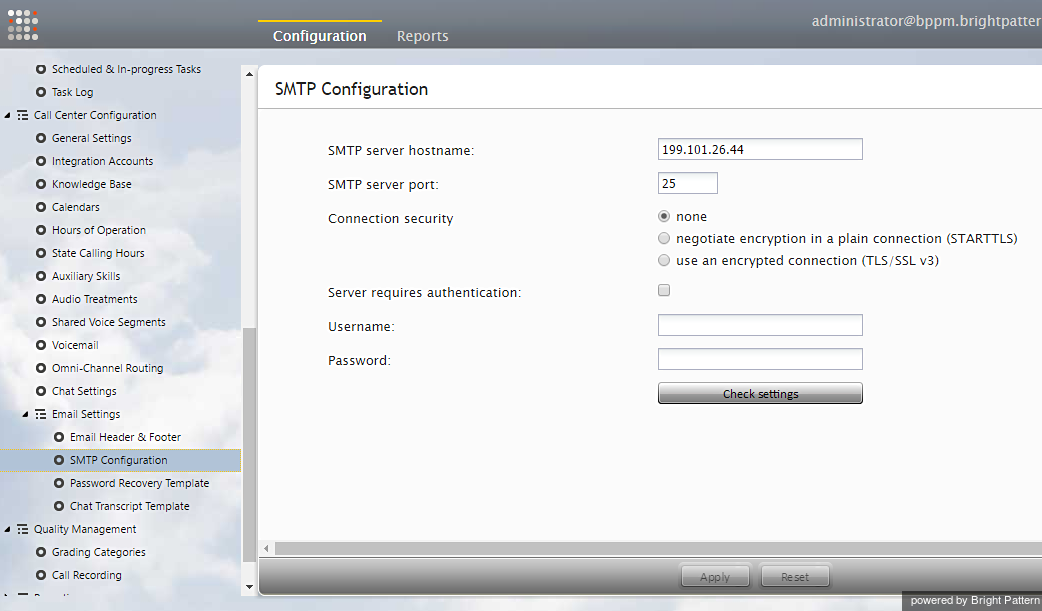
Step 4: Check and test your SMTP connection.
- Make sure your email settings are configured properly and that an SMTP server is specified.
- Navigate to Call Center Configuration > Email Settings > SMTP Server.
- Then enter the server properties in the fields shown.
Step 5: Define a standard message for the chat transcript template.
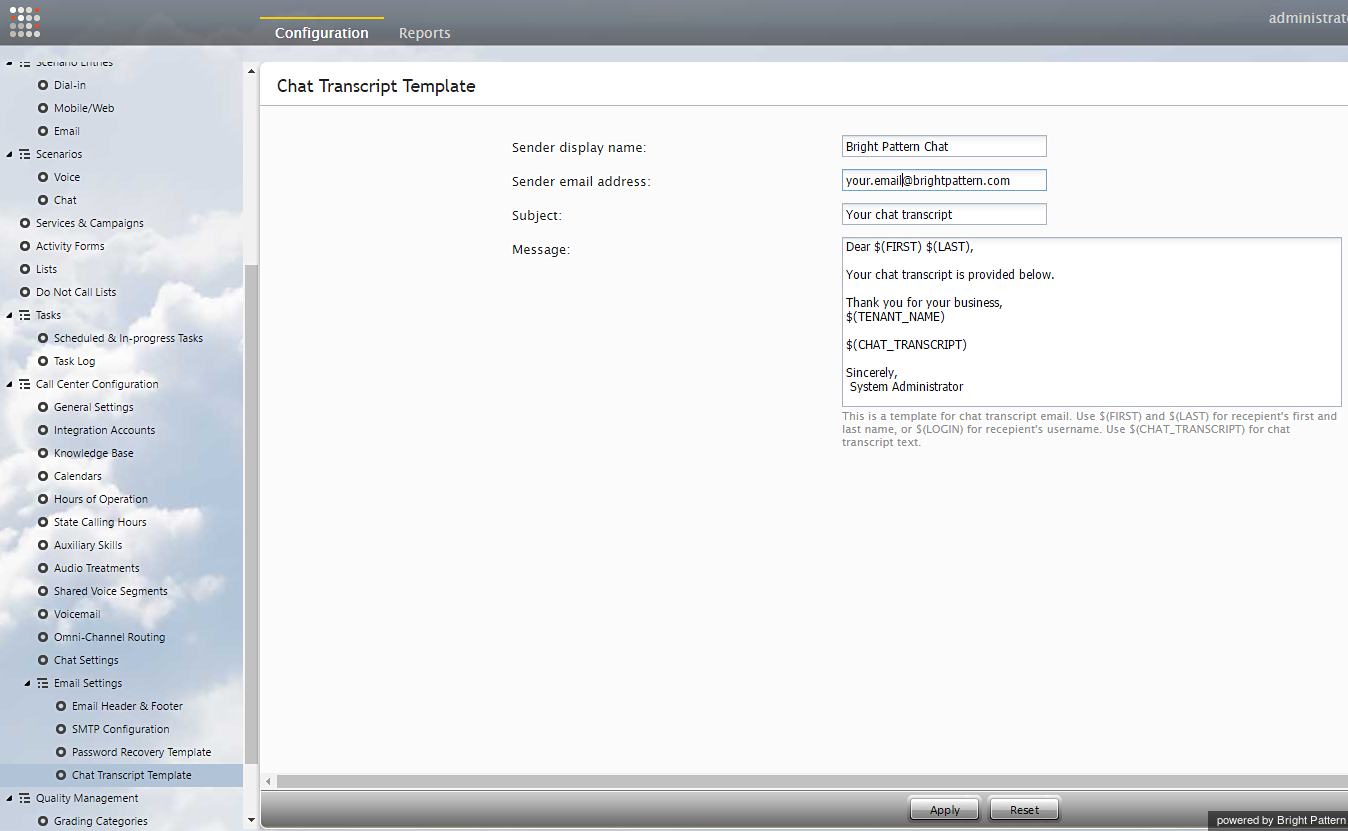
Make sure your Chat Transcript Template is defined. If you do not already have one, create one by navigating to Call Center Configuration > Email Settings > Chat Transcript Template.
A chat transcript template is the standard email that will be sent to the customer. The variables on the template are automatically populated with the customer's information (from the Request Input form in the scenario), your company's information (i.e., your name), and the contents of the chat transcript. You may edit the appearance of such a friendly message in any way you like. An example chat transcript template is shown.
Fill in the following fields:
- Sender display name (your name/your organization's name)
- Sender email address (your email address--whoever is sending the email)
- Subject (email subject line)
- Message (friendly message that includes the chat transcript)
If you set up your chat transcripts exactly like this, your customer will have the option to receive a copy of the chat transcript.
What the Customer Sees
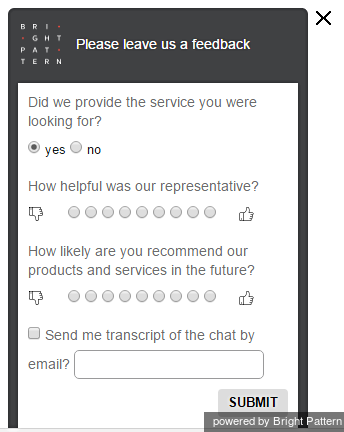
At the end of the conversation, a feedback survey will be given to the customer to complete. This survey action item was placed in the chat scenario as a Request Input block. The customer will see the survey as shown.
The customer completes the feedback survey and receives the chat transcript via email. An example of the email message is shown.

