| Line 31: | Line 31: | ||
After the interaction is concluded, only the masked text will be included in the chat transcript. | After the interaction is concluded, only the masked text will be included in the chat transcript. | ||
| − | |||
| − | |||
| − | |||
| − | |||
| − | |||
| − | |||
| − | |||
| − | |||
| − | |||
| − | |||
| − | |||
| − | |||
| Line 54: | Line 42: | ||
| + | == Remove Attachments in Activity History == | ||
| + | ::[[File:AD-Contact-AH-Mask-5140.PNG|650px|thumb|center|Mask attachments in activity history]] | ||
| + | |||
| + | If you forget to remove an attachment with sensitive data during the chat, it is possible to delete the attachment in the contact's activity history.<br><br> | ||
| + | # In the Agent Desktop application, go to section [[Agent-guide/Work/SearchandPreviewRecords/SearchandPreviewInterface#Contacts|''Search & Preview Records > Contacts'' tab]]. Locate the desired contact record and open it.<br><br> | ||
| + | # Under the [[Agent-guide/Work/SearchandPreviewRecords/SearchandPreviewInterface#Activities_Tab|''Activities'' tab]], find the interaction. In the [[Agent-guide/Work/CasesEmail/MyCasesInterface#Case_View_Panel|case view panel]], locate the attachment.<br><br> | ||
| + | # Highlight (i.e., click and drag) the text of an attachment; a box with the option to '''Mask''' will appear. When you select the '''Mask''' option, the attachment text will be struckthrough. | ||
Revision as of 21:31, 15 February 2022
How to Remove Sensitive Data from Chats
Depending on the type of services that your contact center provides, incoming chat interactions may contain sensitive data or attachments that people not familiar with Internet security risks can include in their messages. Examples of such data include payment card numbers, access codes, and clients’ personal health information.
Handling of such data may be governed by various laws, industry security standards, as well as internal policies of your organization. You may be expected to identify such data and make sure it is masked before the interaction is further processed and stored.
Note: All operations described as follows require the Mask interaction content privilege; for more information, contact your system administrator.
Remove Sensitive Attachments in the Chat Body
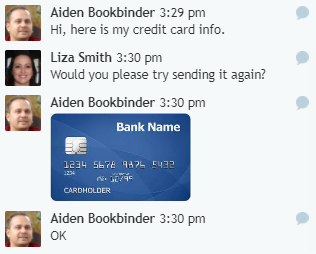
When you need to mask sensitive attachment (e.g., images) in a chat interaction, do the following:
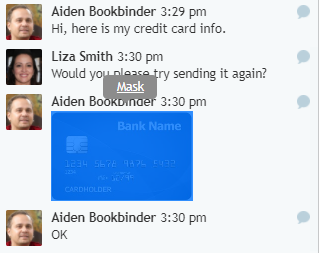
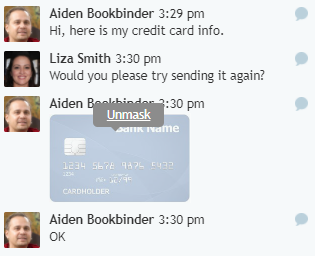
- Highlight (i.e., click and drag) the attachment in the chat; a box with the option to Mask will appear.
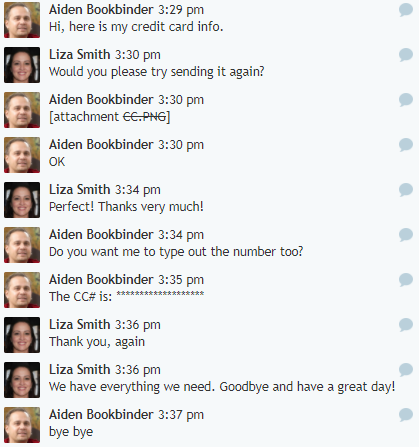
- When you select the Mask option, the attachment is replaced with the file name of the attachment. Note that you may unmask and remask attachment that are sent during the active interaction.
- After the interaction is concluded, only the attachment's file name will be included in the chat transcript.
Remove Sensitive Text in the Chat Body
When you need to mask sensitive text in a chat interaction, do the following:
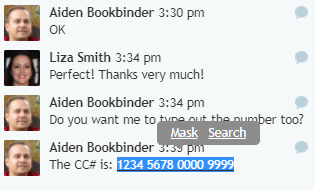
- Highlight (i.e., click and drag) the text in the chat; a box with the option to Mask or Search will appear.
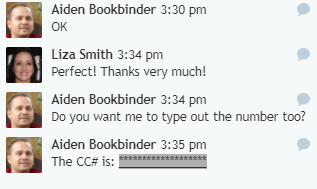
- When you select the Mask option, the text characters will be converted to asterisks (i.e., *). Note that you may unmask and remask text strings that are sent during the active interaction.
After the interaction is concluded, only the masked text will be included in the chat transcript.
Unmasking
It is possible to unmask text and attachments that are masked during an active interaction. Unmasking is useful if you need to verify the sensitive data that was sent. Note: Once an interaction is concluded, the results of all masking actions are permanent and cannot be undone.
To unmask masked content, click on the masked attachment or text. A box with the option Unmask will appear; when the option is selected, the attachment and text will be displayed as they were originally received.
Remove Attachments in Activity History
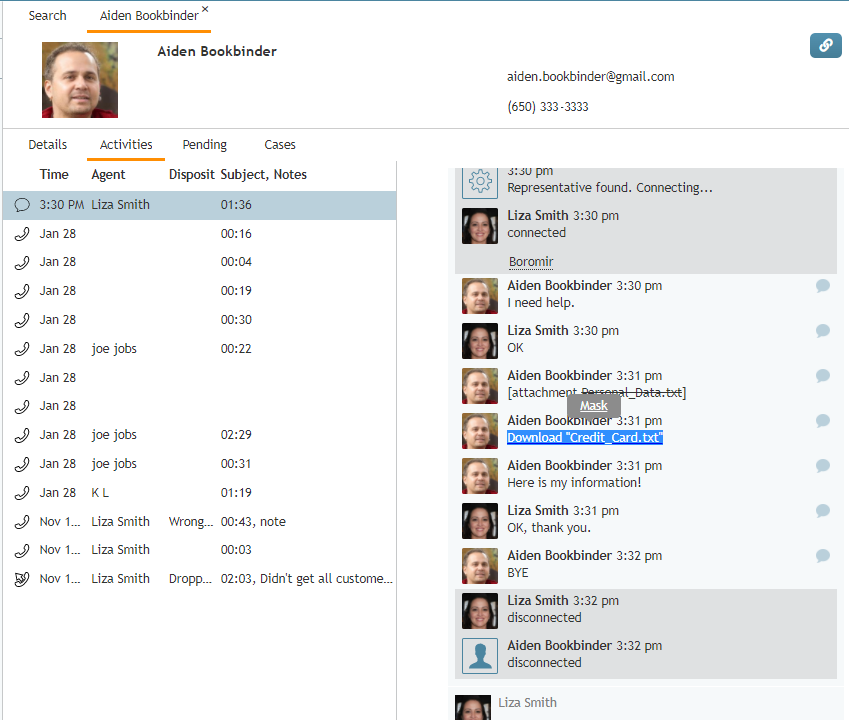
If you forget to remove an attachment with sensitive data during the chat, it is possible to delete the attachment in the contact's activity history.
- In the Agent Desktop application, go to section Search & Preview Records > Contacts tab. Locate the desired contact record and open it.
- Under the Activities tab, find the interaction. In the case view panel, locate the attachment.
- Highlight (i.e., click and drag) the text of an attachment; a box with the option to Mask will appear. When you select the Mask option, the attachment text will be struckthrough.

