Polycom Hardphone Configuration
These instructions will show you how to configure and register a Polycom hardphone manually on the Polycom Configuration Utility web interface. We are using a Polycom SoundStation IP 6000 as an example.
There are several ways to configure a Polycom phone on the web interface: Simple Setup, Lines settings, and SIP. The following instructions will guide you through Lines settings configuration. We recommend that you do not use Simple Setup or SIP.
Prerequisites
In order to configure your Polycom phones with Bright Pattern Contact Center software, you will require a special SIP address; Bright Pattern Operations will create this for you upon request. Note that the address has built-in redundancy (i.e., it contains two servers), so you will only need one SIP address.
Procedure
Step 1: Locate the IP address, SIP extension number, and password of the Polycom phone
- On the Polycom phone, hit Menu > Status > Network > TCP/IP Parameters, and note the listed IP address.
- Note the SIP extension number on the display of the Polycom phone.
- You can locate or set the phone password by logging into /Admin > Setup > Manage > Modify (pencil button) > the SIP extension you wish to register > Phone Settings tab > Common Settings > Phone Password.
Step 2: Open the phone’s configuration utility web interface on a web browser
- Enter the IP address of the Polycom phone in the address bar of your web browser. # When prompted for credentials, select Admin and enter your password. If you don’t know the password or you have never changed it, it is likely “456”.
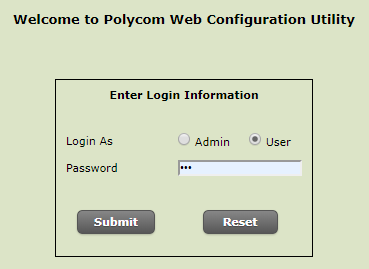
Polycom web interface login screen - The phone cannot be in use during configuration. Before proceeding to Step 3, check that the phone is not being used. Note that if the phone is in use, you will not be able to access the configuration utility.
- We recommend doing a phone backup before proceeding, in case you need to undo what you did. Go to Utilities > Phone Backup & Restore and click Phone Backup.
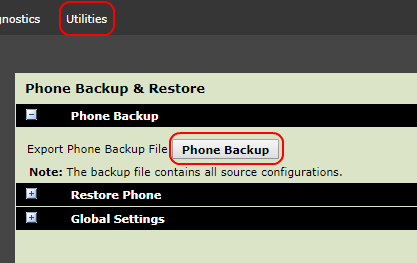
Utilities > Phone Backup & Restore


Step 3: Edit Lines settings
Note that if your phone freezes during any part of configuration, you can unplug/restart it and try again.
- Go to Settings > Lines.
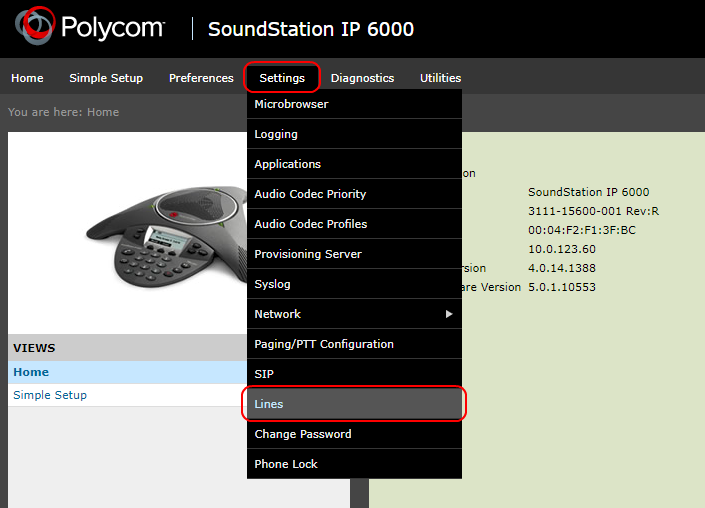
Settings > Lines - Under Line 1 > Identification, set:
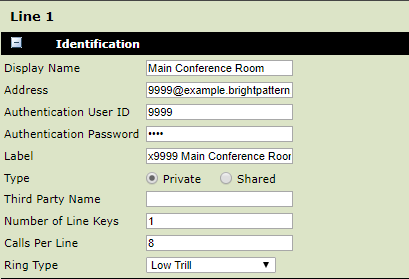
Settings > Line 1 > Identification settings
- Display name: Any name
- Address: The path to your Polycom phone in the following format: extension number@<tenant>.brightpattern.com.
This corresponds to the field “Phone registers dynamically as” in Bright Pattern’s Contact Center Administrator application, section Directory > Hardphones > <Your extension number> > Properties. For example: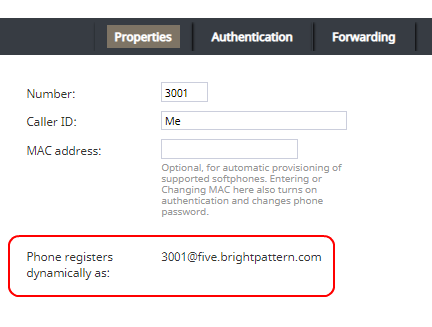
Contact Center Administrator > Hardphones > Properties - Authentication User ID: The authentication username of your Polycom phone (e.g., “9999”).
The Authentication User ID and Authentication password correspond to the “Username” and password as set in Bright Pattern’s Contact Center Administrator application, section Directory > Hardphones > <Your extension number > Authentication. For example: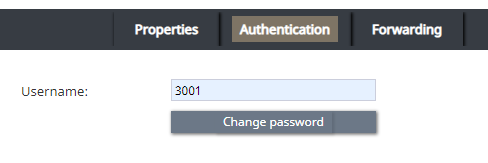
Contact Center Administrator > Directory > Hardphones > <Your extension number > Authentication - Authentication password: The password of your Polycom phone
- Label: Any; this will be shown on the phone’s screen
- Type: Select “Private” or “Shared”
- Third Party Name: Any; OK to leave blank
- Number of Line Keys: Any (e.g., “1”)
- Calls Per Line: Any (e.g., “8”)
- Ring Type: Select
- Display name: Any name
- Under Line 1 > Outbound Proxy, set:
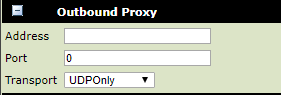
Line 1 > Outbound Proxy settings
- Address: Must be empty (if any value is here, you must remove it)
- Port: Must be “0”
- Transport: Leave as “UDPOnly”
- Address: Must be empty (if any value is here, you must remove it)
- Under Line 1 > Server 1:
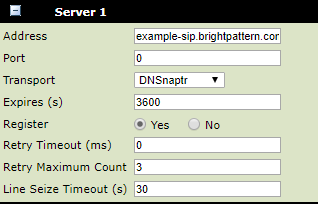
Line 1 > Server 1 settings
- Address: The address in the following format: <tenant>-sip.brightpattern.com (e.g., “example-sip.brightpattern.com). Note that this address is created by Bright Pattern Operations upon request.
- Port: Set “0” (The default is 0. Do not type any other port number here because it comes from the DNS server automatically.)
- Transport: Select “DNSnaptr”. (default).
- Expires (s): The expiration period in seconds - “60” (default is “3600”)
- Register: Select “Yes” (if you select “No,” the phone will not be registered)
- Retry Timeout (ms): The timeout period in milliseconds (e.g., “0”). The default is 100 ms. If you set “0”, the timeout will be set to default.
- Retry Maximum Count: The max number of times to retry (e.g., “3”)
- Line Seize Timeout (s): The line seize timeout in seconds (e.g., “30”)
- Address: The address in the following format: <tenant>-sip.brightpattern.com (e.g., “example-sip.brightpattern.com). Note that this address is created by Bright Pattern Operations upon request.


Step 4: Check for software updates on the Polycom phone
- We recommend updating to the latest software on the Polycom phone at least once per year.
- Still in Polycom’s web interface, go to Utilities > Software Upgrade.
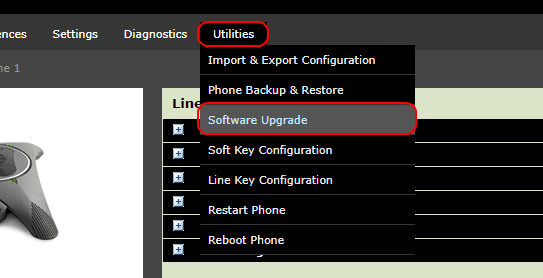
Utilities > Software Upgrade - In Phone Details, you will see your current software version. Leave this as-is.
- Click Check for Updates.
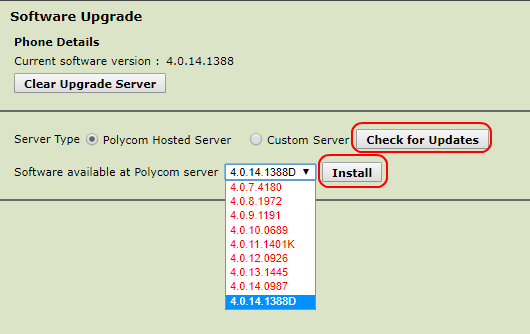
Phone Details - Now you will see the Software available at Polycom server drop-down list. Select and run the latest version (e.g., “4.0.14.1388D”).
- Click Install. The phone will restart. The software update takes about 2–5 minutes.


Polycom phone configuration is now complete.