ServiceNow Integration Configuration for Manual Installation
Manual installation can be necessary for customers not using a production instance from ServiceNow and those that do not have access to the app store. Follow the instructions below to integrate a ServiceNow instance with Bright Pattern Contact Center.
Prerequisites
The Bright Pattern integration with ServiceNow supports both a Communication Widget and Universal Repeater. Depending on which widget version you want to install, the following files will be required:
- Communication Widget (New Widget): ServiceNow - Communication Widget Integration Files
- Universal Repeater (Legacy Widget): ServiceNow - Universal Repeater Integration Files
| The 'Universal Repeater' (Legacy Widget) is not recommended for use among new customers, as it will be eventually sunsetted | ||
1. Activate Required Plugins
Bright Pattern Integration requires installation and activation of the ServiceNow plugins listed below. This can be done by navigating to System Definition > Plugins inside your ServiceNow instance.

- Activate CTI Softphone (com.snc.cti) plugin to enable softphone and call center functionality, such as making, receiving, and transferring phone calls.
- Activate Openframe (com.sn_openframe) plugin to enable external communication systems like Bright Pattern to integrate with ServiceNow.
- Activate Customer Service (com.sn_customerservice) plugin to allow activity history to be saved into ServiceNow native tables.
2. Configure System Properties (Whitelist Origin)
- Navigate to System Properties by searching for "sys_properties.list" in the ServiceNow admin UI’s search field.
- In the System Properties search bar, filter by Name and search for “glide.ui.concourse.onmessage_enforce_same_origin_whitelist”.
- If the property does not already exist, click New to create it
- If the property already exists in the list, click its name to edit it.
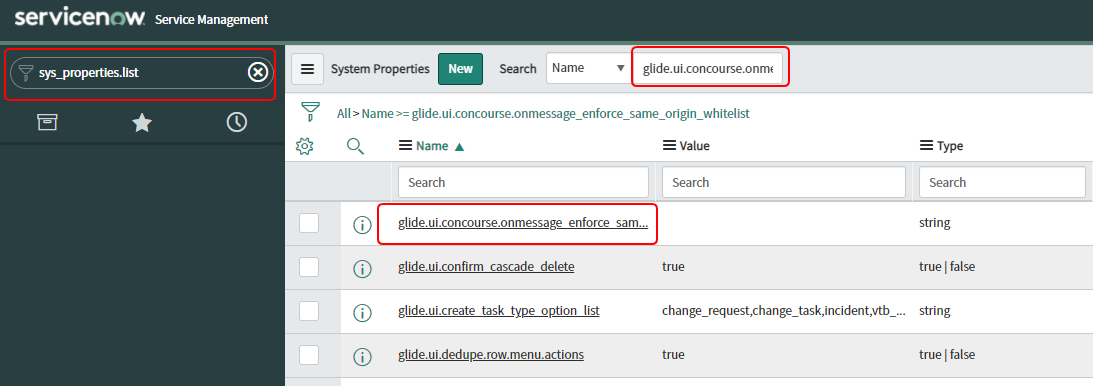
System Properties
- Enter the URL of your Bright Pattern tenant in the Value field.
- The tenant URL typically follows the format
https://<your tenant name>.brightpattern.com - Ensure that the URL begins with
https://and doesn't contain any trailing slashes (e.g. the URL must not end with a/character)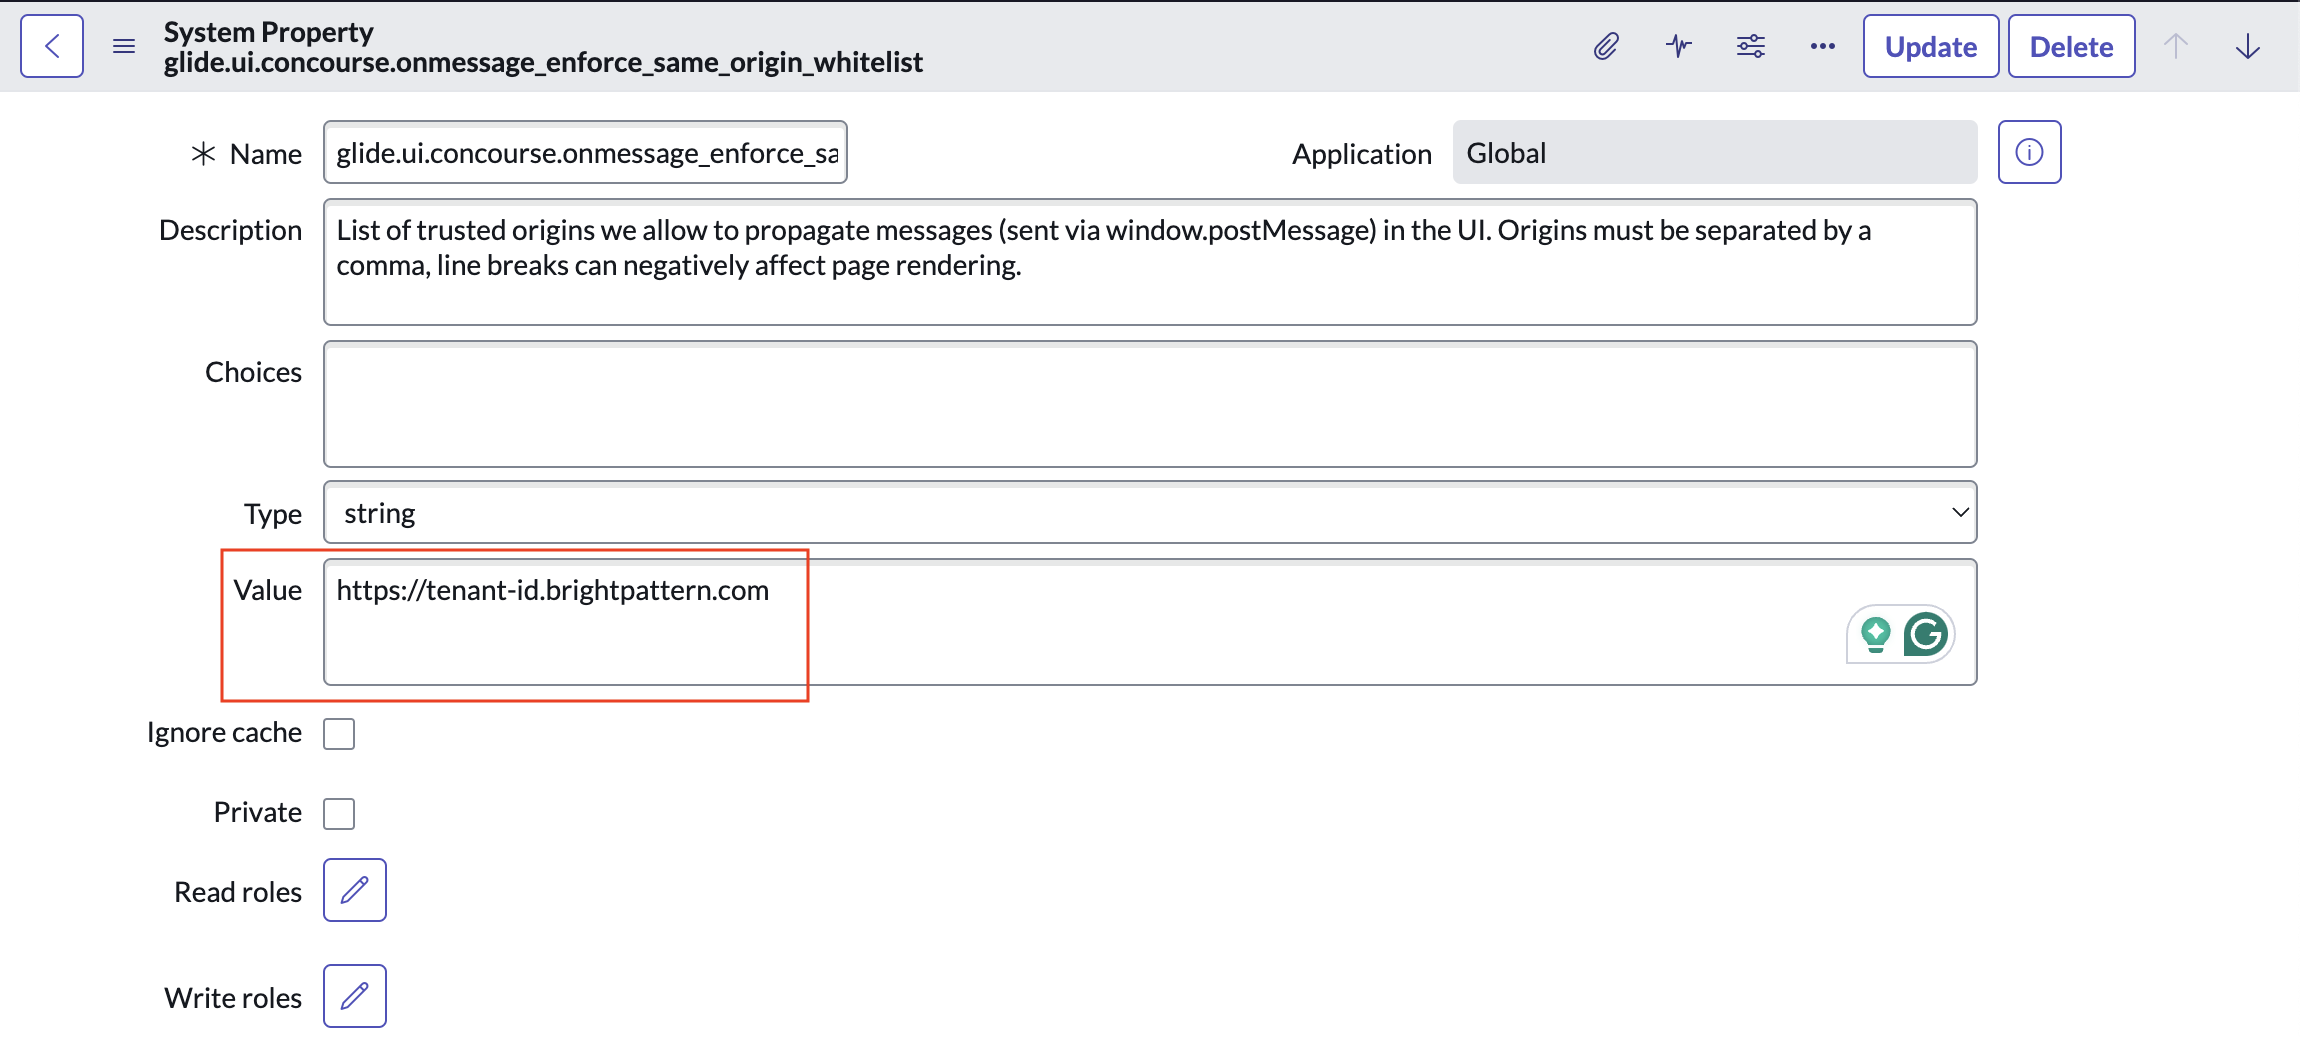
Whitelist Origin Property Configuration
- The tenant URL typically follows the format
- Click Update.


3. Configure Widget Properties
| The following configuration step requires access to the contents of the files listed in Prerequisites section. If you have not already done so, download either the ServiceNow - Communication Widget Integration Files or the ServiceNow - Universal Repeater Integration Files and unzip the archive. | ||
- Navigate to Service Portal > Widgets by searching for “Service Portal” in the ServiceNow admin UI’s search field and clicking Widgets.
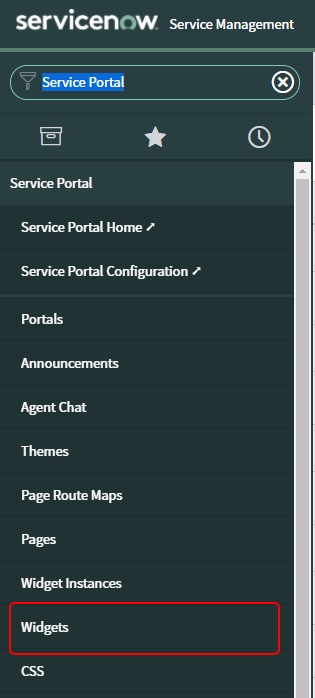
Select Widgets - Click New to create a new widget.
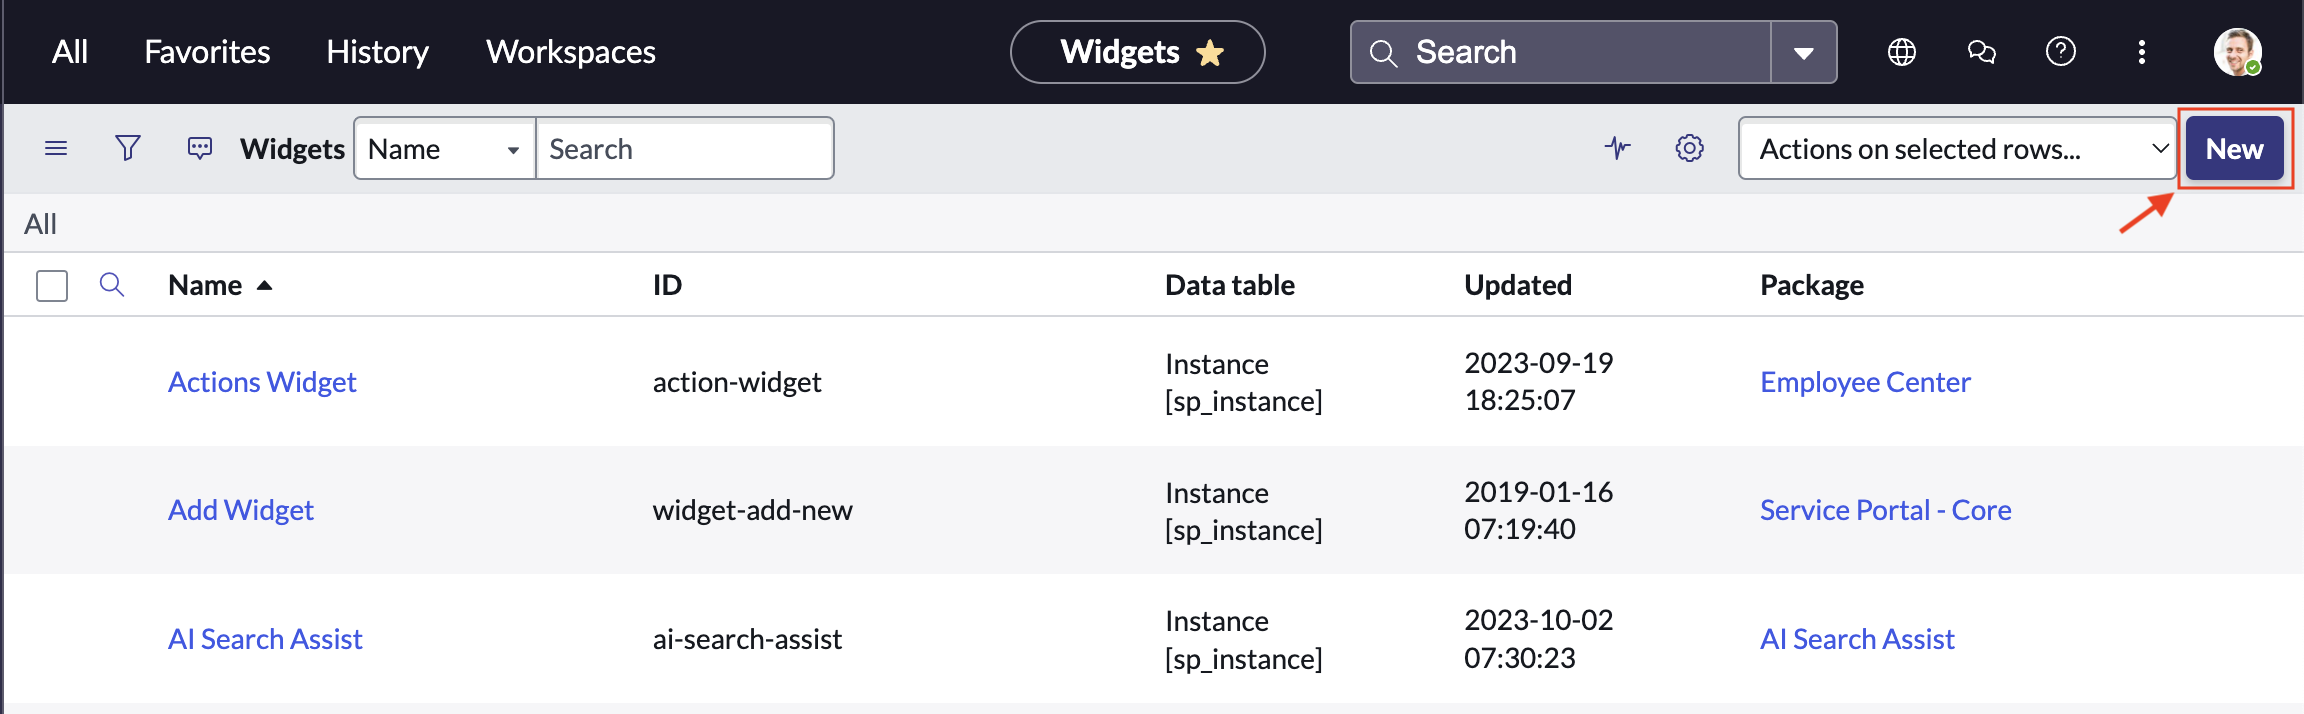
Service Portal Widgets - In the newly created widget record, set the properties as follows:
- Name: Bright Pattern Open Frame AD Proxy
- ID: bpattern_openframe_ad_proxy
- Description: The intermediate frame between ServiceNow OpenFrame panel and Bright Pattern AD Communicator widget
- Enter the contents of the indicated file from the downloaded ''Integration Files'' into the corresponding field of the widget:
- Body HTML template: enter the contents of the widget/body.html file
- CSS: enter the contents of the widget/css.css file
- Server script: enter the contents of the widget/server.js file
- Client controller: enter the contents of the widget/client.js file
- Click Update


4. Configure Page
This section explains how to create and configure a custom ServiceNow page for the communication widget.
- Navigate to Service Portal > Pages by searching for “Service Portal” in the ServiceNow admin UI’s search field and clicking Pages.
- Click New to create a new page.
- On the new page record that opens, configure the page properties as follows:
- Title: Bright Pattern Adapter Page for ServiceNow OpenFrame
- ID: bpattern_adapter_page
- Short description: HTML page to be embedded into the OpenFrame window for a communication widget.
- Page Specific CSS: Enter the contents of the page/css.css file from the ServiceNow Integration Files.
- Click Submit to save your changes. The screen will refresh and display the list of available pages.
- Click on the page you just created (e.g. bpattern_adapter_page)
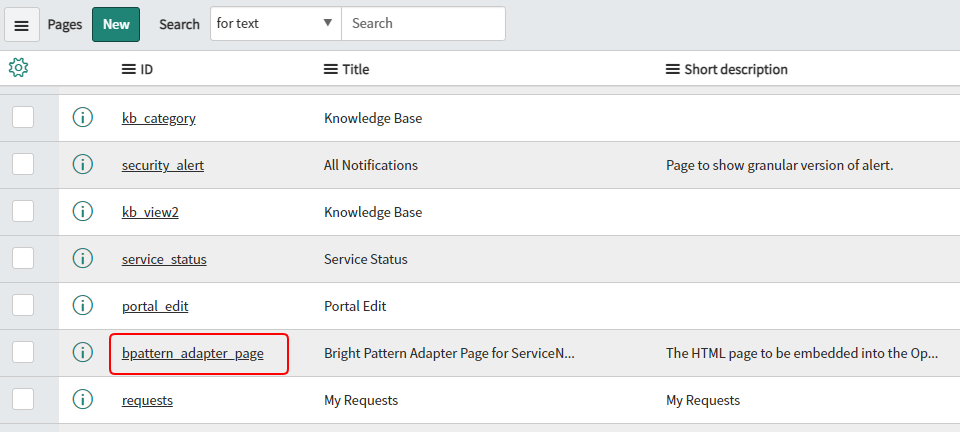
Click on the newly created page - Scroll down to the bottom of the page configuration details and click the Open in Designer link.

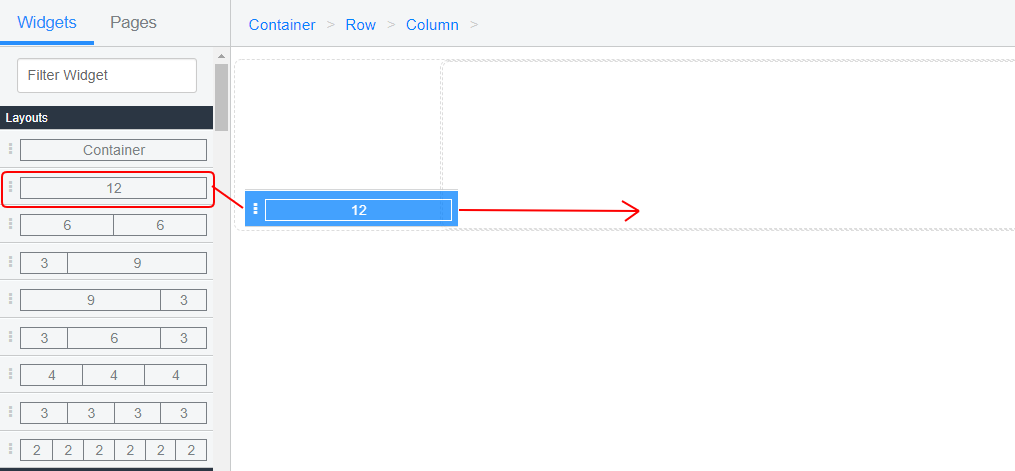
Click Open in Designer - A new browser tab or window will open with the Service Portal Designer. From the Widgets tab, under the Layout section, drag a 12-unit-wide cell and drop it onto the page.
Add a 12-unit-wide cell to the page - Use the Widgets tab search filter to find the Bright Pattern Open Frame AD Proxy widget created in the previous section. Drag and drop it onto the center of the page as you did with the 12-unit cell.

Add the Bright Pattern Open Frame AD Proxy widget to the page - Close the Service Portal Designer tab/window. Your changes will be saved automatically.
- To check that the configuration is correct, go back to the page record for bpattern_adapter_page, and scroll down to the Page Content section. You should see a text description of the page hierarchy created by the previous steps.
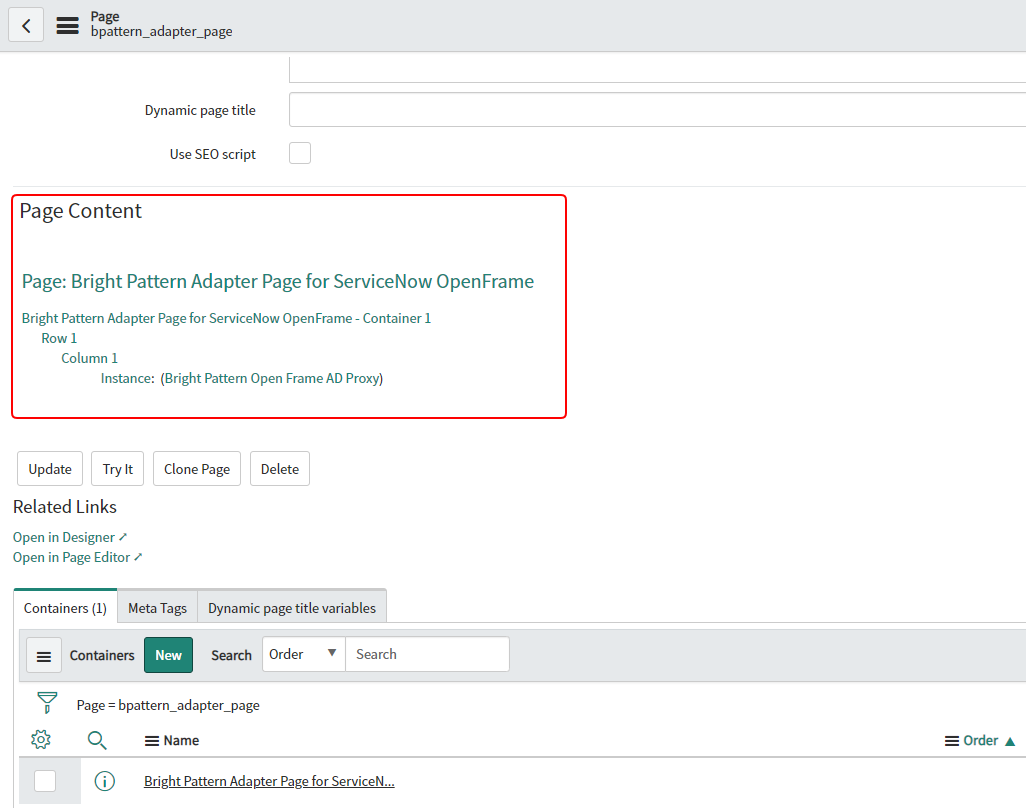
Description of the page content


5. Create and Configure Client Scripts
Client scripts are snippets of JavaScript code that customize the behavior and appearance of forms and fields on a ServiceNow page. The following steps explain how to create the four scripts that are necessary for the Bright Pattern integration to function correctly. The actual code for each script is contained in the same Integration Files archive referenced in the previous section.
- Navigate to System Definition > Client Scripts by searching for “Client Scripts” in the ServiceNow admin UI’s Search field.
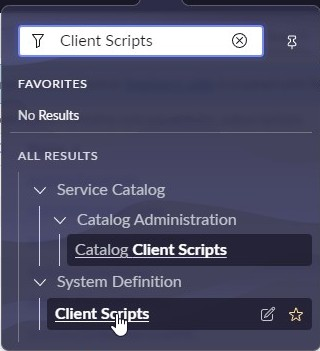
Search for Client Scripts - Create a New client script.
- In the ServiceNow Client Script - New Record editor that opens, configure its fields as indicated:
- Name: sys_user_onLoad
- Table: User [sys_user]
- Type: onLoad
- Inherited: Enable
- Script: Copy the content from the clientScripts/sys_user_onLoad.js file from the Integration Files archive.
- The remaining fields should maintain their default values.

New script editor
- Click Submit to save the script
- Repeat the previous steps to create another script and configure its fields as indicated:
- Name: sys_user_onSubmit
- Table: User [sys_user]
- Type: onSubmit
- Inherited: Enable
- Script: Copy the content from the clientScripts/sys_user_onSubmit.js file from the Integration Files archive.
- The remaining fields should maintain their default values.
- Create another script and configure its fields as indicated:
- Name: task_onLoad
- Table: Task [task]
- Type: onLoad
- Inherited: Enable
- Script: Copy the content from the clientScripts/task_onLoad.js file from the Integration Files archive.
- The remaining fields should maintain their default values.
- Create another script and configure its fields as indicated:
- Name: task_onSubmit
- Table: Task [task]
- Type: onSubmit
- Inherited: Enable
- Script: Copy the content from the clientScripts/task_onSubmit.js file from the Integration Files archive.
- The remaining fields should maintain their default values.


6. Configure Script Includes
- Navigate to System Definition > Scripts Includes by searching for “Scripts Include” in the ServiceNow admin UI’s search field.
- Click New to create a new Script Include record.
- In the ServiceNow Script Include - New Record editor that opens, configure its fields as indicated:
- Name: bpattern_utils
- Client callable: Enable
- Accessible from: All application scopes
- Script: Copy the content from the scriptIncludes/bpattern_utils.js file from the Integration Files archive.
- The remaining fields should maintain their default values.

Edit a new Script Include record
- Click Submit.
- On the Select a user role pop-up window, select the sn_openframe_user role and

Select sn_openframe_user for the user role - Click OK to save.


7. Edit OpenFrame configuration URL
The following describes how to create a new OpenFrame configuration for the page created and configured in the previous sections.
- Navigate to OpenFrame > Configurations by searching for “OpenFrame” in the admin UI's search bar, and clicking Configurations in the sub-menu.
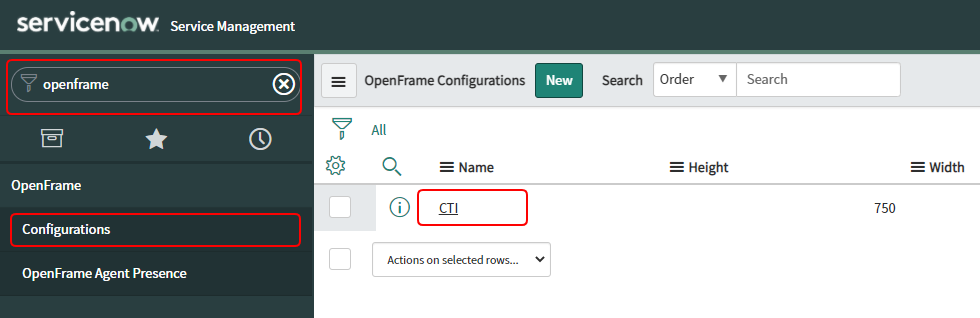
Search for "OpenFrame" and open the Configurations list - In the OpenFrame Configurations list, find the CTI configuration, and click on it to open its properties, or click New if it is not in the list.
- In the OpenFrame CTI Configuration editor, modify the field values as indicated:
- URL: Add the URL of your page:
https://{your_subdomain}.service-now.com/csm?id={page_id}- {your_subdomain}: Your ServiceNow subdomain (e.g., “dev97125”)
- {page_id}: The ID of the page created and configured in the previous sections. In this example bpattern_adapter_page.
- Configuration: Use the following JSON:
{
    "bpatternAdapterUrl": "https://{tenant_origin}/agent/communicator/adapters/servicenow.html",
    "disableSaveActivity": false,
    "openRecordsInNewTab": false,
    "allowEmptyRecordsList": true
}
- {tenant_origin}: The URL of your Bright Pattern tenant, typically
https://<tenant name>.brightpattern.com
- {tenant_origin}: The URL of your Bright Pattern tenant, typically
- Active: Enable.
- All other fields should maintain their default values.
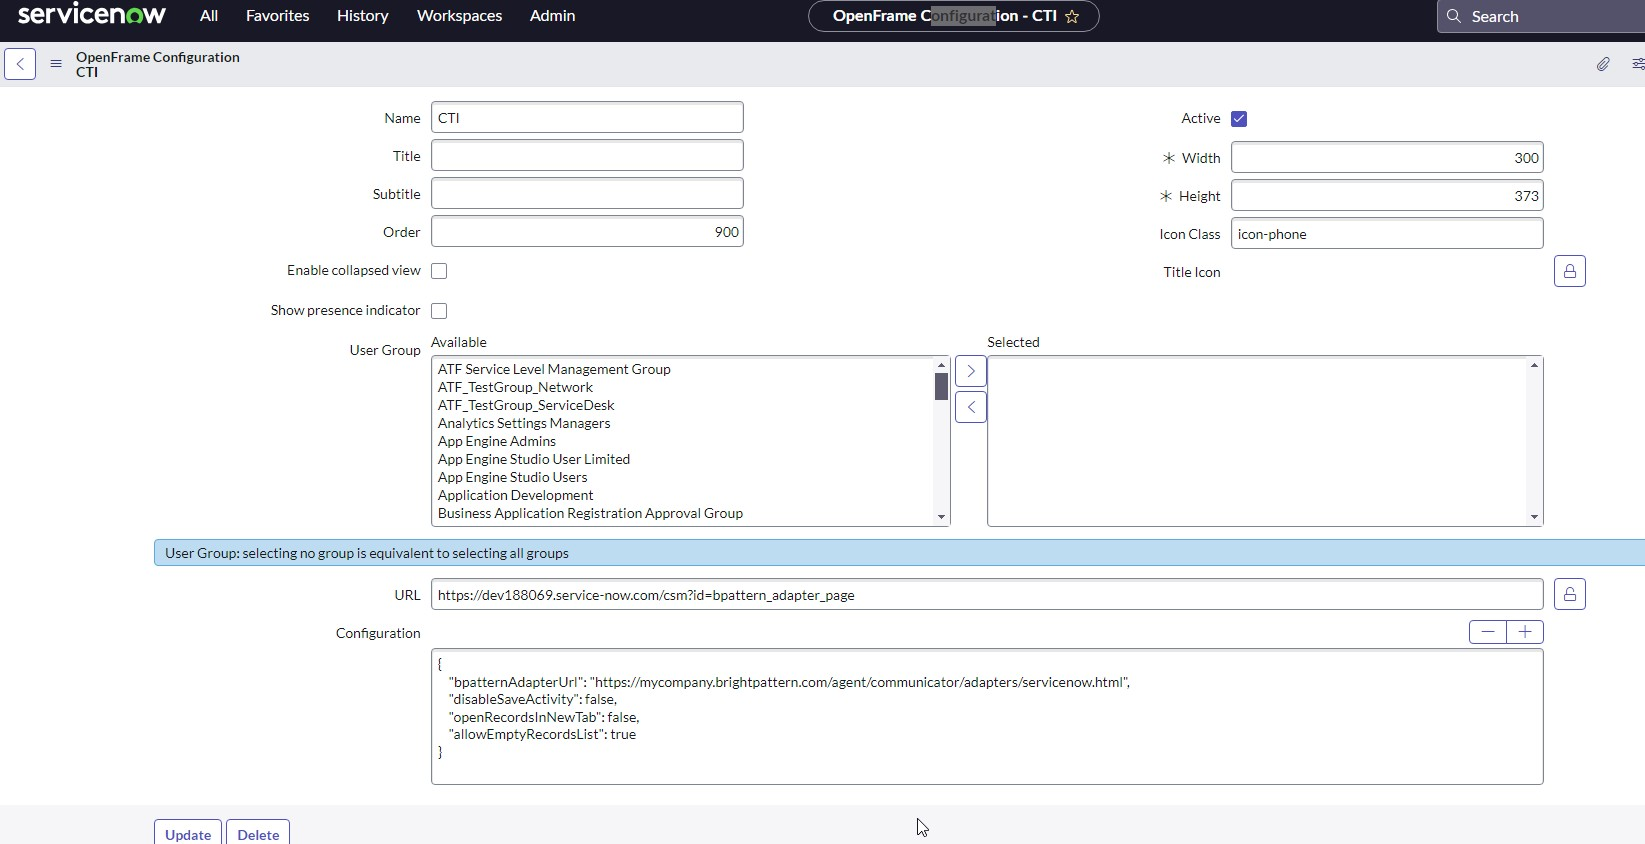
OpenFrame CTI configuration editor
- URL: Add the URL of your page:
- Click Update to save your changes.


8. Assign Roles to Allow Access to OpenFrame
The OpenFrame user role called sn_openframe_user is added with activation of OpenFrame. All user accounts need to have the sn_openframe_user role assigned to them in order to use the embedded Agent Desktop. You can assign this role to individual users, or to all users in a user group.
- To assign the role to an individual user
- Navigate to Organization > Users and click on the name of the user who you want to assign the role.
- At the bottom of the user's details, find the Roles tab and click Edit.
- Use the filters to search for the role sn_openframe_user and add it to the Roles List of the user.
- Click Save.
- To assign the role to a group
- Navigate to Administration > Groups and click on the name of the desired group.
- At the bottom of the page showing the group's details, find the Roles tab and click Edit.
- Use the filters to search for sn_openframe_user and add it to the Roles List of the group.
- Click Save.
9. Add CORS Rules
CORS Rules allow Bright Pattern integration accounts to communicate with ServiceNow.
- Navigate to OpenFrame > Configurations by searching for “OpenFrame” in the admin UI's search bar, and clicking Configurations in the sub-menu.

Create a New CORS Rule - Click New to add a new CORS Rule.
- In the CORS Rule new record editor, configure the indicated fields:
- Name: Any unique name to differentiate it from any other rules you might configure.
- Domain: The URL of your Bright Pattern tenant, typically
https://<tenant name>.brightpattern.com - HTTP Methods tab:
- POST: Enable
- Remaining methods: disable
- The remaining fields maintain their default values

Configure the indicated fields
- Open the HTTP Headers tab, and set Exposed Headers to Access-Control-Allow-Origin:

Set Exposed Headers to Access-Control-Allow-Origin - Click Submit.


10. Configure a new OAuth 2.0 Endpoint
In order to create a new ServiceNow integration account, you must first configure a new OAuth 2.0 endpoint for ServiceNow. Doing so will provide you with a Client ID and Client Secret, which you will need to authorize access to ServiceNow applications.
Note that previous builds of ServiceNow may have asked you to configure OAuth. Now ServiceNow recommends you configure OAuth 2.0. For more information, refer to the ServiceNow OAuth Setup documentation.
- Navigate to System Definition > Plugin by searching for “Plugin” in the admin UI's search bar, and filtering for OAuth 2.0. Ensure that the Status is active.
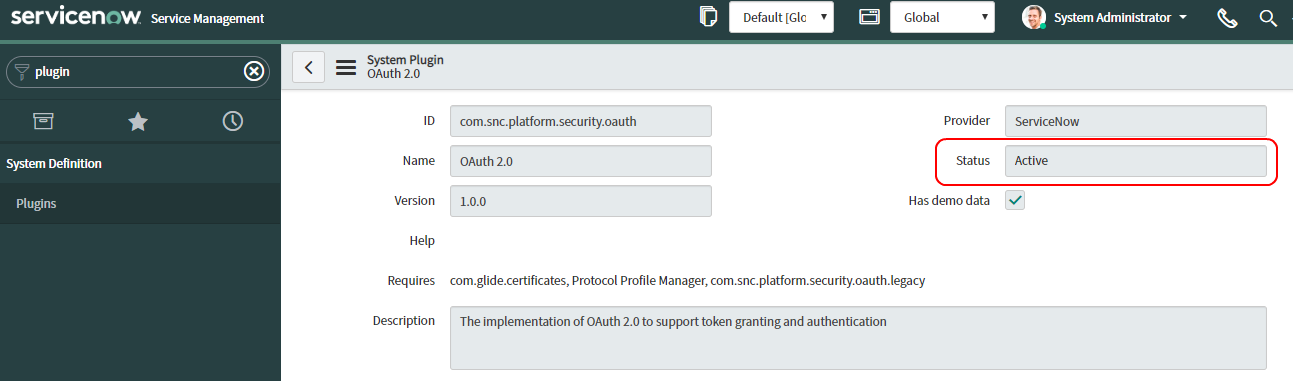
Ensure OAuth 2.0 plugin Status is active - Navigate to System OAuth > Application Registry by searching for “System OAuth” in the admin UI's search bar and selecting Application Registry from the menu. Click New to add a new application registry.
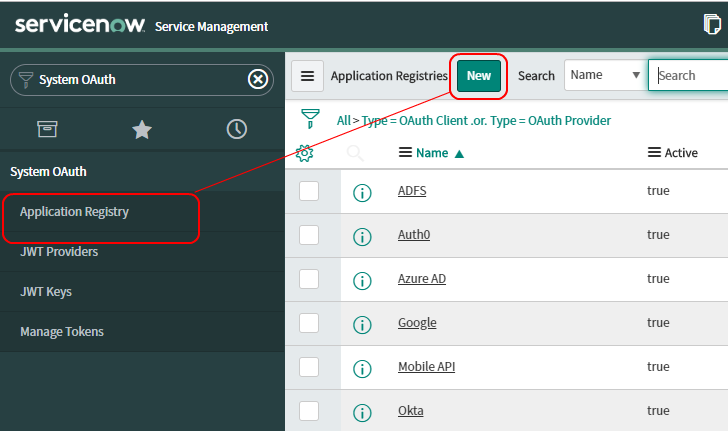
Create a new Application Registry - Choose Create an OAuth API endpoint for external clients as the type of OAuth application:

Choose Create an OAuth API endpoint for external clients - Provide a Name for the application to differentiate it from other OAuth API endpoints you might create. Leave Client Secret blank, and let the other fields maintain their default values.

Indicate a Name for the OAuth API endpoint - Click Submit and a Client Secret will be automatically generated.
- Open the newly created OAuth application and securely save the Client ID and Client Secret for use during the next step.


11. Create and Configure a ServiceNow Integration Account
- Log in to the Bright Pattern Contact Center Administrator application.
- Navigate to Configuration > Integration Accounts and add a new integration account.
- Select ServiceNow and click OK.
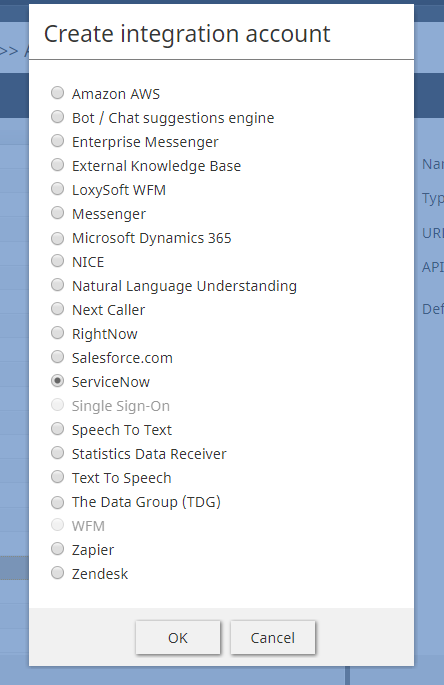
Select ServiceNow - Configure the Integration Account properties as indicated:
- Type: The type of integration account, in this case, ServiceNow.
- Name: A unique name for the integration account to distinguish it from other integration accounts in Bright Pattern.
- Default account - Enable if you have multiple ServiceNow integration accounts, but this one should be used by default.
- URL: The unique URL of your ServiceNow instance, for example
https://dev73456.service-now.com - Client ID: The automatically generated unique ID of the OAuth application created during the 10. Configure a new OAuth 2.0 Endpoint section of this guide.
- Client Secret: The secret shared between the Bright Pattern integration account and ServiceNow OAuth application. Automatically generated when the OAuth application was created during the 10. Configure a new OAuth 2.0 Endpoint section of this guide.
- Refresh Token: Automatically retrieved when you click the Request token button and enter the username and password of your ServiceNow instance in the dialog that opens.

Configure the Integration Account properties
- Click the Test Connection button to ensure that the integration account is able to authenticate with ServiceNow.


12. Open the Agent Desktop Widget in ServiceNow
- In a separate browser window or tab, go to the ServiceNow Developer site and sign in to your developer instance.
- Notice that your ServiceNow Homepage now displays a phone icon at the top right corner of the screen.
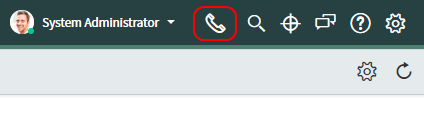
Click the phone icon to open the Agent Desktop widget - Click the phone icon to open the Agent Desktop widget.
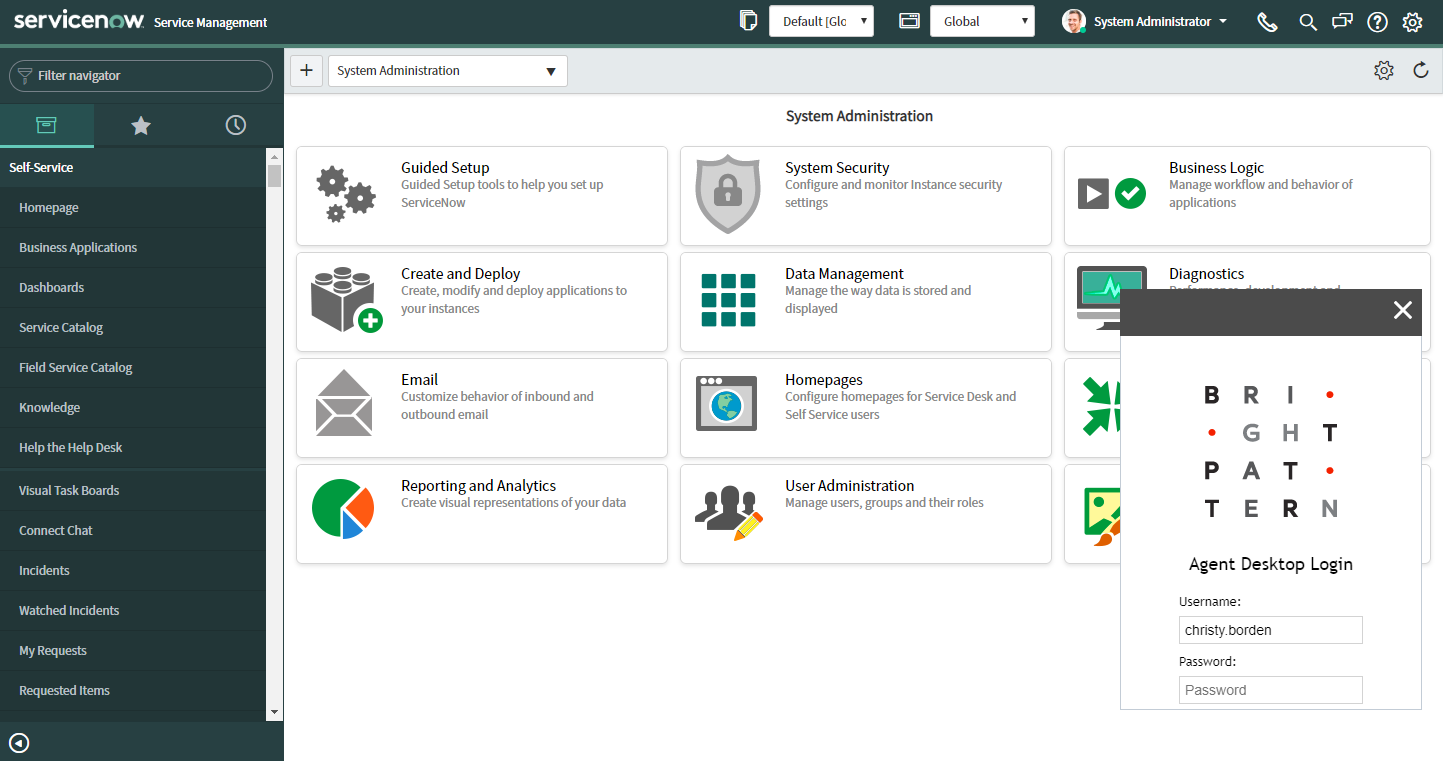
Log in to the Agent Desktop widget < Previous | Next >

