From Bright Pattern Documentation
• 日本語
Scenario Configuration
The following steps will walk you through the process of creating a scenario.
Step 1: Create a web chat scenario.
- In the Contact Center Administrator application, navigate to Configuration > Scenarios > Chat.
- At the bottom of the screen, click the Add "+" button to add a chat scenario. Alternatively, you may select and edit the web chat scenario template called Mobile Chat.
Step 2: Specify screen properties for the scenario.
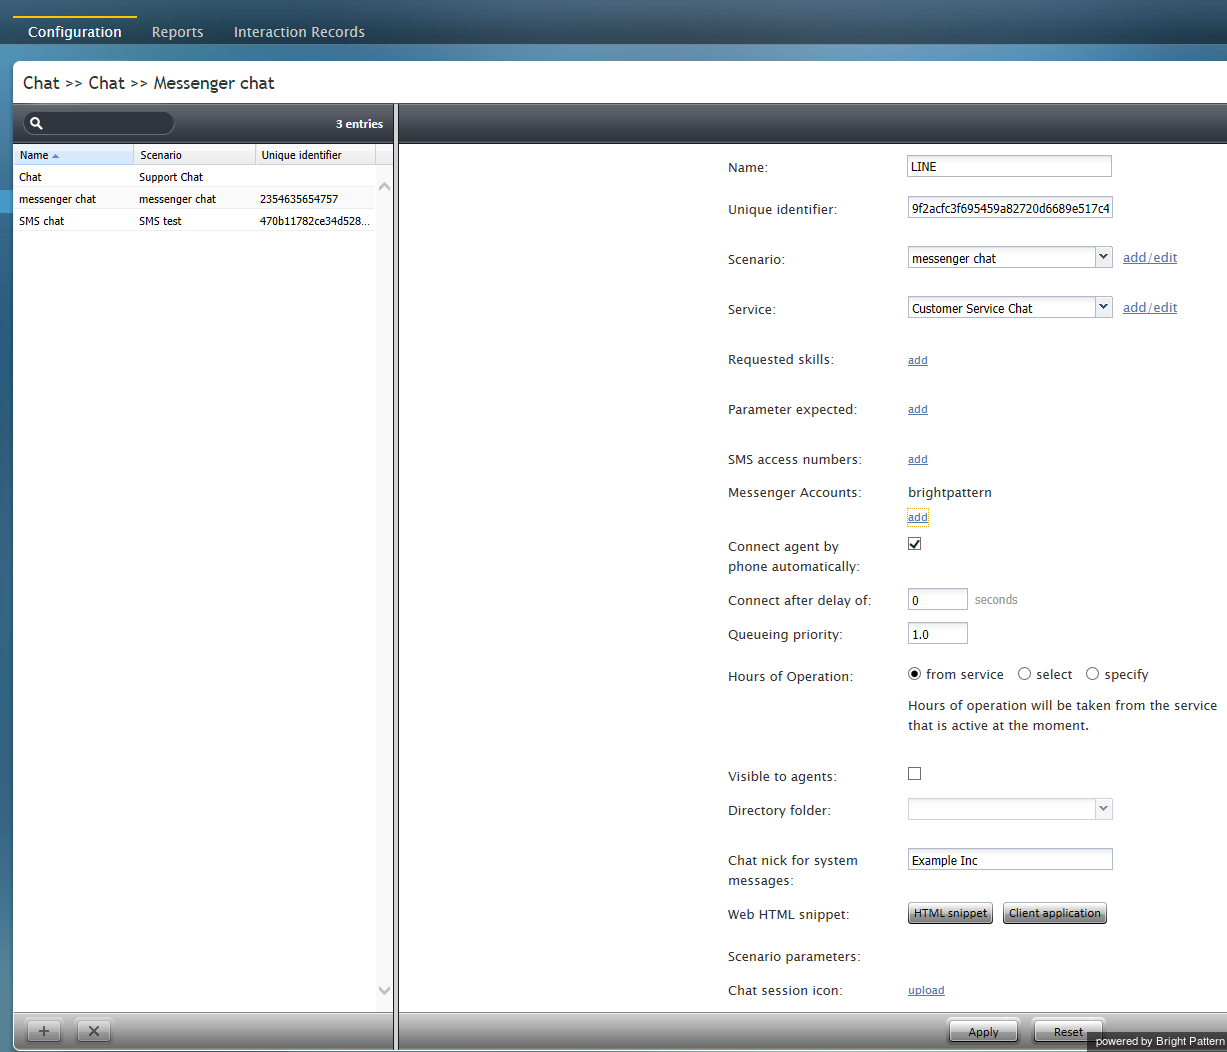
- Screen properties for the scenario are displayed on the right side of the screen. Specify all values as you would for any other mobile/web chat scenario. For more information on such screen properties, see the Contact Center Administrator Guide, section Chat.
- Pay particular attention to the field called Messenger Accounts. In this field, select the name of your LINE@ account or add a new one by clicking the add/edit link.
Step 3: Customize your scenario in Scenario Builder.
- Open your new scenario by double-clicking its name in the Chat list on the left. The scenario will open in the Scenario Builder application.
- Before you do anything else, save your scenario by clicking the Save As button and giving this scenario a unique name, such as "Messenger Chat," to differentiate the new scenario from the scenario template.

