提供: Bright Pattern Documentation
(Created page with "== プレビューの方法 == 編集されたレポートをプレビューするには、以下の手順に従ってください: # 'デザイン'' ビューで全てのパ...") |
(Created page with "編集されたレポートがプレビューエリアに表示されます。必要に応じて、デザインビューに戻ってさらに編集します。それ以上編...") |
||
| Line 15: | Line 15: | ||
| − | + | 編集されたレポートがプレビューエリアに表示されます。必要に応じて、デザインビューに戻ってさらに編集します。それ以上編集しない場合は、''ファイル> 名前を付けて保存''をクリックし新しいファイル名を入力し、編集されたレポートを保存します。 | |
Doing a ''Save As'' only saves the modified report template in the Jaspersoft Studio ''reports'' folder. If you wish to upload the modified report template to Contact Center Administrator, you must also export the new report template and save it to the appropriate folder. | Doing a ''Save As'' only saves the modified report template in the Jaspersoft Studio ''reports'' folder. If you wish to upload the modified report template to Contact Center Administrator, you must also export the new report template and save it to the appropriate folder. | ||
Revision as of 09:13, 14 November 2019
• English
編集されたレポートテンプレートのプレビューと保存
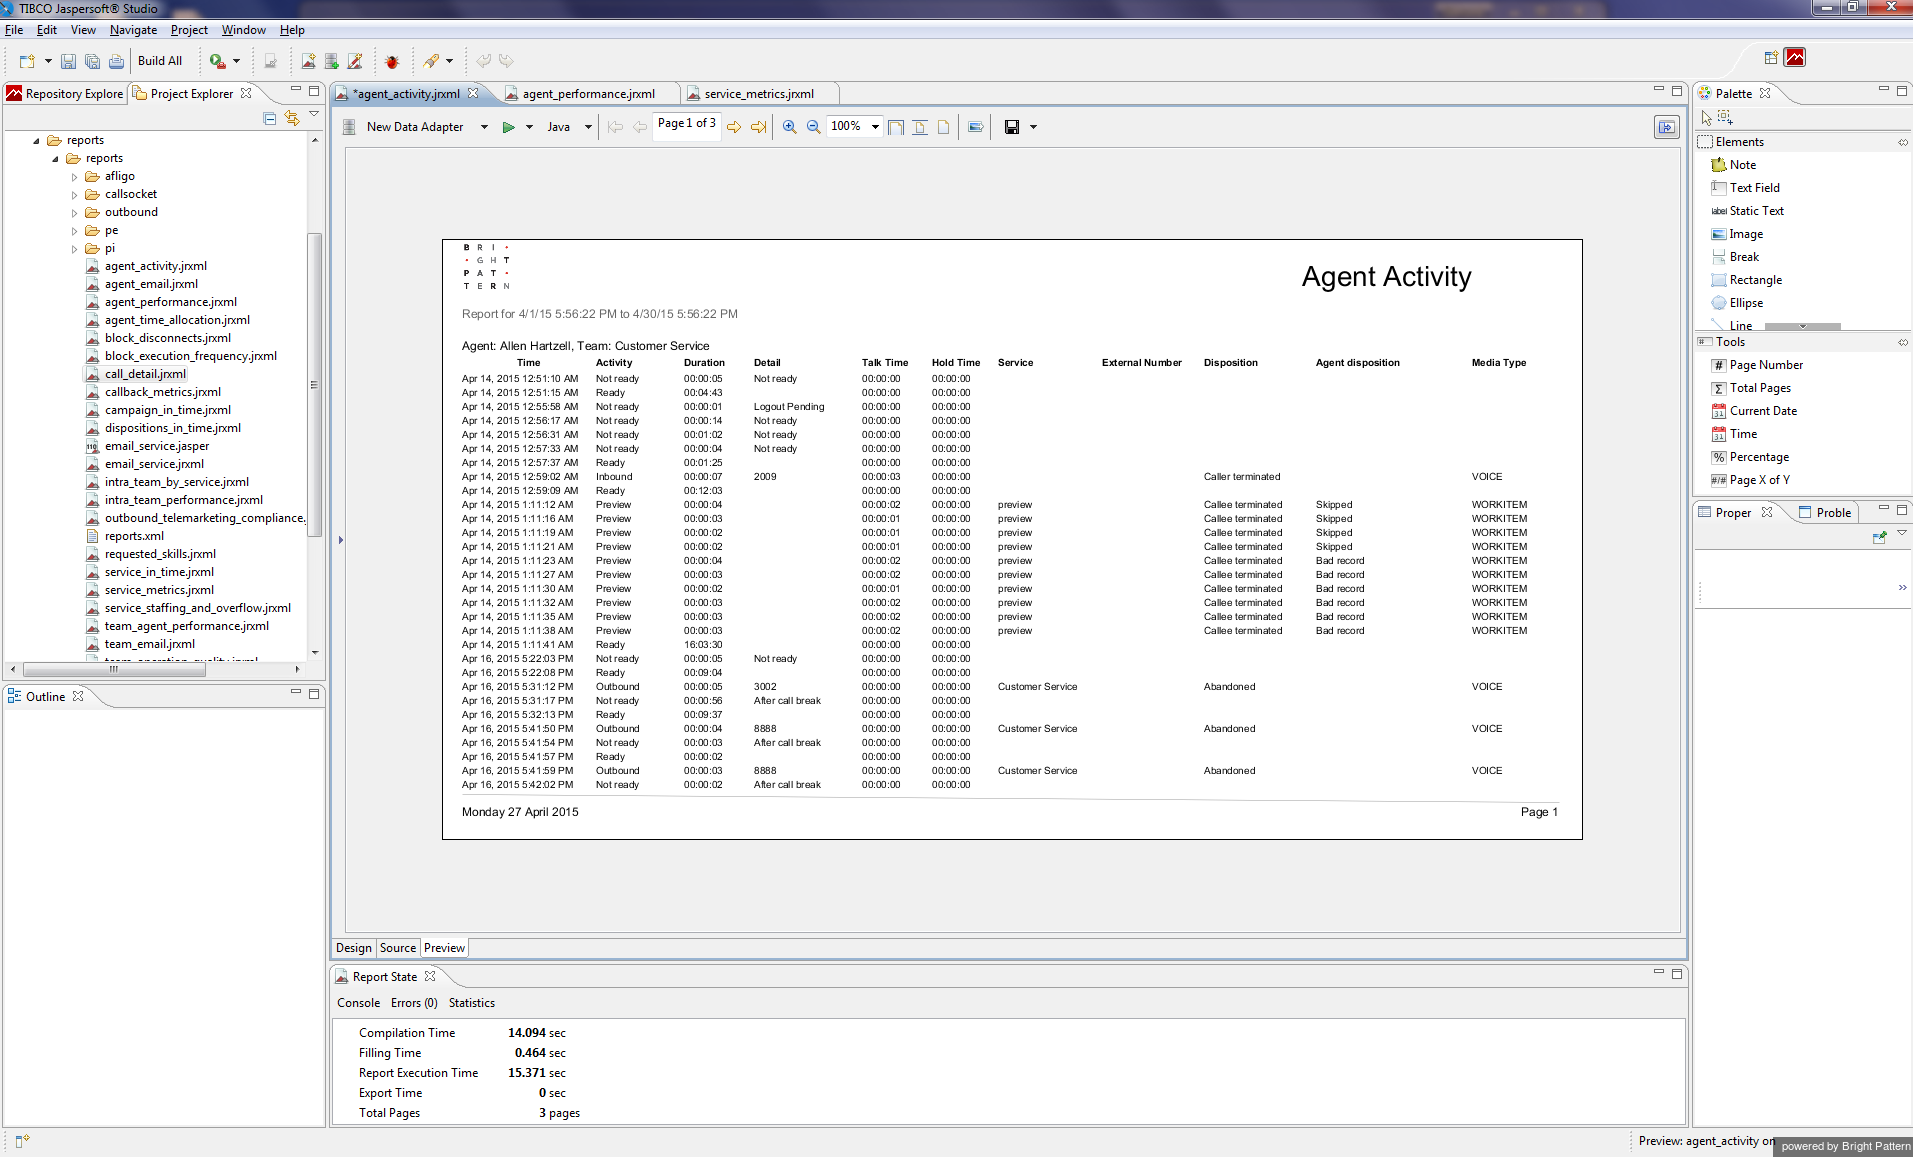
レポートテンプレートを編集するとき、 デザイン ビューで編集された箇所がレポートテンプレートで実際にどのように見えるかを確認できます。 Jaspersoft Studioの プレビュー タブでは、レポートがそのまま生成および表示され、レポートテンプレートの現在状態を見ることができます。
プレビューの方法
編集されたレポートをプレビューするには、以下の手順に従ってください:
- 'デザイン ビューで全てのパラメータ (例: 時間枠 (start_time:Timeframe Start))を入力 /編集します。
- プレビュータブを選択します。
- データソースを選択します。
- プレビューの時に表示させたいレポートフォーマット (例えば、 Java, HTML, PDF, DOCxなど)を入力します。
- 実行ボタンをクリックします。
 .
.
編集されたレポートがプレビューエリアに表示されます。必要に応じて、デザインビューに戻ってさらに編集します。それ以上編集しない場合は、ファイル> 名前を付けて保存をクリックし新しいファイル名を入力し、編集されたレポートを保存します。
Doing a Save As only saves the modified report template in the Jaspersoft Studio reports folder. If you wish to upload the modified report template to Contact Center Administrator, you must also export the new report template and save it to the appropriate folder.
Notes
- If you see an exception regarding JRAbstractScriplet, restart the Jaspersoft Studio and repeat these steps.
- When you click the Preview tab, a report will be run automatically. You must wait for it to be complete before you can select the desired data source and click Run.

