提供: Bright Pattern Documentation
(Created page with "450px") |
(Created page with "=== ステップ 2: 接続を選択します。 === * pップアップウィンドウでは、 '''データベースJDBC接続'''を選択し、'''次へ'''をクリックし...") |
||
| Line 19: | Line 19: | ||
| − | === | + | === ステップ 2: 接続を選択します。 === |
| − | * | + | * pップアップウィンドウでは、 '''データベースJDBC接続'''を選択し、'''次へ'''をクリックします。 |
Revision as of 14:37, 14 November 2019
• English
データアダプターの作成
データアダプターにより、Jaspersoft StudioはSQLクエリを使ってレポートデータベースからデータを取得できます。次の手順に基づいて、クライアントがデータベースにアクセスする方法を定義するプログラミング言語Java用のJava Database Connectivity(JDBC)APIを使用するデータアダプターを作成します。 JDBCは、データベース内のデータを照会および更新する方法を提供します。
データベースに直接アクセスできない限り、データアダプターを作成する必要はありません。データベースへの直接アクセスはライセンス料金がかかります。
手順
データアダプターを作成するには、画面の左隅にあるリポジトリエクスプローラータブに移動し、次の操作を行います。
ステップ 1: データアダプターを作成します。
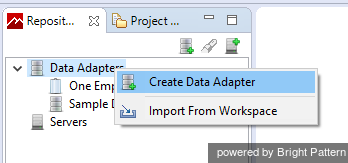
- リポジトリエクスプローラーで、データアダプターを選択し、右クリックします。
- データアダプターの作成を選択します。
ステップ 2: 接続を選択します。
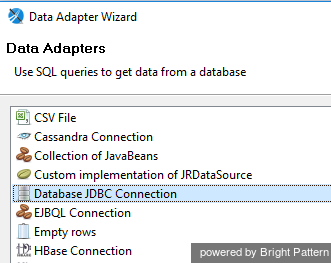
- pップアップウィンドウでは、 データベースJDBC接続を選択し、次へをクリックします。
Step 3: Specify JDBC properties
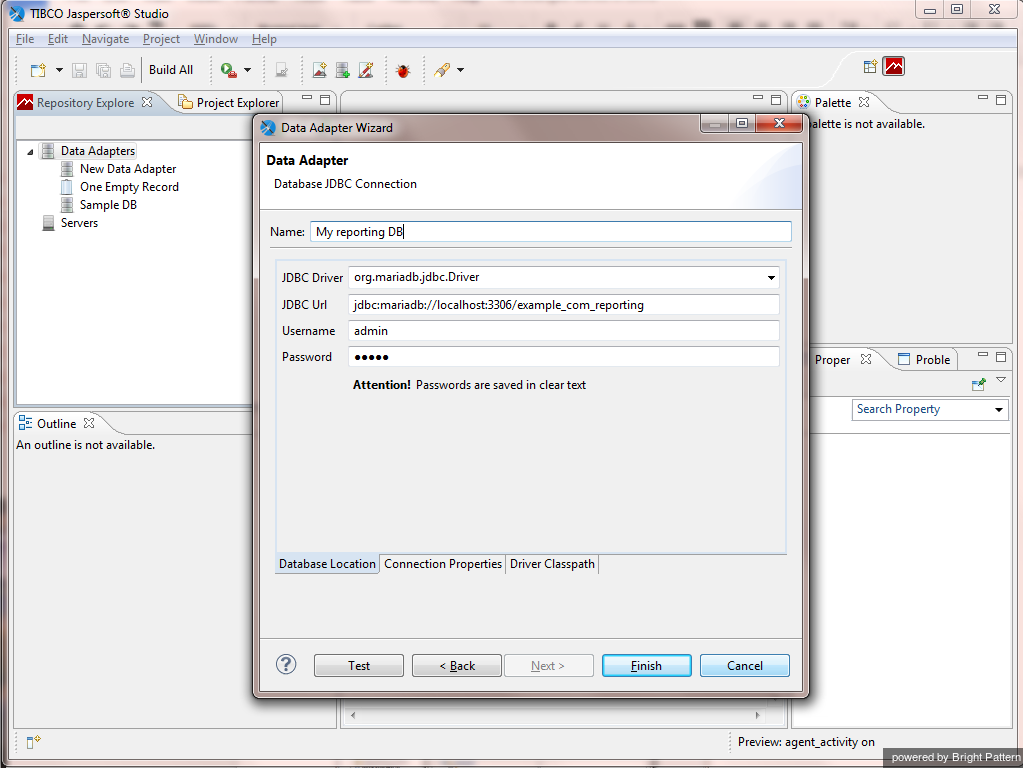
You will be defining the properties (i.e., driver, database server host, authentication) for the Java Database connection.
In the window that pops up, specify the following:
- Name: Name of the data adapter; note that "New Data Adapter" is the default name but it may be renamed
- JDBC Driver: org.mariadb.jdbc.Driver (Note: copy and paste this driver name into the field, or use the pull-down menu to select this driver.)
- JDBC Url: jdbc:mariadb://<your database server host name>:3306/< your reporting database name>
- Username: Username for access to your Reporting Database
- Password: Password for access to your Reporting Database
Then click Finish.
Notes
- For database server host name, database name, and username, open the Contact Center Administrator application and navigate to Reporting Settings.
- In the JDBC Url field, do not include "<" or ">" symbols. Replace "<your database server host name>" and "<your reporting database name>" with your respective host and database names.
< 前へ


