(Created page with "# コンタクトセンター管理者アプリケーションの ''設定 > コールセンターの設定 >統合アカウント''へ進みます。<br /><br /> # '''アカ...") |
(Created page with "==== プロパティ ==== thumb<br /><br /> 以下のフィールドを入力します: * '''名前'...") |
||
| Line 46: | Line 46: | ||
# ''ボット / チャットサジェスト機能エンジンのタイプ''というダイアログで、 '''Watson Conversation'''を選択し、'''OK'''をクリックします。<br /><br />[[File:ChatWat5.PNG|450px|center|"Watson Conversation"の選択]]<br /><br /> | # ''ボット / チャットサジェスト機能エンジンのタイプ''というダイアログで、 '''Watson Conversation'''を選択し、'''OK'''をクリックします。<br /><br />[[File:ChatWat5.PNG|450px|center|"Watson Conversation"の選択]]<br /><br /> | ||
| − | ==== | + | ==== プロパティ ==== |
| − | [[File:ChatWat6.PNG|thumb|800px|center| | + | [[File:ChatWat6.PNG|thumb|800px|center|統合アカウントのプロパティ]]<br /><br /> |
| − | + | 以下のフィールドを入力します: | |
| − | * ''' | + | * '''名前''':ボットのユニークな名前です。<br /><br /> |
| − | * ''' | + | * '''タイプ''':アカウントを追加するときに“Watson Assistant ”というタイプが選択されたため、既定のタイプも“Watson Assistant”です。<br /><br /> |
| − | * '''Url''' | + | * '''Url''':Watson Assistantのエンドポイントです (https://gateway.watsonplatform.net/assistant/api) + '''/v1/workspaces/''' + '''your workspace ID''' (see below) + '''/message?version=2017-05-26'''<br /> |
| − | ** | + | ** 例: https://gateway.watsonplatform.net/assistant/api/v1/workspaces/085c97f9-44c3-403d-8aad-92e86d9379f8d/message?version=2017-05-26<br /> |
| − | ** ''' | + | ** '''ご注意:''' ボットが正しく機能するためには、この方法でURLを入力しなければなりません。<br /><br /> |
| − | * ''' | + | * '''ワークスペース ID''': Watson Assistant ワークスペースの識別番号です。<br /> |
| − | ** | + | ** このIDを取得するには、''IBM Watson Assistant > ワークスペース''へ進み、ご希望のワークスペースの '''アクション'''ボタンをクリックし、 '''詳細の確認'''を選択します。<br /><br />[[File:ChatWat7.PNG|thumb|800px|center|IBM Watson Assistant > ワークスペース]] |
| − | [[File:ChatWat7.PNG|thumb|800px|center|IBM Watson Assistant > | + | ** ワークスペース IDをコピーします。<br /> |
| − | ** | + | [[File:ChatWat8.PNG|thumb|800px|center|ワークスペースIDのコピー]] |
| − | [[File:ChatWat8.PNG|thumb|800px|center| | ||
* '''Username''' - The username for your IBM account that you copied from your service credentials<br /><br /> | * '''Username''' - The username for your IBM account that you copied from your service credentials<br /><br /> | ||
* '''Password''' - The password for your IBM account that you copied from your service credentials<br /><br /> | * '''Password''' - The password for your IBM account that you copied from your service credentials<br /><br /> | ||
Revision as of 19:32, 10 April 2020
ボットとチャットの統合方法
Bright Pattern コンタクトセンターは、AlterraやIBM Watsonなどのプロバイダーと統合して、チャットボットをコンタクトセンターサービスで使用できるようにします。この記事では、IBM Watson Assistant(つまり、対話型ボット)を設定済みのチャットサービスと統合する方法について説明します。
ウェブチャットの設定方法では、チャットシナリオ、チャットサービス、チャットシナリオのエントリポイントが連携してウェブサイトにチャットウィジェットを表示するための設定方法について説明しました。有効なチャットウィジェットは、ウェブサイトのお客様をコンタクトセンターのエージェントへ接続します。
ボットがチャットサービスと統合されている場合、お客様はボットに接続でき、ボットは質問への回答、セルフサービスの提供、必要に応じてエージェントへの接続できます。エージェントにルーティングされたチャットの場合でも、統合されたボットは背景で起動し、サジェスト(つまり、エージェントが選択して使用するためのサジェスト)を提供してエージェントをサポートします。
必須条件
この記事は次のことを前提としています:
- ウェブチャットの設定方法を読み理解すること
- 会社のIBM Cloudアカウントへのアクセスを持つこと
- Watson Assistantの仕組みについて理解すること
手順
この手順には、次のステップが含まれています:
- IBM Watsonでボットを作成する
- IBM Watson統合アカウントを追加する
- ボット統合を組み込んだチャットシナリオを作成または選択する
- ボット専用のチャットサービスを作成または選択する
- チャットシナリオとサービスを統合アカウントにリンクする
- チャットをテストする
ステップ 1: IBM CloudでWatson Assistantを作成します。
- 作成がまだの場合、 BMアカウントにサインアップし、IBM Cloudを起動します。IBM Cloud は、Watson Assistantチャットボットなど、リソースの展開と管理が行えるアプリケーションです。
- IBMの初めてのチュートリアルに記載されている手順に従ってWatson Assistantを作成します。Watson Assistant はボットになり、ワークスペースでそのボットにインテント、エンティティ、およびダイアログを追加できます。Watson Assistantに関する詳しい情報は、リファレンスをご覧ください。
- Watson Assistantの作成方法の基本的なガイドラインもご参考ください。
ステップ 2:Watson認証情報を取得します。
Bright Pattern コンタクトセンターをWatson Assistantと統合するには、認証情報が必要です。認証情報は、統合アカウントの追加手順で使われます。
- IBM Cloud コンソールでは、次の2つの場所のいずれかからWatson Assistant認証情報を取得できます:
- Watson サービス > アシスタント > 管理 (プレーンテキストの認証情報)
- Watson サービス > アシスタント > サービス認証情報 (JSONスニペット専用)
- Watson サービス > アシスタント > 管理 (プレーンテキストの認証情報)
- Watson Assistant のUrl, ユーザ名,パスワードをテキストファイルなどの別のドキュメントに コピーします。

ステップ3: 統合アカウントを追加します。
統合アカウントは、コンタクトセンターがサードパーティのサービスと連携するためのものです。
- コンタクトセンター管理者アプリケーションの 設定 > コールセンターの設定 >統合アカウントへ進みます。
- アカウントの追加 (+) ボタンをクリックし、新しい統合アカウントを追加します。
- ボット / チャットサジェスト機能エンジンというアカウントタイプを選択し、OKをクリックします。
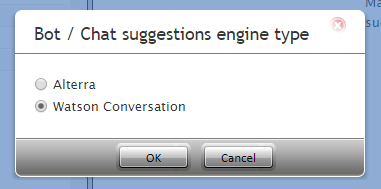
- ボット / チャットサジェスト機能エンジンのタイプというダイアログで、 Watson Conversationを選択し、OKをクリックします。


プロパティ

以下のフィールドを入力します:
- 名前:ボットのユニークな名前です。
- タイプ:アカウントを追加するときに“Watson Assistant ”というタイプが選択されたため、既定のタイプも“Watson Assistant”です。
- Url:Watson Assistantのエンドポイントです (https://gateway.watsonplatform.net/assistant/api) + /v1/workspaces/ + your workspace ID (see below) + /message?version=2017-05-26
- 例: https://gateway.watsonplatform.net/assistant/api/v1/workspaces/085c97f9-44c3-403d-8aad-92e86d9379f8d/message?version=2017-05-26
- ご注意: ボットが正しく機能するためには、この方法でURLを入力しなければなりません。
- 例: https://gateway.watsonplatform.net/assistant/api/v1/workspaces/085c97f9-44c3-403d-8aad-92e86d9379f8d/message?version=2017-05-26
- ワークスペース ID: Watson Assistant ワークスペースの識別番号です。
- このIDを取得するには、IBM Watson Assistant > ワークスペースへ進み、ご希望のワークスペースの アクションボタンをクリックし、 詳細の確認を選択します。
- ワークスペース IDをコピーします。
- このIDを取得するには、IBM Watson Assistant > ワークスペースへ進み、ご希望のワークスペースの アクションボタンをクリックし、 詳細の確認を選択します。


- Username - The username for your IBM account that you copied from your service credentials
- Password - The password for your IBM account that you copied from your service credentials
- Max API calls per day - The maximum number of calls that can be done each day; this limit is here to keep your account from being charged for additional calls beyond the first 1,000 that are included in a free account.
- Maximum suggestions - The maximum number of suggestions (e.g., 3) that can be delivered to the Agent Desktop during active chat interactions. Suggestions are the bot-generated replies that agents can select and use during chats.
- Test Connection - Click to be sure Bright Pattern Contact Center can connect to your Watson Assistant.
- If the credentials are invalid, go back to the Url property and make sure you’ve entered it exactly as explained in this procedure.
- Test until you see the success dialog: "Account credentials appear to be valid."
- If the credentials are invalid, go back to the Url property and make sure you’ve entered it exactly as explained in this procedure.
Click Apply at the bottom of the screen to save your account properties.
Step 4: Create or Select a Chat Scenario
Note that this step is the same as Web Chat Configuration Step 1.
- Go to Configuration > Scenarios > Chat.
- Either select an existing Chat Scenario from the list, or click the Add from template
 button at the bottom of the screen to create a new chat scenario from the “Mobile Chat” template.
 - Creating a new chat scenario from a template will open the Scenario Builder application in a new browser tab or window. For the purpose of this simple setup, leave the scenario as-is and click Save.
- Give the scenario a unique name (e.g., "Bot Scenario") and click Save. Your new scenario will appear in the list of scenarios.


Step 5: Edit the Scenario to Work with Your Bot
To use the Watson Assistant in live web chat interactions, you’ll have to edit the basic Mobile Chat scenario template to allow the bot to interact with the customer. For more information about scenarios, see the Scenario Builder Reference Guide.
There are many ways to construct such a bot-enabled scenario; the instructions given in this step are provided as just one example of how to use your Watson Assistant in chat.
In this scenario-building exercise, you will be configuring the system to use the bot to:
- Automatically accept the customer’s chat request
- Greet the customer
- Provide answers to the customer
- Provide suggested replies to the agent
- Connect to an agent when it’s determined that the bot is not being helpful

- Download File:App Example Bot Scenario.zip and import it to your Contact Center Administrator application.
- Select the imported scenario and click EDIT to open it.
The following scenario blocks (with comments) are included in this example scenario. Be sure to read the comments that explain each scenario block's properties.
- Chat Bot Select Account: This block tells the system which integrated bot will be used for this scenario.
- Set Variable: This establishes the customer's first name and last name. Setting this context helps to personalize the conversation.
- Send Message+: This block delivers a chat message to the customer, incorporating the customer's name.
- Set Variable: This time, we are defining a step. In this example scenario, we want the bot to respond to the customer two times before connecting to the agent. The first time is specified as "step 0" and the second time is specified as "step 1." The scenario will run through both steps. If the customer's issue is not resolved by step 1, the customer is transferred to the agent for help.
- If: The If block specifies what happens if the customer did not write a message in the pre-chat form's Message field. If that field is empty, the scenario tells the bot to send a message. The message aligns with what you have configured your Watson Assistant to say. We call the bot's messages suggestions.
- Add a branch
- Give it a condition of item.message is empty
- Add a branch
- Ask a Bot: The scenario uses this block to get suggestions (i.e., some response from the Watson Assistant) to deliver to the customer. For each of the conditional exits (Failed, Timeout, or No Data), the scenario will send a message and then connect to the agent.
- Send Message+: This is used to send a message to the customer via either chat or SMS. In this example, the message is sent in the active chat interaction. If a specific message is not defined here, the standard system-wide message is sent to the customer.
- Set Variable: This time, we are defining "step 1." Remember, we want the bot to respond to the customer two times before connecting to the agent. The first time is specified as "step 0" and the second time is specified as "step 1." The scenario will run through both steps. If the customer's issue is not resolved by step 1, the customer is transferred to the agent for help.
- If: In this If block, a condition is set to make sure that if the scenario takes more than two steps to resolve the customer's issue, then it will transfer the chat from the bot to the agent.
- Add a branch
- Give it a condition of “steps” > “2”
- Add a branch
- Find Agent: The Find Agent block looks for the next available skilled agent to accept the chat. You can use Find Agent to set wait times and send the customer messages about estimated waiting time (EWT).
- Connect Chat: Connect Chat is for setting the destination of the chat. If you leave the destination fields empty, the Find Agent block will find the first available agent.
- Exit: The Exit block completes the scenario. Without it, the scenario will loop through this configured flow until the customer ends the chat.


Step 6: Create or Select a Chat Service
See Web Chat Configuration Step 2.
Step 7: Create or Choose a Chat Scenario Entry
Note that this step is basically the same as Web Chat Configuration Step 3, with the addition of another important property.
- Go to Configuration > Scenario Entries > Messaging/Chat and select a scenario entry point to use with your chat scenario. The entry point is what starts the scenario.
- If there are no existing chat scenario entries shown, you have to create one.

How to Add a New Chat Scenario Entry
- Click the Add chat scenario entry button.
- In the Properties tab, fill in the properties as appropriate (see below for required and optional properties). For definitions, see the Contact Center Administrator Guide, section Messaging/Chat.
Required Properties
In the Properties tab, make sure to address the following fields right now. These are critical to chat configuration.

- Name - The unique name (any) of the chat scenario entry (e.g., "Redwood Chat")
- Unique identifier - A long string of characters that identifies the chat entry. It is recommended that you change it to something short and unique (e.g., "1234").
- Scenario - Choose the Chat Scenario you selected or created earlier in this procedure (e.g., "Super Chat"). This is where the parts come together to make chat possible.
- Service - Choose the Chat Service you selected or created earlier in this procedure (e.g., "Pacific Chat"). This is where the parts come together to make chat possible.
- Bot / Chat suggestions engine - The engine that will provide suggested replies to the agent during chat. Note that in order to use a bot/chat suggestions engine, you must have an integration account configured for your contact center.
Other Properties
The other remaining properties are optional at this time. You can come back to them later.
Step 8: Edit Chat Widget Style
See Web Chat Configuration Step 4
Step 9: Add a Contact Tab
In order for this chat scenario entry to work, you must add a contact tab for the chat widget. See How to Add a Contact Tab.
Step 10: Get the HTML
See Web Chat Configuration Step 6
Final Step: Test the Chat
You have now successfully set up your contact center service, scenario, and chat widget to work in an integrated manner with your Watson Assistant. You should test it to make sure that the:
- Customer's name entered on the pre-chat form comes through during the chat
- Bot is able to automate the conversation with the customer
- Customer is connected to an agent if the bot couldn't help within two tries
- Agent is able to see the bot's suggestions during the active chat
The following screenshot shows a service chat (on the Agent Desktop side) where the bot provides two responses to the customer and then connects to an agent. You can see the bot's suggestion below the agent's text input field.

And the following is how the chat looks to the customer:
