ボットとチャットの統合方法
Bright Pattern コンタクトセンターは、AlterraやIBM Watsonなどのプロバイダーと統合して、チャットボットをコンタクトセンターサービスで使用できるようにします。この記事では、IBM Watson Assistant(つまり、対話型ボット)を設定済みのチャットサービスと統合する方法について説明します。
ウェブチャットの設定方法では、チャットシナリオ、チャットサービス、チャットシナリオのエントリポイントが連携してウェブサイトにチャットウィジェットを表示するための設定方法について説明しました。有効なチャットウィジェットは、ウェブサイトのお客様をコンタクトセンターのエージェントへ接続します。
ボットがチャットサービスと統合されている場合、お客様はボットに接続でき、ボットは質問への回答、セルフサービスの提供、必要に応じてエージェントへの接続できます。エージェントにルーティングされたチャットの場合でも、統合されたボットは背景で起動し、サジェスト(つまり、エージェントが選択して使用するためのサジェスト)を提供してエージェントをサポートします。
必須条件
この記事は次のことを前提としています:
- ウェブチャットの設定方法を読み理解すること
- 会社のIBM Cloudアカウントへのアクセスを持つこと
- Watson Assistantの仕組みについて理解すること
手順
この手順には、次のステップが含まれています:
- IBM Watsonでボットを作成する
- IBM Watson統合アカウントを追加する
- ボット統合を組み込んだチャットシナリオを作成または選択する
- ボット専用のチャットサービスを作成または選択する
- チャットシナリオとサービスを統合アカウントにリンクする
- チャットをテストする
ステップ 1: IBM CloudでWatson Assistantを作成します。
- 作成がまだの場合、 BMアカウントにサインアップし、IBM Cloudを起動します。IBM Cloud は、Watson Assistantチャットボットなど、リソースの展開と管理が行えるアプリケーションです。
- IBMの初めてのチュートリアルに記載されている手順に従ってWatson Assistantを作成します。Watson Assistant はボットになり、ワークスペースでそのボットにインテント、エンティティ、およびダイアログを追加できます。Watson Assistantに関する詳しい情報は、リファレンスをご覧ください。
- Watson Assistantの作成方法の基本的なガイドラインもご参考ください。
ステップ 2:Watson認証情報を取得します。
Bright Pattern コンタクトセンターをWatson Assistantと統合するには、認証情報が必要です。認証情報は、統合アカウントの追加手順で使われます。
- IBM Cloud コンソールでは、次の2つの場所のいずれかからWatson Assistant認証情報を取得できます:
- Watson サービス > アシスタント > 管理 (プレーンテキストの認証情報)
- Watson サービス > アシスタント > サービス認証情報 (JSONスニペット専用)
- Watson サービス > アシスタント > 管理 (プレーンテキストの認証情報)
- Watson Assistant のUrl, ユーザ名,パスワードをテキストファイルなどの別のドキュメントに コピーします。

ステップ3: 統合アカウントを追加します。
統合アカウントは、コンタクトセンターがサードパーティのサービスと連携するためのものです。
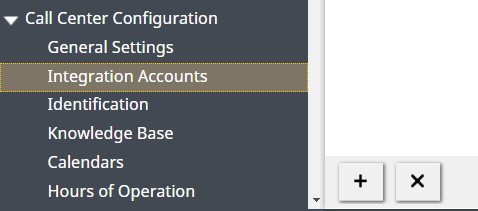
- コンタクトセンター管理者アプリケーションの 設定 > コールセンターの設定 >統合アカウントへ進みます。
- アカウントの追加 (+) ボタンをクリックし、新しい統合アカウントを追加します。
新しい統合アカウントの追加 - ボット / チャットサジェスト機能エンジンというアカウントタイプを選択し、OKをクリックします。
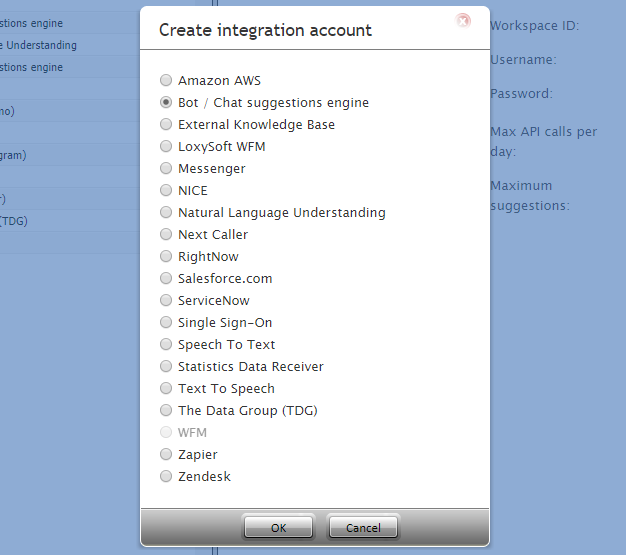
"ボット / チャットサジェスト機能エンジン"の選択 - ボット / チャットサジェスト機能エンジンのタイプというダイアログで、 Watson Conversationを選択し、OKをクリックします。
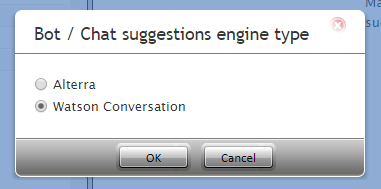
"Watson Conversation"の選択


プロパティ

以下のフィールドを入力します:
- 名前:ボットのユニークな名前です。
- タイプ:アカウントを追加するときに“Watson Assistant ”というタイプが選択されたため、既定のタイプも“Watson Assistant”です。
- Url:Watson Assistantのエンドポイントです (https://gateway.watsonplatform.net/assistant/api) + /v1/workspaces/ + your workspace ID (see below) + /message?version=2017-05-26
- 例: https://gateway.watsonplatform.net/assistant/api/v1/workspaces/085c97f9-44c3-403d-8aad-92e86d9379f8d/message?version=2017-05-26
- ご注意: ボットが正しく機能するためには、この方法でURLを入力しなければなりません。
- 例: https://gateway.watsonplatform.net/assistant/api/v1/workspaces/085c97f9-44c3-403d-8aad-92e86d9379f8d/message?version=2017-05-26
- ワークスペース ID: Watson Assistant ワークスペースの識別番号です。
- このIDを取得するには、IBM Watson Assistant > ワークスペースへ進み、ご希望のワークスペースの アクションボタンをクリックし、 詳細の確認を選択します。
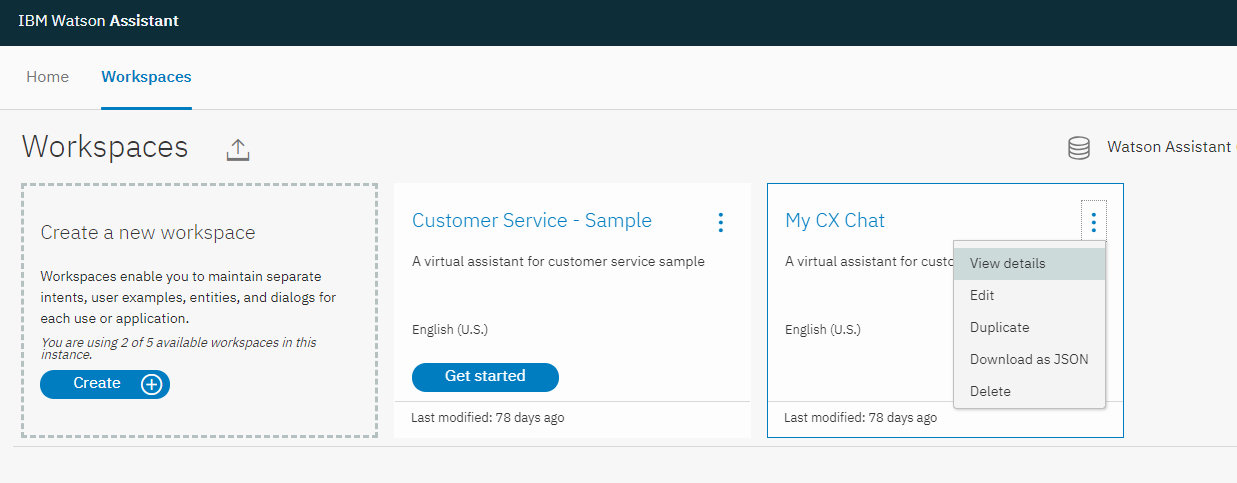
IBM Watson Assistant > ワークスペース - ワークスペース IDをコピーします。
- このIDを取得するには、IBM Watson Assistant > ワークスペースへ進み、ご希望のワークスペースの アクションボタンをクリックし、 詳細の確認を選択します。


- ユーザー名:サービス認証情報からコピーされたIBMアカウントのユーザー名です。
- パスワード:サービス認証情報からコピーされたIBMアカウントのパスワードです。
- 1日あたりのAPIコールの最大件数:毎日発信できるコールの最大件数です。この制限は、無料アカウントに含まれている1000件以降のコールに対して追加料金が課されないようにするためのものです。
- サジェストの最大件数:サジェストの最大件数(例:3)は、アクティブなチャット中にエージェントデスクトップに配信できるサジェストの最大件数です。サジェストは、エージェントがチャット中に選択して使用できるボットからの返信です。
- 接続テスト:クリックして、Bright Pattern コンタクトセンターがWatson Assistantに接続できることを確認します。
- 認証情報が無効な場合は、Urlプロパティに戻り、それらを正しく入力したことを確認してください。
- "アカウントの認証情報は有効です"というダイアログが表示されるまでテストします。
- 認証情報が無効な場合は、Urlプロパティに戻り、それらを正しく入力したことを確認してください。
画面の下部にある適用をクリックして、アカウントのプロパティを保存します。
ステップ 4: チャットシナリオを作成または選択します。
このステップは ウェブチャットの設定ステップ 1と同じです。
- 設定 > シナリオ > チャットへ進みます。
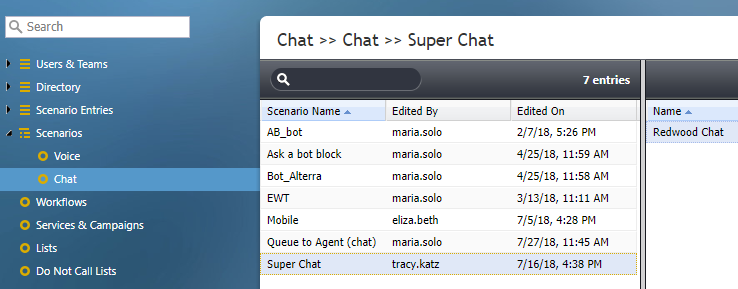
設定 > シナリオ > チャット - リストから既存のチャットシナリオを選択するか、画面の下にある テンプレートの追加
 ボタンをクリックし、”モバイルチャット”に基づいて新しいチャットシナリオを作成します。
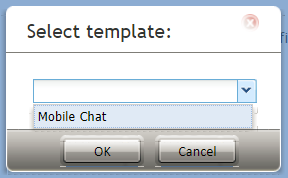
"モバイルチャット" のテンプレートの選択 - テンプレートから新しいチャットシナリオを作成すると、シナリオビルダーアプリケーションが新しいブラウザータブまたはウィンドウで開きます。シナリオをそのままにして、 保存 をクリックします。

シナリオに名前を付ける - シナリオにユニークな名前 (例えば、"ボットシナリオ") を付け、 保存をクリックします。新しいシナリオはシナリオリストに表示されます。


ステップ 5: シナリオを編集してボットと連携します。
ウェブチャットの対話でWatson Assistantを使用するには、基本的なモバイルチャットシナリオテンプレートを編集して、ボットがお客様と対話できるように設定しなければなりません。シナリオの詳しい情報は、 シナリオビルダーリファレンスガイドをご覧ください。
このようなボット対応シナリオの設定方法はたくさんあります。このステップで挙げられている内容は、チャットでのWatson Assistantの使用方法の1つの例です。
このシナリオ作成エクササイズでは、ボットが次のことを実行できるようにシステムを設定します。
- お客様からのチャットリクエストを自動的に受け入れること
- お客様に挨拶すること
- お客様に返信すること
- エージェントにサジェスト返信を提供すること
- ボットの対応が不十分であると判断した時にエージェントに接続すること

- File:App Example Bot Scenario.zipをダウンロードし、コンタクトセンター管理者アプリケーションにインポートします。
- インポートされたシナリオを選択し、編集をクリックして開きます。
次のシナリオブロック(コメント付き)は、このシナリオの例に含まれています。各シナリオブロックのプロパティを説明するコメントを必ずお読みください。
- チャットボット選択アカウント:このブロックは、このシナリオで使う統合ボットについてシステムに通知します。
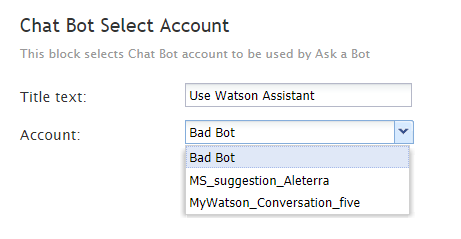
統合アカウントを選択します。 - 変数の設定: これにより、お客様の氏名が取得できます。このコンテキストを設定することで、会話のパーソナライズ化が可能です。
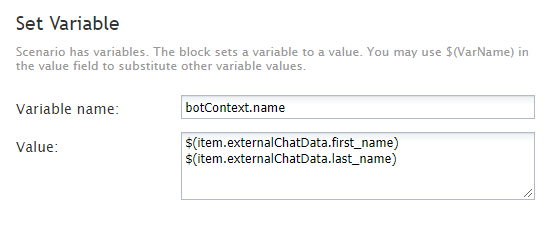
この変数を使ってチャット事前フォームからお客様の名前を取得し、チャット対話で使います - メッセージの送信+: このブロックは、お客様の名前の入ったチャットメッセージをお客様に配信します。
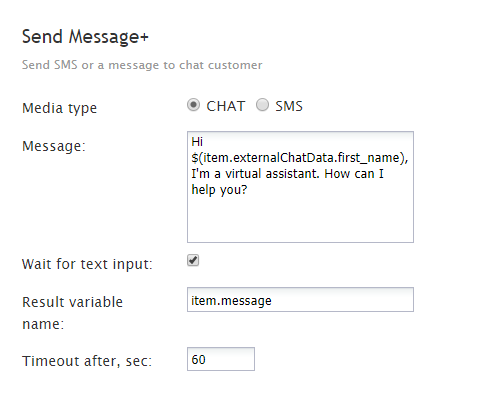
お客様の名前の入ったメッセージを送信するボットを設定します。 - 変数の設定: 今回は、ステップを定義します。この例のシナリオでは、エージェントに接続する前に、ボットがお客様に2回応答するように設定します。 1回目は"ステップ0"、2回目は"ステップ1"として指定されます。シナリオは両方のステップを実行します。お客様のリクエストがステップ1で解決されない場合、お客様はエージェントに転送され、サポートを受けます。

変数を使って、この部分を最初のステップとして定義します。 - If: Ifブロックは、お客様がチャット事前フォームのメッセージフィールドにメッセージを書き込まなかった場合の処理を定義します。そのフィールドが空白である場合、シナリオはボットにメッセージを送信するよう指示します。メッセージは、Watson Assistantで設定した内容と一致します。ボットのメッセージをサジェスト(提案)と呼びます。
- 分岐を追加します。
- item.message条件を空白にします。
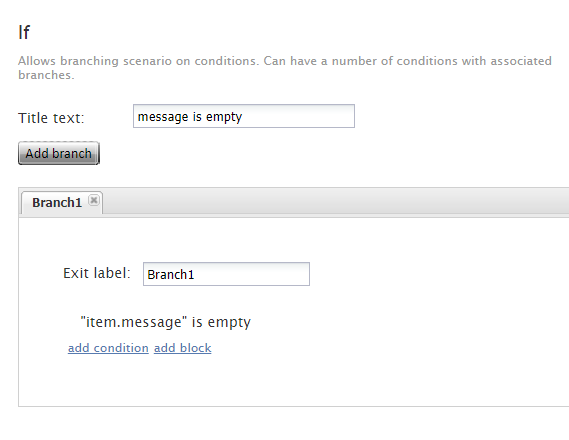
お客様からのメッセージフィールドが空白である場合、ボットがお客様へメッセージを送信するようにします。
- 分岐を追加します。
- Ask a Bot: シナリオはこのブロックを使って、お客様に提供するサジェスト(つまり、Watson Assistantからの応答)を取得します。条件付き出口(失敗、タイムアウト、またはデータなし)のそれぞれについて、シナリオはメッセージを送信し、お客様をエージェントに接続します。

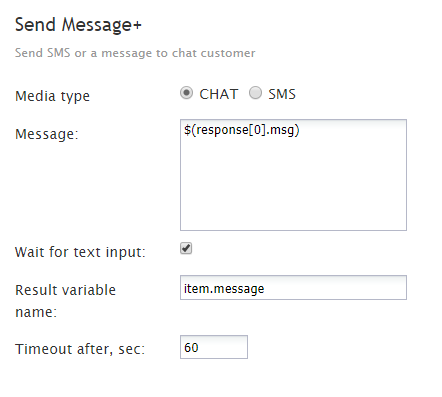
ボットからサジェストを取得します。 - メッセージの送信+: これは、チャットまたはSMSを介してお客様にメッセージを送信するために使われます。この例では、メッセージはアクティブなチャット対話で送信されます。ここでメッセージの内容が定義されていない場合、標準のシステム全体のメッセージがお客様に送信されます。
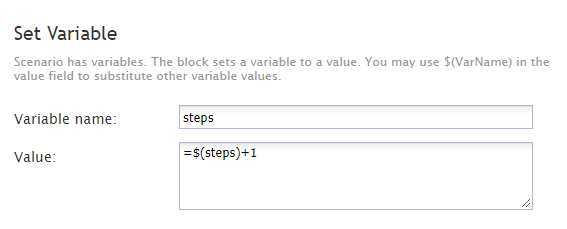
必要に応じて別のメッセージを送信します。 - 変数の設定: 今回は、"ステップ1"を定義します。この例のシナリオでは、エージェントに接続する前に、ボットがお客様に2回応答するように設定します。 1回目は"ステップ0"、2回目は"ステップ1"として指定されます。シナリオは両方のステップを実行します。お客様のリクエストがステップ1で解決されない場合、お客様はエージェントに転送され、サポートを受けます。
この部分をステップ1として定義します。 - If: このIfブロックでは、お客様のリクエストを解決するためにシナリオが2つ以上のステップを実行した場合に、チャットがボットからエージェントに転送されるように条件が設定されます。
- 分岐を追加します。
- “ステップ”> “2”の条件を設定します 。
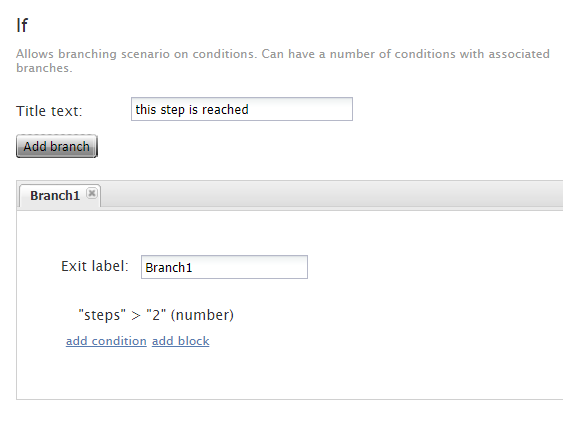
お客様の問題を解決するためにシナリオで2つ以上のステップを実行する場合、エージェントは次のステップを実行します。
- 分岐を追加します。
- エージェントの検索: エージェントの検索ブロックは、チャットの受付が可能で、適切なスキルを持つエージェントを検索します。 エージェントの検索を使って待機時間を設定し、お客様へ予想待機時間(EWT)に関するメッセージを送信できます。
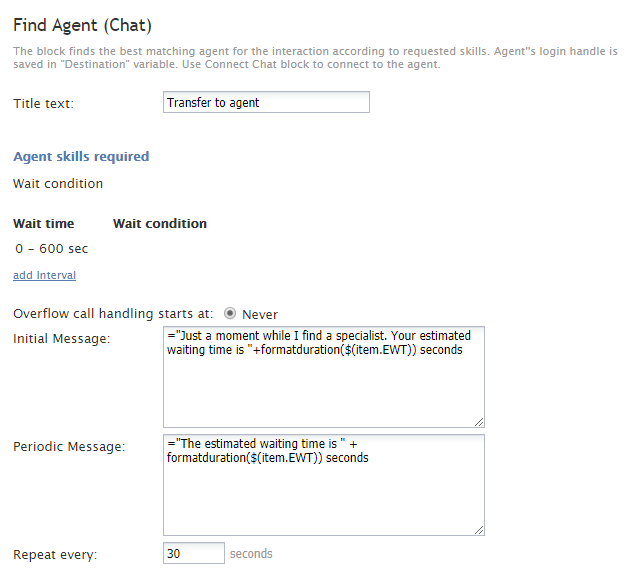
ボットは2つのステップでお客様のリクエストを解決できなかったため、シナリオはエージェントを検索します。 - チャットの接続: チャットの接続は、チャットの宛先を設定するためのブロックです。宛先フィールドを空白にすると、エージェントの検索ブロックは一番目に受付可能なエージェントを検索します。
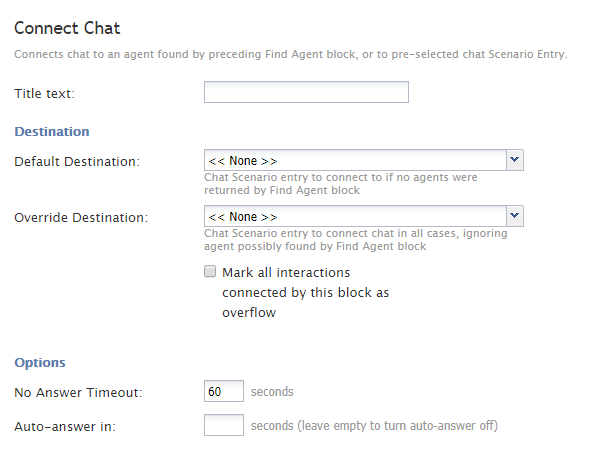
チャットの宛先を指定するか、システムで受付可能なエージェントを検索できます。 - 終了: 終了ブロックはシナリオを終了させます。それがなければ、シナリオはお客様がチャットを終了するまで設定されたフローを繰り返します。


ステップ 6:チャットサービスを作成または選択します。
ウェブチャットの設定 ステップ2をご覧ください。
ステップ 7: チャットシナリオエントリーを作成または選択します。
このステップと内容は、 ウェブチャット設定 ステップ3とほぼ同じです。別の重要なプロパティの追加が必要です。
- 設定 > シナリオエントリ> メッセージ送信/チャットへ進み、チャットシナリオで使うシナリオエントリポイントを選択します。エントリポイントは、シナリオを開始するものです。

メッセージ送信/チャットシナリオエントリリスト - 既存のチャットシナリオエントリが表示されない場合は、それを作成しなければなりません。

新しいチャットシナリオエントリの追加方法
- チャットシナリオエントリの追加 ボタンをクリックします。
- プロパティタブで、必要に応じてプロパティを入力します(必須およびオプションのプロパティについては、以下を参照してください)。定義については、 コンタクトセンター管理者ガイドの メッセージ送信/チャットをご覧ください。
必須プロパティ
プロパティタブで、次のフィールドをすぐに記入しなければなりません。これらはチャットの設定に不可欠です。

- 名前:チャットシナリオエントリーのユニークな名前 (例えば、 "Redwood チャット")
- ユニークな識別子:チャットエントリーを識別する長い文字列。短くてユニークなものに変更することをお勧めします (例えば、 "1234")。
- シナリオ:この手順の前半で選択または作成したチャットシナリオを選択します("Super Chat"など)。これは、チャットを可能にするための部分が揃う場所です。
- サービス:この手順の前半で選択または作成したチャットシナリオを選択します("Pacific Chat"など)。これは、チャットを可能にするための部分が揃う場所です。
- ボット / チャットサジェスト機能エンジン:チャット中にエージェントにサジェスト応答を提供するエンジンです。ボット/チャットサジェスト機能エンジンを使うには、コンタクトセンター用に統合アカウントを設定しなければなりません。
その他プロパティ
その他プロパティは現時点ではオプションです。後でそれらの設定に戻ることができます。
ステップ 8: チャットウィジェットスタイルを編集します。
ウェブチャットの設定 ステップ4をご覧ください。
ステップ 9: コンタクトタブを追加します。
このチャットシナリオエントリーを機能させるには、チャットウィジェットのコンタクトタブを追加しなければなりません。 コンタクトタブの追加方法をご覧ください。
ステップ 10: HTMLを取得します。
ウェブチャットの設定 ステップ 6をご覧ください。
最終のステップ: チャットをテストします。
これで、Watson Assistantと統合された方法で起動するように、コンタクトセンターサービス、シナリオ、およびチャットウィジェットが正常に設定されました。以下のことを確認するためにテストしなければなりません:
- チャット事前フォームに入力された顧客名がチャット中に入力されます。
- ボットはお客様との対話を自動化できます。
- ボットが2つのステップ以内にお客様のリクエストを解決しなかった場合、お客様はエージェントに接続されます。
- エージェントはアクティブなチャット中にボットのサジェストを見ることができます。
次のスクリーンショットは、サービスチャット(エージェントデスクトップ側)を示しています。ボットはお客様に2つの応答を提供してから、エージェントに接続します。エージェントのテキスト入力フィールドの下にボットのサジェストが表示されます。

そして、以下はお客様の画面に表示されるチャットの様子です。
