(Marked this version for translation) |
(Updated via BpDeleteTranslateTags script) |
||
| Line 1: | Line 1: | ||
| − | + | = On-page Initiation Form= | |
The On-page Initiation form includes chat and call buttons that can be customized and placed directly on your website. To customize the buttons, edit the following properties on the form. | The On-page Initiation form includes chat and call buttons that can be customized and placed directly on your website. To customize the buttons, edit the following properties on the form. | ||
| − | == Properties == | + | == Properties == |
[[File:On-Page-50.PNG|800px|thumbnail|center|On-Page Initiation form properties]] | [[File:On-Page-50.PNG|800px|thumbnail|center|On-Page Initiation form properties]] | ||
| − | === Name === | + | === Name === |
Every form can be given a unique ''name'', making it easy to differentiate multiple forms. | Every form can be given a unique ''name'', making it easy to differentiate multiple forms. | ||
| − | === Chat tab and button text === | + | === Chat tab and button text === |
''Chat tab and button text'' is the text that will be shown on the Chat tab, if the Chat tab and button are enabled. | ''Chat tab and button text'' is the text that will be shown on the Chat tab, if the Chat tab and button are enabled. | ||
| − | === Phone call button enabled === | + | === Phone call button enabled === |
When this checkbox is selected, the Pre-Chat form displays the Call tab at the top of the form and the Call button at the bottom of the form. Customers enter information on the form and click the Call button to initiate a phone call to an agent. | When this checkbox is selected, the Pre-Chat form displays the Call tab at the top of the form and the Call button at the bottom of the form. Customers enter information on the form and click the Call button to initiate a phone call to an agent. | ||
| − | === Phone call button text === | + | === Phone call button text === |
''Phone call button text'' is the text that will be shown on the Call tab, if the Phone call button is enabled. | ''Phone call button text'' is the text that will be shown on the Call tab, if the Phone call button is enabled. | ||
| − | === Fields === | + | === Fields === |
You can add fields to the form by clicking '''add'''. For more information, see section [[chat-widget-configuration-guide/WorkingwithFormFields|Working with Form Fields]]. | You can add fields to the form by clicking '''add'''. For more information, see section [[chat-widget-configuration-guide/WorkingwithFormFields|Working with Form Fields]]. | ||
| − | === HTML snippet === | + | === HTML snippet === |
When you are done editing the form, click '''Save'''. Then click the HTML snippet button to copy the HTML code of the chat widget you just created. Paste this HTML into the appropriate place on your website. | When you are done editing the form, click '''Save'''. Then click the HTML snippet button to copy the HTML code of the chat widget you just created. Paste this HTML into the appropriate place on your website. | ||
| − | |||
For more information about HTML snippets, see the ''Contact Center Administrator Guide'', section [[contact-center-administrator-guide/Messaging#Web_HTML_snippet|Messaging]]. | For more information about HTML snippets, see the ''Contact Center Administrator Guide'', section [[contact-center-administrator-guide/Messaging#Web_HTML_snippet|Messaging]]. | ||
| − | |||
| − | |||
| − | |||
| − | |||
| − | |||
| − | |||
| − | |||
| − | |||
Latest revision as of 04:01, 29 May 2024
On-page Initiation Form
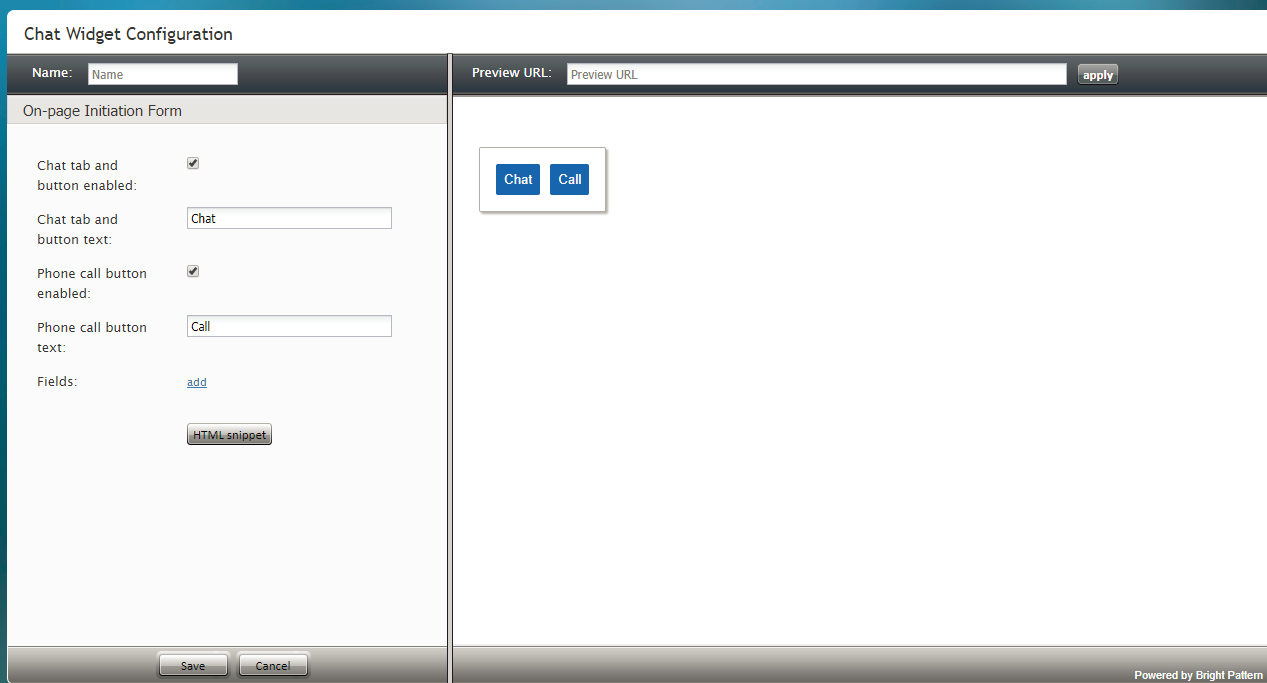
The On-page Initiation form includes chat and call buttons that can be customized and placed directly on your website. To customize the buttons, edit the following properties on the form.
Properties
Name
Every form can be given a unique name, making it easy to differentiate multiple forms.
Chat tab and button text
Chat tab and button text is the text that will be shown on the Chat tab, if the Chat tab and button are enabled.
Phone call button enabled
When this checkbox is selected, the Pre-Chat form displays the Call tab at the top of the form and the Call button at the bottom of the form. Customers enter information on the form and click the Call button to initiate a phone call to an agent.
Phone call button text
Phone call button text is the text that will be shown on the Call tab, if the Phone call button is enabled.
Fields
You can add fields to the form by clicking add. For more information, see section Working with Form Fields.
HTML snippet
When you are done editing the form, click Save. Then click the HTML snippet button to copy the HTML code of the chat widget you just created. Paste this HTML into the appropriate place on your website.
For more information about HTML snippets, see the Contact Center Administrator Guide, section Messaging.

