How to Blacklist Specific Phone Numbers
Contact centers exist to make calls to and receive calls from customers. Unfortunately, contact centers sometimes receive inappropriate calls from customers. In order to protect your agents from abusive callers, Bright Pattern Contact Center software can be configured to blacklist specific phone numbers. Blacklisting or blocking a phone number means that any incoming call from that phone number is not allowed to be connected to the contact center.
This tutorial describes how to blacklist specific phone numbers.
You will learn how to:
- Add a "blacklisted" flag to contact records
- Check if a caller's contact is blacklisted and reject calls by means of scenarios
- Add or edit blacklisted contacts in the Agent Desktop application
Procedure
1. Add a “blacklisted” flag to contact records
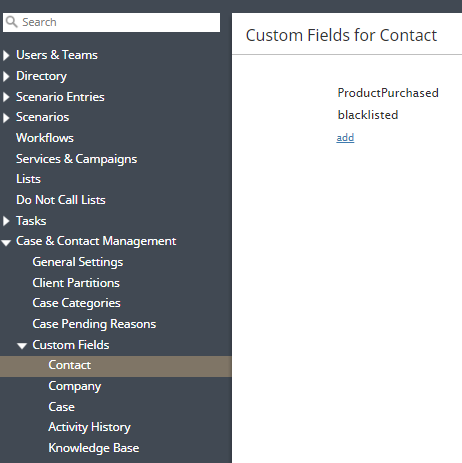
- In the Contact Center Administrator application, section Case & Contact Management > Custom Fields > Contact, add a custom field (e.g., “blacklisted”). Click Apply to save.
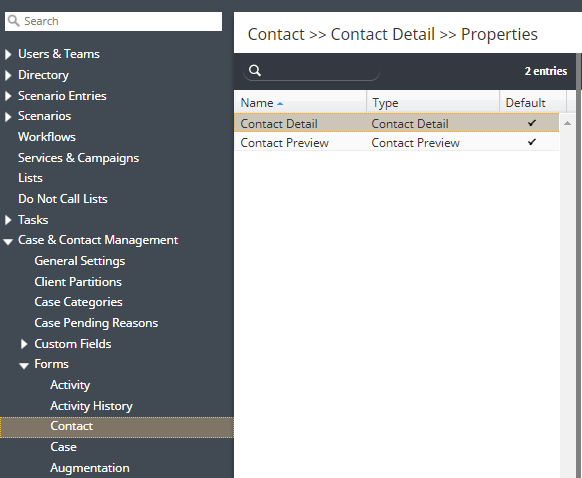
- Navigate to Case & Contact Management > Forms > Contact and open your default Contact Detail form; this will launch the Form Builder application.
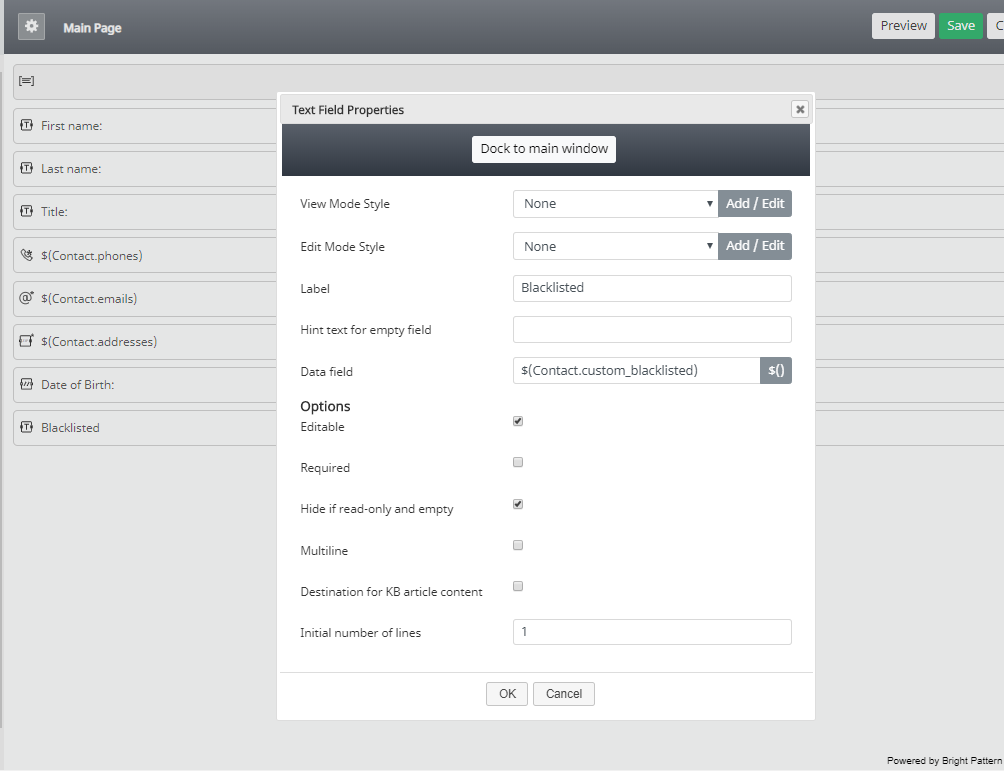
- In the Form Builder application, add a Text field to the Contact form, and then click the edit icon. When configuring the field, apply a Label, select the Editable option, and then map the custom contact field created in Step 1 to the Data field property. Click OK to save the field properties, click Save to save the form, and then close the application.
Note: If you edit the system default Contact Detail form, when you save the form it creates a duplicate Contact Detail form. Rename the duplicate and select the option Default form for this type. Click Apply to save the changes.
2. Configure a scenario that identifies and rejects blacklisted callers
- In the Contact Center Administrator application, navigate to Scenarios > Voice, and then open the voice scenario associated with your configured inbound voice service.
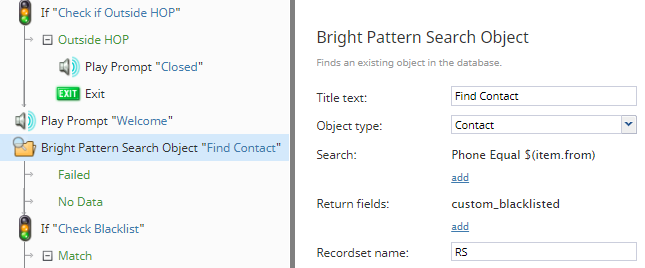
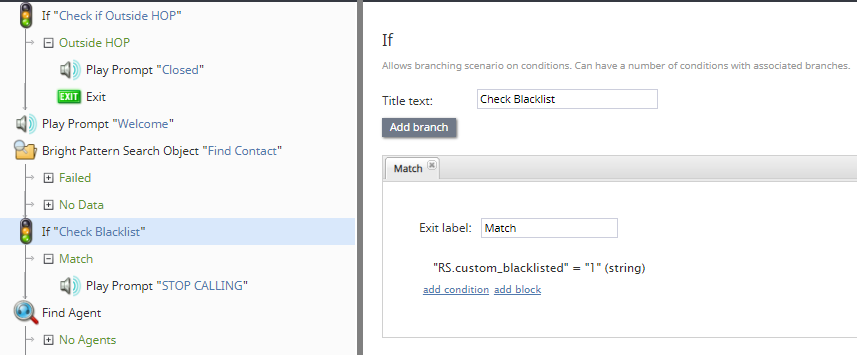
- In the Scenario Builder application, add a Bright Pattern Search Object block to your scenario. Configure the block to include the following:
- Object type: Contact
- Search: Phone Equal ($item.from)
- Return fields: The name of the custom data field that you created in the previous step, as it appears in the field properties (e.g., in the above example this would be "custom_blacklisted")
- Recordset name: Any word or letters you wish to associate with this block (e.g., “RS”)
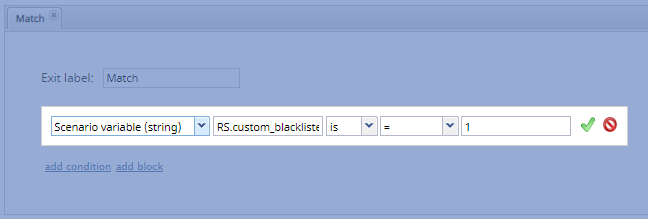
- Next, place an If block immediately after the Bright Pattern Search Object block you created in the previous step to your scenario. Add a branch, add a condition, and configure it as follows:
- Scenario variable (string)
- The variable returned by the previous block, prepended by the recordset name (e.g., “RS.custom_blacklisted”)
- is
- =
- The symbol or string used in the contact form to specify the contact is blacklisted (e.g., 1)
- From the configured branch, you can route the blacklisted caller as you see fit. For example, you could add a Play Prompt block, configure it to play a message to the blacklisted caller, and then add an Exit block to terminate the call.
When you are finished, click Save and exit the application. - If necessary, repeat the four previous steps for your other inbound scenarios that you want to reject blacklisted numbers.
3. Add or edit blacklisted contacts in Agent Desktop
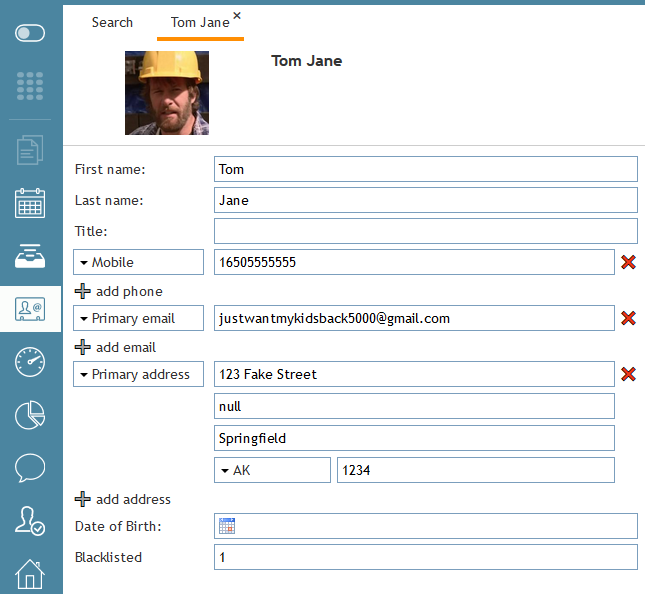
When you need to block a particular number, in the Agent Desktop application, section Search & Preview Records, create a contact for the given caller or edit an existing contact. The field "Blacklisted" will be displayed on the Contact form. Enter a symbol or string that you used in the scenario (step 2.3 above) to specify that the contact is blacklisted (e.g., “1”) in this field, and then select Save.
You can repeat the above step at any time for any other numbers that need to be blacklisted.

