How to Create a Chat Scenario That Pops Case or Contact Information
The Agent Desktop application contains robust case and contact management features, allowing your agents to save, search for, and preview just about any information related to interactions; this information lives in internal databases.
Through scenarios, it is possible to make your extensive case and contact information instantly available to agents when interactions begin, all without your agents having to search for it. Not only will this help your agents save precious time, it keeps your returning customers happy, too.
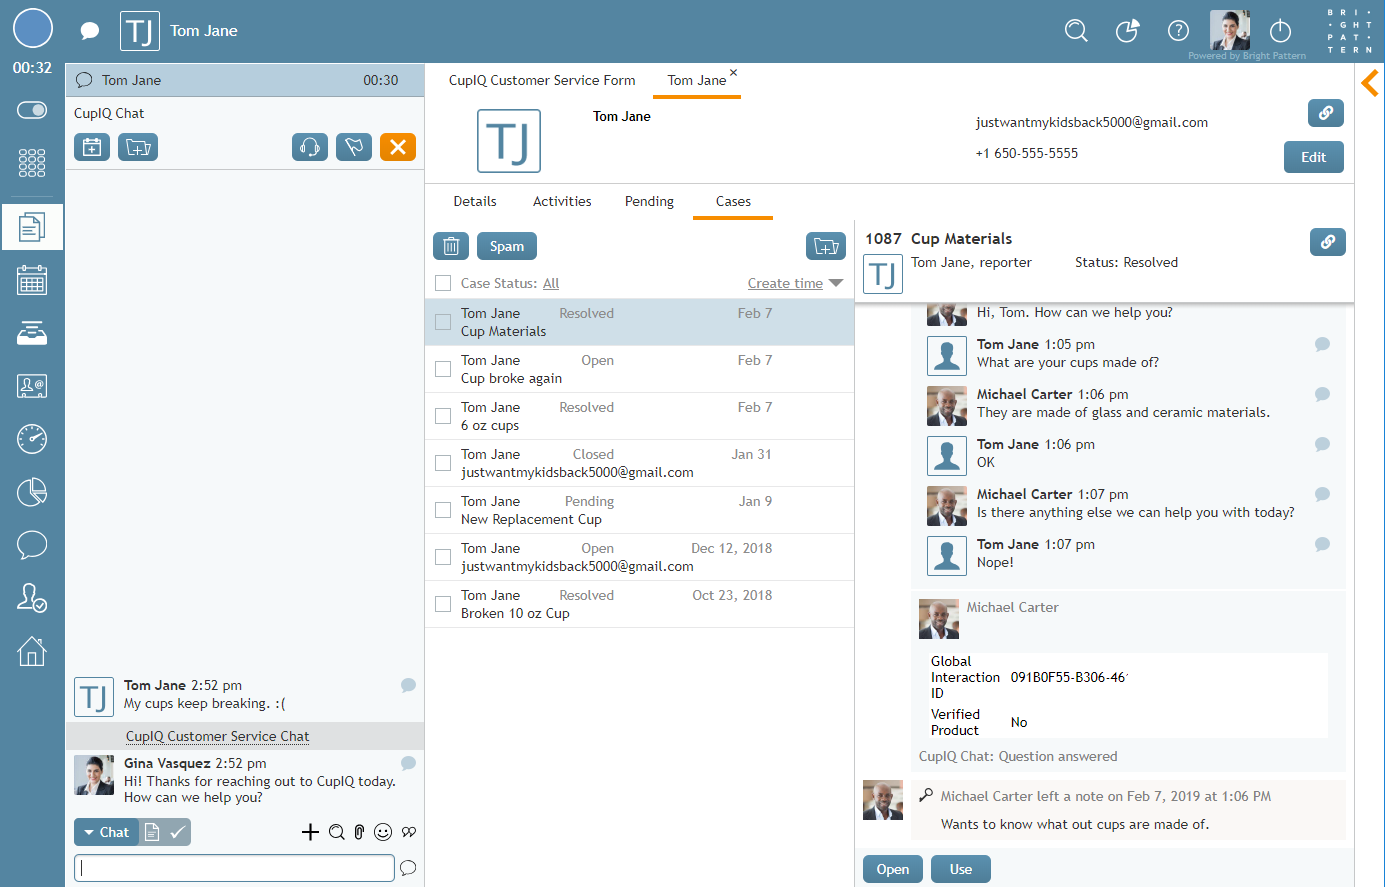
This scenario example shows how, with only a few blocks, it is possible to pop an existing contact's case information to an agent.
Scenario Example
Click the following link to download an annotated version of this chat scenario example.
File:App Screen Pop Customer Cases.zip
For instructions on how to import this file into your contact center, see the Contact Center Administrator Guide, section Scenarios Overview > How to Export and Import Scenarios.
For general information about scenarios, refer to section Scenario Builder Overview.
Scenario Flow
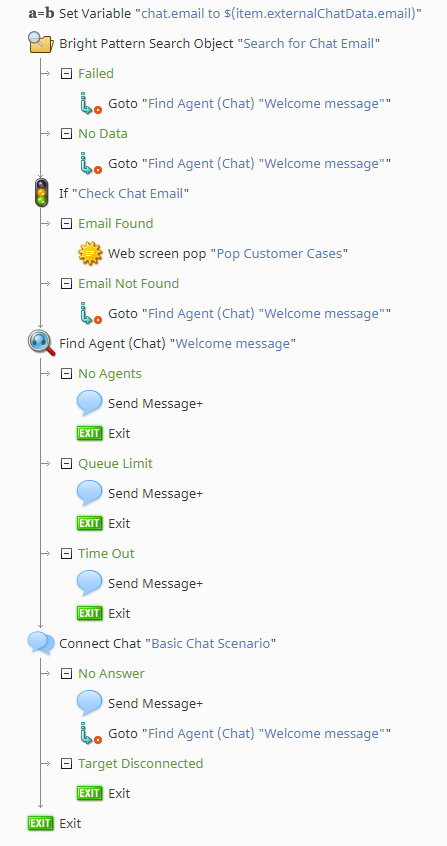
The following chat scenario shows how a saved contact's email address is used to pop related case information to an agent; this is accomplished by using the Bright Pattern Search Object block, the If block, and the Web Screen Pop block.
Designer's note: Most of the configuration steps in this example can be applied in a voice scenario, albeit with the appropriate voice-related blocks and variables; in both chat and voice scenarios, the URLs required in the Web Screen Pop block are the same.
Finally, note that this is an example scenario only and not intended for production use. All conditional exits should be defined with actions for production use.
Scenario Overview
The diagram shown illustrates what the complete scenario looks like when designed in the Scenario Builder application.
Action 1: (Optional) Use Set Variable to Rename the Email Field
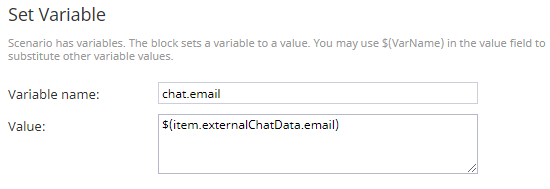
First, we use the Set Variable block to rename the variable $(item.externalChatData.email) as chat.email. Note that renaming $(item.externalChatData.email) is an optional step done to make the variable name easier to type in subsequent blocks.
As a reminder, the variable $(item.externalChatData) pulls information from your configured chat widget; $(item.externalChatData.email) specifically references the email field we have configured in it.
Action 2: Search for a Matching Email
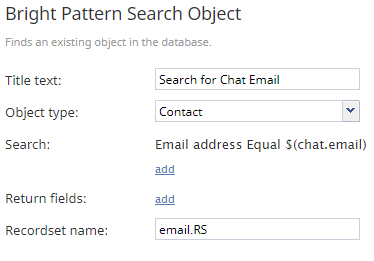
Next, we use the Bright Pattern Search Object block to search our internal database for an existing contact where the email address matches the value of the variable $(chat.email) (i.e., the email address entered in the chat widget). The results of the search are passed to the Recordset name field, which we name email.RS.
Action 3: Pass the Searched Email Address Results to an If Block
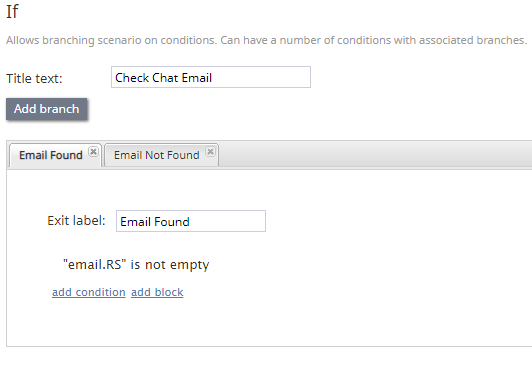
Next, we add an If block and configure it with two branches: Email Found and Email Not Found; the purpose of this is to be able to dictate different actions depending on whether the email address was found or not.
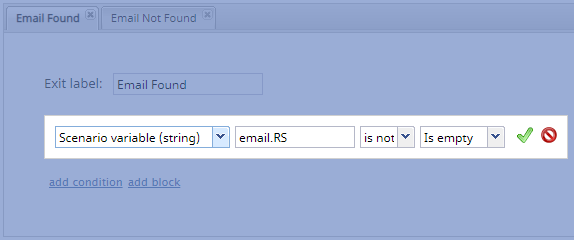
For the Email Found branch, add a condition to check if the string email.RS (i.e., the recordset name from Bright Pattern Search Object contains a value (i.e, "is not empty").
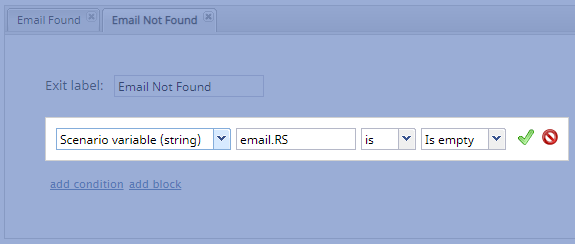
For the "Email Not Found" branch, add a condition to check if the string email.RS does not contain a value (i.e., "is empty").
Action 4: Configure a Web Screen Pop Block on the If Block's "Email Found" Branch
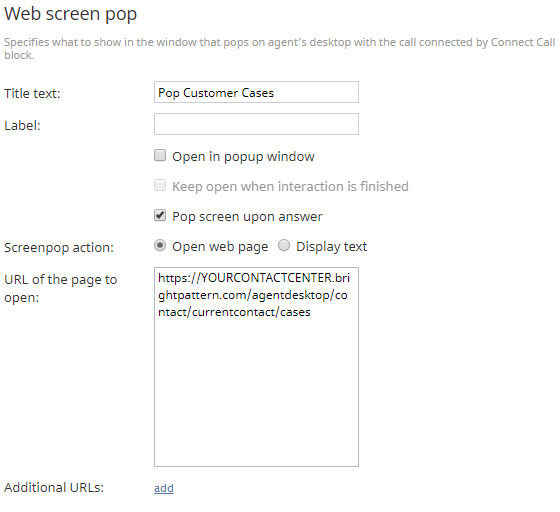
If a value was returned in the recordset name email.RS (i.e., the email address entered in the chat widget matches that of a saved contact), we want the cases associated with this contact to be popped to the agent from a Web Screen Pop block.
In this block, enter the following URL in the URL of the page to open field: https://your_contact_center.brightpattern.com/agentdesktop/contact/currentcontact/cases
From here, if the email address matches one associated with an existing contact, the cases associated with this contact will be popped to the available agent when the chat is connected. If not, no screen pop will occur. For more information on the types of URLs that can be popped, see section Access URLs in this article.
Action 4a: Configure a Goto Block on the If Block's "Email Not Found" Branch
If no value was returned in email.RS (i.e., the email address entered in the chat widget does not match that of a saved contact), we want the customer to connect directly to an agent. To do this, we use a Goto block to jump ahead in the scenario to the Find Agent block.
Action 5: Finish with Find Agent/Connect Chat
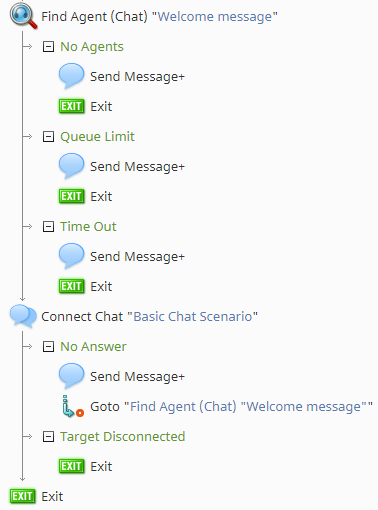
Finally, we are ready to pass the customer to an agent, whether they were identified or not. To do this, configure your scenario with the two most basic chat scenario blocks: Find Agent and Connect Chat. For more information about these blocks, see How to Create a Basic Scenario. As a reminder, define all conditional exits.
Access URLs
The following is a selection of URLs that can be used in the Web Screen Pop block to pop specific case and contact information.
Case
The following URL can be used to pop case information.
Case Number
<your_contact_center>/agentdesktop/case/number/<case number>
URL Explained
- <your_contact_center> is your contact center's URL (e.g., https://some_name.brightpattern.com)
- <case number> is the specific case number
Contact
The following URL can be used to pop contact information.
Contact Tabs
<your_contact_center>/agentdesktop/contact/currentcontact/<details|activities|pending|cases>
URL Explained
- <your_contact_center> is your contact center's URL (e.g., https://some_name.brightpattern.com)
- <details|activities|pending|cases> are the options available to add to the end of the URL (e.g., https://some_name.brightpattern.com/agentdesktop/contact/currentcontact/details); these are the tabs found in every contact record.
< Previous | Next >

