Okta SAML 2.0 SSO Integration Configuration
Bright Pattern Contact Center integrates with Security Assertion Markup Language (SAML) 2.0 identity providers like Okta, allowing you to configure single sign-on (SSO) functionality for Bright Pattern’s Agent Desktop and Contact Center Administrator applications.
The Okta SAML 2.0 SSO integration supports the following features: SP-initiated SSO and IdP-initiated SSO.
This tutorial provides instructions for how to configure Okta applications to work in an integrated manner with Bright Pattern Contact Center.
You will learn how to:
- Add the Bright Pattern application to your Okta account on the Okta Administrator Dashboard
- Assign users of your organization to the application
- Enable and configure the SAML 2.0 method of SSO for the application
- Use your Okta application credentials to create and configure an SSO integration account in Bright Pattern, as well as enable Just-in-time (JIT) user provisioning
After configuration is complete, users of your contact center will be able to log in to Bright Pattern Contact Center applications without providing Bright Pattern credentials.
Prerequisites
- Have an active Okta account through your organization
- Have access to Bright Pattern Contact Center Administrator and Agent Desktop
Procedure
Step 1: Add the Bright Pattern application to your organization's Okta account
- On the Okta Administrator Dashboard, go to Applications and click Add Application.
- In the Search bar, type Bright Pattern and select the Bright Pattern app from the list of available apps.
- Then click Add. This adds the application to your Okta account.
Step 2: Set your contact center’s domain for the app
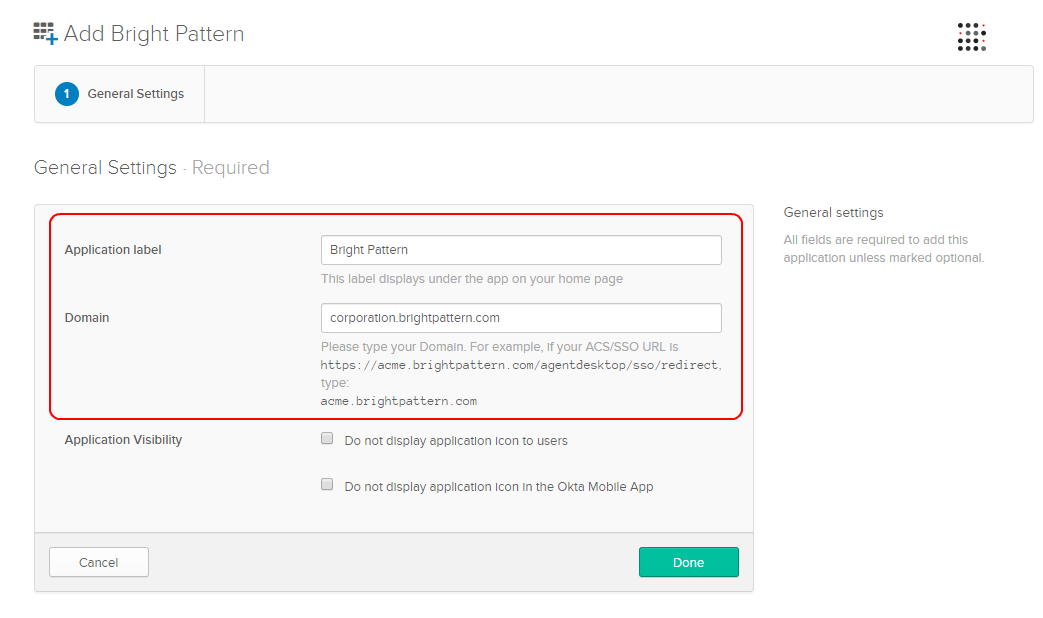
On the application’s General Settings page that opens, set the following options, and then click Done:
- Application label- String (any)
- Domain - Your Bright Pattern Contact Center domain name (e.g., “corporation.brightpattern.com”)
- Application Visibility - Optional
Step 3: Assign users to the app so they can use it
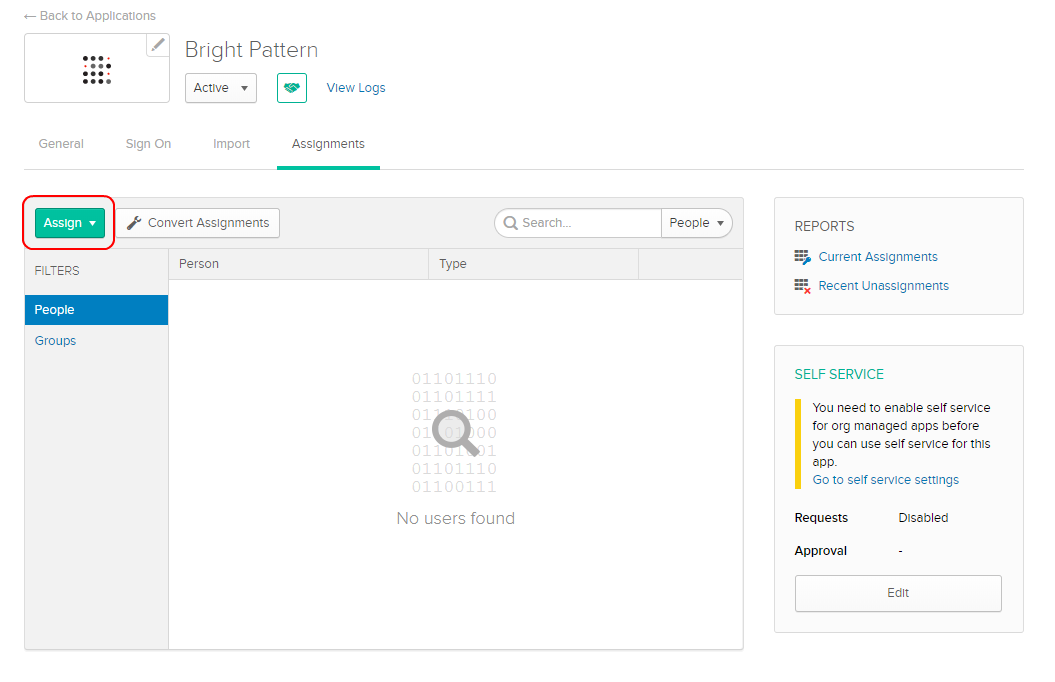
- Go to the application’s Assignments tab.
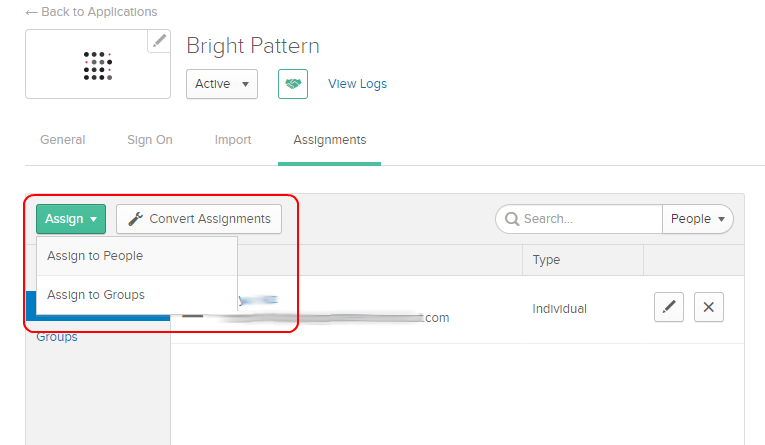
- Click Assign to assign the Bright Pattern application to People and/or Groups. Note: To do this part of setup, you must first have some users added to your Okta account.
- Select Assign to People or Assign to Groups.
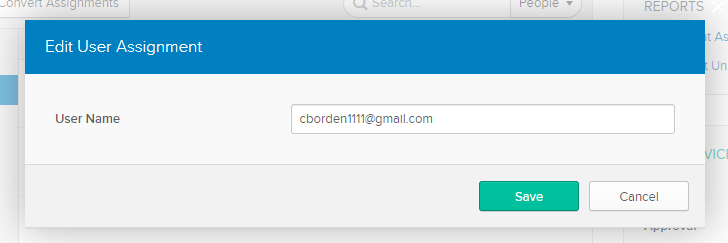
- If you Assign to People, then you also need to click the pencil icon to edit their User Name. By default, the User Name is the person’s email address.
- In Edit User Assignment, change it to match the person’s username as set in Bright Pattern Contact Center.
- In Edit User Assignment, change it to match the person’s username as set in Bright Pattern Contact Center.
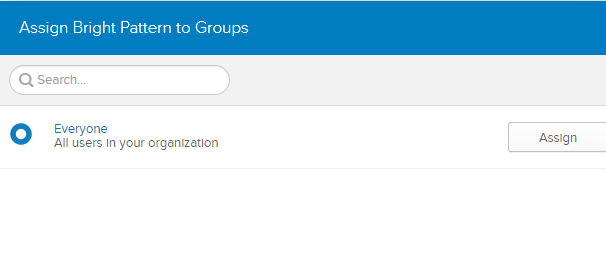
- If you Assign to Groups, you can easily assign the app to Everyone in your organization.
Step 4: Configure SSO
- Go to the app’s Sign On tab.
- In the Settings box, in the SAML 2.0 section, click View Setup Instructions.
- This will open a new browser page offering instructions on how to configure SAML 2.0 for your app. This page makes configuration easy because it automatically populates the fields that you need to fill in your SSO integration account properties (in the next step of this procedure), allowing you to copy and paste Identity Provider Single Sign-On URL, Identity Provider Issuer, and Identity Provider Certificate.
- Now, in a new browser tab, sign in to your Contact Center Administrator application.
- Go to Configuration > Call Center Configuration > Integration Accounts, and click the Add account (“+”) button.
- Select Single Sign-On as the account type. You will then see the integration account properties.
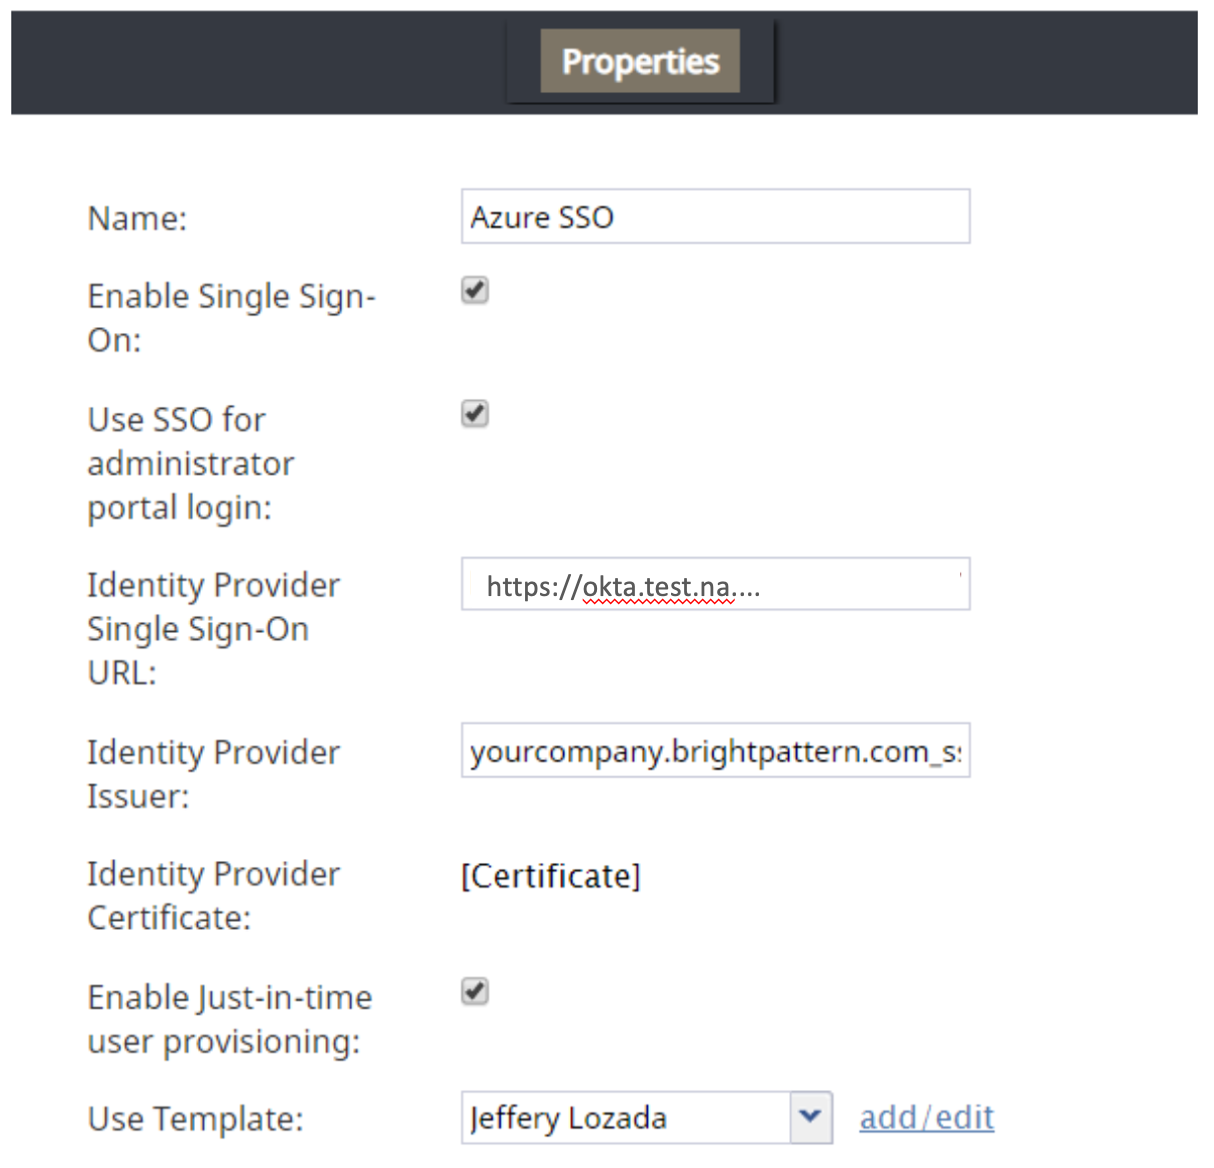
- In Properties, set the following for both Agent Desktop SSO and Admin SSO sections:
- Name - Any name for the integration account
- Enable Single Sign On - Select checkbox
- Identity Provider Single Sign-On URL - This is generated for you when you click View Setup Instructions in Okta > Settings > Sign On Methods.
The URL will take the following pattern:
https://<your-organization-name>.okta.com/app/<your-app-name>/<your-app-entity-id>/sso/saml
For example:
https://corporation.okta.com/app/brightpatternapp/exk27skzeeqnKvIy04x6/sso/saml - Identity Provider Issuer - The ID of Okta, the identity provider. This is also generated for you when you click View Setup Instructions in Okta > Settings > Sign On Methods.
The Identity Provider Issuer will take the following pattern:
http://www.okta.com/<your-app-entity-id>
For example:
http://www.okta.com/exk27skzeeqnKvIy04x6 - Identity Provider Certificate - The certificate contents.
This is also generated for you when you click View Setup Instructions in Okta > Settings > Sign On Methods. Copy the full certificate and paste it into the Certificate box. - Enable Just-in-time user provisioning - Select the checkbox to enable just-in-time (JIT) user provisioning. JIT user provisioning automatically creates call center users on the first SSO login attempt authorized by the identity provider. If you enable JIT, you must also use a template (see next property).
- Use Template - Select this checkbox to copy assignments (e.g., username format, email, roles, teams, skills, etc.) from a specific user with the specific role, and apply them to new call center users created by JIT user provisioning.
For Agent Desktop SSO, be sure to select a user who is an agent or supervisor.
For Admin SSO, be sure to select a user who is an administrator.
- Name - Any name for the integration account
- Click Apply to save your changes.
Step 5: Try logging in to Agent Desktop
Open the Agent Desktop application. You should be able to log in to Agent Desktop without providing Bright Pattern credentials.
Okta SSO integration configuration is now complete.

