How to Configure Activity Forms
Activity forms are forms that agents interact with directly in Agent Desktop and can be used for a wide variety of purposes; however, the main purpose of activity forms is to collect information during interactions. Note that activity forms are used to collect and pass information to Activity History forms.
This article will show you the steps necessary for configuring activity forms in the Contact Center Administrator application and Form Builder application.
Prerequisites
Activity form fields can be mapped to custom fields for contact, company, and Activity History. In order to do this, you must configure these custom fields first. For more information, see the Contact Center Administrator Guide, section Custom Fields.
Procedure
Step 1: Configure an Activity Form in the Contact Center Administrator Application
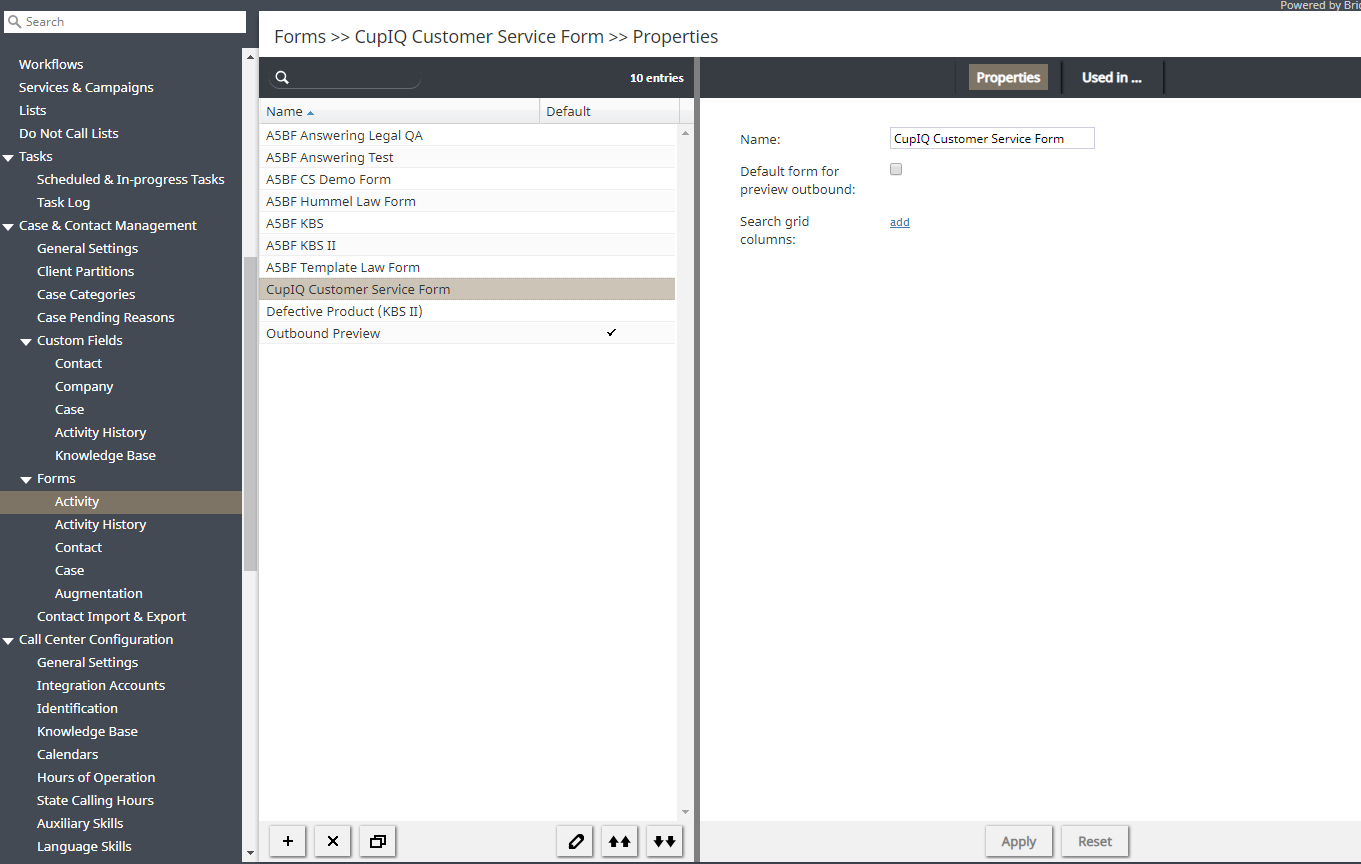
Beginning in the Contact Center Administrator application, section Forms > Activity. Click the Add new form button, which launches the Form Builder application.
Step 2: Create Your Form in the Form Builder Application
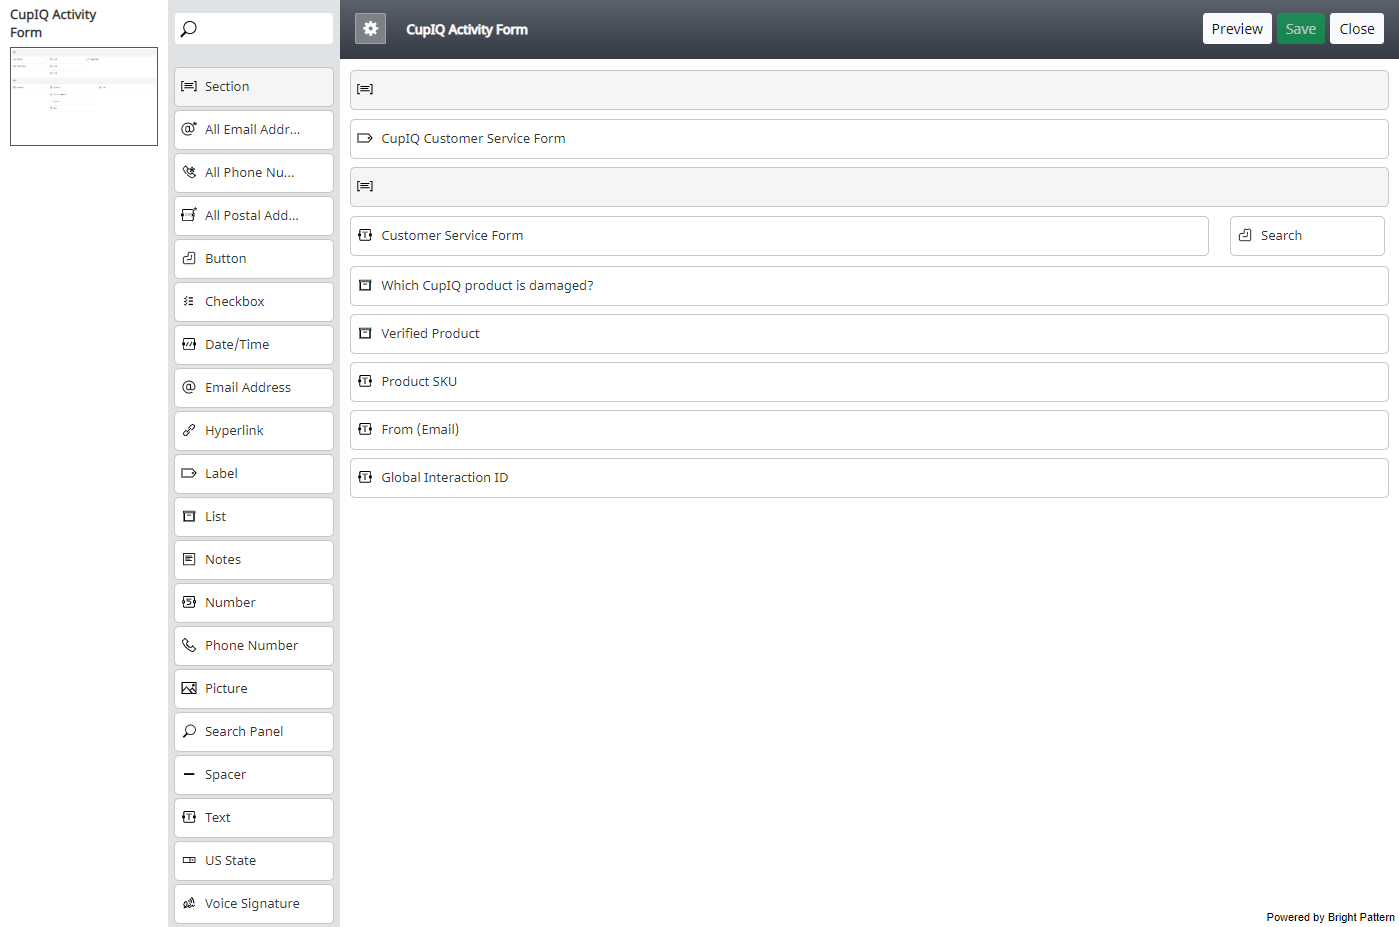
In the Form Builder application, begin adding the types of fields you want your agents to see and interact with. Note that the fields can be interactive or static (i.e., you can configure a field be editable or not).
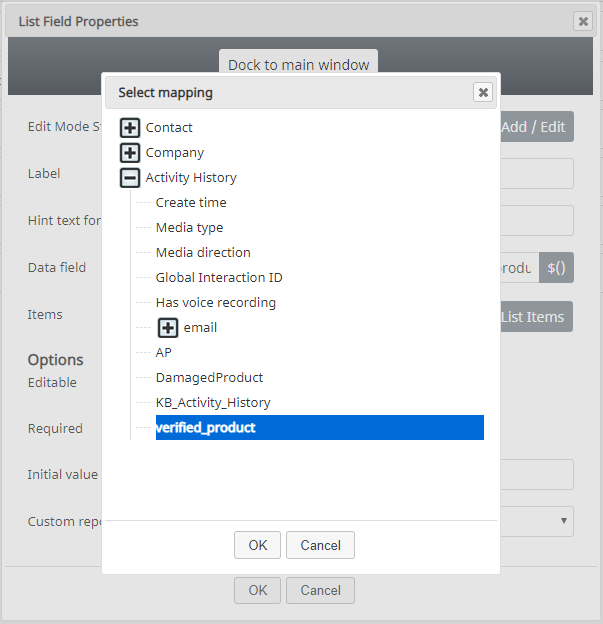
When configuring your form, you may choose to map custom field values to your form fields. Mapping custom field values to form fields allows data entered in the form fields to be passed to other forms and reports.
To map custom field values, when editing the a field's properties, select the data field button. This will pop a window with the data fields you can map to a given form field.
When you are all finished, click the Save button and you will be prompted to name your form.
Step 2a: Add Pages to Your Form
Activity forms can be as detailed or concise as you need them to be. If the former is true, you can add pages to your form using the new page button, located in the pages palette. Adding pages will change the default page name if you have named it. That is, pages name will read "Page 2", "Page 3," and so forth, instead of "New Page".
Additionally, you may clone pages using the clone page button. Clicking this button creates a new page titled "Clone of <page name>" and all controls are copied from the cloning page.
Step 3: Connect Your Form to a Service
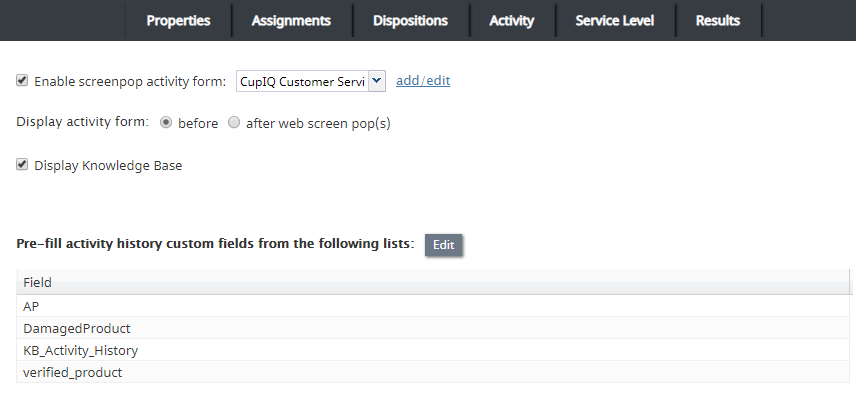
When you are finished building your form, you will need to connect it to a configured service. To do this, return to the Contact Center Administrator application, section Services & Campaigns > Activity tab. From the setting Enable screenpop activity form, you will select the name of the activity form you created.
From the Activity tab, you may configure additional settings, such as whether you want Knowledge Base articles to be displayed when the form is popped, whether you want the activity form to be displayed before or after webpop, and so forth.
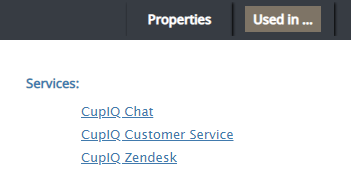
When you are finished connecting the activity form to the service, you can return to section Forms > Activity > Used in ... and see the name of the service(s) associated with the form.
Your Form in Action
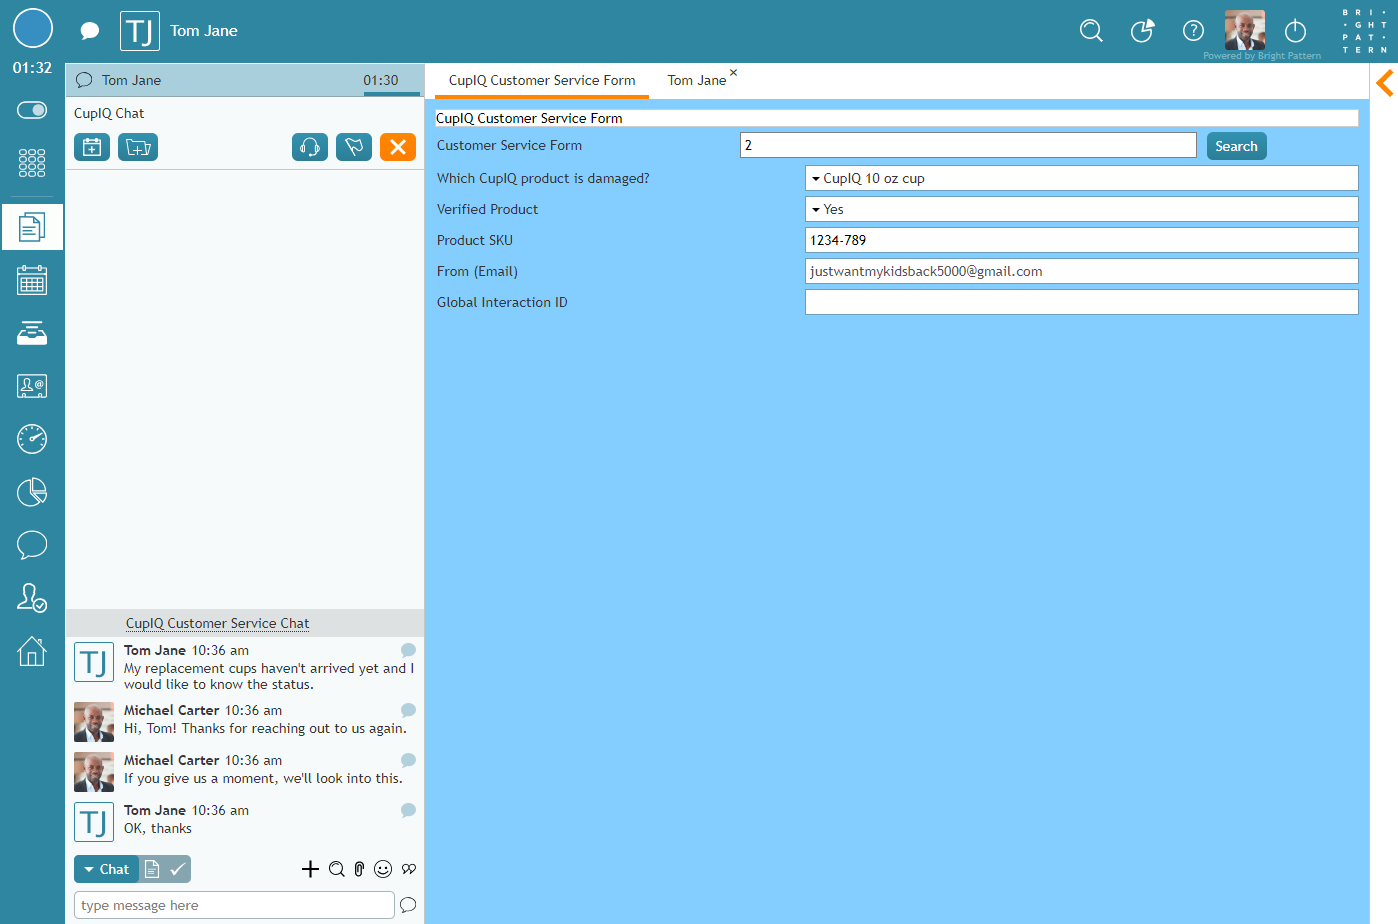
After you are finished connecting your activity form to your service, you will want to ensure it is working in Agent Desktop. In the following image, you can see how a popped activity form looks to agents.

