Redirect Calls Economically with a Single-Step External Transfer Option
The following tutorial describes how to configure a menu with an option that can transfer callers to an external number in a single step (i.e., without being processed by the Connect Call block). This is accomplished by using the External Transfer Call scenario block. Note that this block is available only if your service provider allows the feature for your contact center.
Notes about the External Transfer Call scenario block:
- The block works only if your VoIP telephony carrier allows the feature for your contact center.
- The block is shown in Scenario Builder application only if the Allow using network transfers (SIP REFER) on trunk-to-trunk calls to avoid trombones feature is enabled in the Service Provider application.
- The block should be used instead of the Connect Call block if you want to transfer an existing customer call to an external destination.
- This block only works if you have an existing call to or from a customer; it cannot work if there is no call leg on a trunk already.
- Note that the scenario terminates immediately after transferring through the block and there is no call recording beyond the transfer.
Scenario Example
Click the following link to download an annotated version of this voice scenario example.
Media:App_Menu_with_a_Single-Step_External_Transfer_Option.zip
For instructions on how to import this file into your contact center, see the Contact Center Administrator Guide, section Scenarios Overview > How to Export and Import Scenarios.
For general information about scenarios, refer to section Scenario Builder Overview.
As a reminder, this scenario is an example for testing purposes only and is NOT intended for production use.
Procedure
1. Configure a Menu block
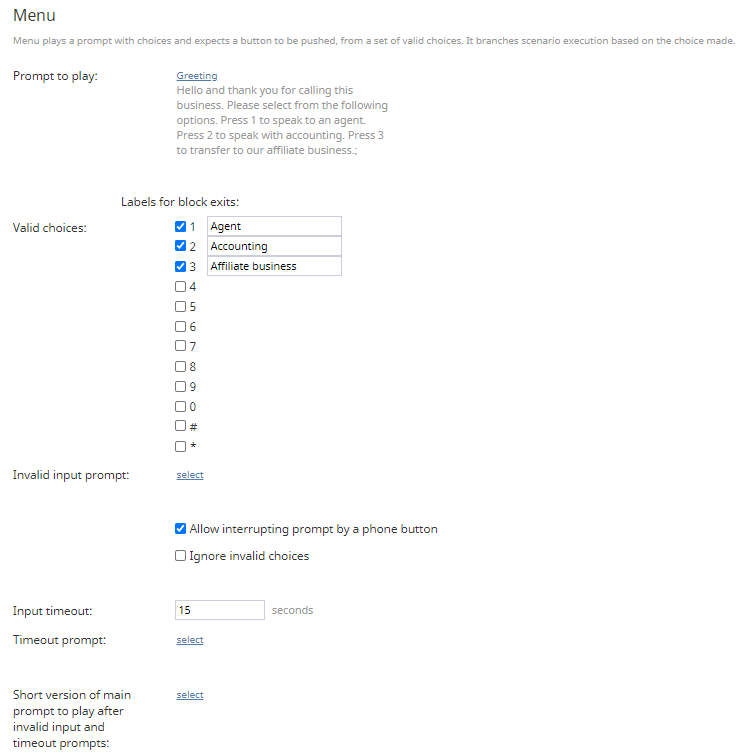
The first step will be to configure a Menu block. In our example, the Menu block has three transfer options:
- Agent
- Accounting
- An affiliate business
The “affiliate business” option will transfer the customer directly to an external number.
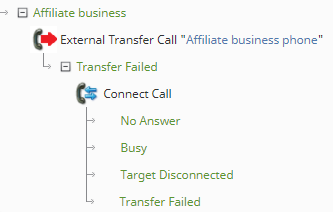
Next, we will add the External Transfer Call block to the desired menu option, which in this example is the affiliate business option. This block routes calls directly to external options without being processed by the Connect Call block. Bypassing the Connect Call block may help your contact center save money.
2a. Add the Connect Call block to the External Transfer Call block’s conditional exit
If the External Transfer Call block takes the Transfer Failed conditional exit, the call can still be bridged to the external number if the Connect Call block is added to the conditional exit branch; the call can be transferred by configuring the Override Destination option. Note that using the Connect Call block may cost your contact center more money; however this option might work better in some instances.
3. Define the actions for the other Menu block options
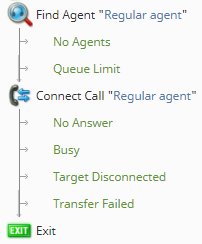
For the remaining menu options, we add the Find Agent and Connect Call block to each option. Each Find Agent block is configured to search for agents with skills that match the branch options (i.e., a general accounting option and a customer service option).


