ServiceNow Integration Configuration for Saving Activity History
Bright Pattern changed the ServiceNow integration configuration in Bright Pattern Contact Center version 5.5.5 to enable a new way for activity history to be saved for all interactions handled via the integrated Agent Desktop widget in your ServiceNow environment. The instructions provided in this article are meant to be used by contact center administrators who previously configured ServiceNow integration for Bright Pattern Contact Center version 5.5.4 and earlier, who have upgraded to version 5.5.5 or later, and who need to modify their ServiceNow configuration.
The widget is an OpenFrame object in the ServiceNow admin UI portal. In this article, you will learn how to configure system properties, widget properties, and page properties, as well as modify your existing OpenFrame configuration properties in ServiceNow.
Prerequisites
This procedure requires the following:
- Use Bright Pattern Contact Center version 5.5.5 or later.
- Have a ServiceNow developer account with an active ServiceNow instance (Paris or later).
- Have administrator privileges for Bright Pattern Contact Center.
- Have previously configured ServiceNow integration configuration for your contact center.
- Download the archive file for this setup at Media:Bp_servicenow_integration_2.0.4.zip.
Procedure
Note that in this procedure, we are configuring the integration in ServiceNow Paris.
Step 1: Configure System Properties
- Log in to your ServiceNow developer account and go to the ServiceNow admin portal of your instance.
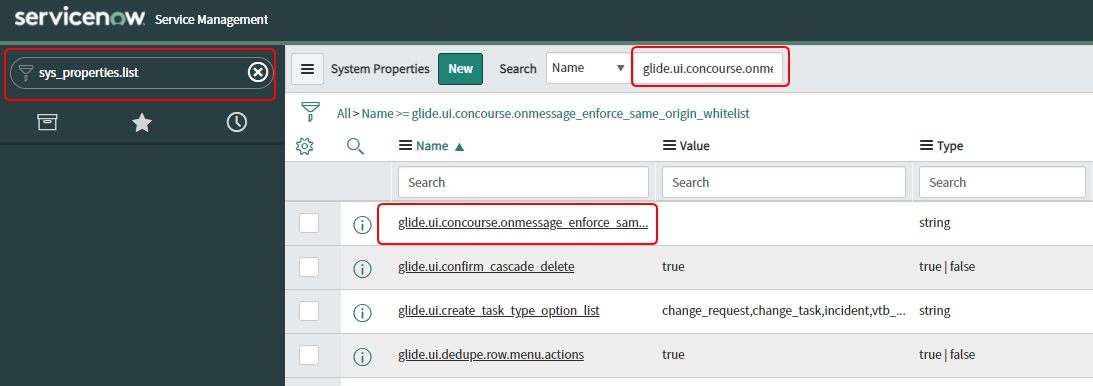
- Go to System Properties by searching for “sys_properties.list” in the ServiceNow admin UI’s Search field.
- Then narrow your search by setting the filter to “Name” and searching the system properties for “glide.ui.concourse.onmessage_enforce_same_origin_whitelist.”
- If the property does not already exist, click New to create it.
- If it already exists and you see it in the list, click into the property to modify it.
- If the property does not already exist, click New to create it.
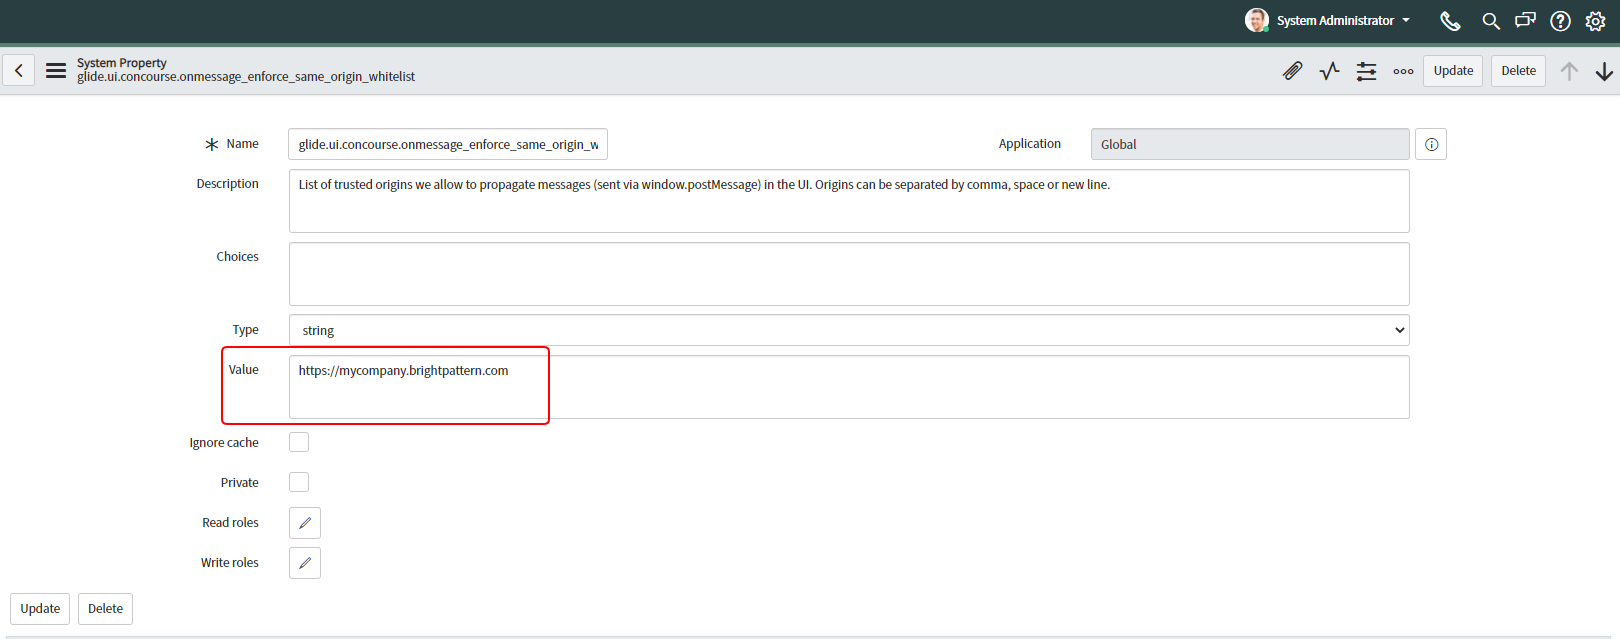
- In the properties for “glide.ui.concourse.onmessage_enforce_same_origin_whitelist” edit the Value field with your contact center URL in the following format: “https://<tenant_url>.brightpattern.com” (e.g., “https://mycompany.brightpattern.com”). Make sure that the URL begins with “https://” and there is no “/” at the end of it.
- Click Update.
Step 2: Configure Widget properties
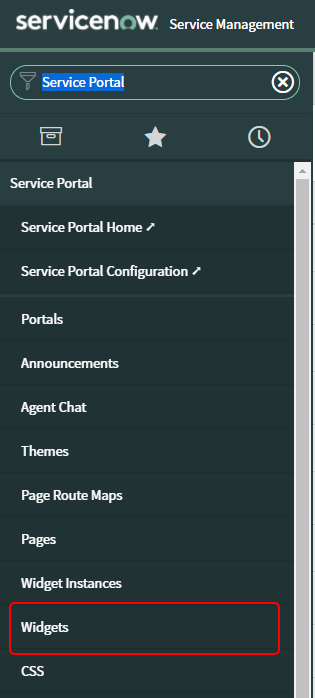
- Go to Service Portal > Widgets by searching for “Service Portal” in the ServiceNow admin UI’s Search field and clicking Widgets.
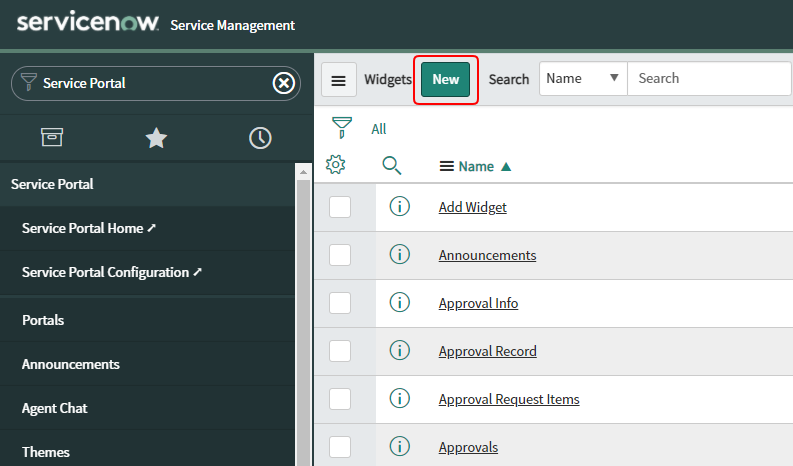
- Click New to create a new widget.
- In the next step, you will be editing the new widget record with some predefined content from Bright Pattern’s prerequisites archive folder. If you have not already done so, download the prerequisites archive now by clicking Media:Bp_servicenow_integration_2.0.4.zip. Be prepared to open its files and copy/paste them into some of the widget record’s properties.
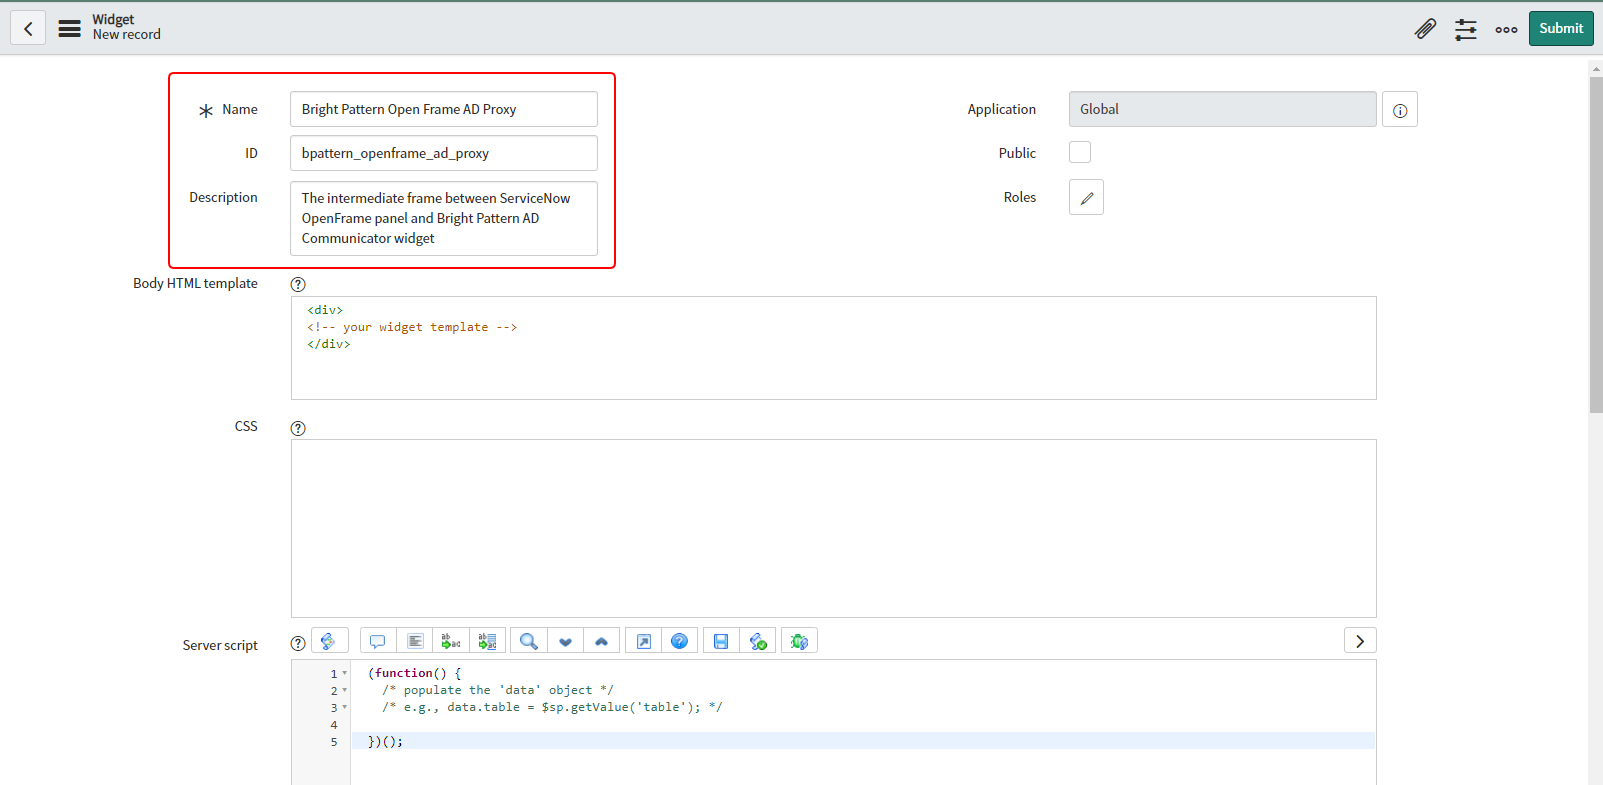
- In the new widget record that opens, set the following properties:
- Name - Bright Pattern Open Frame AD Proxy
- ID - bpattern_openframe_ad_proxy
- Description - The intermediate frame between ServiceNow OpenFrame panel and Bright Pattern AD Communicator widget
- Body HTML template - Open the widget folder from the prerequisites archive, and open the body.html file for editing. Copy the contents of the body.html file and paste it into this field of the new widget record.
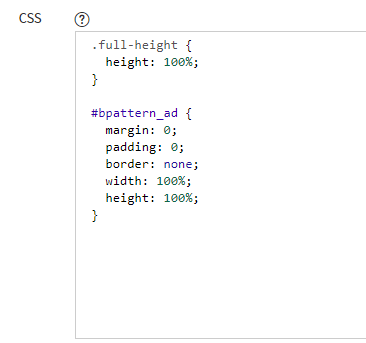
- CSS - Open the widget folder from the prerequisites archive, and open the css.css file for editing. Copy the contents of css.css and paste it into this field of the new widget record.
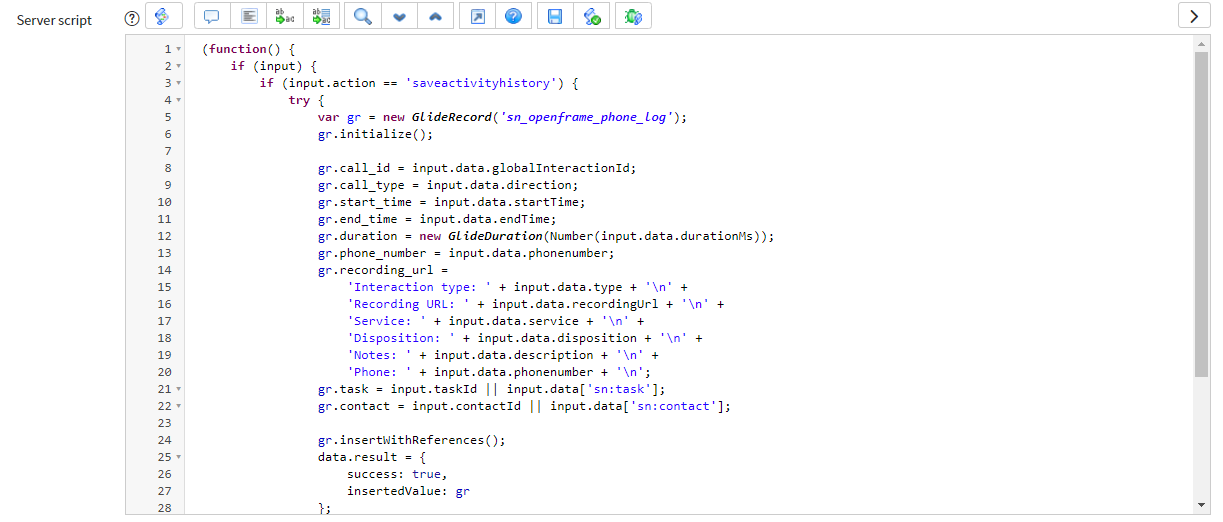
- Server script - Open the widget folder from the prerequisites archive, and open the server.js file for editing. Copy the contents of the server.js file and paste it into this field of the new widget record.
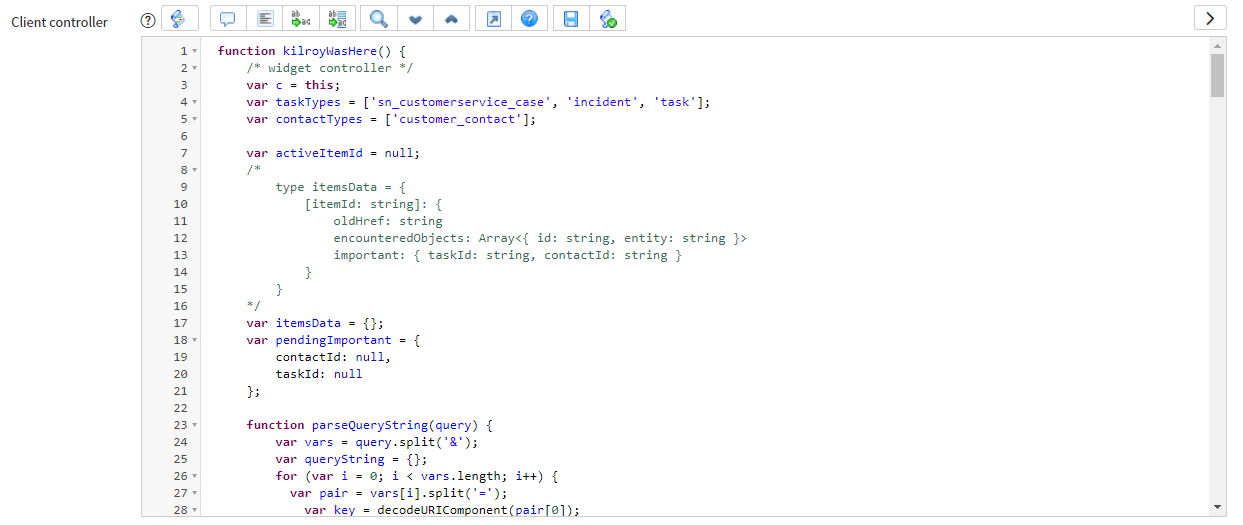
- Client controller - Open the widget folder from the prerequisites archive, and open the client.js file for editing. Copy the contents of the client.js file and paste it into this field of the new widget record.
- Name - Bright Pattern Open Frame AD Proxy
- Click Submit to save your changes to the widget. Widget configuration is now complete.
Step 3: Configure Page properties
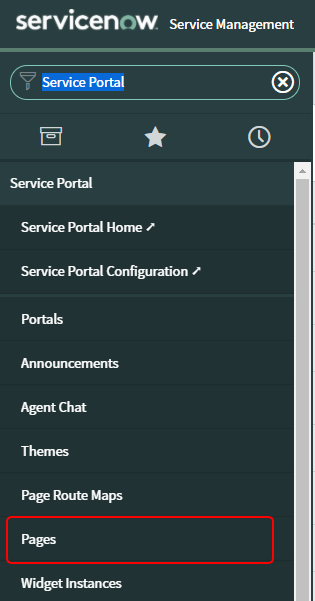
- Go to Service Portal > Pages by searching for “Service Portal” in the ServiceNow admin UI’s Search field and clicking Pages.
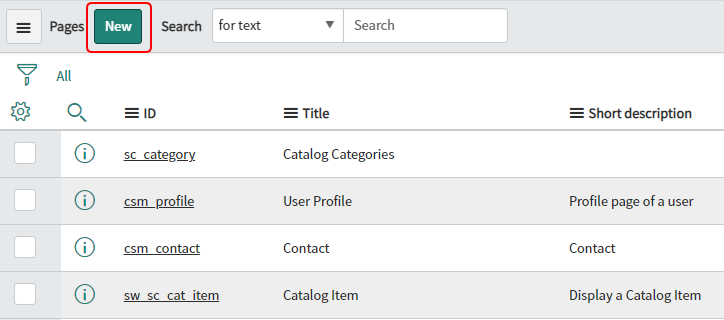
- Click New to create a new page.
- On the new page record that opens, you will be editing the new page record with some predefined content from Bright Pattern’s prerequisites archive folder. Be prepared to open its files and copy/paste them into some of the page record’s properties.
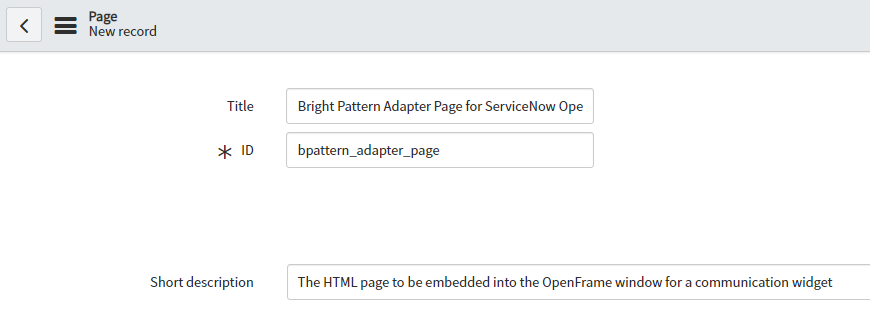
- Set the following properties:
- Title - Bright Pattern Adapter Page for ServiceNow OpenFrame
- ID - bpattern_adapter_page
- Short description - The HTML page to be embedded into the OpenFrame window for a communication widget
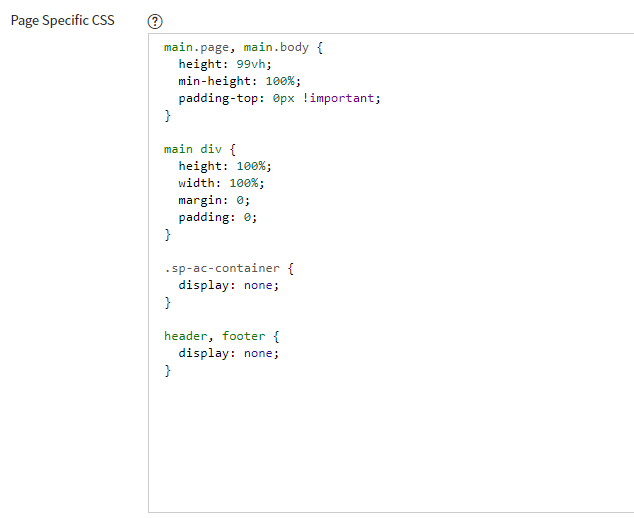
- Page Specific CSS - Open the page folder from the prerequisites archive, and open the css.css file for editing. Copy the contents of css.css and paste it into this field of the new page record.
- Title - Bright Pattern Adapter Page for ServiceNow OpenFrame
- Click Submit to save your changes. The screen will refresh and display the list of available pages.
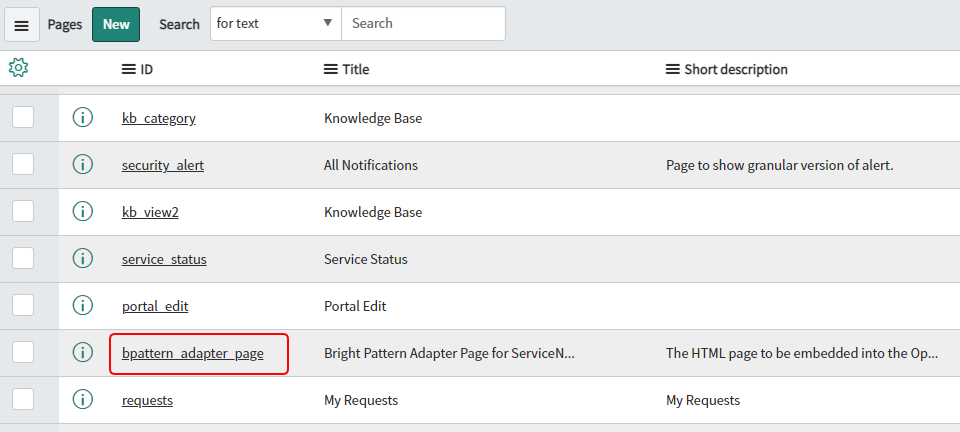
- Click on the page you just created (i.e., "bpattern_adapter_page").
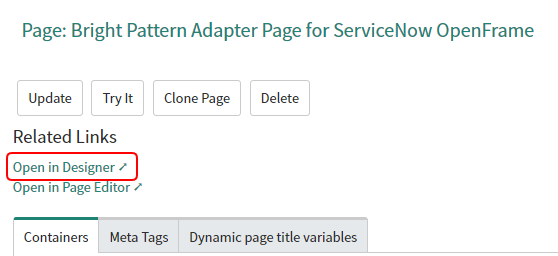
- Scroll down to the bottom of the page configuration details and click Open in Designer.
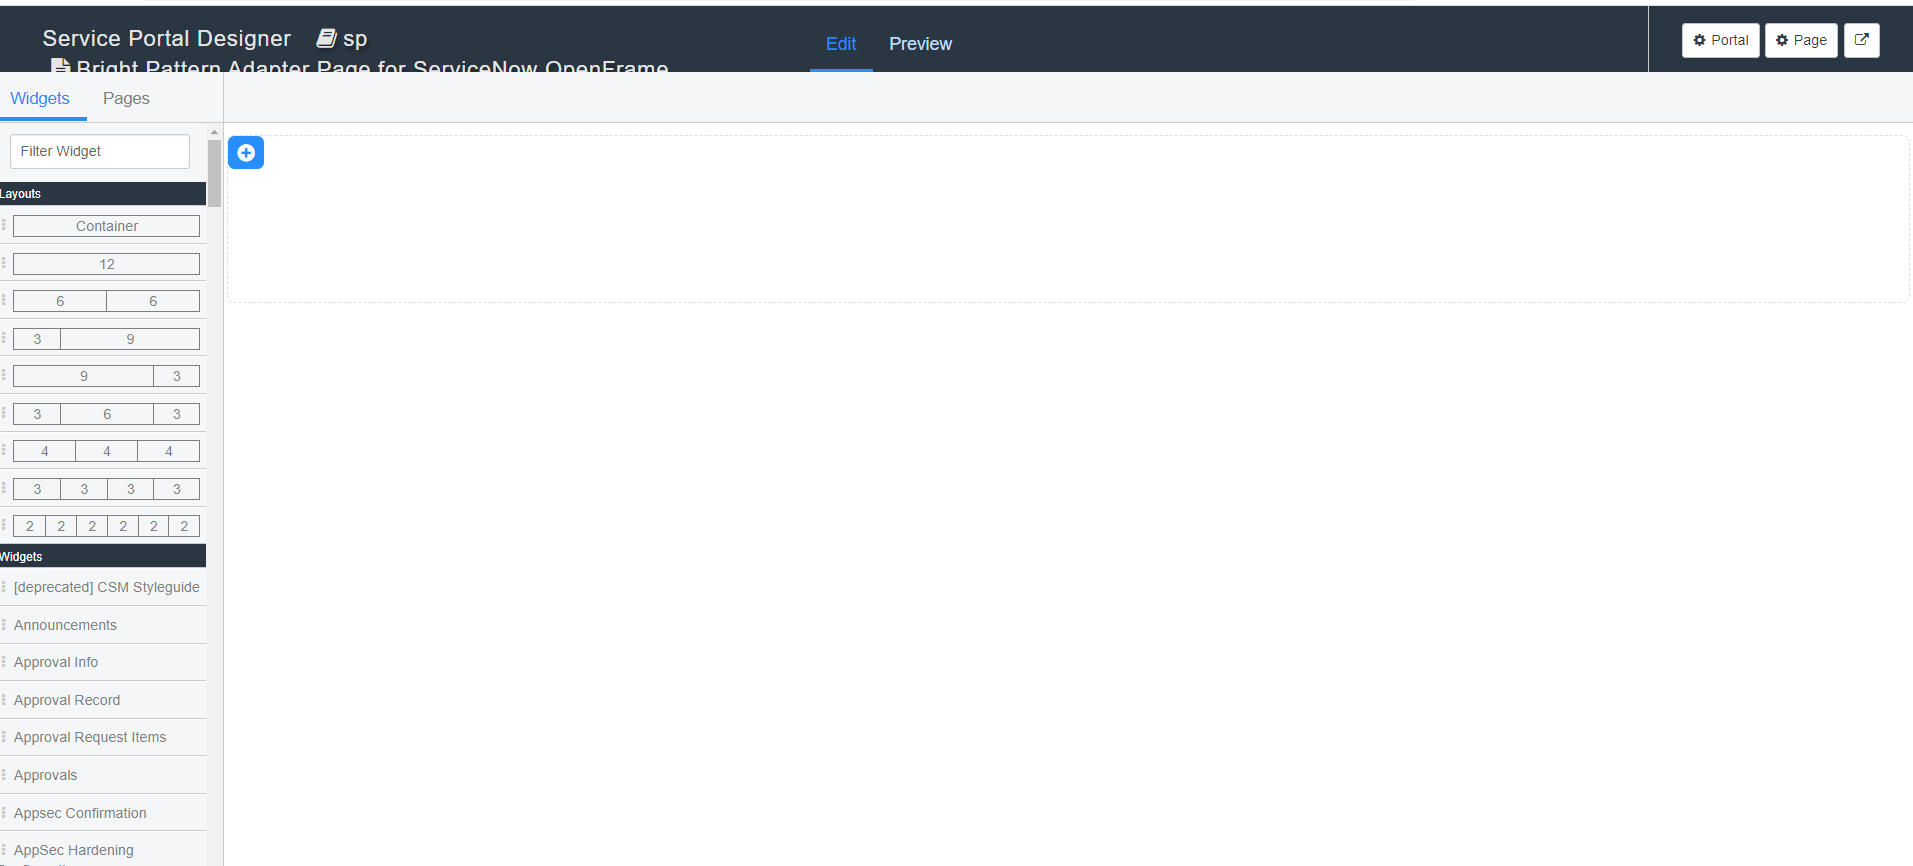
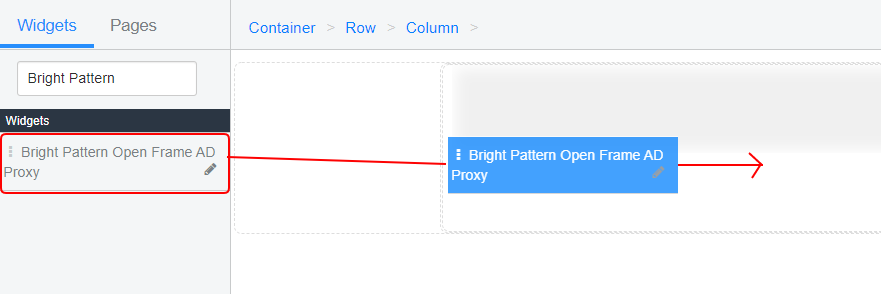
- A new browser tab or window will open with the Designer widget/page editor such as the one shown.
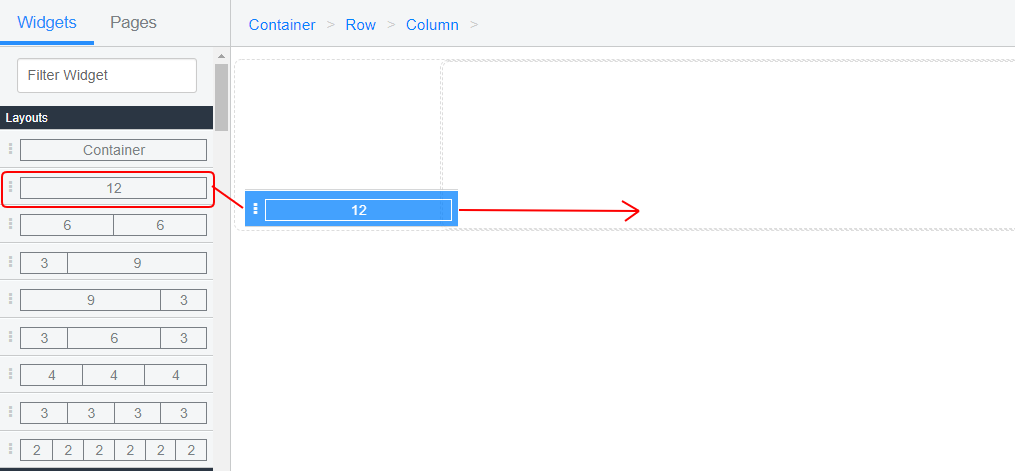
- With the 'Widgets tab in focus, drag a 12-unit-wide cell from the Layout section on the left and drop it onto the page.
- Use the Widgets tab search filter to type “Bright Pattern” and find your Bright Pattern Open Frame AD Proxy widget (which was created in the previous step of this procedure) in the Widgets list below the Layouts panel. Then drag and drop it onto the center of the page as you did with the 12-unit cell.
- Your changes will be saved automatically, and you can close the Designer editor tab/window now.
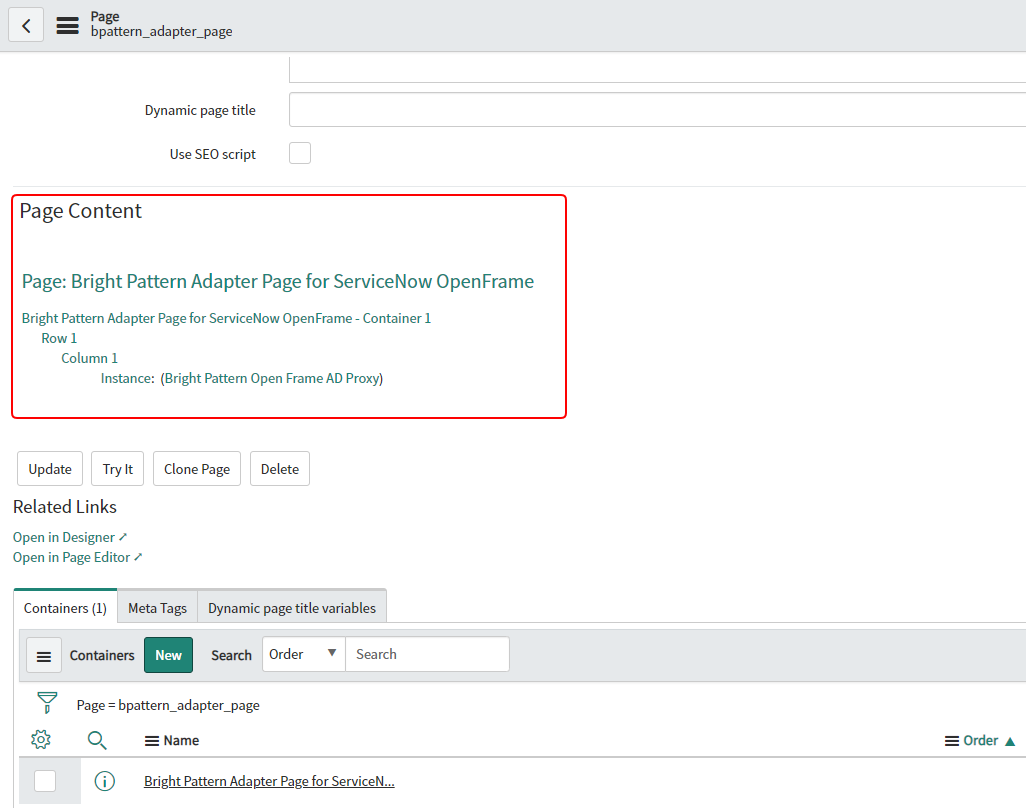
- To check that the configuration is correct, go back to the page record for bpattern_adapter_page, and scroll down to the Page Content section. You should see the following:
Step 4: Edit OpenFrame configuration URL
In this step you will be creating a new OpenFrame configuration with your new page.
- Go to OpenFrame > Configurations by searching for “OpenFrame” and clicking Configurations.
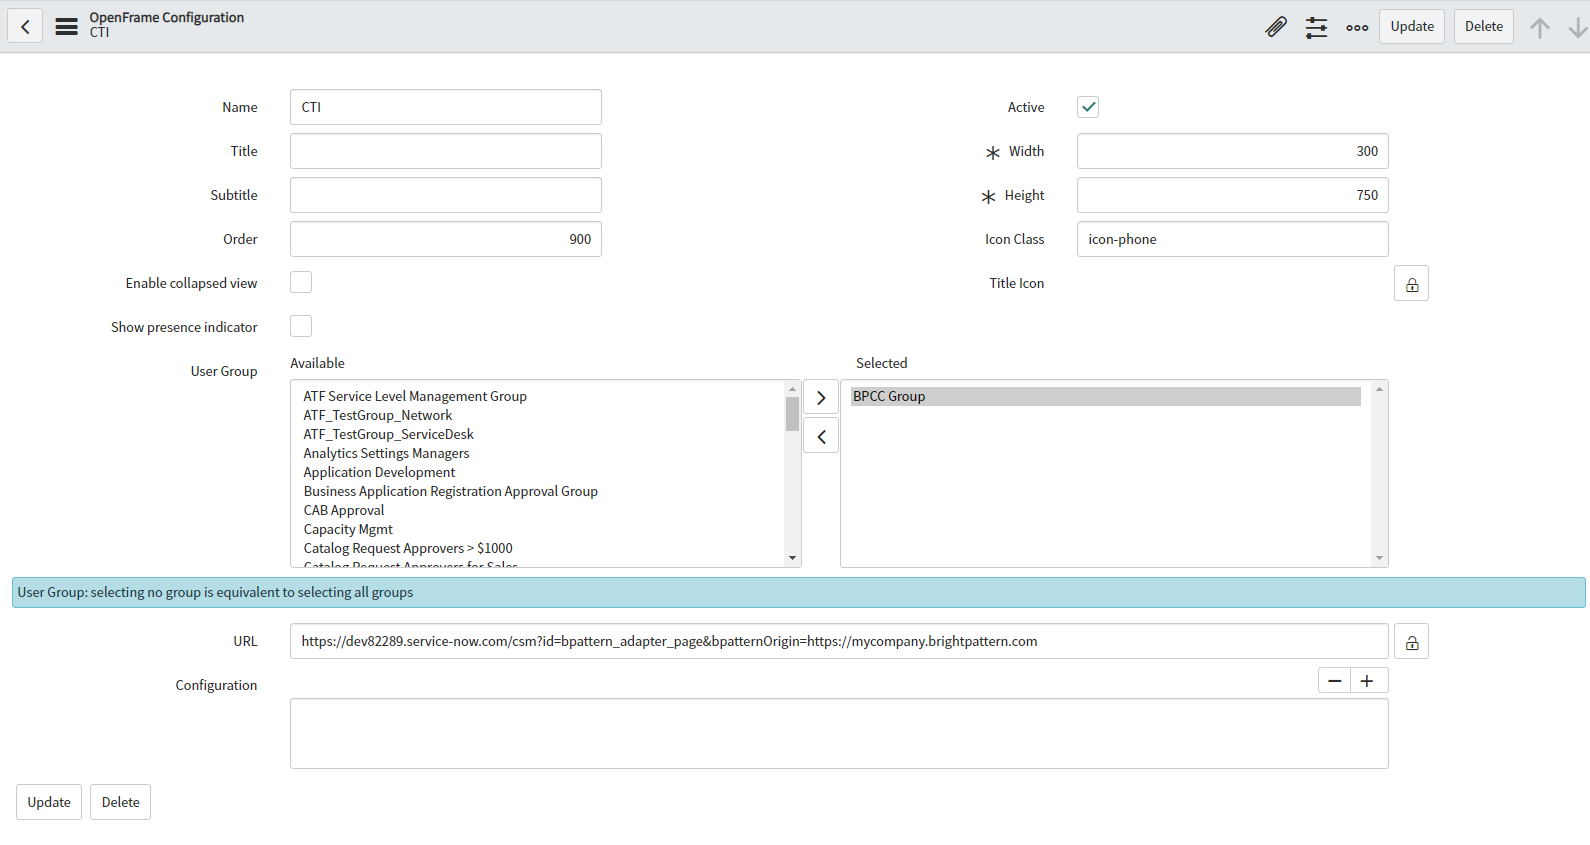
- In the OpenFrame Configurations list, find the CTI OpenFrame configuration that was edited in our default ServiceNow Integration Configuration procedure, and click on it to open its properties.
If there is no existing OpenFrame configuration, click New to create one. - To the right of the URL field, click the lock button to edit the URL.
- Replace the URL with a new URL for the configuration in the following format:
https://{your_subdomain}.service-now.com/csm?id={page_id}&bpatternOrigin={tenant_origin}
In the URL, replace the following with the actual values:
- {your_subdomain} - Your ServiceNow subdomain (e.g., “dev97125”)
- {page_id} - The page ID (e.g., “bpattern_adapter_page”) that was created in Step 3 of this procedure
- {tenant_origin} - The origin of your tenant URL (e.g., “https://mycompany.brightpattern.com”), which is used to open Agent Desktop in iframe
For example:
https://dev97125.service-now.com/csm?id=bpattern_adapter_page&bpatternOrigin=https://mycompany.brightpattern.com
- {your_subdomain} - Your ServiceNow subdomain (e.g., “dev97125”)
- Click the lock button again to lock the URL.
- Make sure that the OpenFrame configuration is still active (see the checkbox for Active at the top of the configuration properties).
- Click Update to save your changes.
Configuration is now complete. Now you will be able to use the new version of ServiceNow integration in your OpenFrame widget (i.e., the integrated Agent Desktop widget) and activity history will be saved.

