ServiceNow Integration Configuration
ServiceNow integration allows you to use the Bright Pattern Agent Desktop application within your ServiceNow instance, providing direct access to the phone, live chat, SMS, and other configured messaging capabilities. Through integration, the Agent Desktop application is embedded in ServiceNow as an OpenFrame widget, and there is the option to pop out Agent Desktop in a separate browser tab for full use of activities, cases, interaction details, and more.
ServiceNow integration configuration involves linking your ServiceNow instance to Bright Pattern Contact Center in a ServiceNow integration account.
In this article, you will learn how to:
- Activate plugins for phone use on ServiceNow
- Set up OpenFrame
- Configure system properties, widget properties, page properties, and OpenFrame properties to enable activity history to be saved for interactions handled by the widget
- Add CORS rules
- Authorize access to ServiceNow
- Create a ServiceNow integration account
- Adjust the display size of Agent Desktop in ServiceNow
Prerequisites
This procedure requires the following:
- Use Bright Pattern Contact Center version 5.9.0 or later.
- Have a ServiceNow developer account with an active ServiceNow instance (Madrid or later).
- Have administrator privileges for Bright Pattern Contact Center.
Procedure
For this configuration, we used ServiceNow Washington DC and Bright Pattern Contact Center version 5.27.0. If you are using an older build of ServiceNow (i.e., before Tokyo), you will need to upgrade your instance before proceeding.
1. Download Bright Pattern Integration app from ServiceNow Store
1. Navigate to the ServiceNow store at store.servicenow.com.
2. Search for "Bright Pattern Omnichannel Communications"

3. Depending on your organization's use cases, select either the CSM or the ITSM version of Bright Pattern integration app
4. Click Get and follow the steps in the Guided Setup to configure the installed app
5. Proceed to your ServiceNow instance, and navigate to System Applications > All Available Applications > All
6. Search for "Bright Pattern Omnichannel"
7. Click Install
Note: You may receive a warning regarding custom tables. Bright Pattern uses a custom table to provide additional interaction data. For more information regarding compliance, refer to this page from ServiceNow
2. Activate Required Plugins
Bright Pattern Integration requires installation and activation of ServiceNow plugins listed below. This can be done by navigating to System Definition -> Plugins inside your ServiceNow instance.

- Activate CTI Softphone (com.snc.cti) plugin to enables softphone and call center functionality, such as making, receiving, and transferring phone calls
- Activate Openframe (com.sn_openframe) plugin to enable external communication systems like Bright Pattern to integrate with ServiceNow
- Activate Customer Service (com.sn_customerservice) plugin to enable activity history saving into ServiceNow native tables
3. Configure System Properties (Whitelist Origin)
1. Navigate to System Properties by entering "sys_properties.list" in the admin UI's Search bar and pressing Return.
2. Ensure that the filter is set to Name and enter “glide.ui.concourse.onmessage_enforce_same_origin_whitelist” in the Search bar
- If the property does not already exist, click New to create it
- If it already exists and you see it in the list, click into the property to modify it

3. Edit the Value field to contain the URL of your Bright Pattern tenant URL in the following format: “https://<your_tenant>.brightpattern.com”, replacing <your_tenant> with your actual tenant name
- e.g. - https://tenant-id.brightpattern.com
- Note: Ensure that the URL begins with “https://” and doesn't contain “/” at the end of it to prevent errors

4. Click Update
4. Configure OpenFrame
1. Navigate to OpenFrame > Configurations by searching for “OpenFrame” and clicking Configurations.
2. In the OpenFrame Configurations list, find the CTI OpenFrame configuration, and click on it to open its properties.
- If there is no existing OpenFrame configuration, click New to create one.

3. Configure the URL field:
- Click the lock button to the right of the field to edit the URL
- Ensure that the URL has the following format: https://<your_instance>.service-now.com/csm?id=bpattern_adapter_page
- Replace <your_instance> with your ServiceNow instance subdomain (e.g. "dev97125")
- In the Configuration section, edit the "bpatternAdapterURL" parameter, replacing <your_tenant> with your Bright Pattern tenant - e.g. https://mycompany.brightpattern.com”
5. Assign OpenFrame User Role
The OpenFrame user role called sn_openframe_user is added with activation of OpenFrame. All user accounts need to have the sn_openframe_user role assigned to them in order to use the embedded Agent Desktop. You can assign it to individual users, or to the group of which the users are members.
To assign the role to an individual user:
- Go to Organization > Users and click on the name of the user who needs the role.
- At the bottom of the user's details, find the Roles tab and click Edit.
- Use the filters to search for "sn_openframe_user" and add it to the user's role list.
- Click Save.
- Repeat for all desired users.

To assign the role to a group:
- Go to User Administration > Groups and click on the name of the desired group.
- At the bottom of the group's details, find the Roles tab and click Edit.
- Use the filters to search for "sn_openframe_user" and add it to the group's role list.
- Click Save.
- Remember to add users to the group that includes this role.
6. Add CORS Rules
CORS Rules allow Bright Pattern integration accounts to communicate with ServiceNow.
- In your ServiceNow instance, go to System Web Services > REST > CORS Rules and click New.
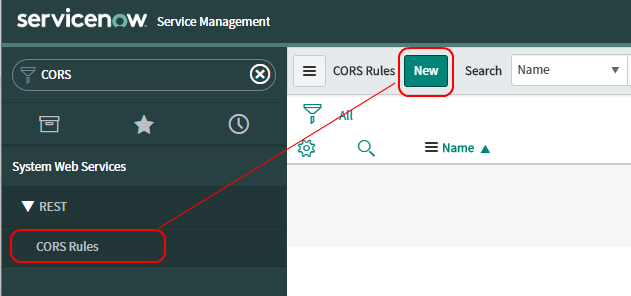
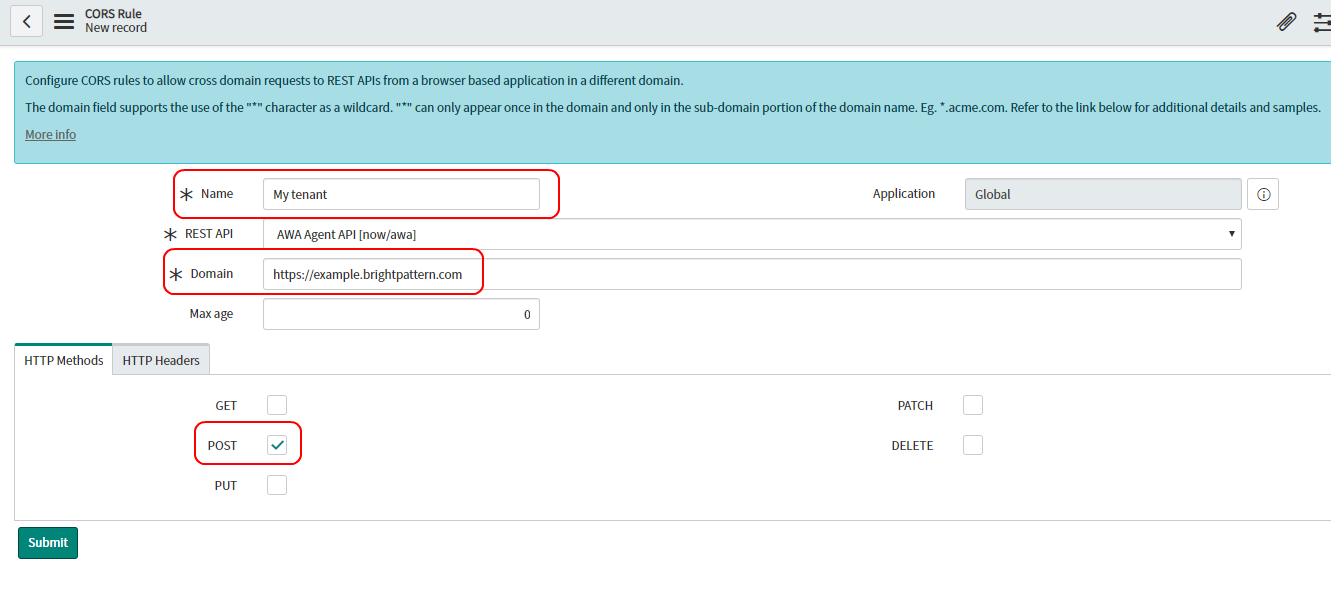
Add new CORS rules - In Name, enter a unique name (any).
- In Domain, enter https://<tenant-name>.brightpattern.com, where <tenant-name> is the name of your contact center.
- Select HTTP method POST.
CORS rules and settings - Set HTTP header Access-Control-Allow-Origin.
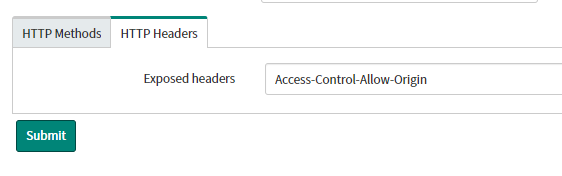
HTTP headers


7. Configure a new OAuth 2.0 Endpoint
In order to create a new ServiceNow integration account, you must first configure a new OAuth 2.0 endpoint for ServiceNow. Doing so will provide you with the Client ID and Client Secret, which you will need to authorize access to ServiceNow applications. You will specify the Client ID and Client Secret in your ServiceNow integration account properties in Step 10 of this procedure.
- Make sure the OAuth plugin is active.
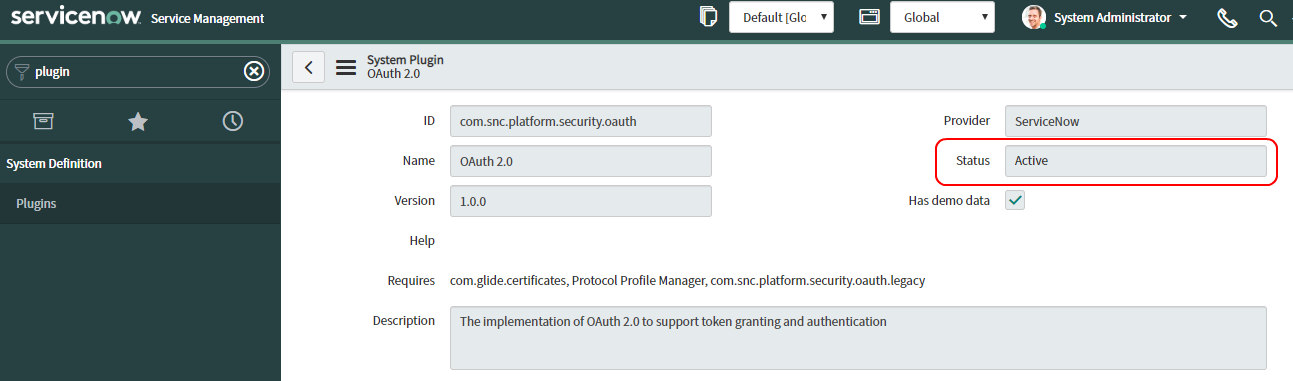
OAuth plugin - Create an endpoint by going to System OAuth > Application Registry and clicking New.
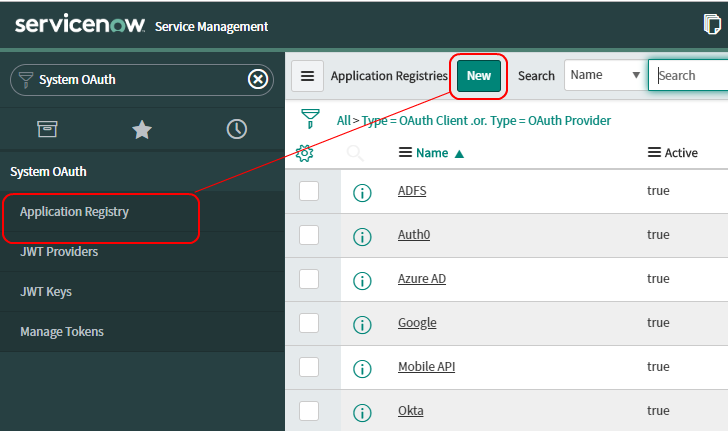
Add new application registry - Then click Create an OAuth API endpoint for external clients.
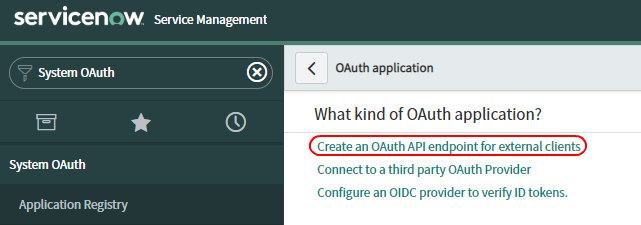
Create the endpoint - Give this registration a name and click Save. The Client ID is filled in for you. The Client Secret will fill upon saving.
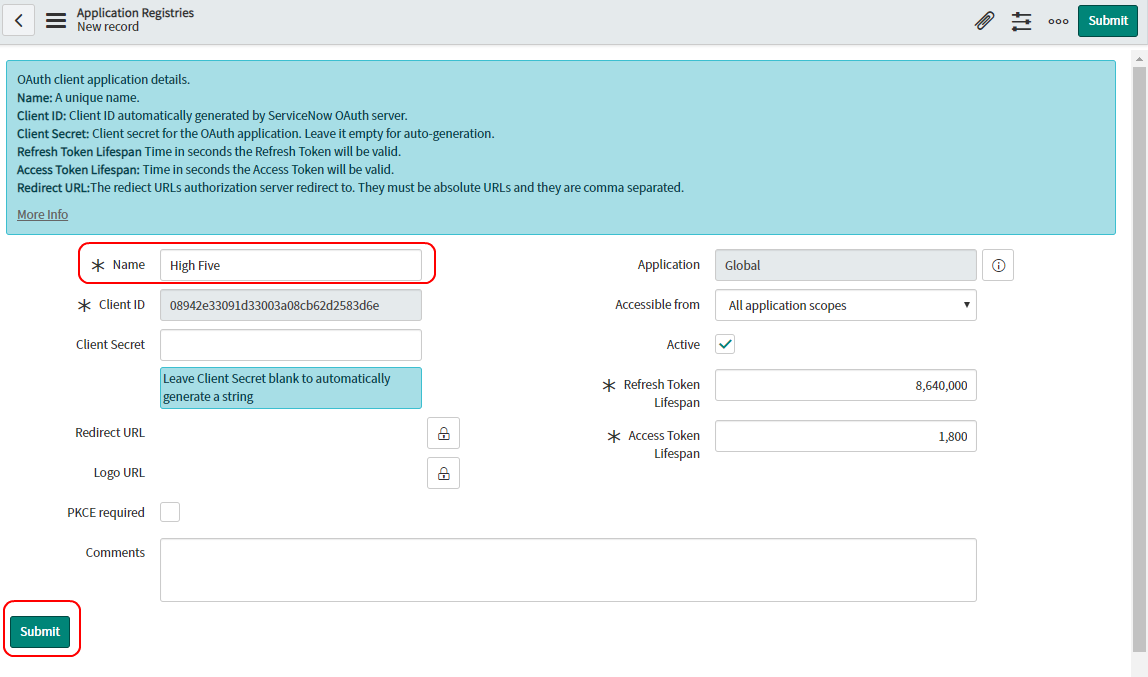
Name the registration and save - Now when you open the application registry you just created, you can view and copy the Client Secret.


8. Create cross-scope access for the Bright Pattern application
The Bright Pattern Embedded Agent Desktop Widget runs in a restricted scope that requires explicit access to outside tables. To update the OpenFrame PhoneLog table, grant the application the necessary cross-scope application privileges.
- Navigate to the Omnichannel Contact Center for ServiceNow under System Applications.
- If not selected, click the link to switch the scope to Omnichannel Contact Center.

- Navigate to System Applications > Application Cross-Scope Access.
- Click New and fill out the form as the following table shows.

| Target Scope | Target Name | Target Type | Operation | State |
|---|---|---|---|---|
| openframe | sn_openframe_phone_log | Table | Create | Allowed |
| openframe | sn_openframe_phone_log | Table | Delete | Allowed |
| openframe | sn_openframe_phone_log | Table | Write | Allowed |
| openframe | sn_openframe_phone_log | Scriptable | Execute API | Allowed |
| global | sys_user | Table | Create | Allowed |
| global | sys_user | Table | Read | Allowed |
| global | sys_user | Table | Delete | Allowed |
| global | sys_user | Table | Write | Allowed |
| global | sys_user | Scriptable | Execute API | Allowed |
| global | GlideRecord.setValue | Scriptable | ExecuteAPI | Allowed |
| global | GlideRecord.insert | Scriptable | ExecuteAPI | Allowed |
| global | GlideRecord.update | Scriptable | ExecuteAPI | Allowed |
| global | GlideRecord.deleteRecord | Scriptable | ExecuteAPI | Allowed |
| global | GlideRecord.getUniqueValue | Scriptable | ExecuteAPI | Allowed |

9. Create a new integration account
- Log in as Admin to the Contact Center Administrator application. Then navigate to Configuration > Integration Accounts.
- Click the Add + button to add a new account. In the Create integration account window that appears, select ServiceNow and click OK.
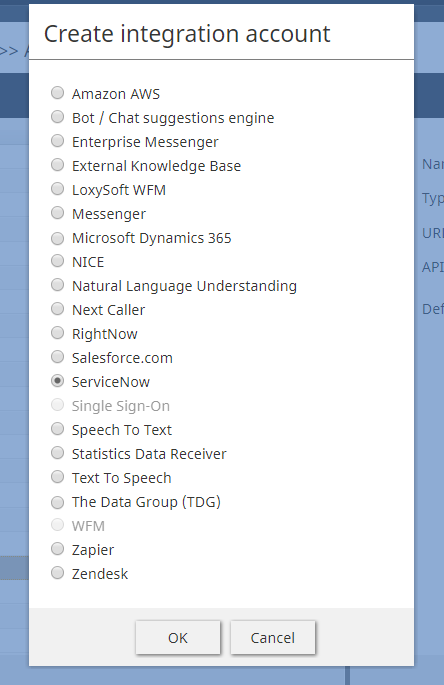
Select "ServiceNow" as the type of integration account to create

10. Specify ServiceNow integration account properties
Using the My Instance credentials that you saved when you first requested a ServiceNow developer instance, as well as the credentials from OAuth setup, enter values for the following screen properties. (If you do not know your credentials, ask your system administrator.) Be sure to click Apply to save your changes.

- Type - The type of integration account (i.e., in this case, ServiceNow, which is filled in because you added the account of this type).
- Name - A unique name (any) for your integration account.
- Default account - Select this checkbox if this ServiceNow integration account will be used as default.
- URL - The unique URL of your instance (e.g., "https://dev73456.service-now.com")
- Client ID - The Client ID (string) is the automatically generated unique ID of the application (e.g., "08942j33191d72005a08cb62d2583d6e"). The instance uses the client ID when requesting an access token. Note that the client ID is obtained when configuring the OAuth Endpoint earlier in this procedure.
- Client Secret - The Client Secret is the shared secret string that both the instance and the application use to authorize communications with one another. The instance uses the client secret when requesting an access token. Note that the client secret is obtained when configuring the OAuth Endpoint earlier in this procedure.
- Request Refresh Token - This button will request a refresh token. In the dialog that opens, enter the username and password of your ServiceNow instance.
- Test connection - This button tests the validity of the connection. If the connection is OK, the “Connection is valid” message appears.
Click Apply to save your changes.
11. Authenticate your newly integrated account in ServiceNow
- In a separate browser window or tab, open and sign in to your developer instance.
ServiceNow Developer sign in - Notice that your ServiceNow Homepage now displays a phone icon at the top right corner of the screen.

You can now make calls from your ServiceNow home page - Click on the phone icon to open the Agent Desktop application widget.
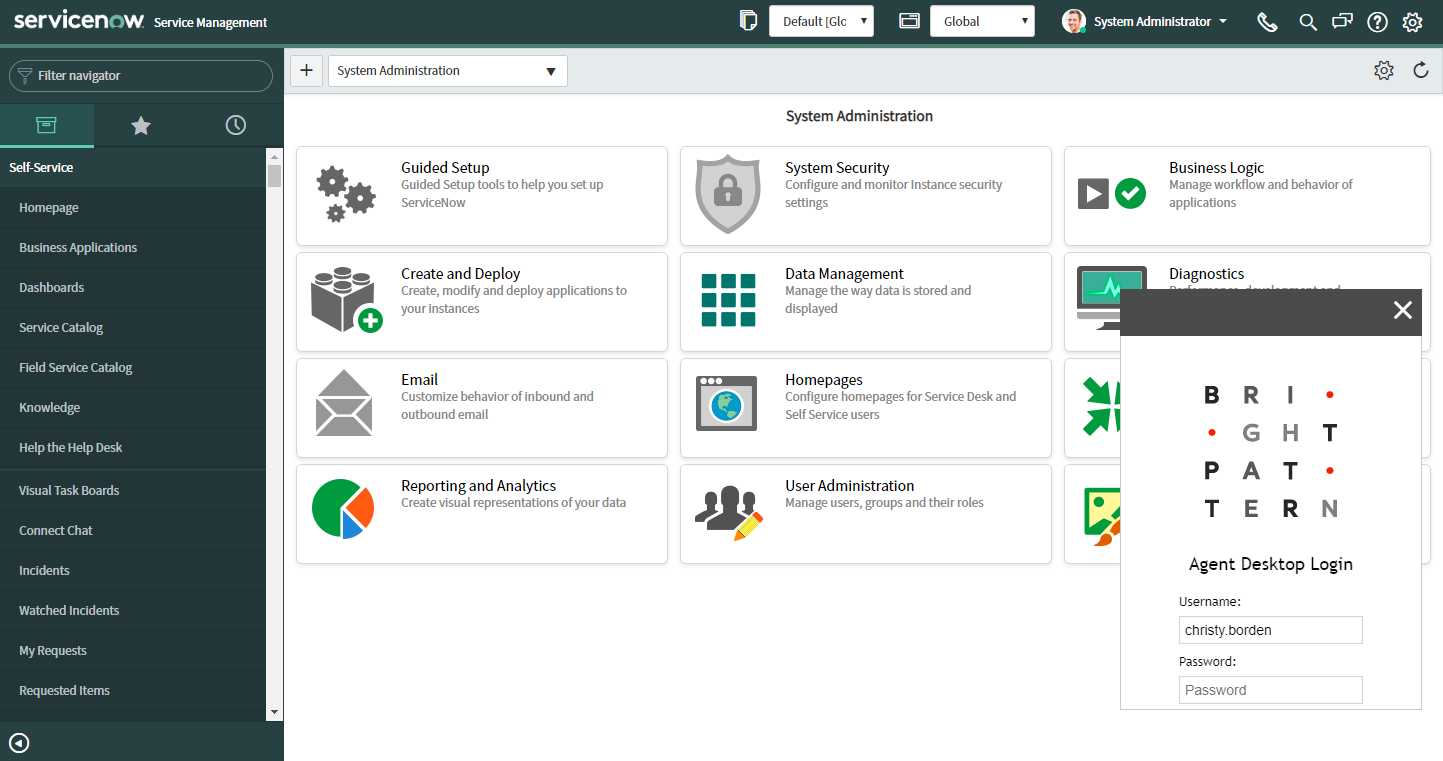
Log in to Agent Desktop from the integrated widget


12. Resize the Agent Desktop widget (optional)
You can change the width and height of the Agent Desktop widget by adjusting ServiceNow’s OpenFrame configuration properties. Access such configuration settings by searching ServiceNow for “openframe” or by going to ServiceNow’s System Properties > OpenFrame.
The default display size in OpenFrame properties is 373 (W) x 300 (H). In the example shown, we have resized the frame to be 300 (W) x 750 (H).

The Agent Desktop widget can be dragged and dropped onto any other part of the webpage.
13. Log in and complete Agent Desktop installation
- Sign in to Agent Desktop with your username and password, being sure to select your desired phone device.
- By default, you log in with a softphone. To choose another device, click the current Phone device setting and select the desired type of device from the menu that appears. For more information about the available device options, see the Bright Pattern Contact Center Agent Guide, section Selecting a Phone Device.
- Click the Login button. Note that if this is your first login into Agent Desktop on the given computer, you will be prompted to install the Agent Desktop Helper Application.
The Bright Pattern Contact Center Agent Desktop widget will now show a standard set of tabs and controls available to a contact center agent.

For more information about the Agent Desktop tabs and controls, see the Agent Guide. Note that the appearance and location of these controls has been modified to match the overall look and feel of the ServiceNow application.
You are now able to accept inbound calls and chats, initiate outbound calls and chats, send messages to other contact center users, and more. The integrated Agent Desktop widget will save activity history for all interactions handled via the widget in your ServiceNow environment.
