Softphone and Click-to-Call
ServiceNow integration puts a software telephone (softphone) right where you need it--on the integrated Agent Desktop. Any ServiceNow user can dial internal and external phone numbers from either the Dial tab of the Active Communications List, or the case page of a specific contact.
Click-to-Call is an important function that allows you to initiate calls to people who originated or handled a ServiceNow case, with a single click. Contacts from previous interactions are saved in the system, so that agents and supervisors can call such contacts using the Click-to-Call function.
How to Use the Click-to-Call Function
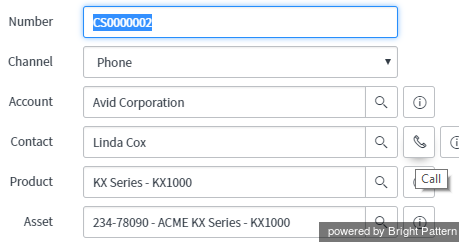
- Select a ServiceNow case assigned to someone who has a phone number configured in the system. Notice the contact information, as shown.
- Next, click the Click-to-Call
 icon beside the contact’s name to make a call.
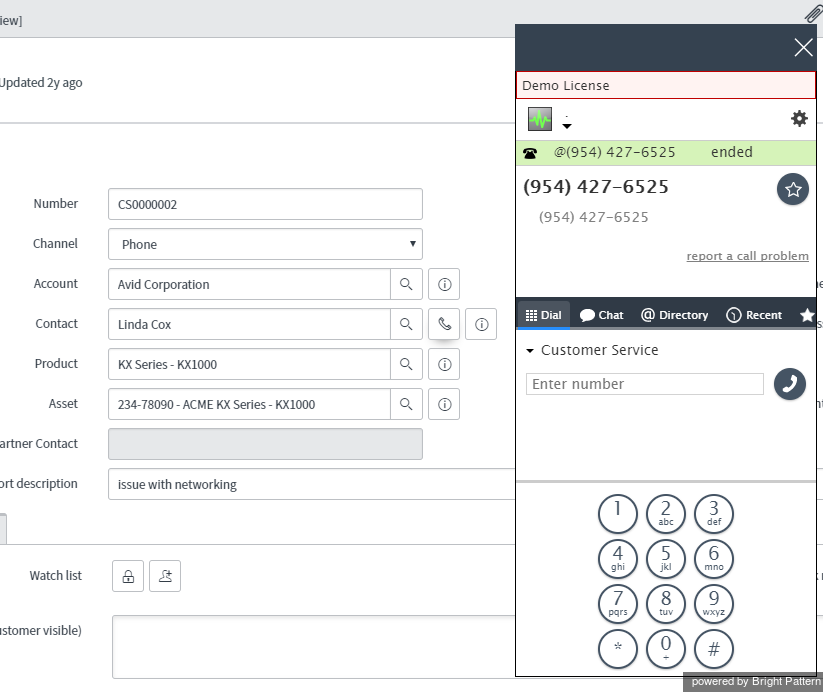
 - The Agent Desktop widget is launched and you are prompted to log in if you are not logged in already. The phone number of your contact is dialed, which you can see from the Agent Desktop widget.
When the call is answered, you should have all of the call control functions (e.g., mute, hold, transfer, release) available to you via the integrated Agent Desktop window. Note that when you transfer an interaction to another integrated desktop user, the ServiceNow item that was open on your desktop at the time of transfer will be displayed for that user.
For more information, see the Agent Guide.


