Enable Scenarios to Access Salesforce Data
A Salesforce External Client App allows external applications to access and interact with Salesforce data objects programmatically. This document explains how to create an external client app to connect with the Bright Pattern Salesforce integration account. Such an integration allows Salesforce scenario blocks to perform automated tasks within your scenarios, including Search or Insert.
| Salesforce transition from Connected Apps to External Client Apps | ||
| Salesforce no longer allows the creation of Connected Apps. This functionality has been replaced by External Client Apps.
Refer to the following Salesforce resources for more information: | ||
The server-side integration is implemented using Salesforce web services via the Salesforce REST API. Bright Pattern Contact Center authenticates with Salesforce using the Web Server OAuth Authentication flow. The refresh token mechanism is used to obtain and refresh the access token.
This article will show you how to:
- Create a new External Client App
- Configure the app
- Get the consumer key and consumer secret needed for your Bright Pattern Salesforce integration account
- Configure appropriate permissions for the dedicated app user
Step 1: Create an External Client App
To begin the integration process, create an External Client App in your Salesforce instance.
- Navigate to the Salesforce Setup menu.
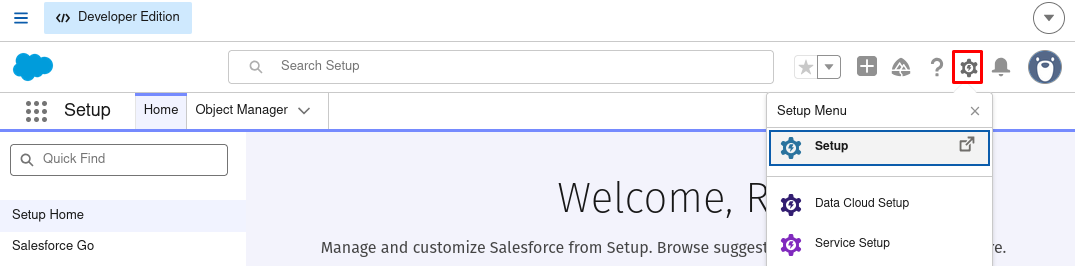
Select the Setup icon in the navigation header - In the Quick Find box, enter "App Manager" and select App Manager from the results.
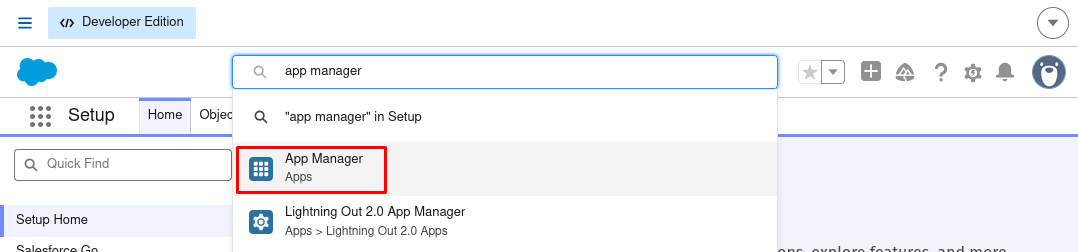
Search for and select App Manager - Click New External Client App.
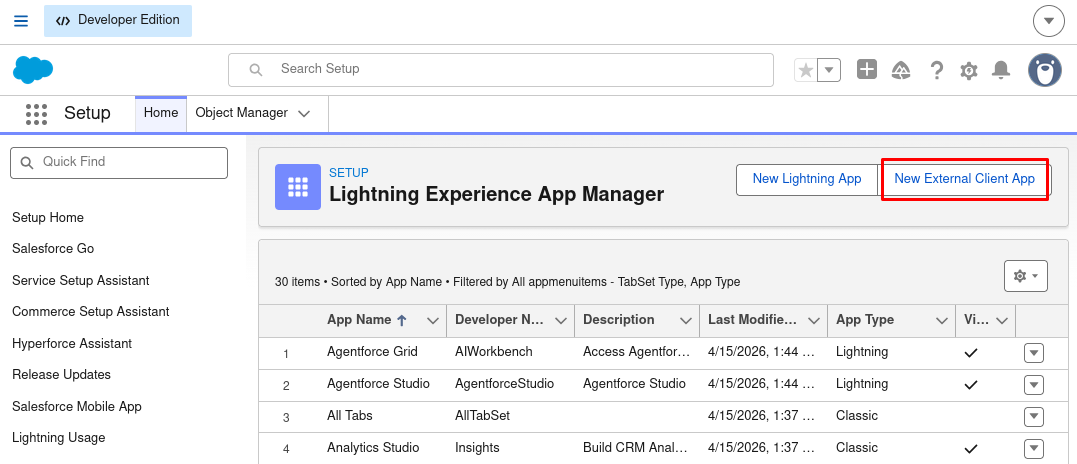
Click the New External Client App button in the App Manager


Step 2: Configure the External Client App
On the configuration page for the new External Client App, set the following parameters:
2.1 Basic information
Define the identifying information for the app.

- External Client App Name: Enter a unique name for the application.
- API Name: Enter a unique identifier for programmatic use. This field defaults to the app name with underscores.
- Contact Email: Enter the email address for the administrator or support team.
- Distribution State: Select Local.
2.2 API (Enable OAuth Settings)
In the API section, set the following parameters:

- Enable OAuth: Select the checkbox
- Callback URL: Set
https://<your-brightpattern-domain>/admin/salesforcecallback.html
(e.g.,https://example.brightpattern.com/admin/salesforcecallback.html) - Available OAuth Scopes: Select the following:
- Full access (full)
- Manage user data via APIs (api)
- Perform requests at any time (refresh_token, offline_access)
- Full access (full)
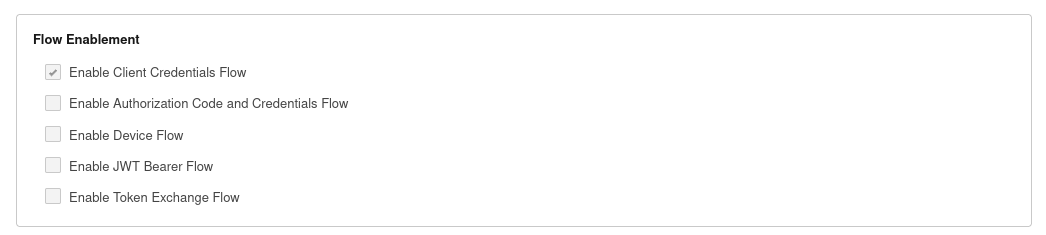
- Under Flow enablement (part of the API section), check the box for Enable Client Credentials Flow
- Click Create to save the configured app.

2.3 Configure App Policies
Policies define the security and authorization requirements for the application, including user access permissions and OAuth flow constraints.
- After saving the application, select the Policies tab and click Edit.
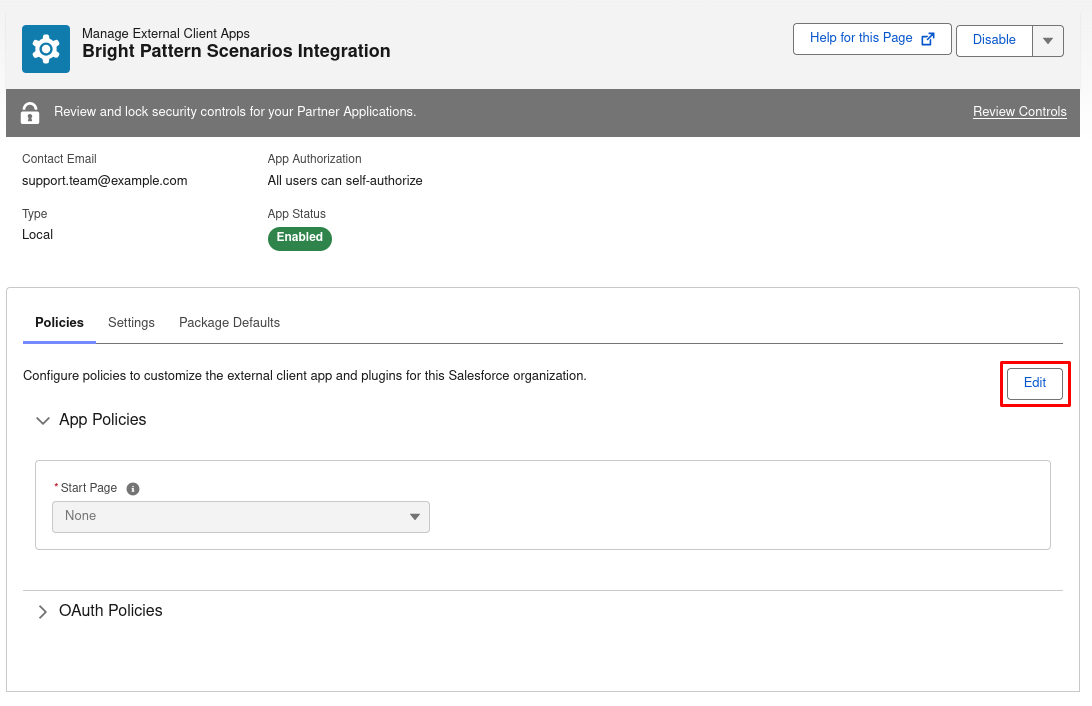
Select the Policies tab and click Edit - In the OAuth Policies section, configure the following:
- Set Permitted Users to "Admin approved users are pre-authorized".
- Set Permitted Users to "Admin approved users are pre-authorized".
- In the OAuth Flows and External Client App Enhancements section:
- Select the Enable Client Credentials Flow checkbox.
- In the Run As field, indicate the dedicated Salesforce user account the application will use to execute actions.
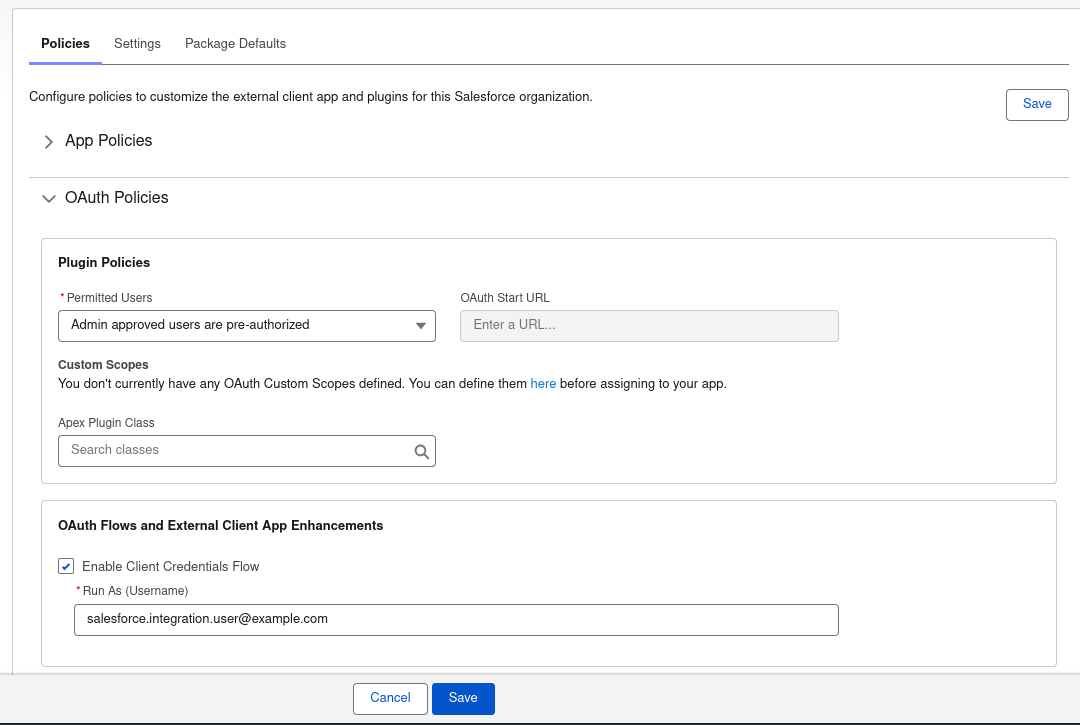
Verify the configured OAuth policies and Client Credentials flow settings
- Select the Enable Client Credentials Flow checkbox.
- Click Save.
- Wait ten minutes for the changes to propagate before proceeding.


Step 3: Retrieve Consumer Key and Consumer Secret
The consumer key and consumer secret are required parameters for the Salesforce integration account.
- In the External Client App Manager, navigate to the Settings tab for your application and click Consumer Key and Secret.
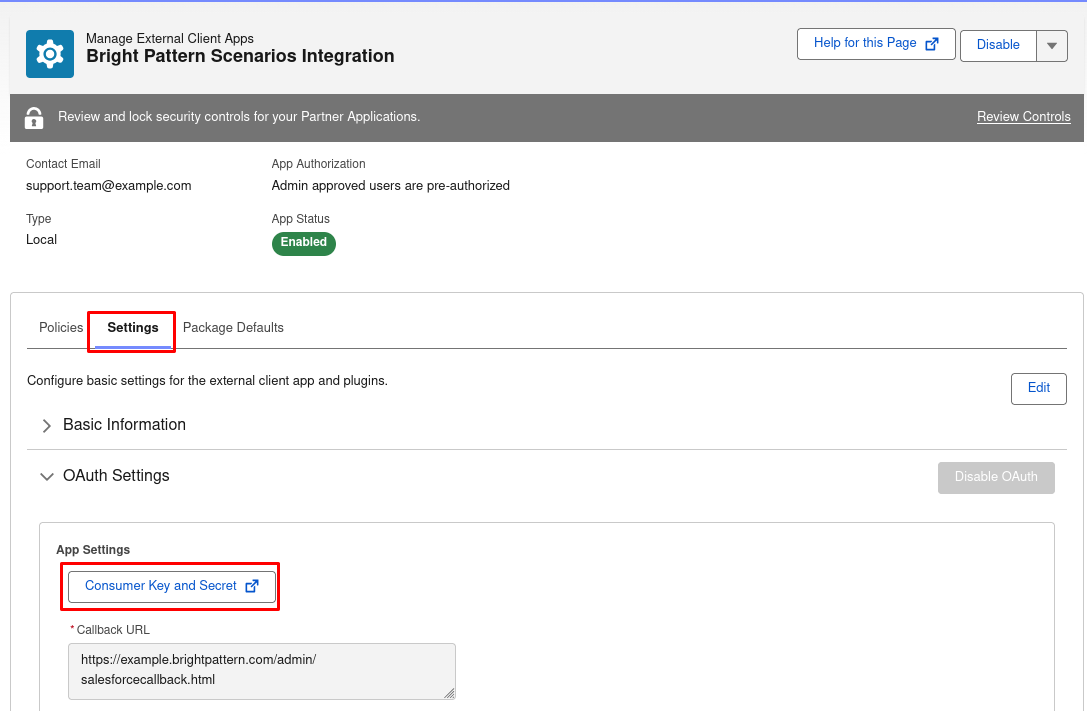
Access the Consumer Key and Consumer Secret from the settings tab - Complete the multi-factor authentication (MFA) challenge when prompted to view and copy the Consumer Key and Consumer Secret.
- Save these securely for use when configuring the Salesforce integration account properties.

Step 4: Configure the App User
Assign an appropriate profile or permission set to the integration user account (the user specified in the Run As field in the Configure Policies section above). This ensures the application has access to the Salesforce objects required for your scenarios.
- Navigate to Setup > Users > Users and click Edit for the integration user.
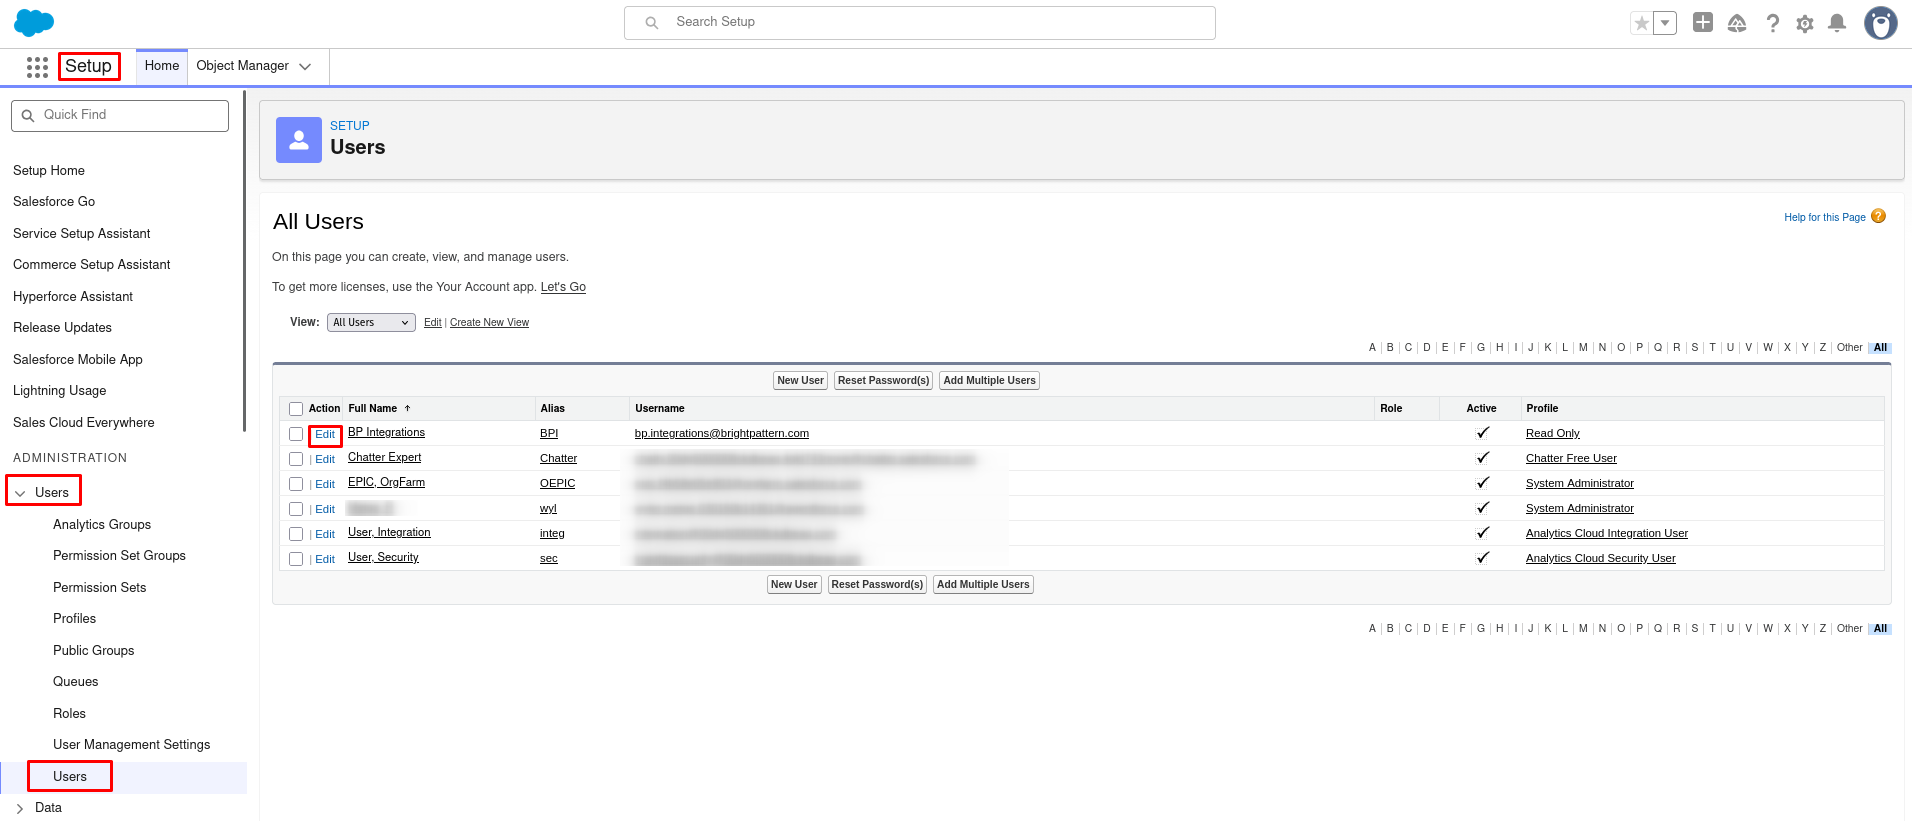
Open the integration user profile - Assign a User License and Profile based on the required integration tasks.

