Add Salesforce Integration Account in Bright Pattern
Now that your call center and connected app are configured in Salesforce, you can create the integration account that establishes the connection between Salesforce and Bright Pattern Contact Center. New integration accounts are added in the Contact Center Administrator application. For more information, see the Contact Center Administrator Guide section Integration Accounts.
1. Create a New Integration Account
In the Contact Center Administrator application, go to Configuration > Call Center Configuration > Integration Accounts and click + to add a new account of type Salesforce.com.

2. Edit Properties

Basic Properties
- Type: This type of integration will always show the read-only value of "Salesforce.com".
- Name: The name of the account to distinguish it throughout the Bright Pattern Contact Center
- Default account: Select this checkbox if you have multiple Salesforce integration accounts and you want this account to be used by default.
- Url: The URL of your registered domain on Salesforce where your users will sign in to your instance. The URL should be in the following format:
https://<your-domain-name>.my.salesforce.com/
Data Access from Scenarios Properties
In the Data Access from Scenarios section, set:
- Sandbox environment - Select checkbox if your Salesforce environment is a sandbox
- Consumer key: The consumer key of the External Client App configured in Salesforce for the integration. Refer to the section Retrieve Consumer Key and Consumer Secret for detailed instructions.
- Consumer secret: The consumer secret for the app, accessed similar to the consumer key above.
- Refresh token: Click Request token to allow access to your Salesforce External Client App.
- Check limits: You can use the Check limits button to see the SFDC limits associated with this account.
Single Sign-on Properties
In this section, you will enable single sign-on (SSO) functionality for Salesforce integration. SSO provides simultaneous login to Bright Pattern Contact Center applications and the embedded Agent Desktop widget on Salesforce. For example, users who log in to the Agent Desktop widget on Salesforce will find themselves also logged in to Bright Pattern applications (e.g., Agent Desktop, Contact Center Administrator, etc.).
Identity Provider Certificate
Provide the Salesforce Identity Provider Certificate (see instructions below). If you do not plan on configuring SSO, leave the certificate field empty.
How to Add A Certificate
Before you can add the certificate, you have to ensure that there is one. In case you have multiple certificates, you must choose the certificate you want to use as the Identity Provider Certificate on the App Settings page.
- In Salesforce Lightning Setup, go to Security > Certificate and Key Management.
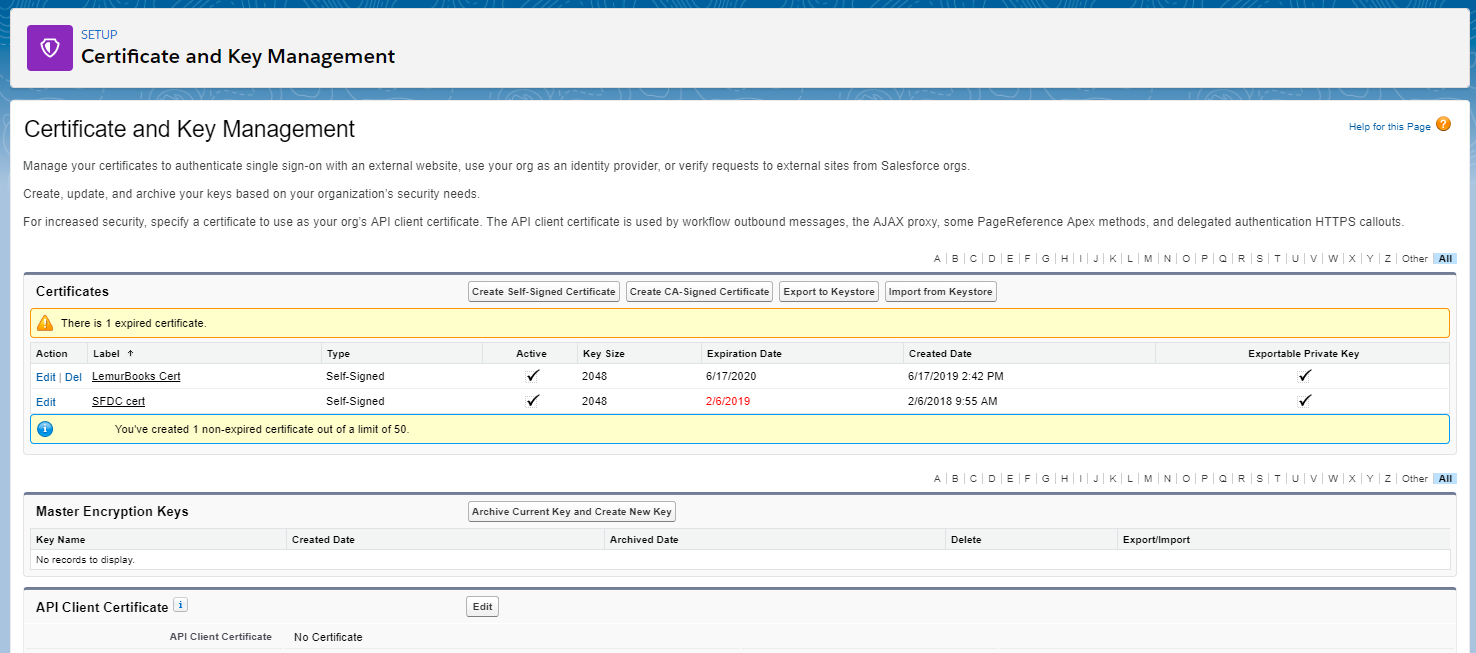
Certificate and Key Management - If there are no certificates listed, or your certificate is expired, either create a new one or import a certificate from your setup.
- To import, click the Import from Keystore button. Any certificates you import will be shown in the Idp Certificate field on the Connected App Detail page. Note that if you have multiple certificates, you must choose the certificate you want to use as the Idp Certificate on the Connected App Detail page.
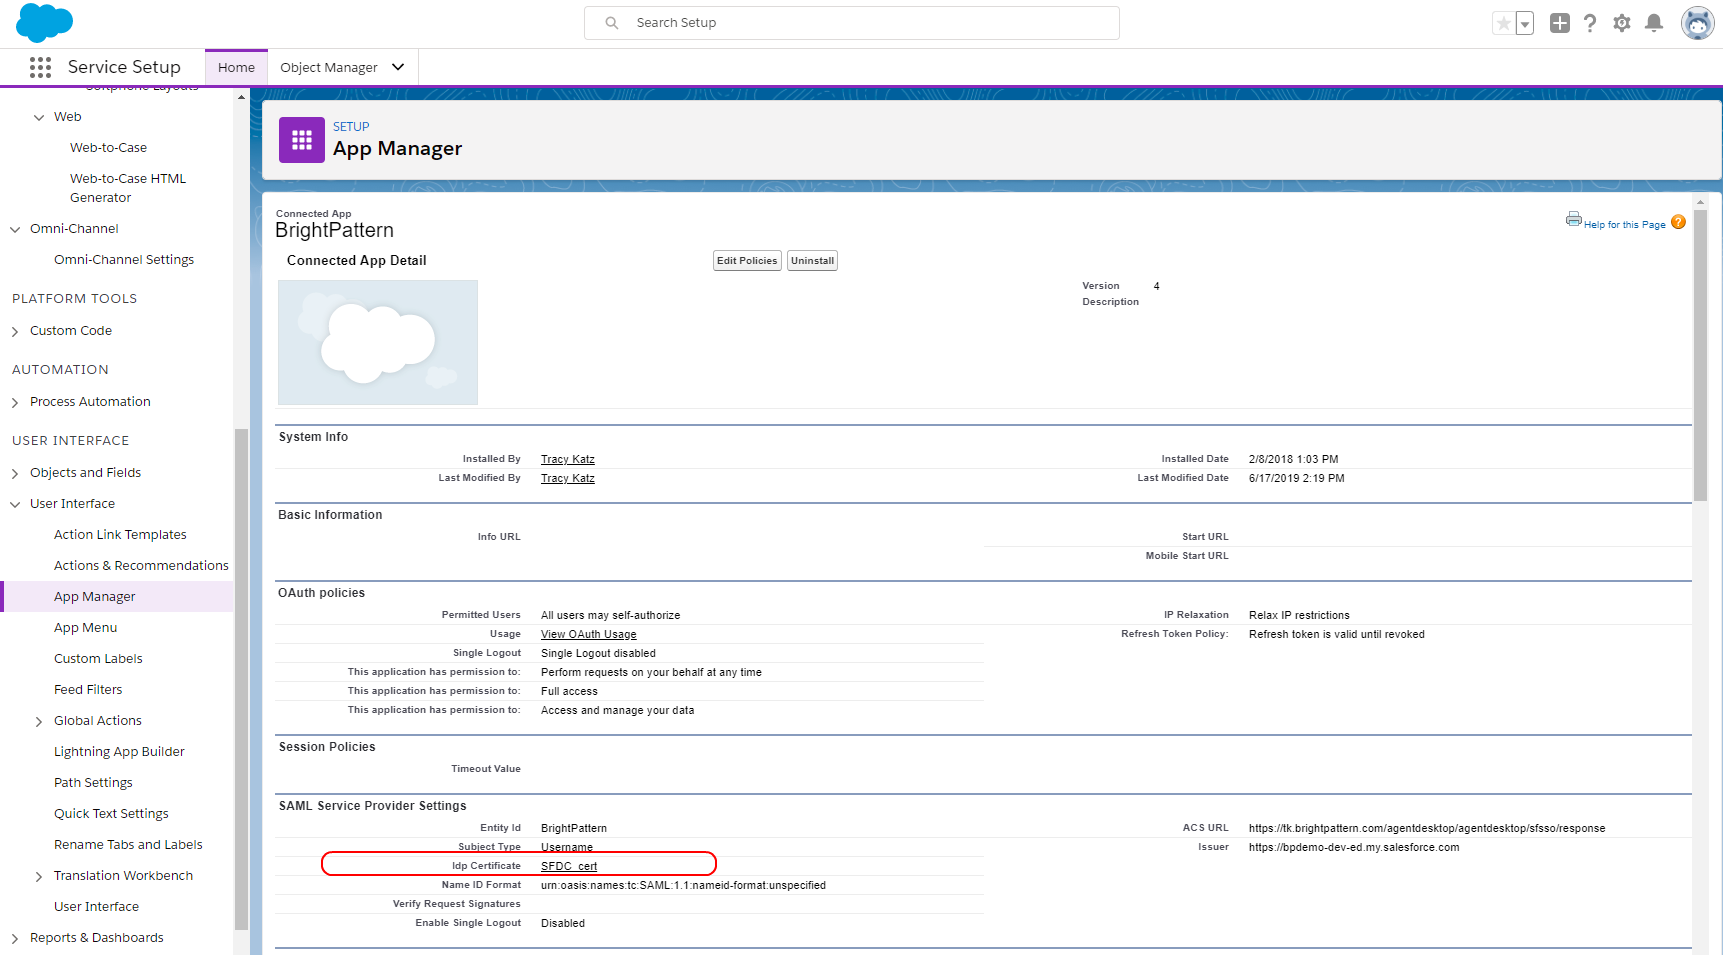
IDP certificate shown on User Interface > App Manager > Connected App Detail - Select the certificate desired (or import a certificate). Note that you may have multiple certificates shown.
- To import, click the Import from Keystore button. Any certificates you import will be shown in the Idp Certificate field on the Connected App Detail page. Note that if you have multiple certificates, you must choose the certificate you want to use as the Idp Certificate on the Connected App Detail page.
- Click Download Certificate.
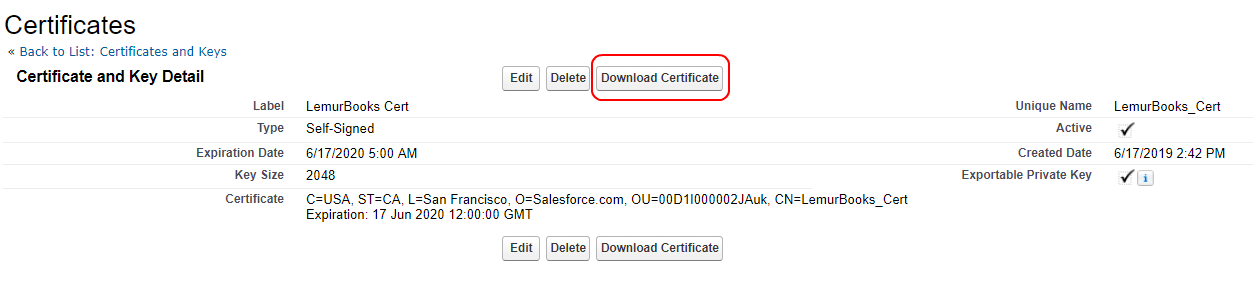
Download the certificate from Salesforce - Open the file in a text editor and copy the certificate content only (i.e., the text between
-----BEGIN CERTIFICATE-----and-----END CERTIFICATE-----).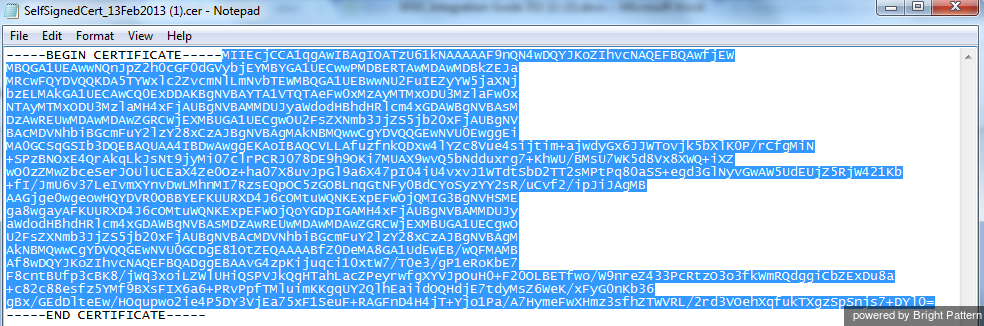
- Go back to the Contact Center Administrator application and paste the certificate into the Salesforce integration account properties.
- In the Set Identity Provider certificate dialog, click Set. This saves the certificate.


Identity Provider Initiated Login URL
This is the Idp-initiated Login URL from your Salesforce External Client App.
- To find this URL: Open the External Client App as described in Get the Identity Provider Initiated Login URL and navigate to the Policies tab, then the SAML Policies section, and finally the SAML Login Info sub-section. Copy the entire IdP-Initiated Login URL.

Locate the IdP-Initiated Login URL under SAML Login Info

- To configure without SSO: Even if you do not configure SSO, you still need to set something in this required field. If you do not plan on configuring SSO, enter any character or string (e.g., "https://" or "/") to invalidate the URL.
3. Save
Click Apply to save your changes. Salesforce integration account configuration is now complete.
Next, you can view our tutorials to learn how to set up scenarios to use Salesforce data.