From Bright Pattern Documentation
<translate>
Configure Microsoft Azure and Dynamics 365 CRM for Web API access
Step 1: Add new registered app
- In the Azure Portal > Azure Active Directory > App Registrations, click Add New to add a new registered app.
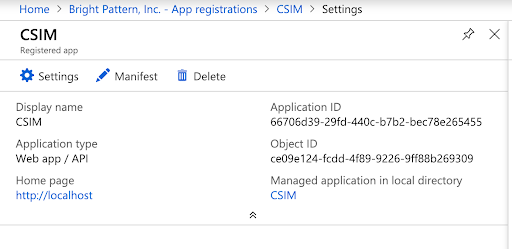
- Edit the registered app fields with the following values:
- Application type - Web app / API
- Application ID - The Client ID
- Object ID - This ID will be filled in for the registered app
- Home page - http://localhost [Note: use exactly this value as it also will be hardcoded in the Azure Portal]
- Application type - Web app / API
Step 2: Add API access
- In the newly created app, go to Required Permissions > APIs > Add to add API access.
- In Add API access, make the following selections:
- In Select an API, select Dynamics CRM Online API.
- Select the checkbox for Delegated Permissions.
- When done, click Grant Permissions.
- In Select an API, select Dynamics CRM Online API.
Step 3: Get the API key (the Client Secret) and endpoint
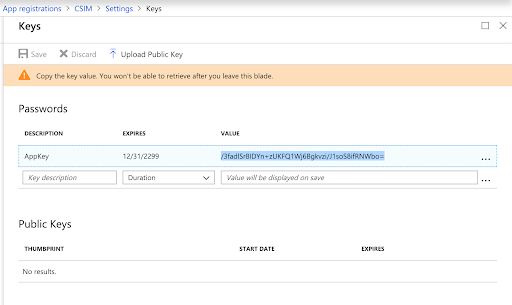
- In the newly created app, go to Keys and:
- In Description, name the app key.
- In Expires, set Never expires.
- Click Save. Once saved, the key value will be shown. The key value is the Client Secret, which you need for later configuration steps.
- Copy the key value now because this is the only moment you can see the actual key.
- In Description, name the app key.
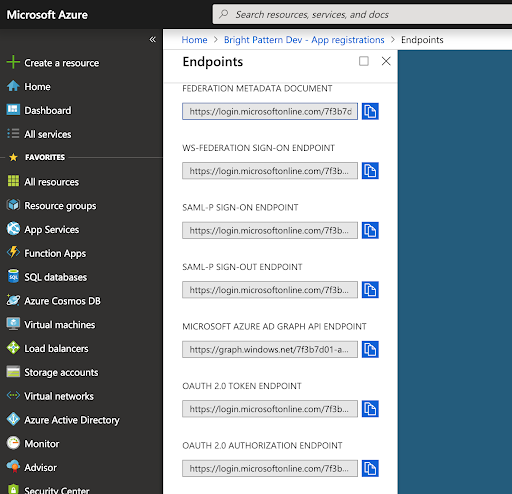
- Go to App Registrations > Endpoints and copy the OAUTH 2.0 Authorization Endpoint and OAUTH 2.0 Token Endpoint values.
Step 4: Update security roles
- Open the Dynamics 365 CRM (not Azure) application, and go to Settings > Security > Security Roles.
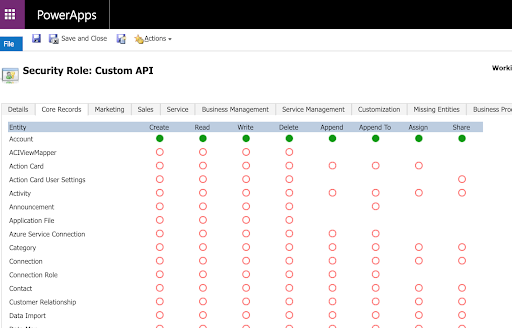
- Add new role (or copy existing role).
- Make sure the role has required privileges (the screenshot shown only grants access to the Account CRM object).
- Add new role (or copy existing role).
Step 5: Add app users
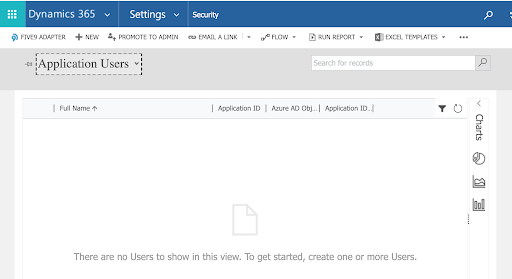
- Go to Settings > Security > Users.
- Switch view to Application Users.
- Switch view to Application Users.
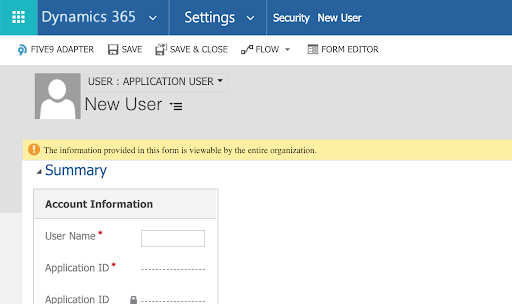
- Add new user.
- Once new user form is shown, change it to Application User.
- Once new user form is shown, change it to Application User.
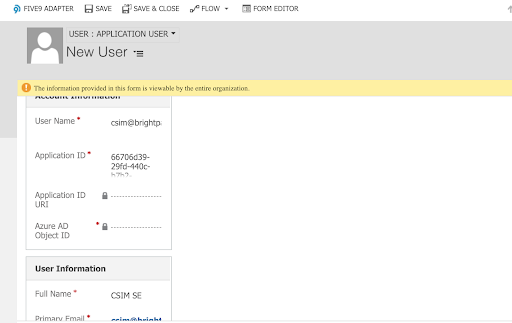
- In Account Information, fill in the following:
- User Name
- Application ID - Your application ID (i.e., the Client ID)
- User Name
- In User Information, fill in the following:
- Full Name - User's first name and last name
- Primary Email - User's email address
- Full Name - User's first name and last name
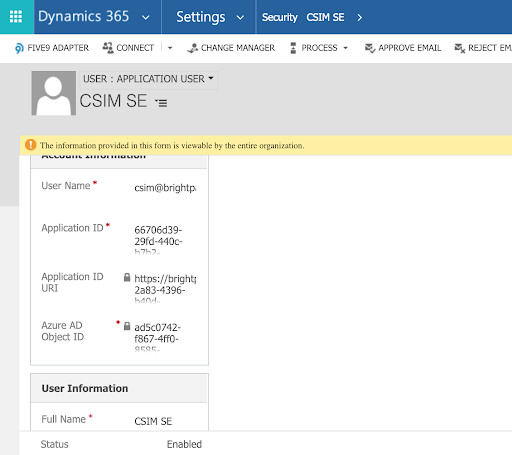
- Save the record. At this time, the Application ID URI and Azure AD Object ID fields are filled in.
Step 6: Add roles to the users you created
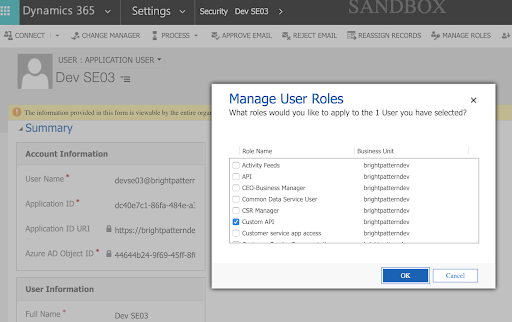
- Click Manage Roles.
- In Manage User Roles, add the custom role created to that user.
- In Manage User Roles, add the custom role created to that user.
This completes Microsoft Dynamics 365 CRM and Azure configuration.
</translate>

