From Bright Pattern Documentation
<translate>
Configure Microsoft Azure and Dynamics 365 CRM for Web API access
Step 1: Add new registered app
- In the Azure Portal > Azure Active Directory > App Registrations, click + New registration to add a new registered app.
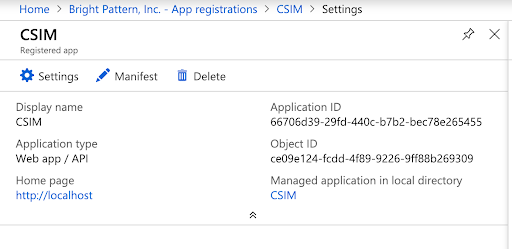
- View the registered app and click Settings.
- Then click Properties, and edit the properties with the following values:
- Application type - Web app / API
- Application ID - The Client ID
- Object ID - This ID will be filled in for the registered app
- Home page - http://localhost [Note: use exactly this value as it also will be hardcoded in the Azure Portal]
- Application type - Web app / API
Step 2: Add Reply URL
The Reply URL is the callback URL for your Bright Pattern Contact Center.
- Still in your registered app's Settings, click on Reply URLs.
- Enter a URL in the following format and click Save:
https://<tenant>.brightpattern.com/admin/msdynamicscallback.html
For example:
https://example.brightpattern.com/admin/msdynamicscallback.html
Step 3: Add API access
- In the newly created app, go to Settings > API Access > Required Permissions and click Add to add API access.
- In Add API access, make the following selections:
- In Select an API, select Dynamics CRM Online.
- Select the checkbox for Delegated Permissions.
- When done, click Grant Permissions and click Yes.
- In Select an API, select Dynamics CRM Online.
Step 4: Get the key (the Client Secret) and endpoint
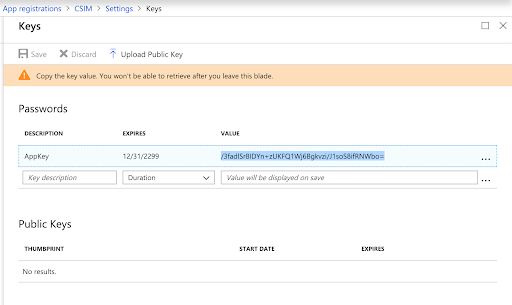
- In the newly created app, go to Settings > API Access > Keys and:
- In Description, name the app key.
- In Expires, set Never expires.
- Click Save. Once saved, the key value will be shown. The key value is the Client Secret, which you need for later configuration steps. Make sure that the key value does not contain "+". If it does, create a new one until you get one without the "+".
- Copy the key value now because this is the only moment you can see the actual key.
- In Description, name the app key.
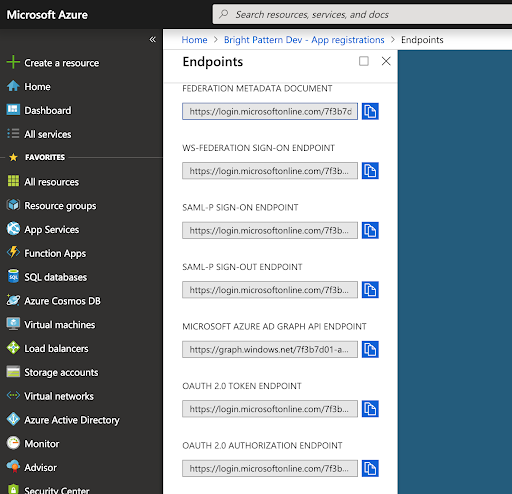
- Go back to Azure Active Directory > App Registrations and click Endpoints.
- Copy the OAUTH 2.0 Authorization Endpoint and OAUTH 2.0 Token Endpoint values.
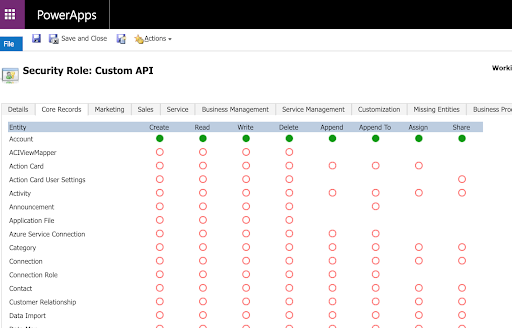
Step 5: Update security roles
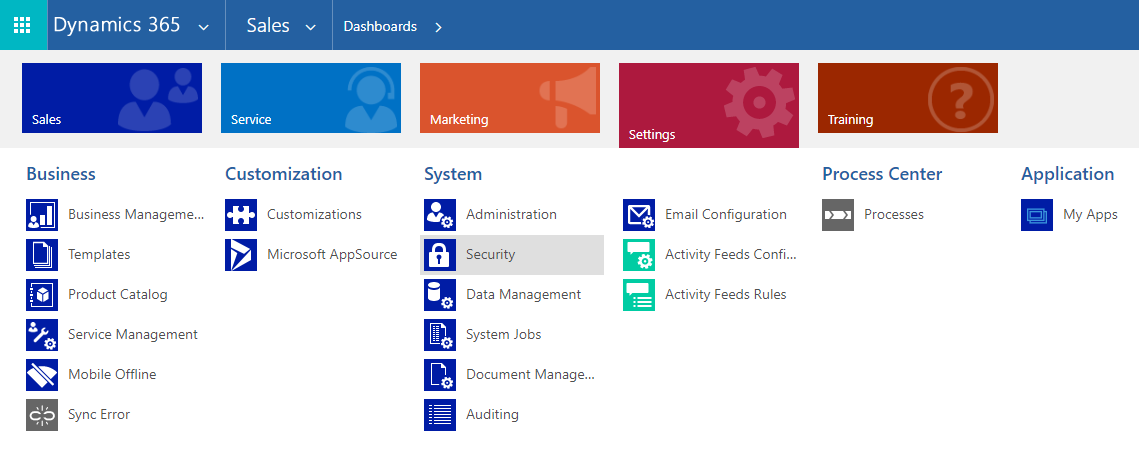
- Open the Dynamics 365 CRM (not Azure) application, and at the top of the page, click on a drop-down link, which will bring up a number of menu items. Click on Settings > Security > Security Roles.
- Add new role (or copy existing role).
- Make sure the role has required privileges (the screenshot shown only grants access to the Account CRM object).
Step 6: Add app users (optional) or update user account information
If you already have users in your configuration, you can skip adding a new app user, and instead, update an existing user's account information to include the Application ID, Application ID URI, and Azure AD Object ID (see Step 6.3 below).
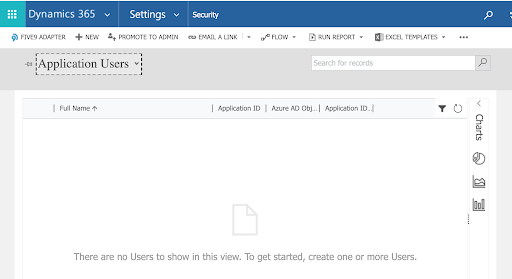
- Go to Settings > Security > Users.
- Switch view to Application Users.
- Switch view to Application Users.
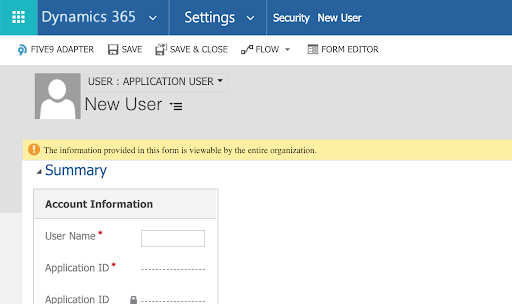
- Add new user.
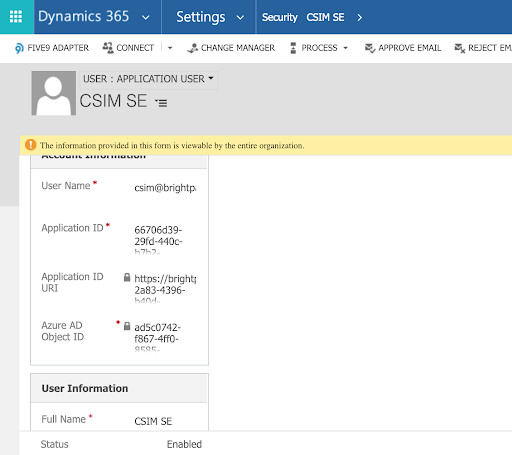
- Once new user form is shown, change it to Application User.
- Once new user form is shown, change it to Application User.
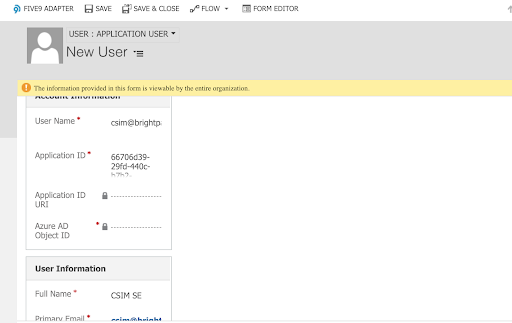
- In Account Information, fill in the following:
- User Name
- Application ID - Your application ID (i.e., the Client ID)
- User Name
- In User Information, fill in the following:
- Full Name - User's first name and last name
- Primary Email - User's email address
- Full Name - User's first name and last name
- Save the record. At this time, the Application ID URI and Azure AD Object ID fields are filled in.
Step 7: Add roles to the users you created
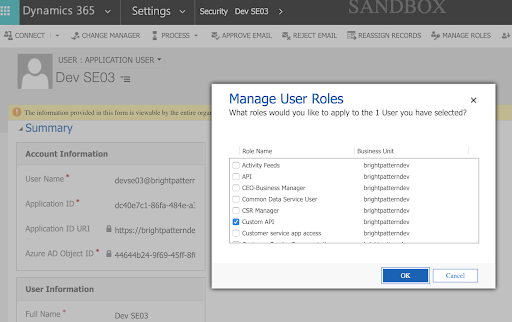
- Click Manage Roles.
- In Manage User Roles, add the custom role created to that user.
- In Manage User Roles, add the custom role created to that user.
This completes Microsoft Dynamics 365 CRM and Azure configuration.
</translate>

