Watson Assistantの作成方法
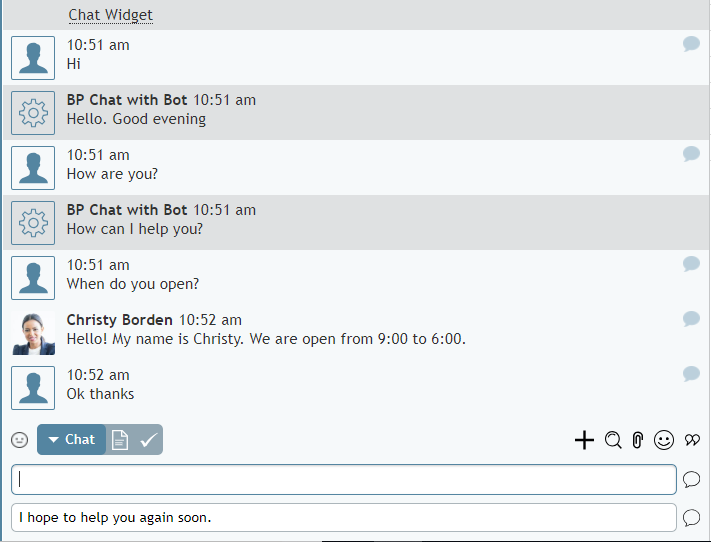
Bright Patternコンタクトセンターは、IBM Watsonなどのプロバイダーと統合して、チャットボットをコンタクトセンターサービスで使用できるようにします。
この記事では、 設定されたチャットサービスにおいて対話型ボットとして利用できるIBM Watson Assistant の設定方法について説明します。この記事の手順は IBM Watson Assistant と IBM Watson Assistant (Conversation)に適用されます。
手順
この手順では、初めてのWatson Assistantボットを設定するプロセスについて説明します。 Watson Assistantおよびその他のIBMリソースの詳細については、IBMの初めてのチュートリアル と IBMの API リファレンスをご覧ください。
ステップ 1: AWSアカウントを作成します。
- 作成がまだの場合、IBM アカウントの作成を行います。このプロセスの結果、 IBMidが生成・有効化されます。
- IBM Cloudにサインアップします。IBM Cloud は、Watson Assistantボットなどのリソースを調整および管理する場所です。
ステップ 2: Watson Assistant をリソースとして追加します。
- IBMのリソースカタログ でWatson Assistantを検索します。
- サービス名, 地域を編集し、 リソースグループを選択します。
- アシスタントの作成をクリックし、Watson Assistantを追加します。
- アシスタントページが開き、アカウントプランタイプで利用できるスキルが表示されます。
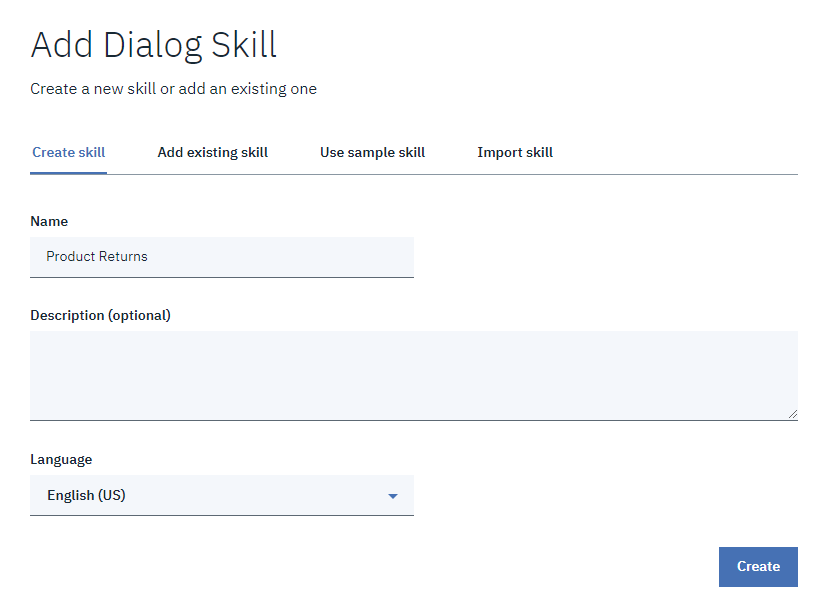
ステップ 3: ダイヤログスキルを追加します。
スキルは、ボットを設定するためのワークスペースです(IBMのスキルは以前からワークスペースと呼ばれていました)。スキルは、 自然言語理解 (つまり、センチメント分析) をWatson Assistantに提供します。対話型ボットであるため、ライブチャット中にお客様と話すためのダイヤログスキルを作成します。
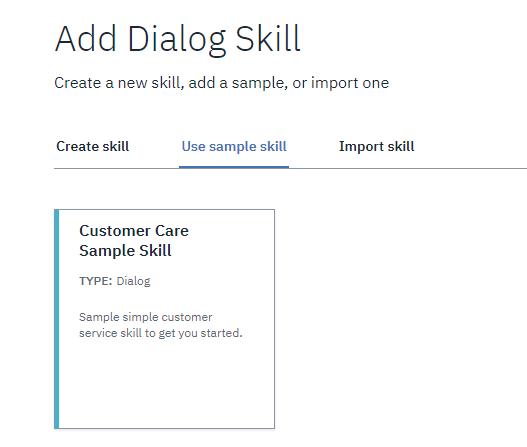
- ダイヤログスキルの追加をクリックします。
- この例では、 サンプルスキルの使用を選択し 、カスタマーケアのサンプルスキルをクリックします。これは、使用および編集するためにすでに設定されています。もう一度クリックすると、アシスタントページが開きます。ここでスキルを設定します。
ステップ 4: ダイアログスキルのインテントを作成または追加します。
サンプルスキルが選択されたため、アシスタントページにいくつかの事前に設定されたインテントが表示されます。 インテントとは、お客様が入力したキーワードによってトリガーされるアクションです。
Watsonシンタックスでは、インテントは原則としてハッシュタグ記号("#")で始まり、その後にタイトルの単語が付きます(つまり、 "to"のような前置詞または"the"冠詞でない限り、単語の最初の文字は大文字になります)。複数の単語は下線 ("_")で区切られます。
例: #Talk_to_Someone
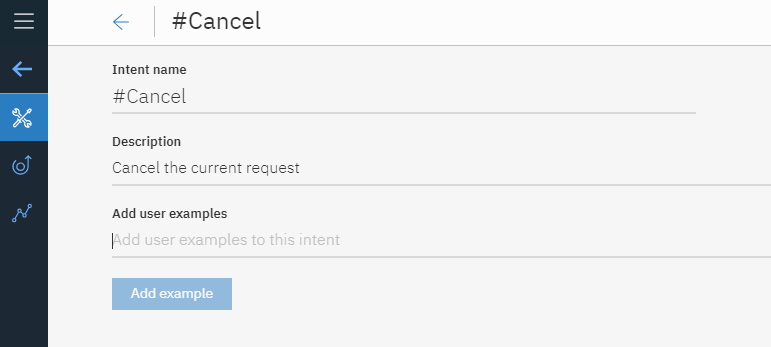
リストの一番目のインテントをクリックして、インテントを確認します。この例では、 #Cancelをクリックしプロパティを確認しています。事前に設定された全てのインテントをそのままにするか、新しいユーザーの例を追加します。
インテントのプロパティ
各インテントに対して以下の項目を指定します:
- インテント名: "#" およびテキストから成る名前(例:"#Cancel")
- 説明:インテントの意味 (例: "現行のリクエストのキャンセル")
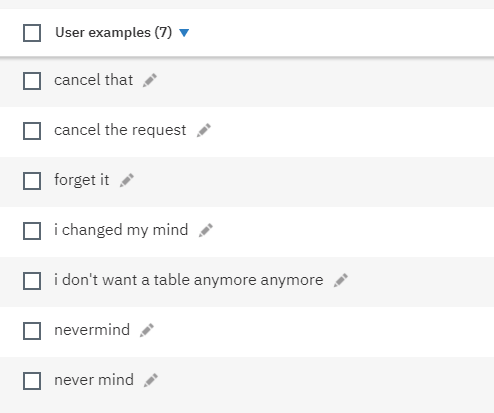
- ユーザーの例:インテントをトリガーするキーワードやフレーズ (例:チャット中にお客様が入力する可能性のあるもの)。ユーザーの例が多ければ多いほどボットが役立つため、できる限り多くの例とスペル/フレーズのバリエーションを追加します。
ステップ 5: エンティティを作成します。
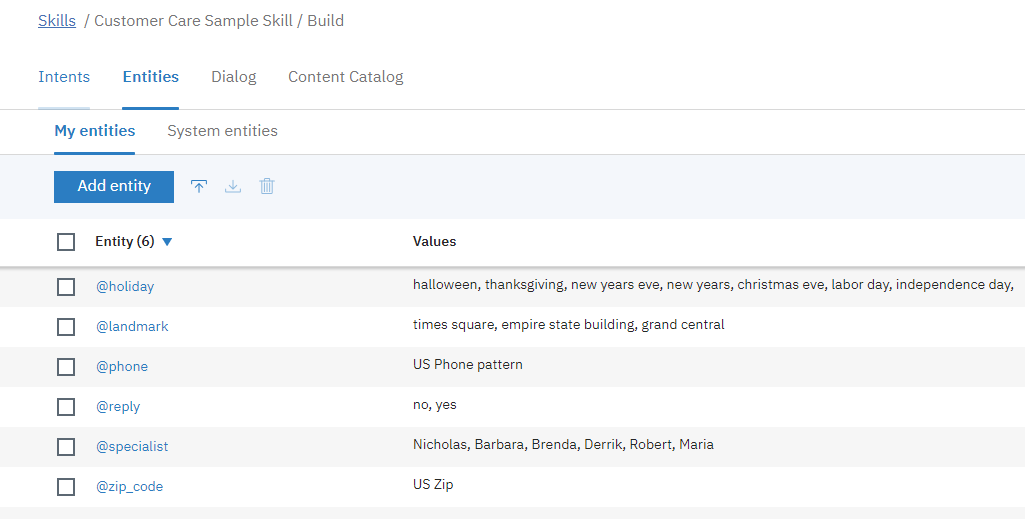
アシスタントページの上部にあるエンティティタブをクリックします。インテントと同様に、いくつかの事前設定されたエンティティが表示されます。 エンティティは、ボットが認識するお客様のテキストをより細かく定義する単語セットのようなものです。
Watsonシンタックスでは、エンティティは原則として"@" 記号で始まり、その後に小文字の単語が付きます。複数の単語は下線 ("_")で区切られます。
例: @zip_code
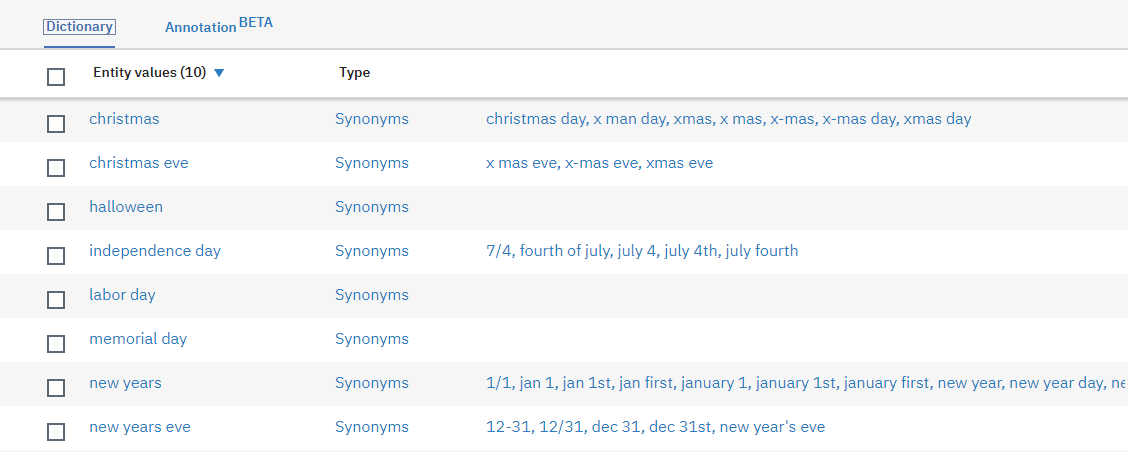
リストの一番目のエンティティをクリックして、確認します。この例では、 @holidayをクリックしそのプロパティを確認しています。この例では、事前に設定された全てのエンティティをそのままにします。
Entity Properties
For every entity, you need to specify:
- Entity name - Descriptive name consisting of the "@" symbol and text (e.g., "@holiday")
- Value name - A particular word that's included under the umbrella of the entity (e.g., "Hanukkah" and "Christmas" could be values for entity "@holiday")
- Synonyms - Related words that could be used in place of the value name (e.g., "turkey day" could be a synonym for "Thanksgiving"); if you don't know any synonyms, IBM can recommend some for you
Step 6: Design your dialog flow
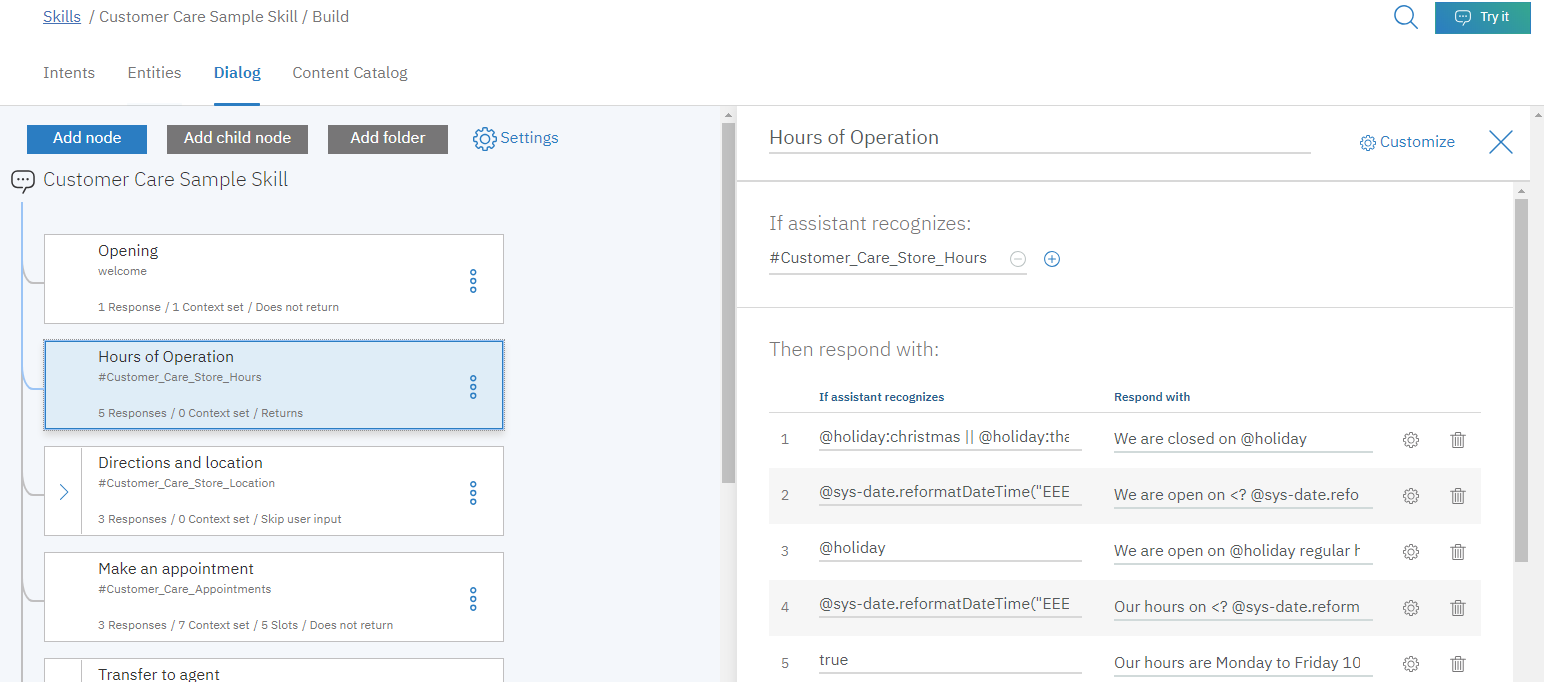
Click on the Dialog tab at the top of the Skills page. The dialog for the sample skill you selected in Step 3 will be shown.
A dialog is like a scenario in that it defines what the bot does in response to a customer's text or actions. When you design your dialog flow, you are telling the Watson Assistant what to do when it recognizes defined intents and entities during an active chat. Branches of a dialog are called nodes, and nodes can be organized into folders.
Dialog Properties
In this example, we are going to leave everything in the dialog as-is. Click on the "Hours of Operation" node to open up properties for that node:
- Name - The name of the node (you can edit it here)
- If assistant recognizes - This is where you specify intents related to the node name (e.g., for this "Hours of Operation" node, you are telling the bot what to do when it recognizes the user examples defined in the "#Customer_Care_Store_Hours" intent)
- Then respond with - This is where you specify entities and how the bot should respond when it recognizes them
- If assistant recognizes - Enter entities here (with "@" symbol)
- Respond with - This is the bot's response to the customer; in Bright Pattern's Agent Desktop, anything entered in this field becomes the bot suggestion
- If assistant recognizes - Enter entities here (with "@" symbol)
- Wait for user input - Select this to provide a bot response only when the customer types something
Step 7: Try the Dialog
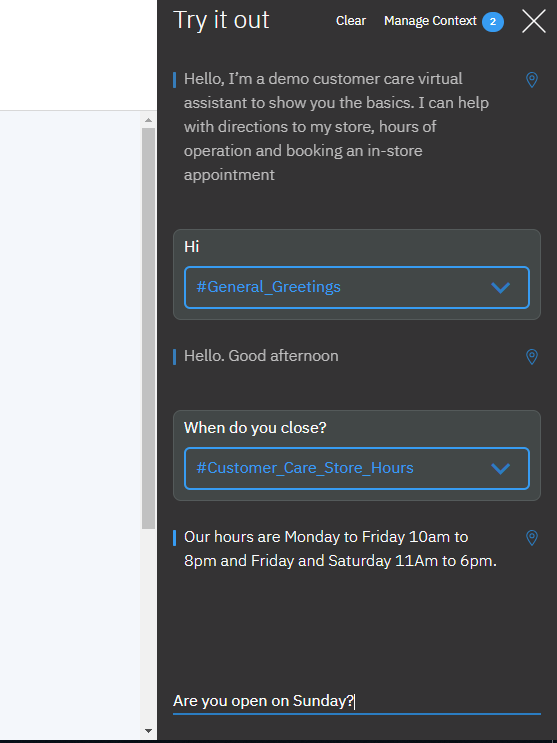
- Click the Try it button at the top of the page. This button launches the Watson Assistant you just built within a chat window.
- Pretend to be a customer and type some text into the text input field to see how the bot responds. The Try it out tool will show the intents and entities that the bot recognizes from the text you entered. You can click on the intents shown to select other ones or mark them as irrelevant.
Please read IBM's documentation to get a deeper understanding of Watson Assistant skills, intents, entities, and dialogs. Refer to IBM’s Getting Started tutorial and IBM’s API Reference.
Step 7: Add the Watson Assistant
Now that you're done creating a dialog skill, it's time to assign the skill to your Watson Assistant. This last step is important because later, you may have multiple Watson Assistants and skills, and IBM needs to know which ones are assigned to each other.
- Click Add Assistant.
- Select the Use sample skill tab, which is the skill you just set up in this procedure. If you do not see it listed, select the Add existing skill tab and find it there..
- Click on the desired skill name. That's it.
Next Steps
You have now set up a very basic Watson Assistant that can be integrated with Bright Pattern Contact Center. You may now:
- Read IBM's documentation, explore the Watson Assistant, and edit it as desired
- Create a Watson bot/chat suggestions integration account
- Edit a chat scenario that uses your Watson Assistant
- Configure web chat to work with bots
< 前へ | 次へ >

