How to Create a Watson Assistant
Bright Pattern Contact Center integrates with providers like IBM Watson to enable chatbots to be used in your contact center services.
In this article, you will learn how to create a basic IBM Watson Assistant that can be used as a conversational bot with your configured chat service. Note that the instructions provided in this article apply to either IBM Watson Assistant or IBM Watson Assistant (Conversation).

Procedure
This procedure will walk you through the process of setting up your first Watson Assistant. For a deeper understanding of Watson Assistant and other IBM resources, refer to IBM’s Getting Started tutorial and IBM’s API Reference.
Step 1: Create an IBM account
- If you haven’t already done so, create an IBM account. This process creates and activates an IBMid.
- Sign up for IBM Cloud. IBM Cloud is where you will be developing and managing resources like Watson Assistant bots.
Step 2: Add Watson Assistant as a resource
- Search IBM's catalog of resources for Watson Assistant.
- Edit service name, region, and select a resource group.
- Click Create Assistant to add Watson Assistant.
- The Assistants page will open, showing the skills available for your account plan type.
Step 3: Add a dialog skill
Skills are the workspaces where you will be developing your bot (note that IBM skills used to be called workspaces). Skills are what provide Natural Language Understanding (i.e., sentiment analysis) for your Watson Assistant. Because you are making a conversational bot, you will be building a dialog skill for talking to customers during live chat.
- Click Add dialog skill.
- For the sake of this example procedure, select Use sample skill, and click Customer Care Sample Skill, which is already set up for you to use and edit. Click it again and the Assistant page will open. That is where you develop your skill.
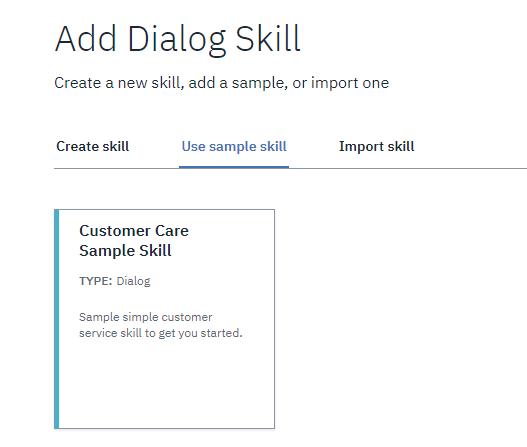
Use sample skill

Step 4: Create and/or add intents for your dialog skill
Because you selected the sample skill, the Assistant page will show some preconfigured intents. Intents are actions triggered by keywords entered by your customer.
In Watson syntax, intents always begin with the hashtag ("#") symbol, followed by word(s) in title case (i.e., where the first letter of a word is capitalized, unless it's a preposition like "to" or an article like "the"). Multiple words are separated by underscores ("_").
Like this: #Talk_to_Someone
Get familiar with intents by clicking on the first one in the list. In this example, we clicked on #Cancel to review its properties. You can leave all the preconfigured intents as-is or add new user examples.

Intent Properties
For every intent, you need to specify:
- Intent name - Descriptive name consisting of "#" and text (e.g., "#Cancel")
- Description - What this intent does (e.g., "Cancel current request")
- User examples - Keywords and phrases that trigger the intent (e.g., anything a customer might type during the chat); add as many examples and variations of spelling/phrases as you can, as the user examples are what make the bot compelling and helpful

Step 5: Create entities
Click on the Entities tab at the top of the Assistant page. As with intents, you will see some preconfigured entities. Entities are like word sets that more narrowly define the customer text that the bot recognizes.
In Watson syntax, entities always begin with the "@" symbol, followed by word(s) in lowercase. Multiple words are separated by underscores ("_").
Like this: @zip_code
Get familiar with entities by clicking on the first one in the list. In this example, we clicked on @holiday to review its properties. For this example, leave all the preconfigured entities as-is.

Entity Properties
For every entity, you need to specify:
- Entity name - Descriptive name consisting of the "@" symbol and text (e.g., "@holiday")
- Value name - A particular word that's included under the umbrella of the entity (e.g., "Hanukkah" and "Christmas" could be values for entity "@holiday")
- Synonyms - Related words that could be used in place of the value name (e.g., "turkey day" could be a synonym for "Thanksgiving"); if you don't know any synonyms, IBM can recommend some for you

Step 6: Design your dialog flow
Click on the Dialog tab at the top of the Skills page. The dialog for the sample skill you selected in Step 3 will be shown.
A dialog is like a scenario in that it defines what the bot does in response to a customer's text or actions. When you design your dialog flow, you are telling the Watson Assistant what to do when it recognizes defined intents and entities during an active chat. Branches of a dialog are called nodes, and nodes can be organized into folders.

Dialog Properties
In this example, we are going to leave everything in the dialog as-is. Click on the "Hours of Operation" node to open up properties for that node:
- Name - The name of the node (you can edit it here)
- If assistant recognizes - This is where you specify intents related to the node name (e.g., for this "Hours of Operation" node, you are telling the bot what to do when it recognizes the user examples defined in the "#Customer_Care_Store_Hours" intent)
- Then respond with - This is where you specify entities and how the bot should respond when it recognizes them
- If assistant recognizes - Enter entities here (with "@" symbol)
- Respond with - This is the bot's response to the customer; in Bright Pattern's Agent Desktop, anything entered in this field becomes the bot suggestion
- If assistant recognizes - Enter entities here (with "@" symbol)
- Wait for user input - Select this to provide a bot response only when the customer types something
Step 7: Try the Dialog
- Click the Try it button at the top of the page. This button launches the Watson Assistant you just built within a chat window.
- Pretend to be a customer and type some text into the text input field to see how the bot responds. The Try it out tool will show the intents and entities that the bot recognizes from the text you entered. You can click on the intents shown to select other ones or mark them as irrelevant.
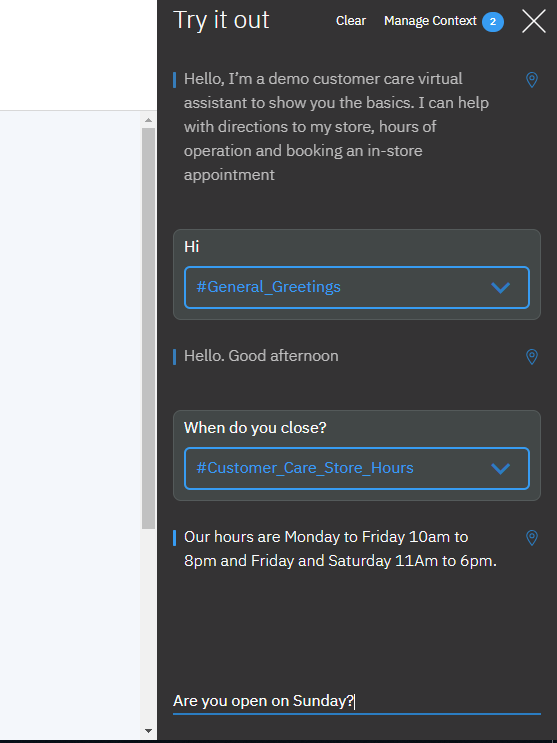
Sample dialog

Please read IBM's documentation to get a deeper understanding of Watson Assistant skills, intents, entities, and dialogs. Refer to IBM’s Getting Started tutorial and IBM’s API Reference.
Step 7: Add the Watson Assistant
Now that you're done creating a dialog skill, it's time to assign the skill to your Watson Assistant. This last step is important because later, you may have multiple Watson Assistants and skills, and IBM needs to know which ones are assigned to each other.
- Click Add Assistant.
- Select the Use sample skill tab, which is the skill you just set up in this procedure. If you do not see it listed, select the Add existing skill tab and find it there..
- Click on the desired skill name. That's it.

Next Steps
You have now set up a very basic Watson Assistant that can be integrated with Bright Pattern Contact Center. You may now:
- Read IBM's documentation, explore the Watson Assistant, and edit it as desired
- Create a Watson bot/chat suggestions integration account
- Edit a chat scenario that uses your Watson Assistant
- Configure web chat to work with bots
< Previous | Next >