アクティビティフォームの設定方法
アクティビティフォームは、エージェントがエージェントデスクトップで直接処理するフォームであり、さまざまな目的に使用できます。ただし、アクティビティフォームの主な目的は、対話中に情報を収集することです。アクティビティフォームは、情報を収集してアクティビティ履歴フォームへ渡すために使われます。
この記事では、コンタクトセンター管理者アプリケーションとフォームビルダーアプリケーションでアクティビティフォームを設定するために必要な手順について説明します。
必須条件
アクティビティフォームフィールドは、 コンタクト, 会社, アクティビティ履歴のカスタムフィールドにマッピングできます。 これを行うには、まずこれらのカスタムフィールドを設定します。詳しい情報については、 コンタクトセンター管理者ガイドのカスタムフィールドをご覧ください。
手順
ステップ 1: コンタクトセンター管理者アプリケーションでアクティビティフォームを設定します。
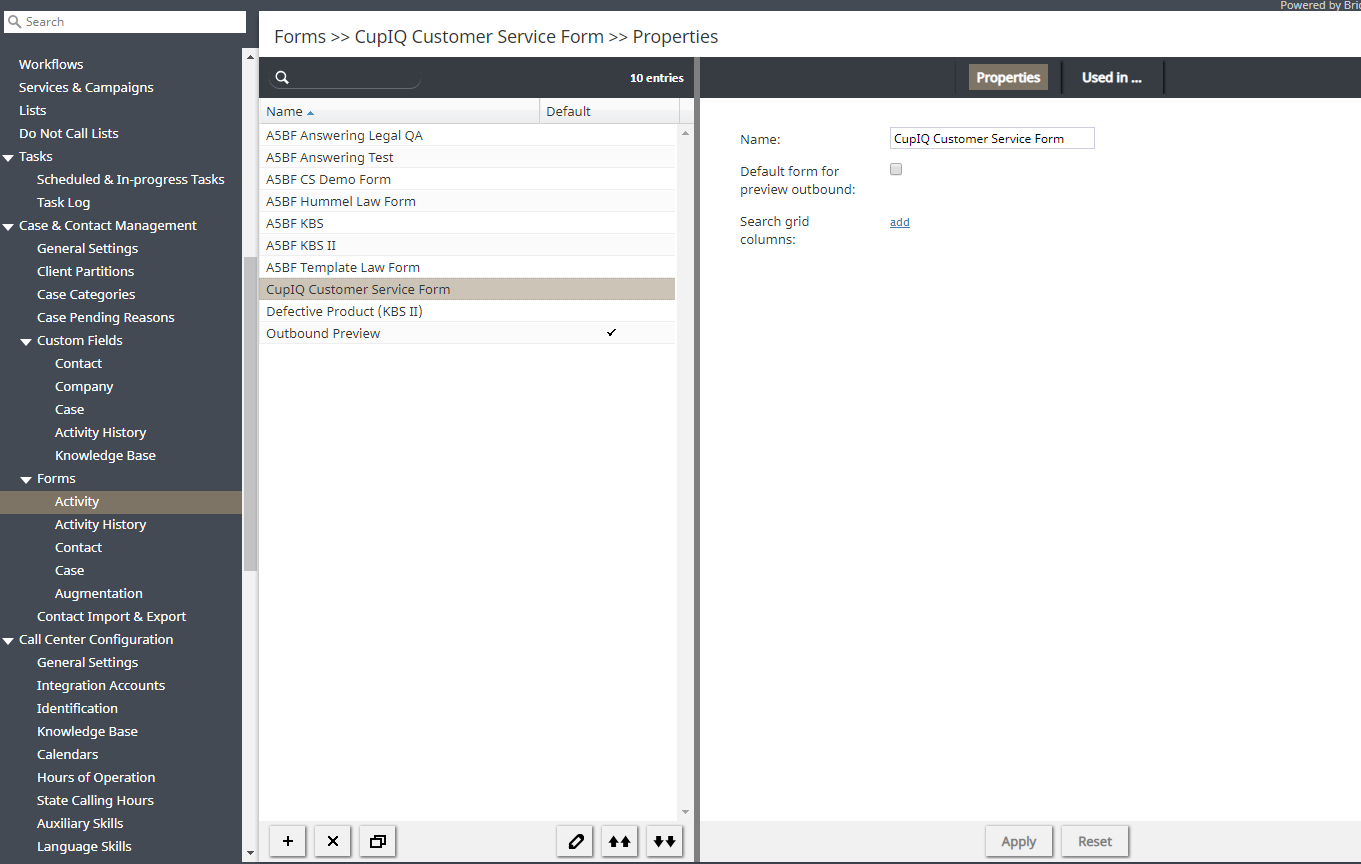
コンタクトセンター管理者アプリケーションのフォーム > アクティビティから開始します。 新しいフォームの追加' ボタンをクリックし、 フォームビルダーを起動します。
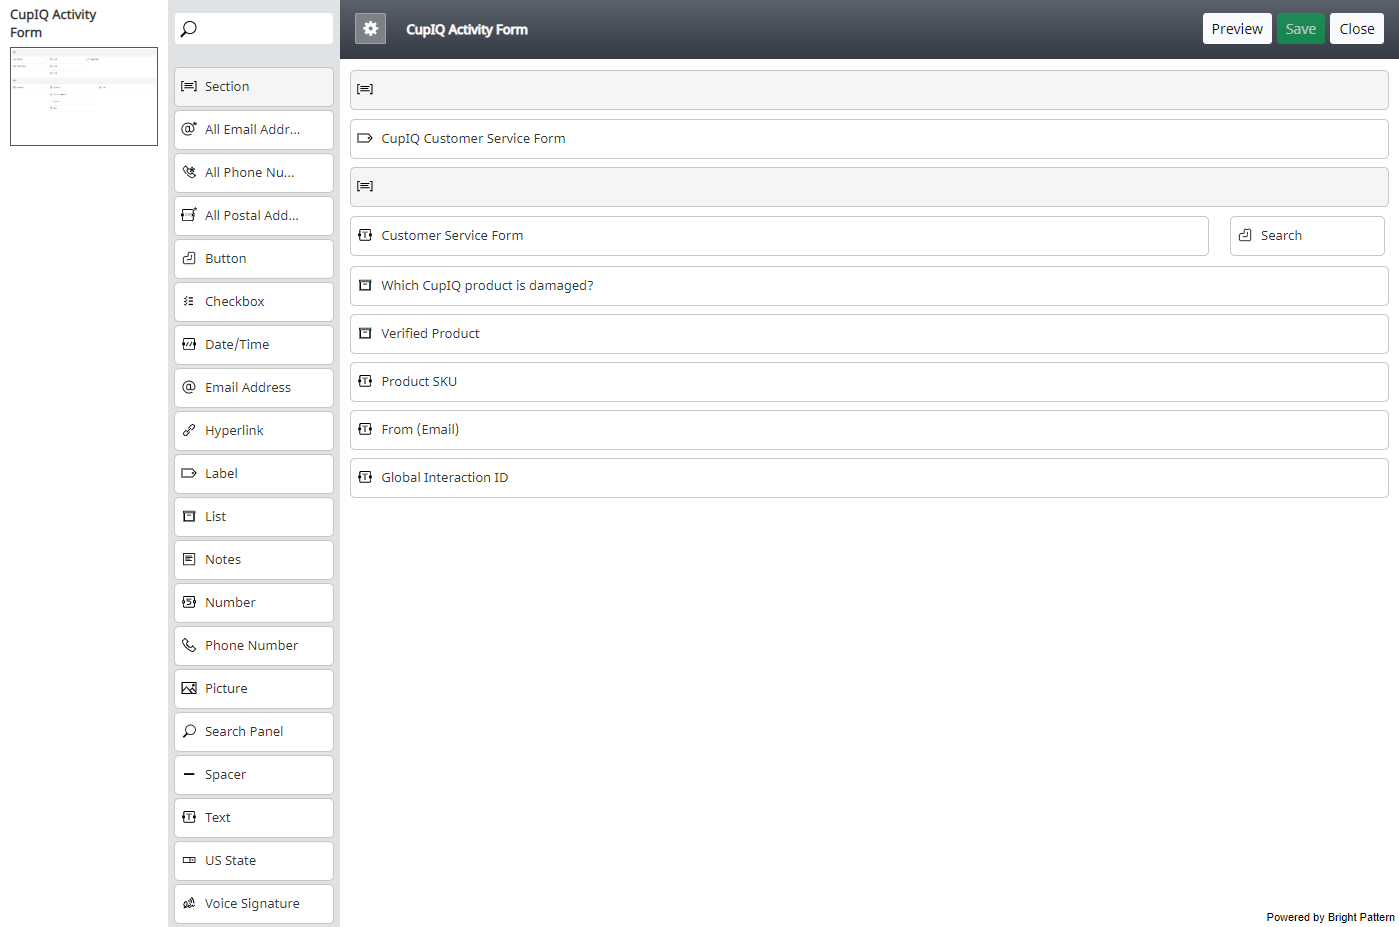
ステップ 2: フォームビルダーアプリケーションでフォームを作成します。
フォームビルダーアプリケーションで、エージェントが閲覧および操作できるフィールドの追加を開始します。フィールドはインタラクティブまたは静的にすることができます(つまり、フィールドを編集可能にするかどうかを設定できます)。
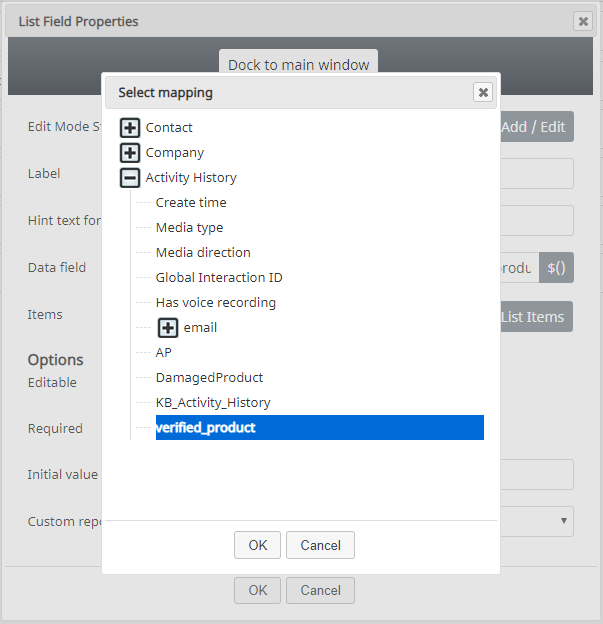
フォームを設定する際に、カスタムフィールド値をフォームフィールドにマッピングするかどうかを指定できます。カスタムフィールド値をフォームフィールドにマッピングすると、フォームフィールドに入力されたデータを他のフォームやレポートでも使用できます。
カスタムフィールド値をマッピングするには、フィールドプロパティを編集する際に データフィールド ボタンをクリックします。 これにより、特定のフォームフィールドにマッピングできるデータフィールドがウィンドウに表示されます。
When you are all finished, click the Save button and you will be prompted to name your form.
Step 2a: Add Pages to Your Form
Activity forms can be as detailed or concise as you need them to be. If the former is true, you can add pages to your form using the new page button, located in the pages palette. Adding pages will change the default page name if you have named it. That is, pages name will read "Page 2", "Page 3," and so forth, instead of "New Page".
Additionally, you may clone pages using the clone page button. Clicking this button creates a new page titled "Clone of <page name>" and all controls are copied from the cloning page.
Step 3: Connect Your Form to a Service
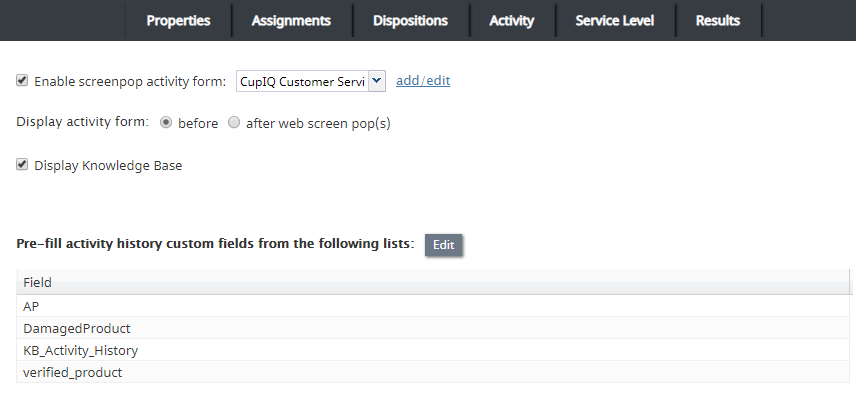
When you are finished building your form, you will need to connect it to a configured service. To do this, return to the Contact Center Administrator application, section Services & Campaigns > Activity tab. From the setting Enable screenpop activity form, you will select the name of the activity form you created.
From the Activity tab, you may configure additional settings, such as whether you want Knowledge Base articles to be displayed when the form is popped, whether you want the activity form to be displayed before or after webpop, and so forth.
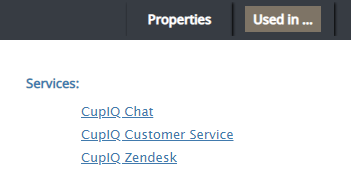
When you are finished connecting the activity form to the service, you can return to section Forms > Activity > Used in ... and see the name of the service(s) associated with the form.
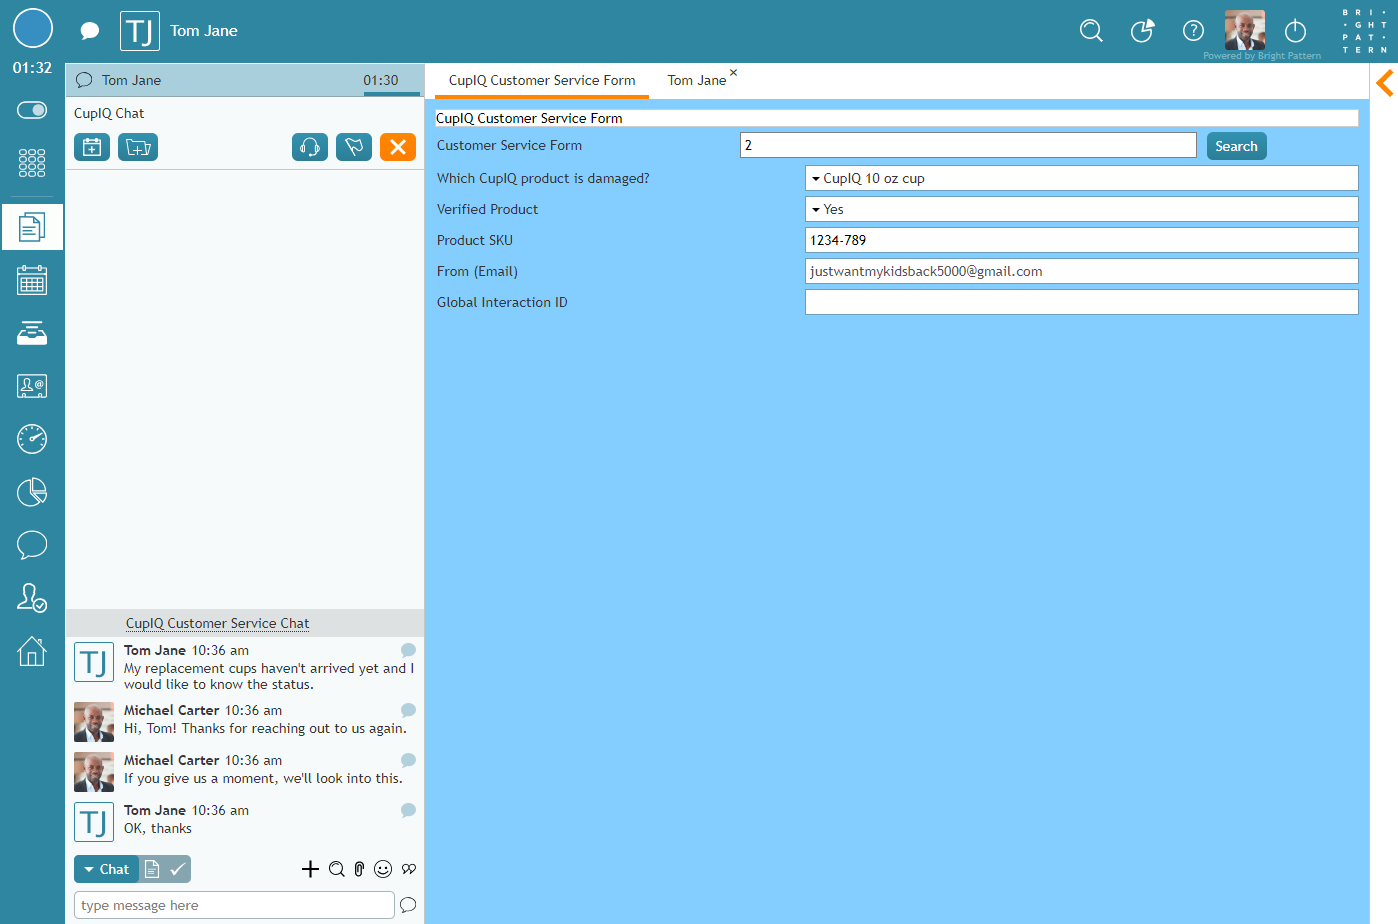
Your Form in Action
After you are finished connecting your activity form to your service, you will want to ensure it is working in Agent Desktop. In the following image, you can see how a popped activity form looks to agents.

