設定
既存の受信音声サービスのバーチャルキュー(VQ)の設定方法は以下の通りです:
ステップ 1: VQが有効になるサービスに対してコールを配信するシナリオを選択します。
- コンタクトセンター管理者アプリケーションに管理者としてログインします。
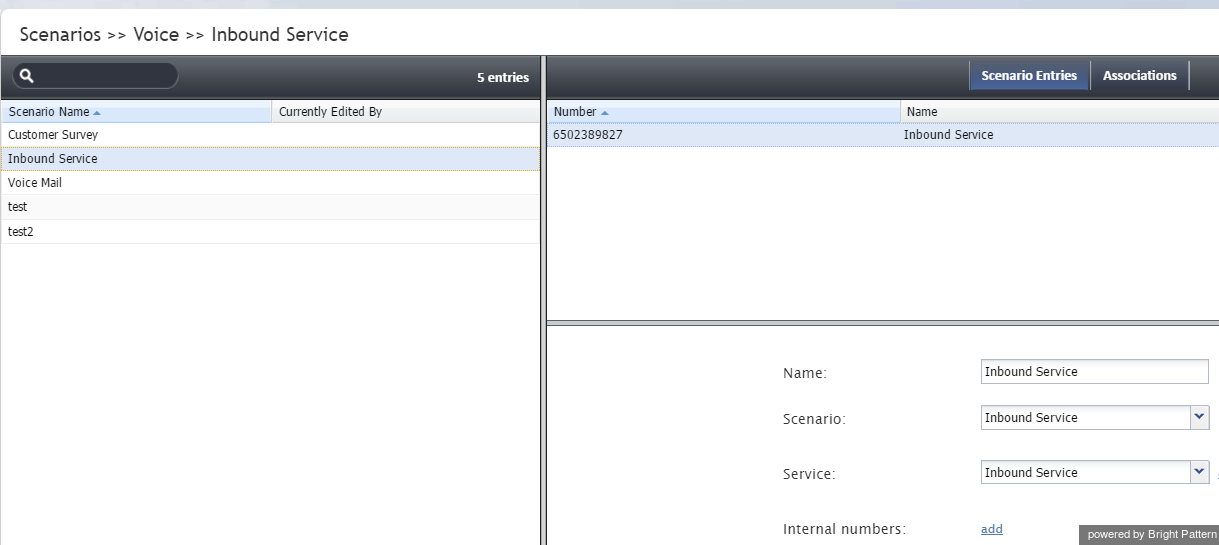
- シナリオ > 音声へ進みます。
- VQが有効になるサービスに対するコールの配信に使われるシナリオを選択します。示されている例では、"受信サービス"というシナリオが選択されます。
ステップ 2: シナリオ名を変更します。
- シナリオ名をダブルクリックするか、編集ボタンをクリックして、シナリオビルダーアプリケーションでシナリオを開きます。
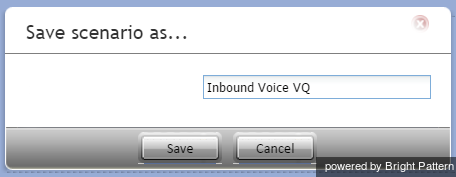
- 名前を付けて保存ボタンを使って、このシナリオを新しい名前で保存します。 この名前は任意で付けることができます。
ステップ 3: シナリオビルダーでエージェントの検索ブロックを選択します。
- シナリオ名をダブルクリックするか、シナリオ編集
 ボタンをクリックし、シナリオビルダーアプリケーションでシナリオを開きます。
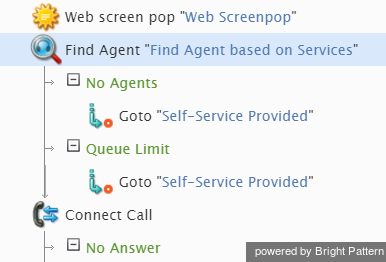
 - この新しいシナリオ内で エージェントの検索ブロックを選択します。このブロックは、VQが有効になるサービスに対するコールを配信するために使われます。
ステップ 4:VQを有効にし予想待機時間のしきい値を指定します。
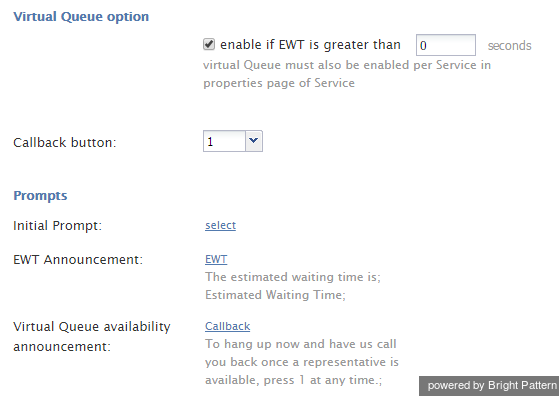
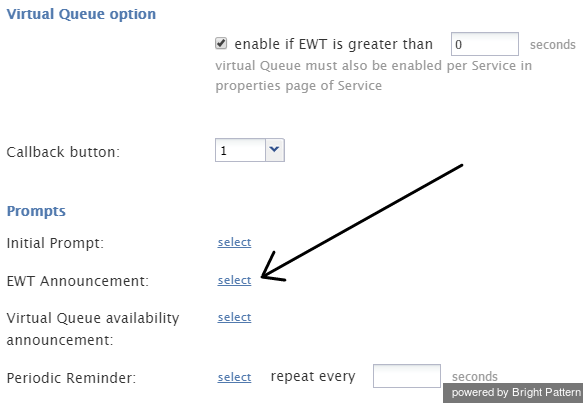
- エージェントの検索ブロックの バーチャルキューオプションで、VQを有効にするチェックボックスを選択します。
- 次に、予想待機時間(EWT)のしきい値を秒単位で指定します。 VQオプションは、特定のコールのEWTが指定したしきい値を超えた場合にのみ提供されます。示されている例では、しきい値はゼロ(0)秒です。
ステップ 5: コールバックを有効にします。
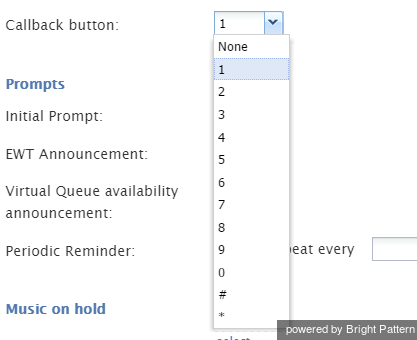
コールバックボタンの ドロップダウンメニューで、数字を選択します。これは、発信者がVQオプションを受け入れるために押すダイヤルパッドの数字です。
ステップ 6:お客様に対して再生されるEWTアナウンスを作成します。
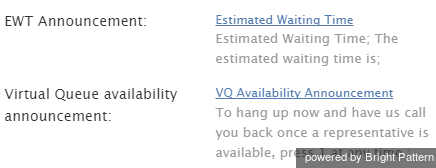
- EWTアナウンスを作成します。EWTアナウンスの例は以下の通りです: 予想待機時間は <分数または秒数>です。ここでの"予想待機時間"は EWTタイプの音声セグメントです。
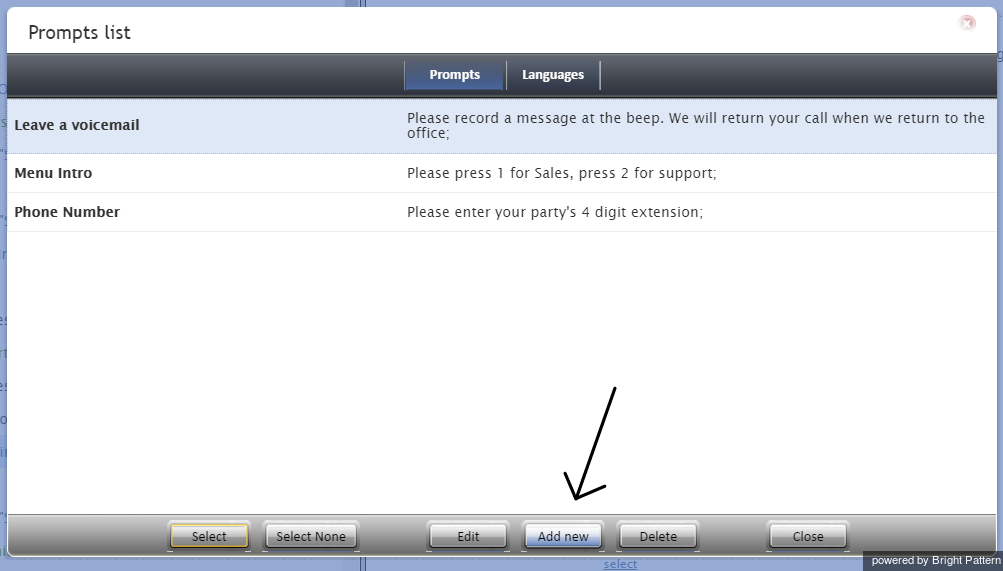
ご注意: アナウンスがすでに作成済みの場合、ステップ7へ進みます。 - 新しいプロンプトまたはアナウンスを作成するには、プロンプトリストでEWT アナウンスを探し、 選択をクリックします。
- 表示するプロンプトリスト ウィンドウ内の追加をクリックします。
- 表示する新規プロンプトウィンドウで、アナウンス名を入力します。
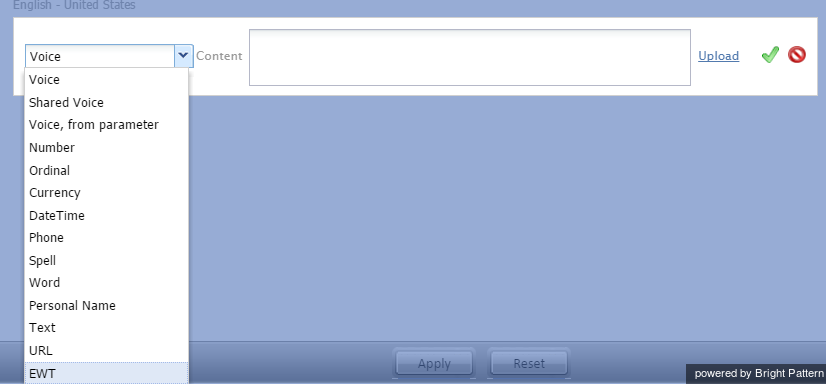
- 音声セグメントの追加をクリックします。
- 表示するドロップダウンメニュ内のEWTを選択し、緑色のチェックマークをクリックします。
- もう一度音声セグメントの追加をクリックします。
- 表示するドロップダウンメニュ内の 音声を選択し、アナウンスで流れるテキストを入力します。通常、テキストは予想待機時間は・・・です。 これは、お客様が電話で聞く音声アナウンスです。
- アップロードをクリックしてアナウンスのテキストに音声セグメントを追加します。
- EWT アナウンスには2つのセグメントが追加されました。変更を保存するには、適用をクリックします。
- 表示するプロンプトリストで、先ほど作成したEWTアナウンスを選択し、 選択をクリックします。
ステップ 7: バーチャルキューの利用に関するアナウンスを作成します。
バーチャルキューの利用に関するアナウンスは、発信者にVQオプションを提案するために使われます。例えば、アナウンスには、この電話を切って、担当者が対応可能になったら折り返し電話をするには、電話途中でも[数字]を押してくださいという内容が含まれる場合があります。ここでの 数字 とは、手順5で選択した数字です。このアナウンスを作成するには、上記のステップ6に示されている指示に従ってください:
- Beside Virtual Queue availability announcement:, click select.
- In the Prompts list that appears, click Add new.
- Add a voice segment, naming it "Virtual Queue availability announcement" and typing "To hang up now and have us call you back once a representative is available, press 1 at any time." in the content box.
- Upload the voice recording that will be played to callers.
- Click Apply to save your changes.
- In the Prompts list that appears again, select the new announcement you just created, and click Select.
Your Prompts section of the Find Agent block now includes the two announcements you created.
Step 8: Define Request Callback block properties
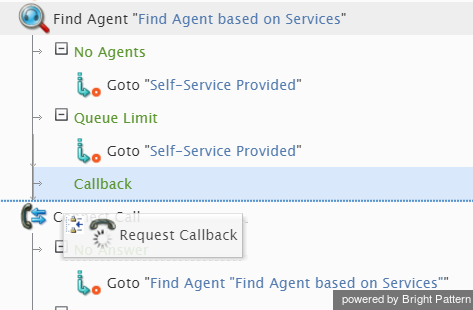
For the Callback exit of the Find Agent block, insert a Request Callback block and define its parameters.
Parameters
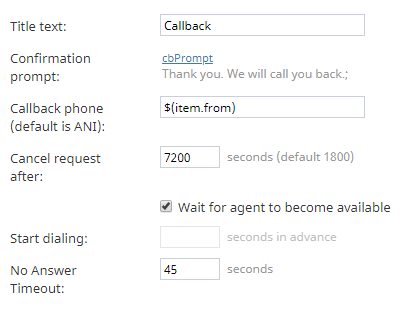
The parameters are described as follows:
- Title text - The name of this block
- Confirmation prompt - Confirms the callback request (e.g., “Thank you. We will call you back.”)
- Callback phone - Specifies the phone number for the callback. If callbacks will always be made to the phone that was used to make the original call, you can use the $(item.from) variable here, which is the caller ID of the original call. If, however, you want to give the customer a choice of providing another phone number for callback, you should use a combination of scenario blocks Set Variable, Menu, and Collect Digits as illustrated in the example offered in this tutorial. In this case, set the Callback phone to the new variable that you define in the Set Variable block.
- Cancel request after - Specifies the amount of time (in seconds) after which the virtual calls will be terminated if no matching agents are found
- Wait for agent to become available - If checked, a callback will be made after explicit agent reservation; otherwise the EWT-based callback mechanism will be used. See How It Works for more information.
- Start dialing - For the EWT-based callback mechanism, this parameter specifies how far in advance (in seconds) of the EWT expiration moment the callback attempt will be made; note that if an agent becomes available earlier for the given call, the callback will be placed at that moment.
- No Answer Timeout - Specifies how long (in seconds) the block will wait for the customer to answer the callback attempt before taking the No Answer exit
Step 9: Use an IVR prompt to inform the customer that he/she is receiving a callback
The normal exit of the Request Callback block is taken when the callback attempt is answered before the specified No Answer Timeout expires. Instead of connecting the answered call directly to the Find Agent block for immediate distribution to an agent, it is good practice to use an IVR prompt to announce to the customer that this is the requested callback. This explains the purpose of the call to the customer and, more importantly, prepares the caller for a possible short waiting time in case an agent is not immediately available.
In the Scenario Example given in this guide, the Menu block is used to make such an announcement and to wait for customer’s confirmation before passing this call to the Find Agent block for distribution.
Step 10: Define when conditional exits should be taken
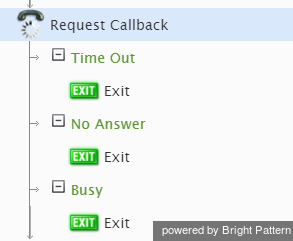
Use the conditional exits of the Request Callback block to define what happens when the callback attempt meets various "abnormal" conditions, such as No Answer or Busy. In the Scenario Example given in this guide, the call is terminated under any such conditions, which is shown via the Exit blocks placed beneath each conditional exit.
Step 11: Enable VQ for any other services and save your work
- Repeat Step 3 through Step 10 for other Find Agent blocks of this scenario that are used to distribute calls to other services for which you would like to enable VQ.
- Save the new scenario by clicking the Save button at the bottom of Scenario Builder.
Step 12: Complete remaining VQ configuration steps in Contact Center Administrator
- To complete the remaining VQ configuration steps, open the Contact Center Administration application.
- Log in as Admin.
Step 13: Activate the VQ function for the service desired
The configured VQ will not be operational until it is explicitly activated for the desired services.
- To activate the VQ function for a particular service for which it was configured as described above, select the Enable callback functionality checkbox in the Properties tab of that service.
- Before you activate the VQ function for all other services where it may have been configured, consider using the Virtual Queue Report to monitor VQ performance within the service where it has been activated and to adjust its parameters if necessary. See the Reporting Reference Guide for more information on reports. See also section Reporting for more information.
Step 14: Test the scenario
As with any other significant service configuration change, the new scenario should be tried in a test environment.
- Create a test dial-in scenario entry, associate it with your new scenario and make some test calls imitating various VQ conditions to make sure everything works as you expect.
- Pick a time when your call center is closed for business and replace your current production scenario with the VQ-enabled scenario in the dial-in scenario entries where the current scenario is used. (These scenario entries will appear in the Scenario Entries tab when you select your current scenario in the Scenarios > Voice list view. To make the replacement, click one of the listed dial-in scenario entries and select the new scenario from the Scenario drop-down list.)
Notes
- When configured, virtual queue callback is attempted only once. If you would like to offer virtual queue during specific times, you may use an If block to inspect time of day. If the call occurs during a time that you would want to offer virtual queue, use a Find Agent block with the virtual queue option enabled. If the call time occurs outside of the desired time, use a Find Agent block that does not offer virtual queue.
< 前へ | 次へ >

