| Line 13: | Line 13: | ||
* View requested data | * View requested data | ||
| − | == | + | |
| − | + | == Sample Code == | |
| + | In this sample code, the methods are attached to button elements. | ||
| + | |||
| + | Copy this sample code for pasting into your HTML file. This is the bare minimum that you need for the SDK to work. Make sure you replace "<tenant>" with the name of your Agent Desktop web server (e.g., "example.brightpattern.com"). | ||
| + | |||
| + | |||
| + | <syntaxhighlight lang="javascript"> | ||
| + | <script type="text/javascript" src="https://<tenant>.brightpattern.com/agentdesktop/libs/servicepattern-sdk-v1.js"> </script> | ||
| + | |||
| + | <iframe id="repeater" style="position:absolute; right: 8px; width: 300px; height: 700px;" src="https://<tenant>.brightpattern.com/agentdesktop/UniversalRepeater.jsp"></iframe> | ||
| + | |||
| + | <button onclick="bpspat.api.getState(log)">Get State</button> | ||
| + | |||
| + | <div id="log">Logs...</div> | ||
| + | |||
| + | <script type="text/javascript"> | ||
| + | window.bpspat.api.init("https://<tenant>.brightpattern.com"); | ||
| + | function log(data) { | ||
| + | let div = document.createElement("div"); | ||
| + | div.innerHTML = JSON.stringify(data); | ||
| + | document.getElementById("log").appendChild(div); | ||
| + | } | ||
| + | </script> | ||
| + | </syntaxhighlight> | ||
| + | |||
| + | |||
| + | == Example Exercise == | ||
| + | There are many ways to style your page elements and Agent Desktop widget display. The following is provided for example purposes only. | ||
# Paste the [[5.3:Embedded-agent-desktop-sdk-specification/UseCases/GetAgentStateInteractionInfo#Sample_Code | | # Paste the [[5.3:Embedded-agent-desktop-sdk-specification/UseCases/GetAgentStateInteractionInfo#Sample_Code | | ||
| − | sample code]] into the body of your HTML file | + | sample code]] into the body of your HTML file.<br /><br /> |
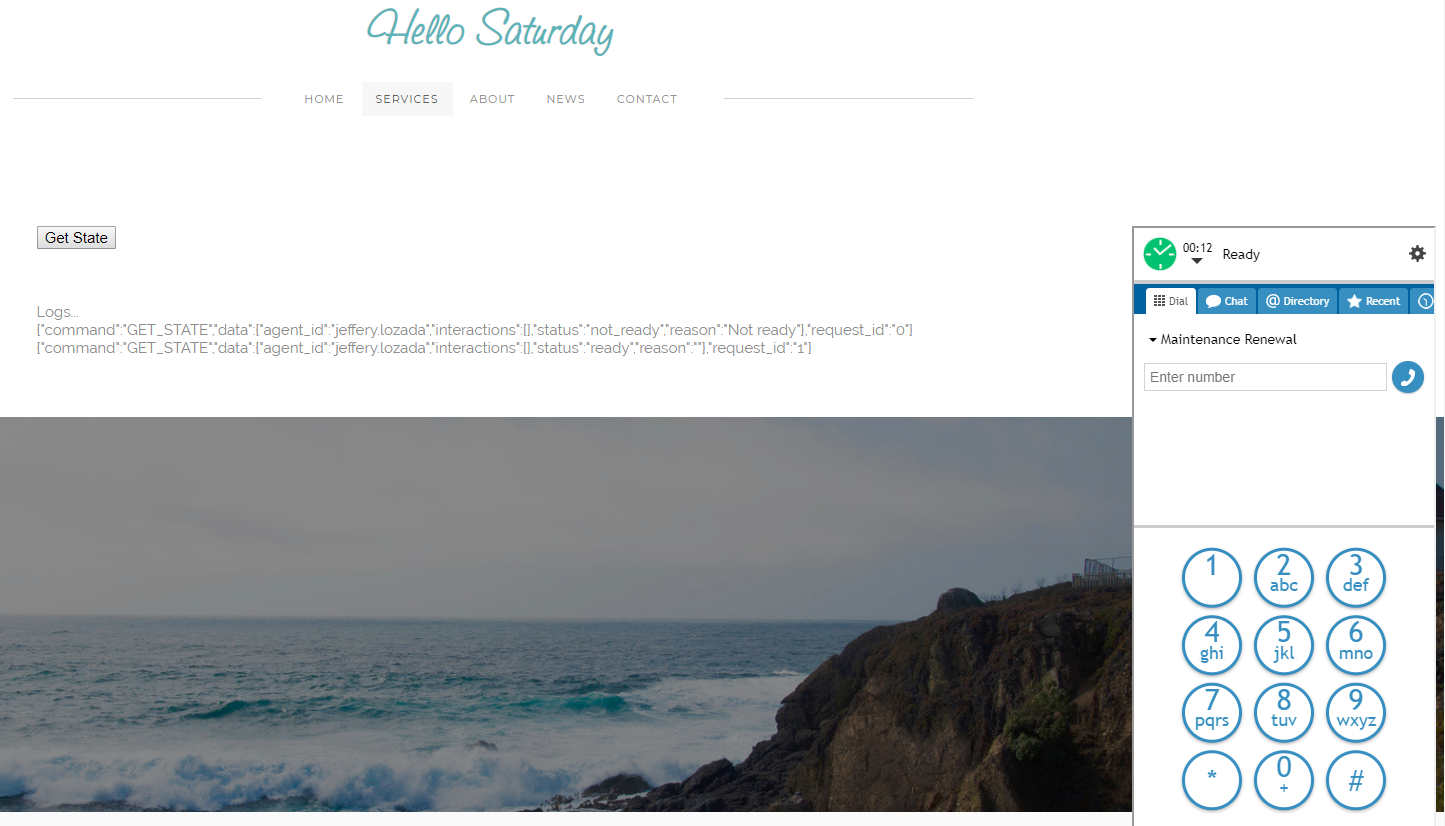
# Save and open the page in your web browser.<br /><br />[[File:Agent-State1-53.PNG|thumb|800px|center|Example webpage with getState button]] | # Save and open the page in your web browser.<br /><br />[[File:Agent-State1-53.PNG|thumb|800px|center|Example webpage with getState button]] | ||
# Make sure the agent is logged in.<br /><br /> | # Make sure the agent is logged in.<br /><br /> | ||
| Line 32: | Line 59: | ||
| − | + | ||
| − | |||
| − | |||
| − | |||
| − | |||
| − | |||
| − | |||
| − | |||
| − | |||
| − | |||
| − | |||
| − | |||
| − | |||
| − | |||
| − | |||
| − | |||
| − | |||
Latest revision as of 22:20, 26 March 2019
Get Agent State and Interaction Information
You can use the getState method to request data about an agent's current state and interaction(s). This method allows you to get data about a logged-in agent quickly.
The getState method can be attached to a web element, such as a button, on your webpage. When clicked, the button will process the API method and retrieve some data, displaying it as a running log on the page. The data will continue to be updated as the agent's state and interactions change in real time.
It is helpful to use getState with other methods of the API because getState will provide agent and interaction parameters, such as item_id (interaction ID), which you will need in order to control call recordings, for example.
In this article, you will learn how to:
- Attach getState to a button
- Place sample JavaScript into HTML
- Use getState to make a request
- View requested data
Sample Code
In this sample code, the methods are attached to button elements.
Copy this sample code for pasting into your HTML file. This is the bare minimum that you need for the SDK to work. Make sure you replace "<tenant>" with the name of your Agent Desktop web server (e.g., "example.brightpattern.com").
 <script type="text/javascript" src="https://<tenant>.brightpattern.com/agentdesktop/libs/servicepattern-sdk-v1.js"> </script>

 <iframe id="repeater" style="position:absolute; right: 8px; width: 300px; height: 700px;" src="https://<tenant>.brightpattern.com/agentdesktop/UniversalRepeater.jsp"></iframe>

 <button onclick="bpspat.api.getState(log)">Get State</button>

 <div id="log">Logs...</div>

 <script type="text/javascript">
 window.bpspat.api.init("https://<tenant>.brightpattern.com");
 function log(data) {
 let div = document.createElement("div");
 div.innerHTML = JSON.stringify(data);
 document.getElementById("log").appendChild(div);
 }
 </script>
Example Exercise
There are many ways to style your page elements and Agent Desktop widget display. The following is provided for example purposes only.
- Paste the
sample code into the body of your HTML file.
- Save and open the page in your web browser.
- Make sure the agent is logged in.
- Click the Get State button to initiate the request.
- View the response data on the page. The response should look like this:


{"command":"GET_STATE","data":{"agent_id":"jeffery.lozada","interactions":[],"status":"not_ready","reason":"Not ready"},"request_id":"0"}
{"command":"GET_STATE","data":{"agent_id":"jeffery.lozada","interactions":[],"status":"ready","reason":""},"request_id":"1"}
You can see that every time you click Get State, the response data will show updated information for the agent's current status, including interactions handled.
