Enable Scenarios to Access Salesforce Data
A connected app integrates an application like Bright Pattern Contact Center with Salesforce using APIs and lets Bright Pattern scenarios access and interact with Salesforce data objects using CRUD (i.e., Create, Retrieve, Update, Delete) functionality.
The server-side integration is implemented using Salesforce web services via the Salesforce REST API (http://wiki.developerforce.com/page/REST_API). Bright Pattern Contact Center authenticates with Salesforce using the Web Server OAuth Authentication flow. The refresh token mechanism is used to obtain and refresh the access token.
This article will show you how to:
- Create a new connected app
- Enable API access
- Get the consumer key and consumer secret needed for your integration account properties
- Determine which user roles can access the connected app
Step 1: Create a new connected app
- In Salesforce Lightning, go to Platform Tools > Apps > App Manager.
- At the top of the Lightning Experience App Manager, click New Connected App.

Step 2: Configure the connected app
On the New Connected App page, set the following:
Basic information
- Connected App Name - Any unused name
- API Name - Any unused name
- Contact Email - Your contact email address

API (Enable OAuth Settings)
- Enable OAuth Settings - Select checkbox
- Callback URL - Set https://<your-brightpattern-domain>/admin/salesforcecallback.html (e.g., "https://example.brightpattern.com/admin/salesforcecallback.html")
- Available OAuth Scopes - Select the following:
- Full access (full)
- Manage user data via APIs (api)
- Perform requests at any time (refresh_token, offline_access)
- Configure API Flows
- "Require Proof Key for Code Exchange (PKCE) Extension for Supported Authorization Flows” option is checked by default. Important: Make sure to uncheck this option
- You may leave the rest as default
_configuration_view.png)
Important: Click "Save" when you are done!
Updates to these parameters take a few minutes to propagate through the system--wait 10 minutes while Salesforce updates these settings internally.
Step 3: Get the consumer key and consumer secret
- In App Setup > Apps > App Manager, select the newly created app and click view details of the connected app you just created.
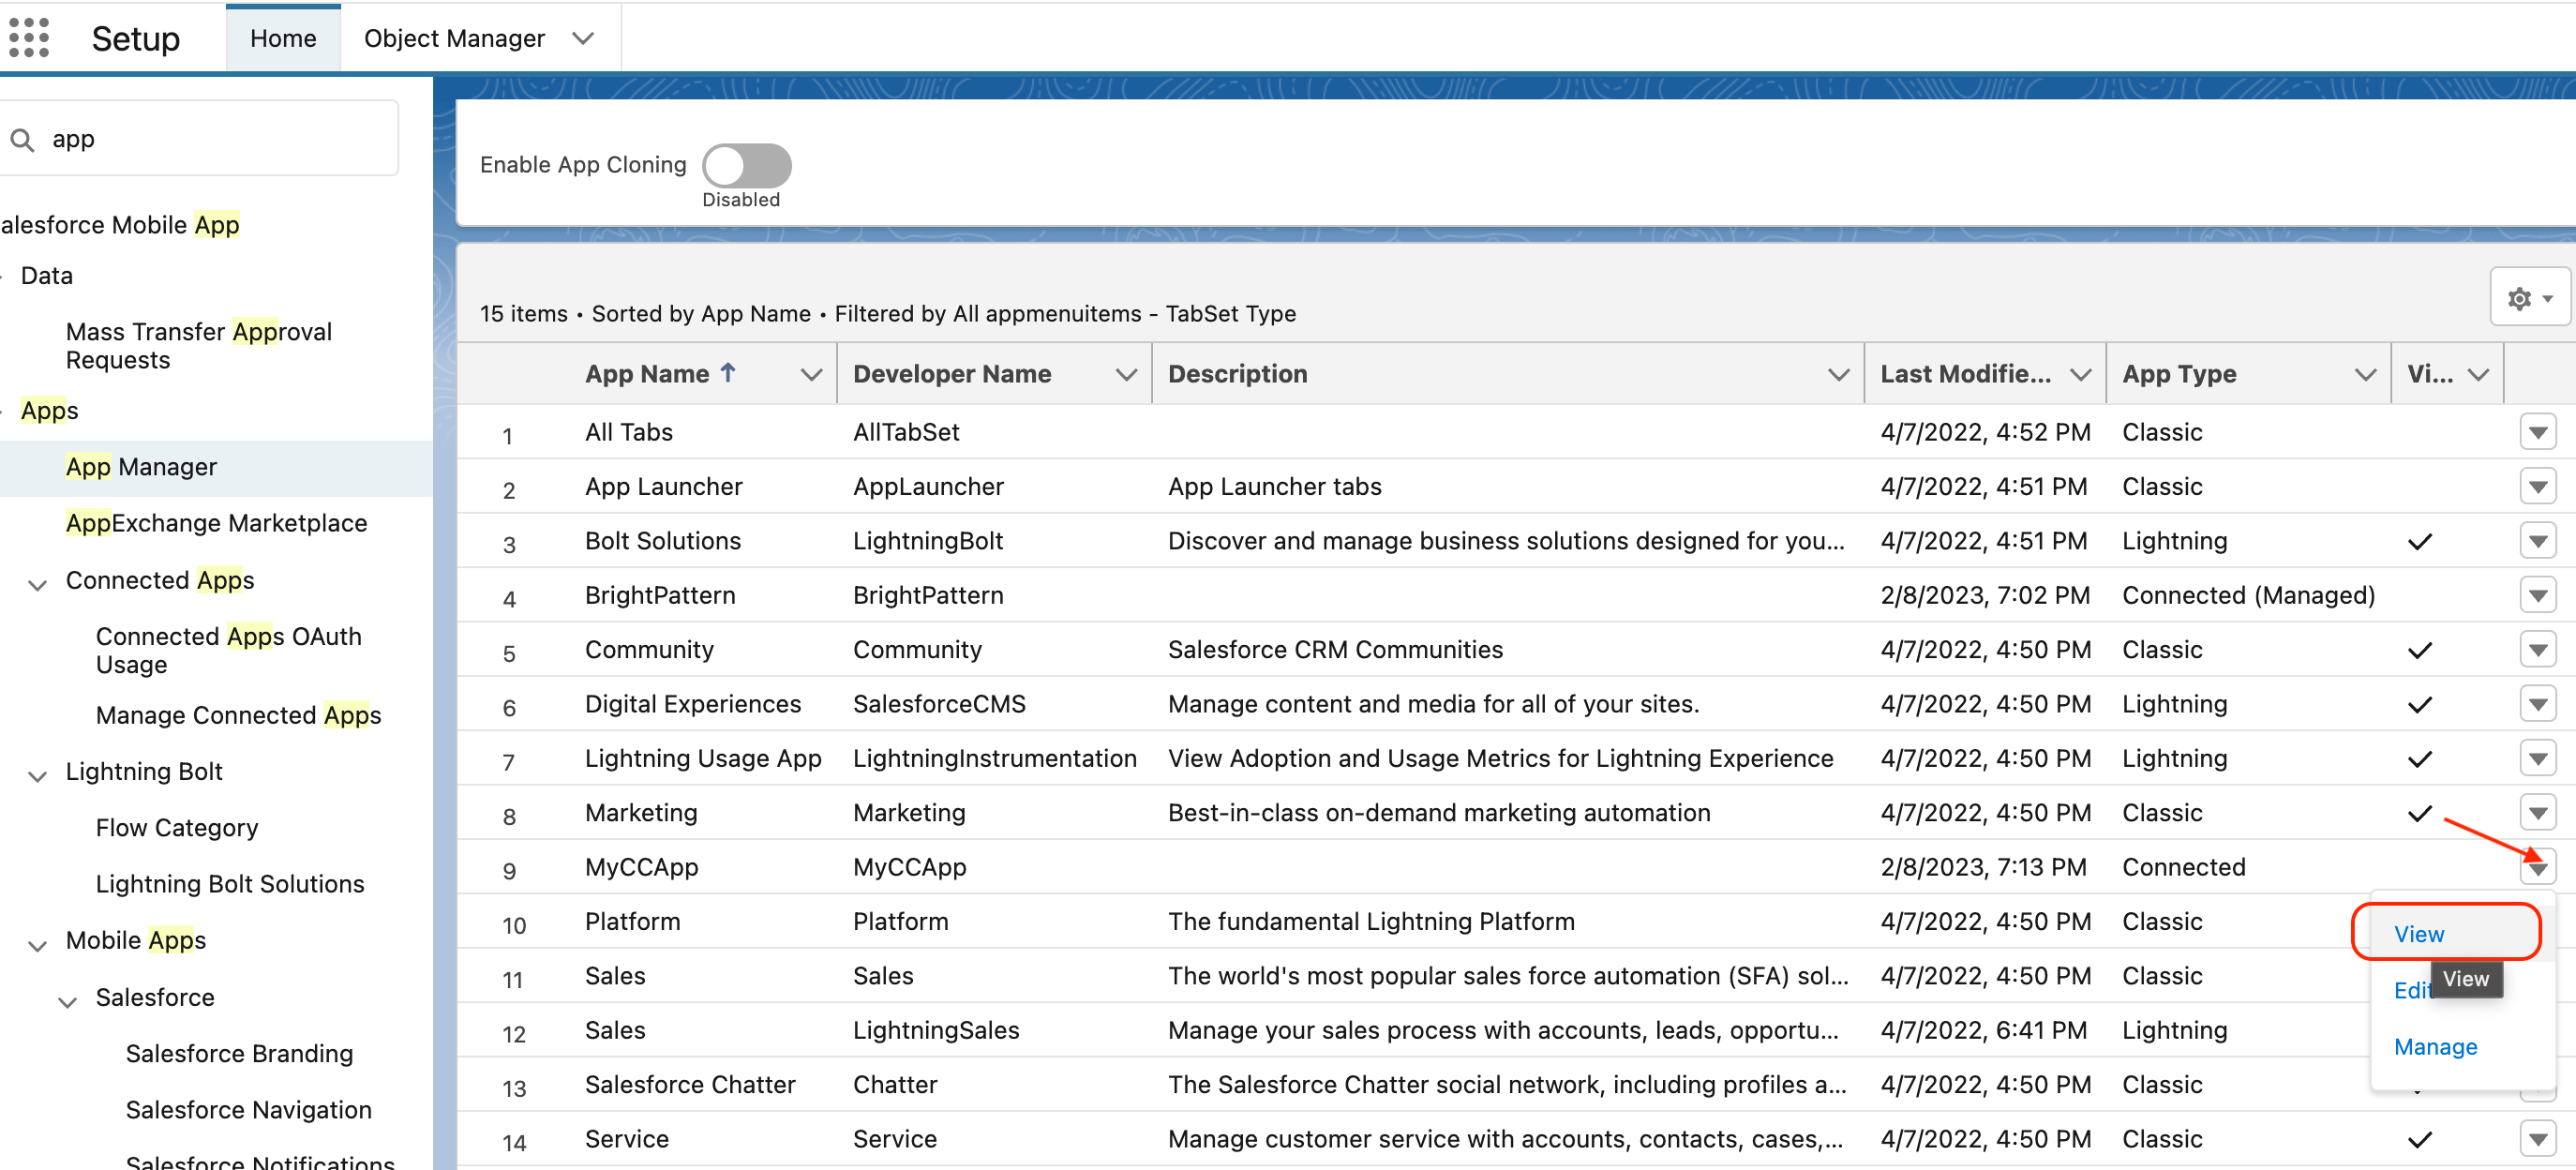
- Copy the Consumer key and Consumer secret directly from the connected app.

- Save these for later use, when you paste them into your integration account properties.


Step 4: Update the security profile to include the new connected app
- In Salesforce Lightning Setup, from Administration > Users, edit the System Administrator security profile.
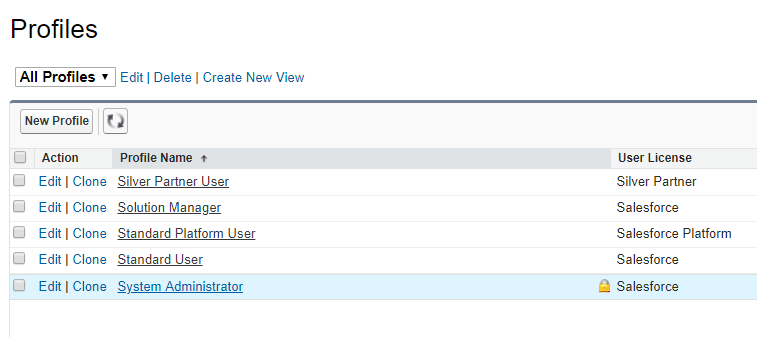
Click "Edit" for the System Administrator security profile - In the Connected App Access section, select the checkbox for the connected app created earlier (e.g., "LemurBooksApp" in this example). This grants users with the system administrator role access to your connected app.
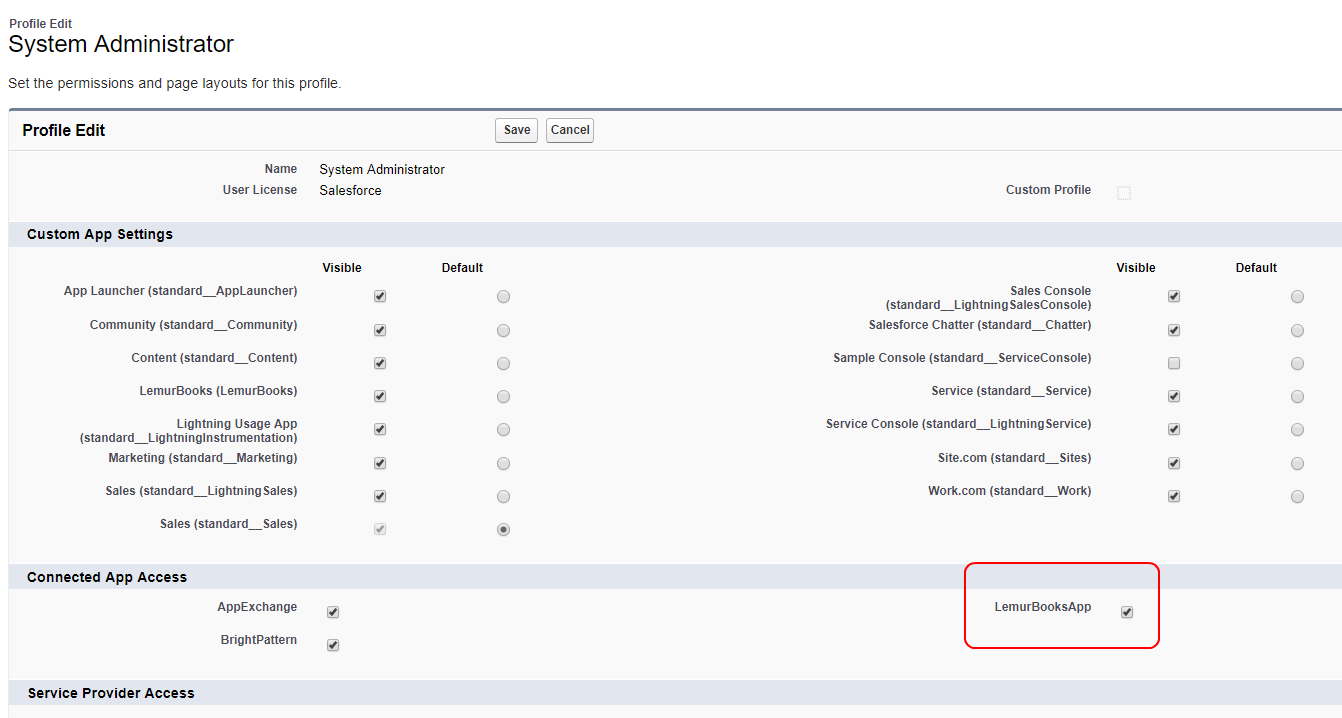
Connected App Access - Click Save.
- You should do the same for any user profile type (e.g., "Standard User") that will need access to your connected apps. If you are not sure which user profiles to edit, go to your connected app's Profiles section to see which profile types they have been assigned.
< Previous | Next >

