Configuring Click-to-Preview
The integrated Agent Desktop widget provides click-to-dial functionality for one-touch dialing of contacts in your Salesforce environment. Bright Pattern Contact Center allows you to use click-to-dial to preview the contact’s phone number before either dialing the phone number or sending an SMS/MMS message by selecting a corresponding widget button (i.e., the Dial button for making a voice call, or the chat button for sending SMS/MMS). This functionality gives agents the chance to preview the number before calling or messaging the contact.
Note that this functionality is available for Salesforce Lightning view only.
This article describes how to enable this functionality by updating your Call Center settings in Salesforce Lightning Setup.
Prerequisites
- Complete all steps for Salesforce Lightning integration configuration.
- Have an active Salesforce developer account and be the system administrator of the account.
- Use Bright Pattern Contact Center version 5.5.4 or later and have administrator privileges.
Procedure
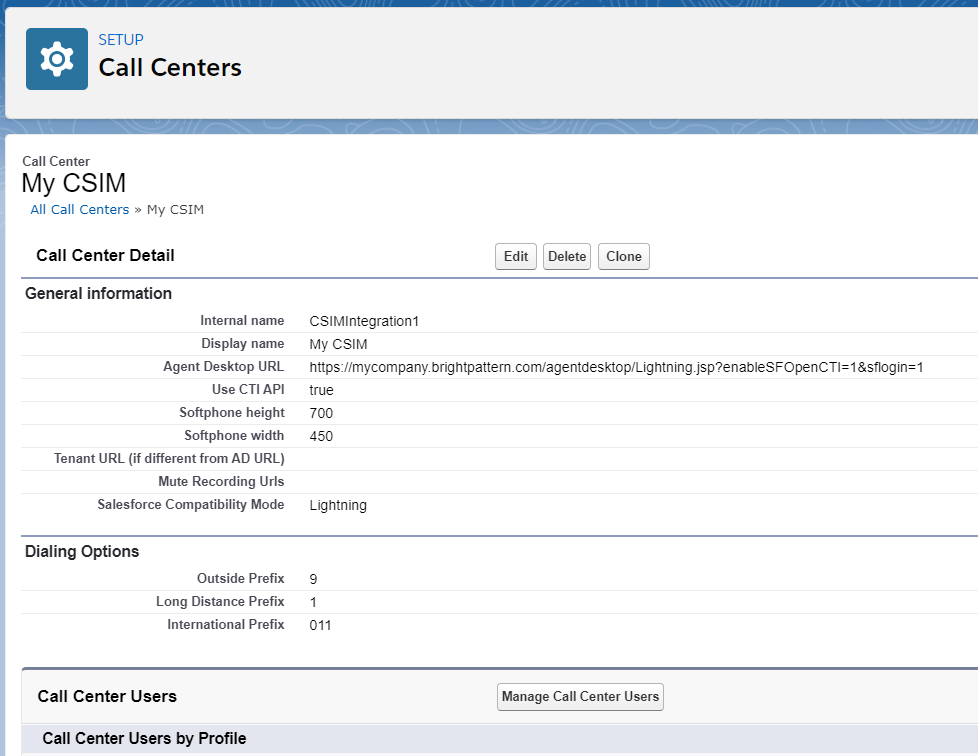
Step 1: Open your Call Center properties for editing
- Log in to your Salesforce Developer account and go to Setup.
- Go to Platform Tools > Feature Settings > Service > Call Center > Call Centers and select the call center that you wish to modify. For more information on call center configuration, see the Salesforce Integration Guide, section Call Center Setup.
- On the Call Center Detail page, click Edit at the top of the list. The Call Center Edit page will open. The properties on this page are the call center parameters that will enable integration with Bright Pattern Contact Center.
Importing a call center definition

Step 2: Enable the deferredDial parameter in your call center’s Agent Desktop URL
For property Agent Desktop URL, depending on your existing configuration, do the following:
- If your existing URL contains the parameter deferredDial=0, change the parameter to deferredDial=1 (e.g., “https://mycompany.brightpattern.com/agentdesktop/Lightning.jsp?enableSFOpenCTI=1&sflogin=1&deferredDial=1”).
- If your URL does not contain the deferredDial parameter, add the parameter deferredDial=1 to the existing URL (e.g., “https://mycompany.brightpattern.com/agentdesktop/Lightning.jsp?enableSFOpenCTI=1&sflogin=1&deferredDial=1”).
deferredDial is the parameter that enables click-to-preview functionality. The default value is 0 (zero), which means that click-to-preview is disabled and the Click-to-Dial button behaves in the same way that it did before: clicking the button immediately dials the contact phone number. Setting the value to 1 enables the functionality. - Click Save.
Step 3: Open your Lightning App and call a contact
- From Salesforce Lightning Setup, click the AppLauncher
 icon (at the top left of the screen).
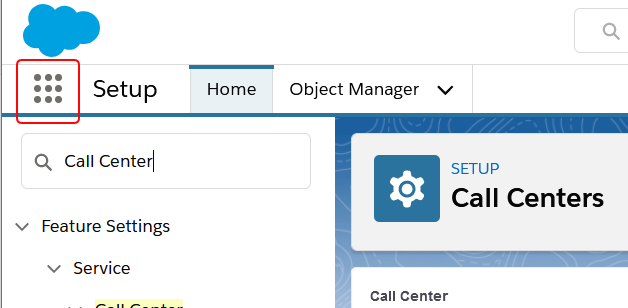
The App Launcher icon - From the App Launcher menu, click View All.

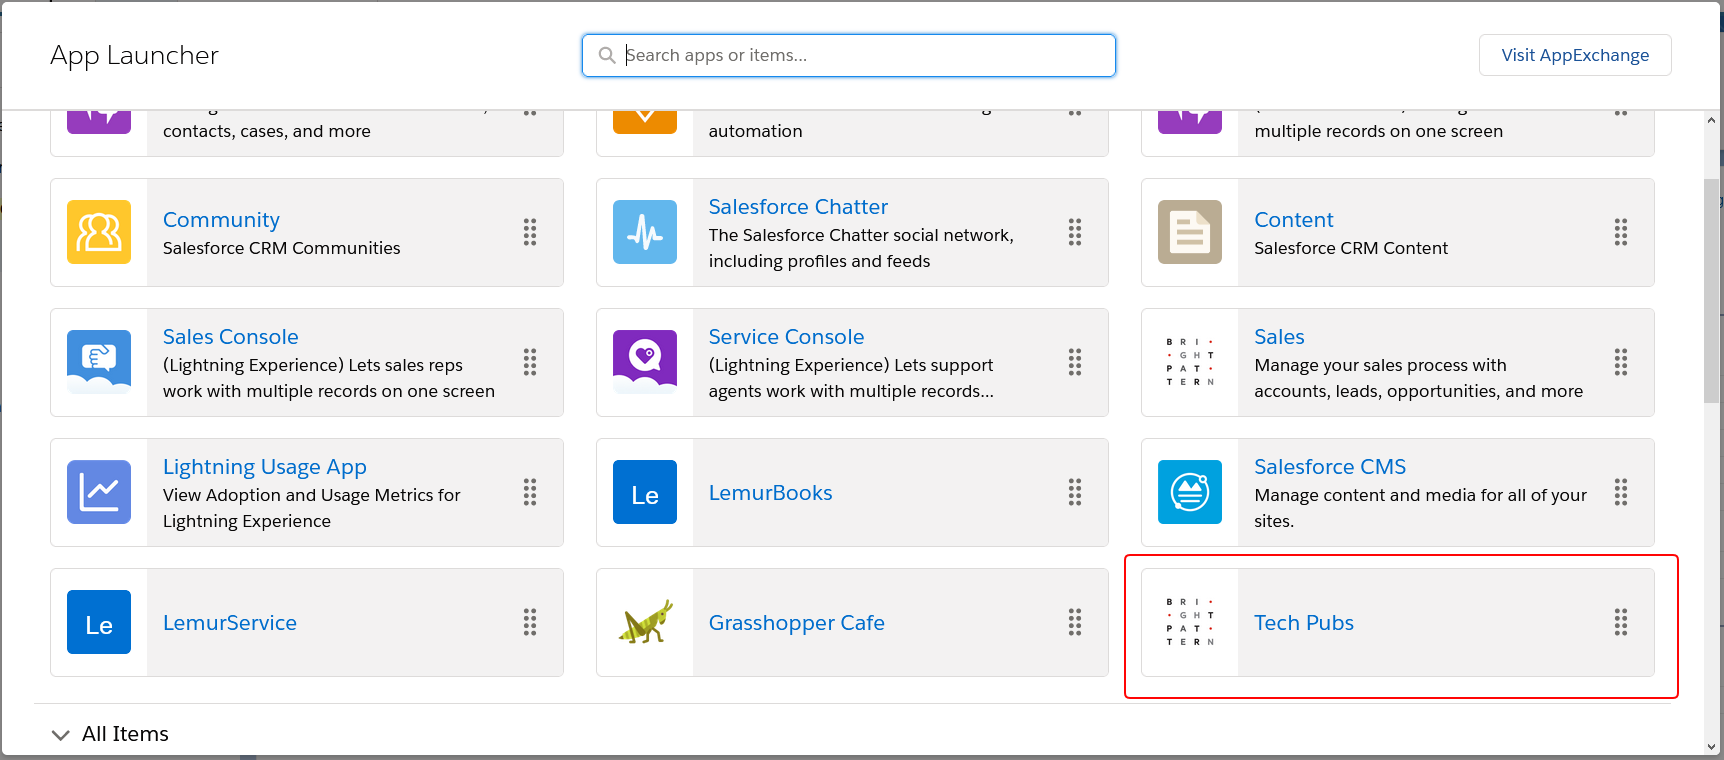
Click View All to get to your Lightning App in the App Launcher - In the App Launcher dialog that pops open, click the name of your Lightning App. This app should be the same app that was configured in the Salesforce Integration Guide, section Create a Lightning App.
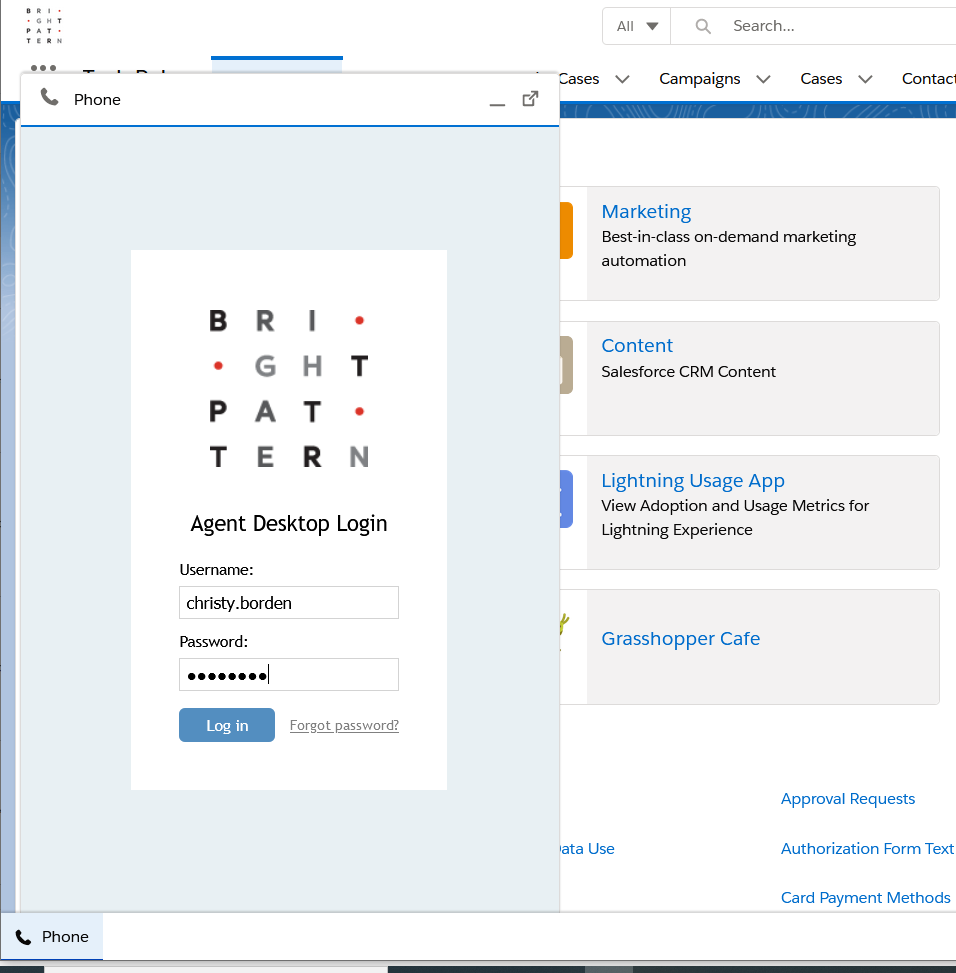
Selecting a Lightning app from the App Launcher - Click the Phone icon at the bottom of the page to pop the integrated Agent Desktop widget, and log in as an agent assigned to a team that can handle service calls.
The Agent Desktop Login screen on the integrated widget - Go to the Contacts section and click the Click-to-Dial button (i.e., either the phone icon or the phone number).
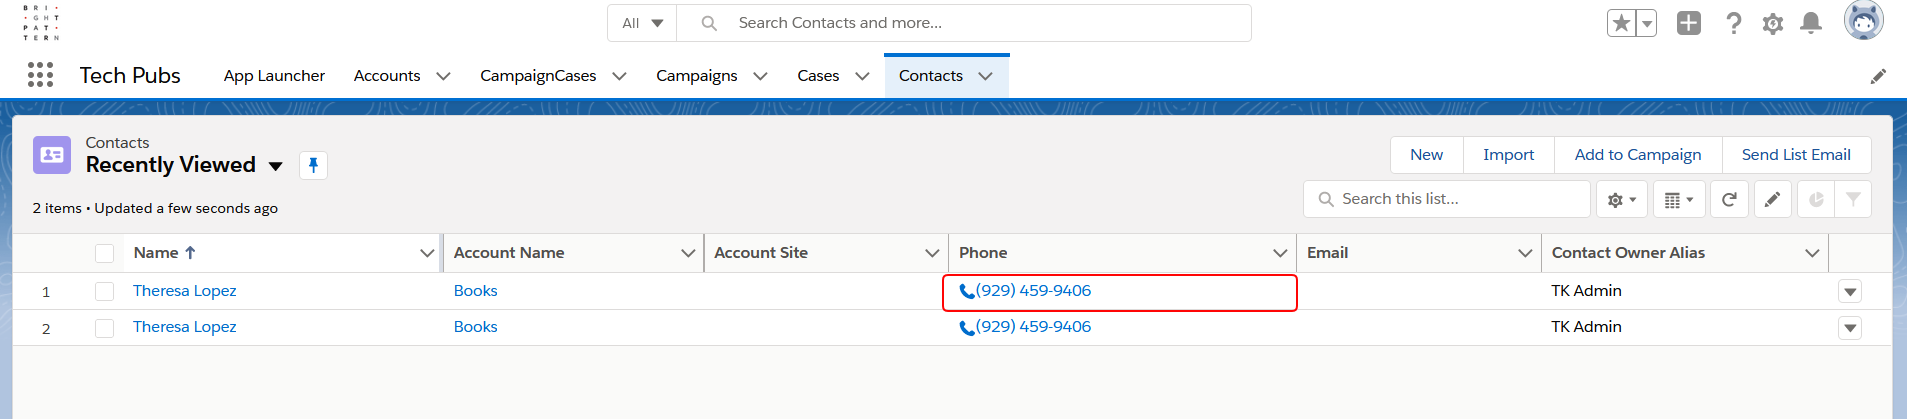
Viewing a contact’s phone number from the Contacts list in Salesforce Lightning
Alternatively, you may select the name of any person in the Contacts list, and click on their phone number from their contact details page.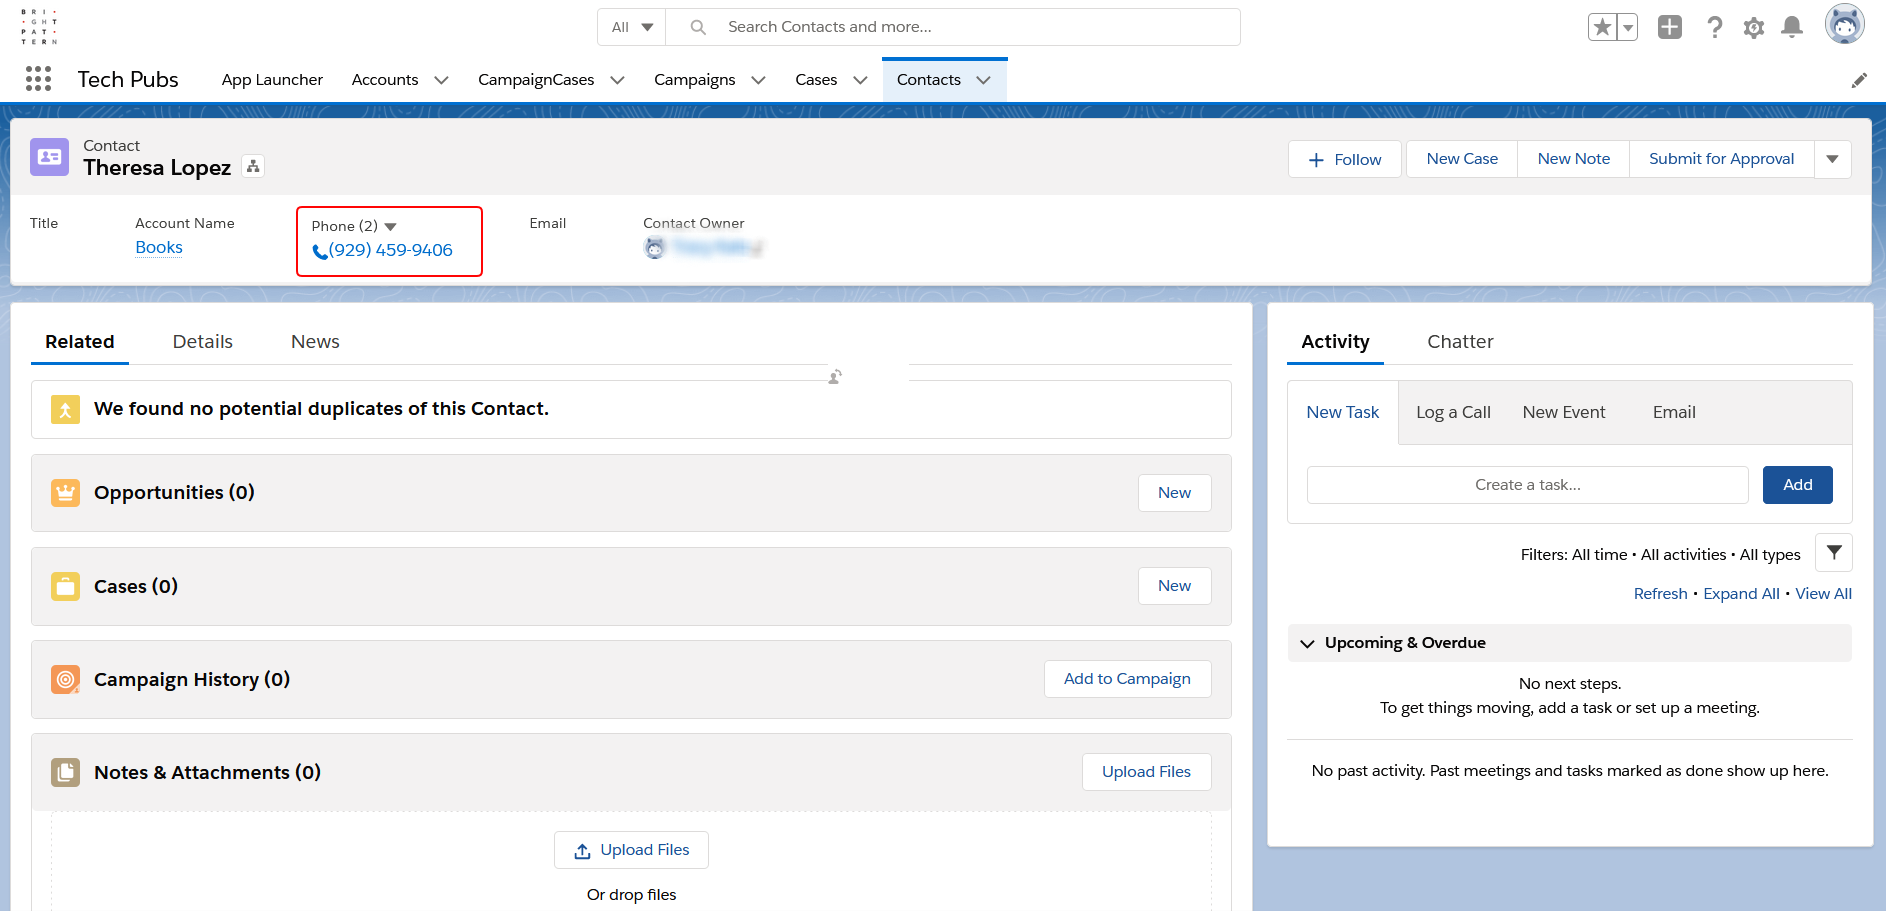
Viewing a contact’s phone number in Salesforce Lightning - As soon as you click to call the contact, the Agent Desktop widget will pop up and the phone number will be pre-filled in the phone number entry field. You now have the option to dial the number.
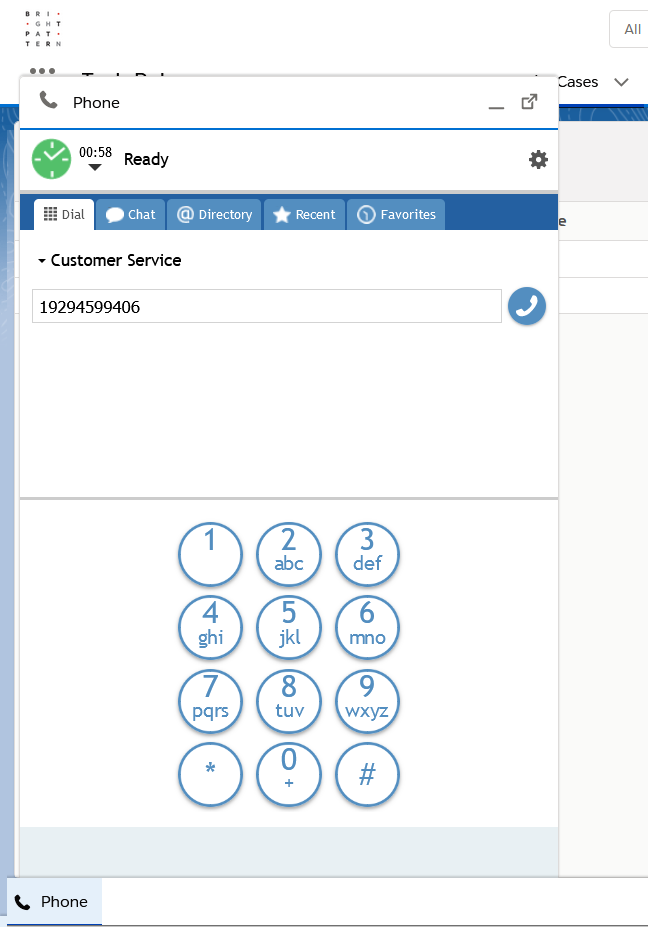
The contact’s phone number in the Agent Desktop widget’s phone number field


Click-to-Preview configuration is now complete. For more information about Salesforce configuration and setup, see All Salesforce Tutorials.