How to Configure Proactive Offers in Chat
A proactive offer is a pop-up web chat widget that offers opportunities to call or chat with a live agent. We call them proactive because, unlike typical service interactions that rely on the customer to initiate the conversation, proactive offers are initiated by contact centers.

You can use proactive offers to offer immediate help, promote sales and discounts, entice customers not to leave the website, and much more. In Bright Pattern Contact Center, proactive offers are configured to launch when specified conditions are triggered. Note that you can place a proactive offer on the same page as a web chat, or you can place the proactive offer stand-alone.
In this article, you will learn how to configure a chat scenario, chat service, chat scenario entry point and proactive offer conditions to work together to pop proactive offers on your website.
Procedure
Step 1: Create or choose a chat scenario
You may select an existing chat scenario to use, or create a new chat scenario. For details, see the Contact Center Administrator Guide, section Chat Scenarios.
Step 2: Create or choose a chat service
To launch any type of chat, you will need to have a chat service configured first. For details, see our tutorial, Chat Service Configuration.
Step 3: Create or choose a messaging/chat scenario entry
You also need to create or select an existing messaging/chat scenario entry. For details, see the Contact Center Administrator Guide, section Messaging/Chat Scenario Entries.
Step 4: Add a proactive offer
In the Contact Center Administrator application, section Scenario Entries > Messaging/Chat > Chat widget tab, beneath Proactive Offers, click add.

When the Chat Widget Configuration Editor opens, you will see the following areas:
- Name - You must enter a name (any name) for the widget.
- Tabs - On the left side of the screen, click on each tab to edit specific properties of the proactive offer widget.
- Preview URL - Optionally enter the URL of the webpage where this widget will appear. Doing so will make the page appear as a background for the proactive offer widget in the preview pane. Note that the webpage must be hosted in order to display properly in the preview pane.
- Preview pane - Displays a preview image of the widget as it is configured. If you entered a preview URL, the widget will appear with that webpage in the background, in the same position and style as configured.

Step 5: Enable the proactive offer and set contact options
The Proactive Offer tab is where you turn on the widget and determine which communication channel(s), such as chat or voice call or both, to offer the customer.

Set the following:
- Enabled - Select the checkbox to enable the proactive offer widget. This is the most important setting. If you do not select Enabled, the proactive offer will not be shown on your website.
- HTML Content - By default, the HTML shown is “<h1 style="text-align: center">Do you need any help?”. You may customize the code however you want, as long as you use proper HTML tagging. For example, you may change the formatting/display of text and insert reference to images into the proactive offer widget.
For example:
<h1 style="text-align: center">Header Text<br><img src="https://<domain>/image.jpg" alt="alt image label" width="300" height="180">

Note that the proactive offer styling (e.g., text color, background color, button color, etc.) is controlled by overall chat styling, and it cannot be overridden in the proactive offer's HTML Content field. To make such style changes, go to the Contact Center Administrator application, section Scenario Entries > Messaging/Chat > Chat widget tab > Chat Styling, and click edit. For more information, see the Chat Widget Configuration Guide, section Chat Widget Styling.

Contact Options
Within the Proactive Offer tab are contact options, which are the clickable methods of reaching your contact center. You do not have to set both call and chat options; you are welcome to choose one or both.
All of the following contact options should be set as desired:
- Chat button enabled - Select checkbox if you want to allow customers to start a web chat from the proactive offer widget.
- Chat button text - The display label on the Chat button; by default, this is “Chat”
- Phone call button enabled - Select checkbox if you want to allow customers to start a voice call from the proactive offer widget.
- Phone call button text - The display label on the Call button; by default, this is “Call”
- Cancel button text - The display label on the Cancel button; by default, this is “Cancel”
- Close button - Select checkbox if you want the “X” Close button to appear on the proactive offer widget. This is optional but recommended.
Step 6: Set the proactive offer widget’s style
In Proactive Offer Styling, you can determine the look and feel of the widget itself. If you make no changes, the widget’s style will remain in the default settings shown.
To customize style, set the following as desired:
- Width - The widget’s width in pixels
- Height - The widget’s height in pixels
- Animation in - How the proactive chat widget moves across or appears on the screen
- Animation out - How the proactive chat widget moves off the screen
- Location - Where the chat widget will be placed on your webpage (e.g., top right, middle right, bottom right, etc.)

Step 7: Set proactive offer conditions
In Proactive Offer Conditions, click add to set the requirements that must be met for the proactive chat to be shown to website visitors. These requirements are called conditions, and conditions are what make your proactive offers creative and specific to your use case. You can add as many conditions as you like.
Many conditions are available, but the most common conditions include the following:
- About to exit (mouse move) - This condition will trigger a proactive offer to pop when the customer’s cursor moves on the page, as if to leave the page or navigate somewhere else. You can use a proactive offer to get the customer’s attention and keep them on the page longer.

- Referring URL - This condition will trigger a proactive offer to pop when the customer accesses a specific page via a specific URL, such as one provided in a sales offer.
For example, let’s say an email newsletter announces a summer promo and all you have to do is <click here> to get a special discount, where <click here> is the URL https://mycompany.com/2020/06/?utm_medium=&utm_source=newsletter&utm_campaign=20200617-enews-&utm_content=summerdiscount
In that example, you would paste that URL into the text field, as shown, to set the Referring URL condition:

Step 8: Optionally configure a pre-chat form
This step is optional, to be completed only if you enabled chat in the proactive offer and you want to collect some information from the customer before they are connected to an agent in chat.
In the Pre-Chat Form Configuration tab, select the checkbox for Enabled and set the pre-chat form properties. If you do not select Enabled, no pre-chat form will be presented to the customer.

Step 9: Add your webpage's URL
- Save your work and then close the Chat Widget Configuration Editor.
- Back in the Chat Widget tab, beneath your proactive offer, click add url.
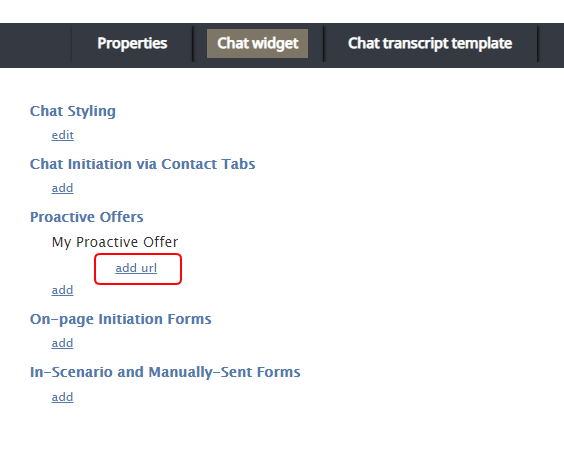
Add the URL to make the proactive offer launch on the page - Enter the URL of the webpage where the proactive offer will appear. If you do not do this, the proactive offer will not launch.
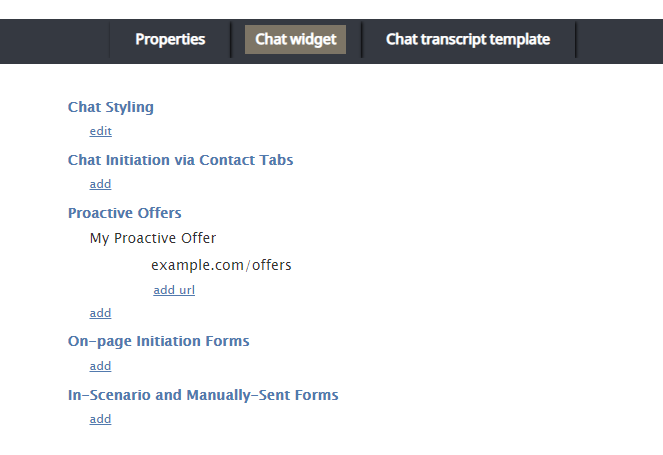
After adding the URL to the proactive offer, the URL is displayed - Click Apply at the bottom to save your changes.


Step 10: Get the HTML
Copy the proactive chat widget’s code and place it on your webpage. See How to Use the Web HTML Snippet.
Step 11: Test the proactive offer
As the final step of this process, test that the proactive offer can be launched with your specified conditions:
- Log in to Agent Desktop as an agent on the team assigned to the chat service, and set your agent state to Ready.
- In a separate web browser (incognito is OK), go to the webpage where the HTML chat snippet has been placed.
- Trigger all the proactive offer conditions specified in configuration. If, for example, you specified the “About to exit (mouse move)” condition, remain on that page for several minutes and then try to close the browser tab or window. Your movement should cause the proactive offer to pop on the page.
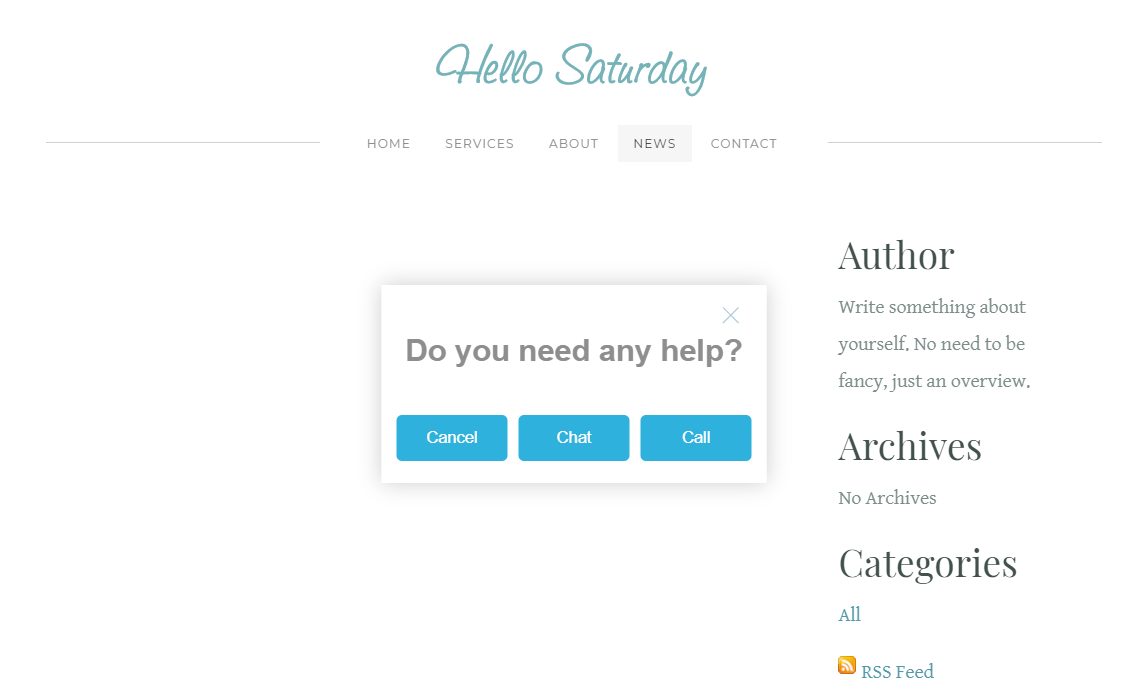
Example of proactive offer on a live page - If the proactive offer does not launch, go back through this procedure and make sure that you have followed all steps.

Proactive offer configuration is now complete. For more information on chat widget configuration, see the Chat Widget Configuration Guide.