Bright PatternへSalesforce統合アカウントを追加する
コールセンターと接続アプリケーションがSalesforceで設定されたので、SalesforceとBright Pattern コンタクトセンター間の接続を確立する統合アカウントを作成できます。 新しい統合アカウントの追加はコンタクトセンター管理者アプリケーションで行われます。詳しい情報については、 コンタクトセンター管理者ガイド の統合アカウントをご覧ください。
ステップ1: 新しい統合アカウントを作成します。
コンタクトセンター管理者アプリケーションで設定 >コールセンター設定 > 統合アカウント へ進み、 +をクリックし、 Salesforce.comというタイプの新しいアカウントを追加します。

ステップ 2: プロパティを編集します。

基本プロパティ
- タイプ:追加される統合アカウントとしてこのタイプが選択されたため、既定値は"Salesforce.com"です。
- 名前 :アカウントの名前(任意の名前)です。
- 既定のアカウント :お手持ちの複数のSalesforce統合アカウントの内、特定のアカウントをデフォルトで使う場合、このチェックボックスを選択します。
- Url :ユーザーがサインインするSalesforceの登録済みドメインのURLです。 URLは次の形式でなければなりません: https://<your-domain-name>.my.salesforce.com/
シナリオのプロパティからのデータアクセス
シナリオからのデータアクセス では、以下を設定します:
- サンドボックス環境 :Saleforce環境が サンドボックスである場合、このチェックボックスを選択します。
- コンシューマキー :以前にSalesforceで設定した接続アプリケーションのコンシューマキーです。 接続アプリケーションのコンシュマーキーは、Salesforce Lightning セットアップの セキュリティ > 証明書とキーの管理にあります。
- コンシューマシークレット :Salesforceで以前に設定した接続アプリケーションのコンシューマシークレットです。 接続アプリケーションのコンシュマーシークレットは、Salesforce Lightning セットアップの セキュリティ > 証明書とキーの管理にあります。
- リフレッシュトークン :トークンのリクエストをクリックし、Salesforce 接続アプリケーションへのアクセスを許可します。
- 制限の確認 :制限の確認 ボタンを使うと、アカウントに関連する SFDC制限 の確認ができます。
シングルサインオンのプロパティ
このセクションでは、Salesforce統合のシングルサインオン(SSO)機能を有効にします。 SSOは、Bright Pattern コンタクトセンターアプリケーションとSalesforceで設定されたエージェントデスクトップウィジェットへの同時ログインを可能にします。例えば、Salesforceのエージェントデスクトップウィジェットにログインするユーザーは、Bright Patternアプリケーション(エージェントデスクトップ、コンタクトセンター管理者アプリケーションなど)にも自動ログインします。
IDプロバイダーの証明書
Salesforce IDプロバイダーの証明書を提出します (手順は以下の通りです)。SSOを設定する予定がない場合、証明書フィールドを空白のままにします。
証明書の追加方法
証明書を追加する前に、証明書があるかどうかを確認しなければなりません。複数の証明書がある場合は、アプリケーション設定ページでIDプロバイダー証明書として使う証明書を選択します。
- Salesforce Lightningセットアップでは、 セキュリティ >証明書とキーの管理へ進みます。
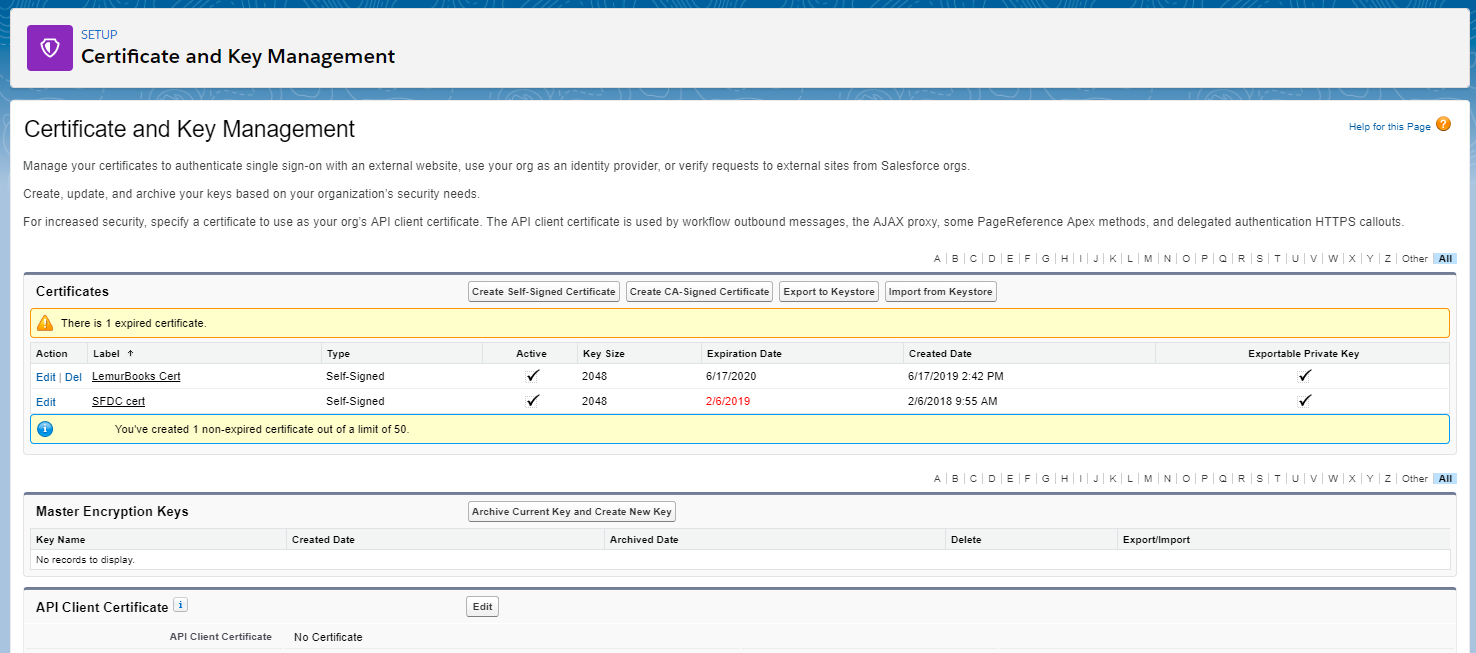
証明書とキーの管理 - リストに証明書がない場合、または証明書の有効期限が切れている場合は、新しい証明書を生成するか、セットアップから証明書をインポートします。.
- インポートするには、Keystoreからのインポートボタンをクリックします。インポートした全ての証明書は、接続アプリケーションの詳細ページの Idp 証明 フィールドに表示されます。複数の証明書がある場合は、接続アプリケーションの詳細ページでIDP証明書として使う証明書を選択します。
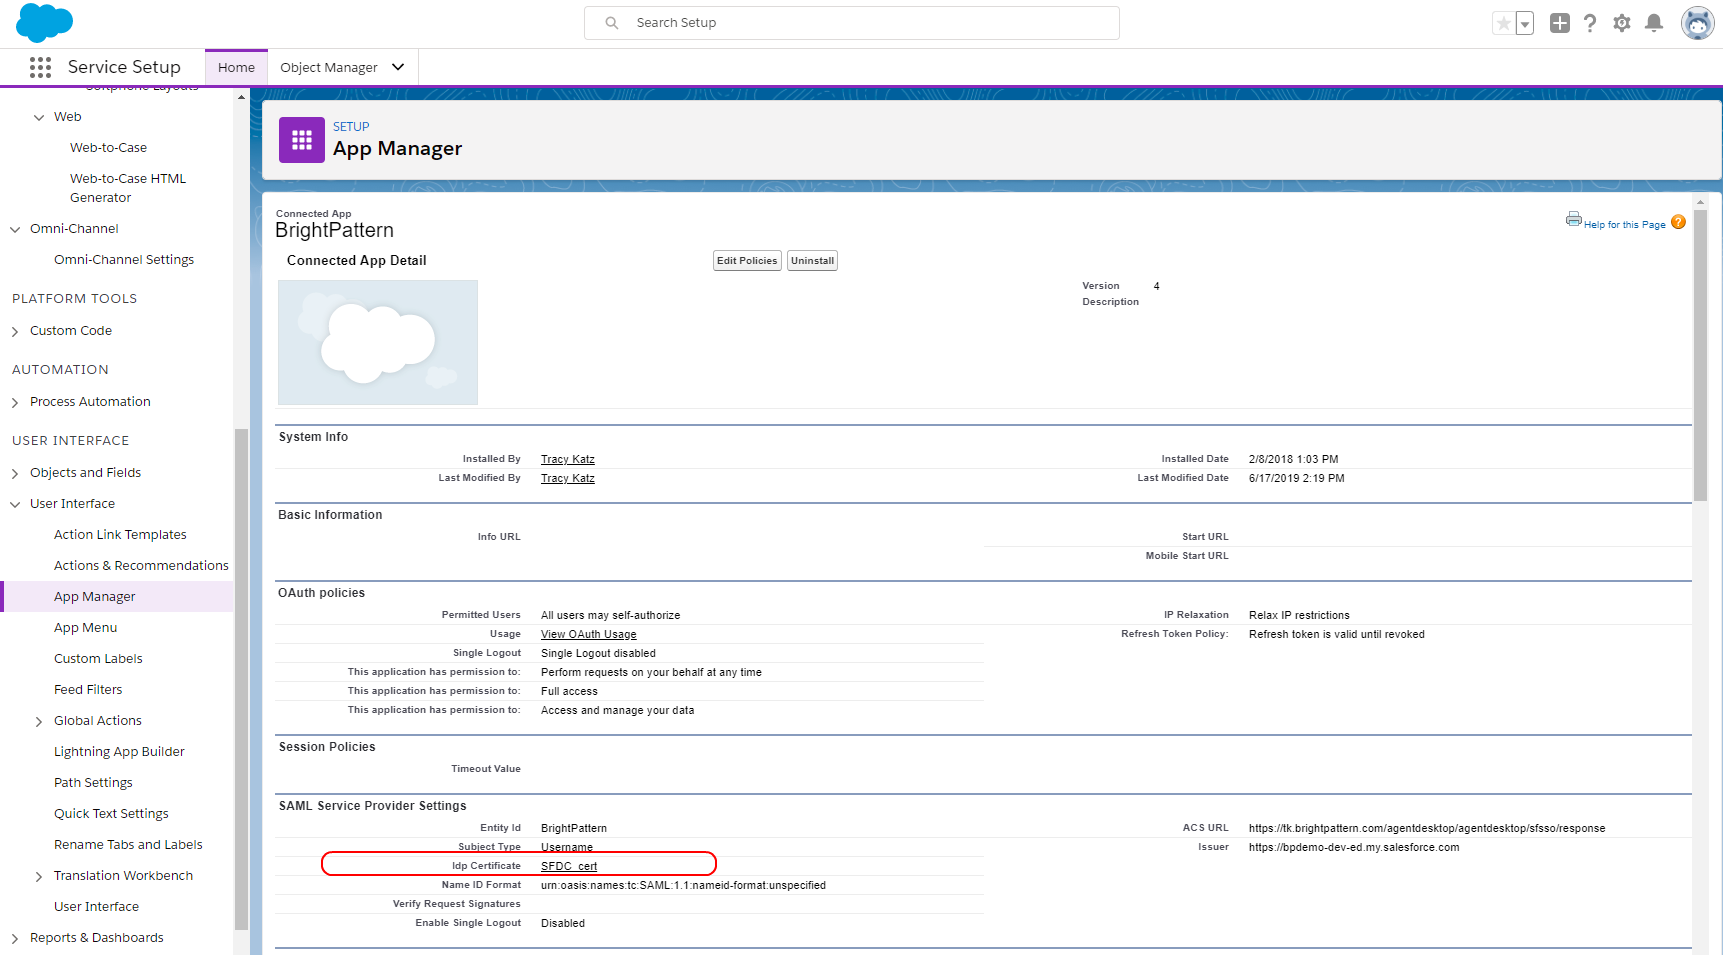
ユーザーインターフェイスで表示されるIDP 証明書 > アプリマネジャー > 接続アプリケーションの詳細 - 証明書を選択します(またはインポートします)。複数の証明書が表示される場合があります。
- インポートするには、Keystoreからのインポートボタンをクリックします。インポートした全ての証明書は、接続アプリケーションの詳細ページの Idp 証明 フィールドに表示されます。複数の証明書がある場合は、接続アプリケーションの詳細ページでIDP証明書として使う証明書を選択します。
- 証明書のダウンロードをクリックします。
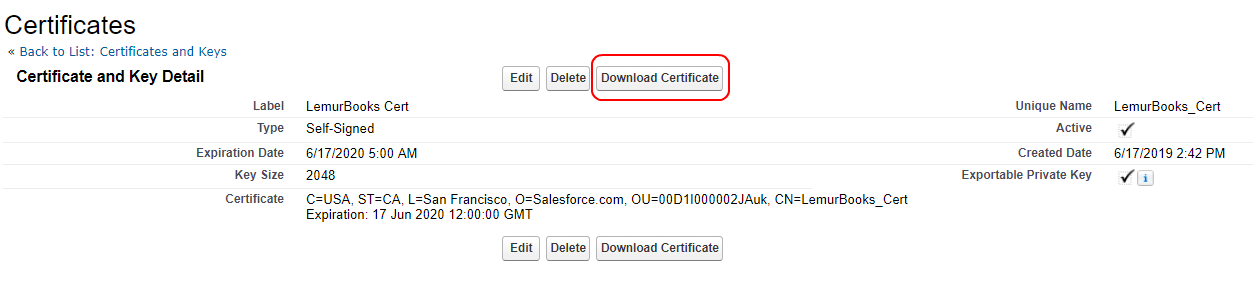
Salesforceから証明書のダウンロード - ファイルを開き、証明書のコンテンツのみをコピーします (即ち、 -----BEGIN CERTIFICATE----- と -----END CERTIFICATE-----の間に入る文書)。
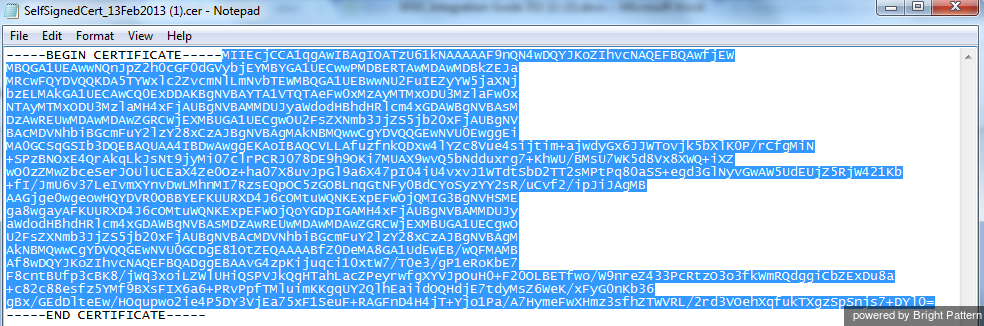
- コンタクトセンター管理者アプリケーションへ戻り、証明書を Salesforce統合アカウントプロパティに 貼り付け します。
- IDプロバイダー証明書の設定ダイアログ で設定をクリックします。それによって、証明書の貼り付けが行われます。


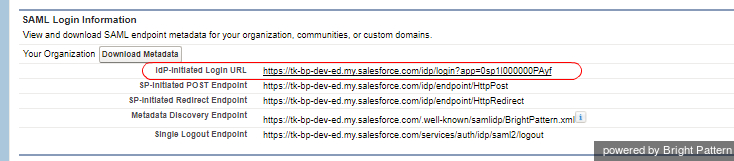
IDプロバイダーが生成したログインURL
Salesforce接続アプリケーションの詳細ページからコピーされた "IdpログインURL"です。
この URLを検索するには:
- Salesforce Lightning セットアップ > プラットフォームツール > アプリケーション >接続アプリケーション > 接続アプリケーションの管理
へ移動します。 - 接続アプリケーションをクリックし、前に生成した"BrightPattern" アプリケーションを選択します。
- SAML ログイン情報で、 IdpログインURLからURLを全コピーします。

ご注意: SSOを設定しない場合でも、この必須フィールドに何かを入力しなければなりません。 SSOを設定する予定がない場合は、任意の文字または文字列 (例えば、 "https://" または "/") を入力してURLを無効にします。
ステップ3: 保存します。
適用をクリックし、変更を保存します。 Salesforce統合アカウントの設定は完了します。
次に、 チュートリアル へ移動して、Salesforceデータを使用できるシナリオの設定方法について学びます。