(Created page with "* 次のレポートでは複数のエージェントを選択できます: ** エージェントアクティビティ ** ...") |
|||
| (32 intermediate revisions by the same user not shown) | |||
| Line 27: | Line 27: | ||
** [[reporting-reference-guide/Intra-TeamPerformanceReport| チーム内エージェント別パフォーマンス]] | ** [[reporting-reference-guide/Intra-TeamPerformanceReport| チーム内エージェント別パフォーマンス]] | ||
| − | * | + | * エージェントの名前は、ドロップダウンセレクターにアルファベット順にリストされます。センターで設定されている[[contact-center-administrator-guide/GeneralSettings#Display_name_format|表示名フォーマット]]によって、姓または名の順で表示されます。 |
| − | ** | + | ** センターの設定された名前表示に応じて、名前の最初の文字を入力して特定のエージェントを検索できます。 |
| − | [[File:Reports-Agent-Name-By-Typing-53.PNG|450px|thumb|center| | + | [[File:Reports-Agent-Name-By-Typing-53.PNG|450px|thumb|center|"L"文字で始まるエージェント名の検索例]] |
| − | * | + | *30日間以上非アクティブであるエージェントは、ドロップダウンセレクターから除外されます。検索期間前の30日以内にアクティビティがあったエージェントの名前は、灰色・斜体フォントで表示されます。 |
| − | [[File:Reports-Inactive-Agent-Search-53.PNG|540px|thumb|center| | + | [[File:Reports-Inactive-Agent-Search-53.PNG|540px|thumb|center|灰色・斜体で表示されるエージェント名は、検索期間中ではなく、検索期間前までのアクティビティを示します。]] |
| − | * | + | *さらに、ドロップダウンメニューから'''無効/削除されたエージェントの表示 '''というチェックボックスを選択すると、レポートから無効化および/または削除されたエージェントを自動的に含めることができます。エージェントにはレポートの時間枠内にアクティビティがあった場合でも、上記は適用されます。 |
| − | == | + | == レポートのクローン == |
| − | + | レポートをコピーするには、'''クローン'''ボタンをクリックします。 | |
| − | [[File:Reports-Generation-Filters-Clone-53.png|800px|thumbnail|center| | + | [[File:Reports-Generation-Filters-Clone-53.png|800px|thumbnail|center|クローン]] |
| − | + | クローンするレポートは、''レポート名のクローン''の下にある利用可能なレポートのリストにあります。ここで、レポートの [[#How_to_Rename_Reports|名前変更]] および [[#How_to_Customize_Reports|カスタマイズ]] が可能です。 | |
| − | [[File:Reports-Cloned-In-List-53.PNG|800px|thumb|center| | + | [[File:Reports-Cloned-In-List-53.PNG|800px|thumb|center| ...のクローン ]] |
| − | == | + | == クローンされたレポートの削除 == |
| − | + | クローンされたレポートを前レポートのリストから削除するには、'''削除'''ボタンをクリックします。削除できるのは、クローンされたレポートのみです。選択したレポートは、コンタクトセンターで利用可能な全レポートリストから削除されます。 | |
| − | [[File:Reports-Generation-Filters-Delete-Clone-53.png|800px|thumbnail|center| | + | [[File:Reports-Generation-Filters-Delete-Clone-53.png|800px|thumbnail|center|削除]] |
| − | == | + | == レポートの名前変更 == |
| − | + | レポートの名前変更を行うには、 '''名前変更'''ボタンをクリックします。レポートの新しい名前を入力するためのダイアログウィンドウが表示されます。選択したレポートに新しい名前が表示され、コンタクトセンターで利用可能な全レポートリストから利用できるようになります。 | |
| − | [[File:Reports-Generation-Filters-Rename-53.png|800px|thumb|center| | + | [[File:Reports-Generation-Filters-Rename-53.png|800px|thumb|center|名前変更]] |
| − | == | + | == レポートの実行 == |
| − | + | レポートを生成するには、レポート詳細ペインの下部にある '''レポートの実行'''ボタンをクリックします。レポートの生成には少し時間がかかる場合があります。 | |
| − | [[File:Reports-Generation-Filters-Run-Report-53.png|800px|thumbnail|center| | + | [[File:Reports-Generation-Filters-Run-Report-53.png|800px|thumbnail|center|レポートの実行]] |
| − | + | レポートは別のブラウザータブ/ウィンドウに表示され、使用可能なブラウザーウィンドウスペース全体を占めるように拡大されます。したがって、ブラウザで複数のレポートを同時に開くことができます。生成されたレポートは、コンタクトセンター管理者アプリケーションを閉じた場合でも引き続き表示できます。データ量によっては、生成されたレポートが数ページで表示する場合があります。 | |
| − | [[File:Generated-Report-Example-50.png|800px|thumbnail|center| | + | [[File:Generated-Report-Example-50.png|800px|thumbnail|center|生成されたレポートは新しいブラウザタブ/ウィンドウで開きます。]] |
| − | == | + | == 生成されたレポートの表示と使用 == |
| − | + | 生成されたレポートは、ブラウザーのタブ/ウィンドウ内にデータを含む静的テーブルとして表示されます。ナビゲーションとエクスポートに使用できるリンクは、ページの上部にあります。レポートを.XLSなどの形式にエクスポートする場合、他のスプレッドシートと同様に、データのフィルタリング、並べ替え、再フォーマット化ができます。 | |
| − | === | + | === ナビゲーション === |
| − | + | レポートのコンテンツをナビゲートするには、ページナビゲーション矢印を使うか、表示させたいページ番号を入力します。 | |
| − | === | + | === メトリック === |
| − | + | 各レポートが提供するメトリックに関する詳しい情報は、[[reporting-reference-guide/GeneralInformationAboutDetailReports|詳細レポート]]と [[reporting-reference-guide/GeneralInformationAboutAggregateReports|集計レポート]]をご覧ください。 | |
| − | === | + | ===レポートのエクスポート === |
| − | + | 生成されたレポートをエクスポートするには、形式(PDF、XLS、CSV、またはTXT)を選択し、対応するリンクをクリックします。 | |
| − | === | + | === レポートの再実行=== |
| − | + | 別のリソース及び/または別のレポート間隔で同じレポートを実行するには、フィルター設定を変更し、'''レポートの実行 '''ボタンを再度クリックします。 | |
| − | === | + | === レポートへ戻る === |
| − | + | レポートのリストに戻るには、他のブラウザータブまたはウィンドウのコンタクトセンター管理者アプリケーションのレポートに戻ります。 | |
| − | == | + | == レポートのカスタマイズ == |
| − | + | レポートの表示をカスタマイズするには、'''カスタマイズ''' ボタンをクリックします。 | |
| − | [[File:Reports-Generation-Filters-Customize-53.png|800px|thumbnail|center| | + | [[File:Reports-Generation-Filters-Customize-53.png|800px|thumbnail|center|カスタマイズボタンをクリック]] |
| − | + | レポートは、''レポートカスタマイザ''アプリケーションの新しいブラウザタブまたはウィンドウで開きます。 | |
| − | [[File:Report-Customizer-50.png|800px|thumbnail|center| | + | [[File:Report-Customizer-50.png|800px|thumbnail|center|レポートカスタマイザーアプリケーションを使って列とレポートの内容をカスタマイズします。]] |
| − | + | このウェブアプリケーションでは、次のことができます: | |
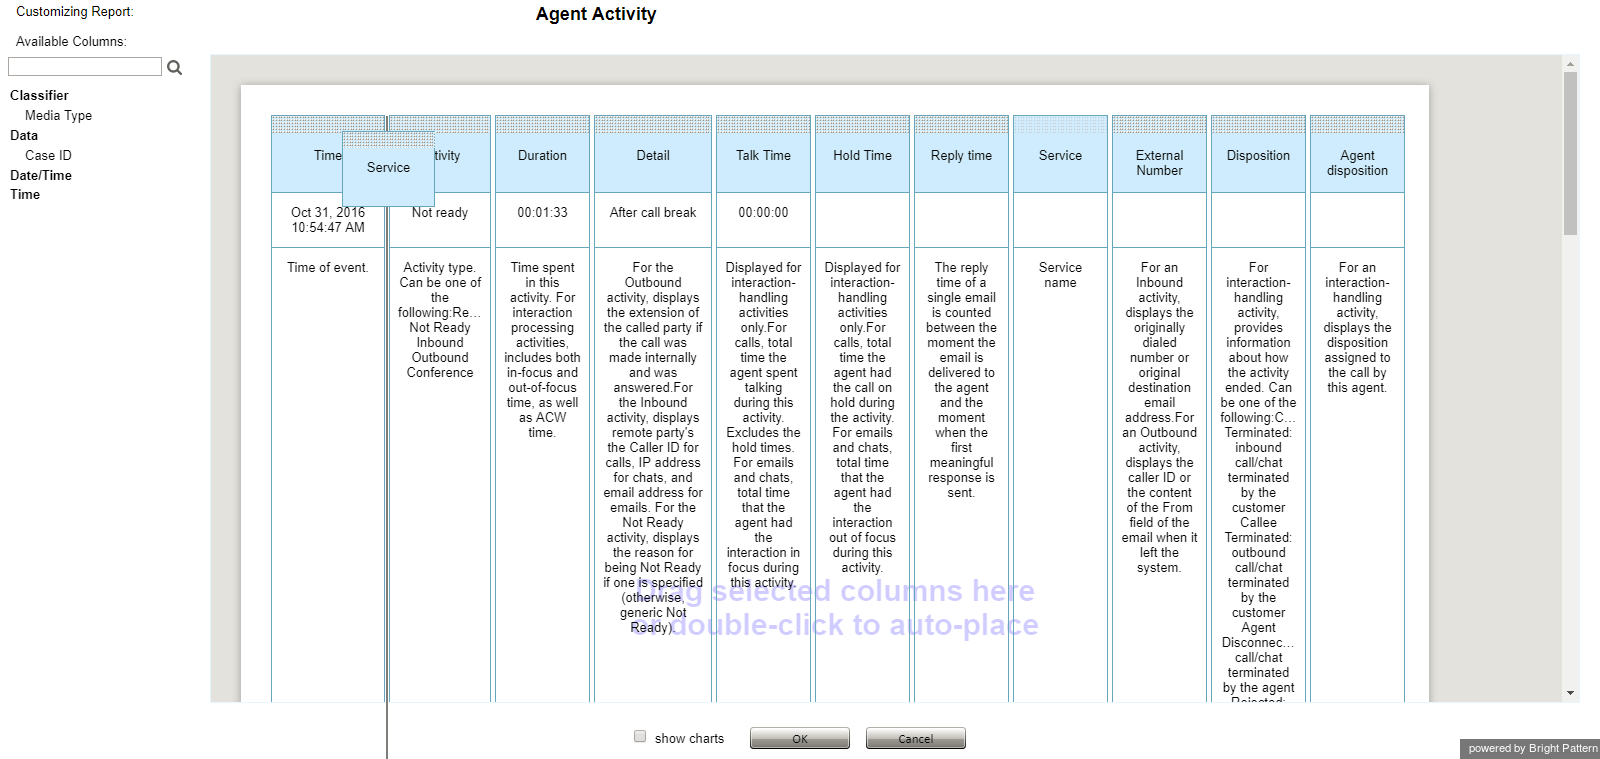
| − | * | + | * 列をクリックしてレポートの別の場所にドラッグすること[[File:Changing-Column-Placement-50.png|800px|center]] |
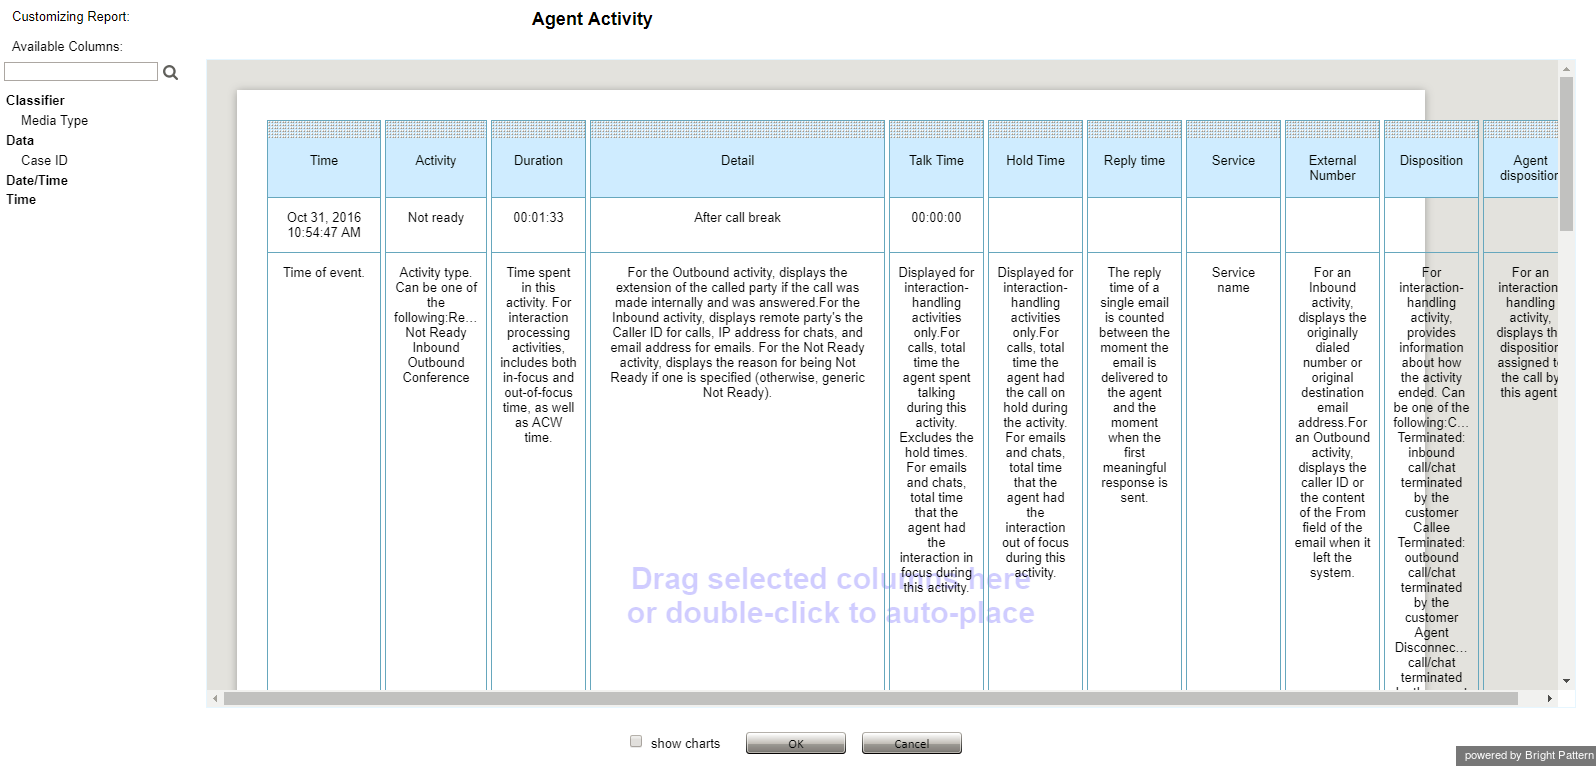
| − | * | + | * 列の境界線をクリックとドラッグして列の幅を調整すること[[File:Adjusting-Column-Width-50.png|800px|center]] |
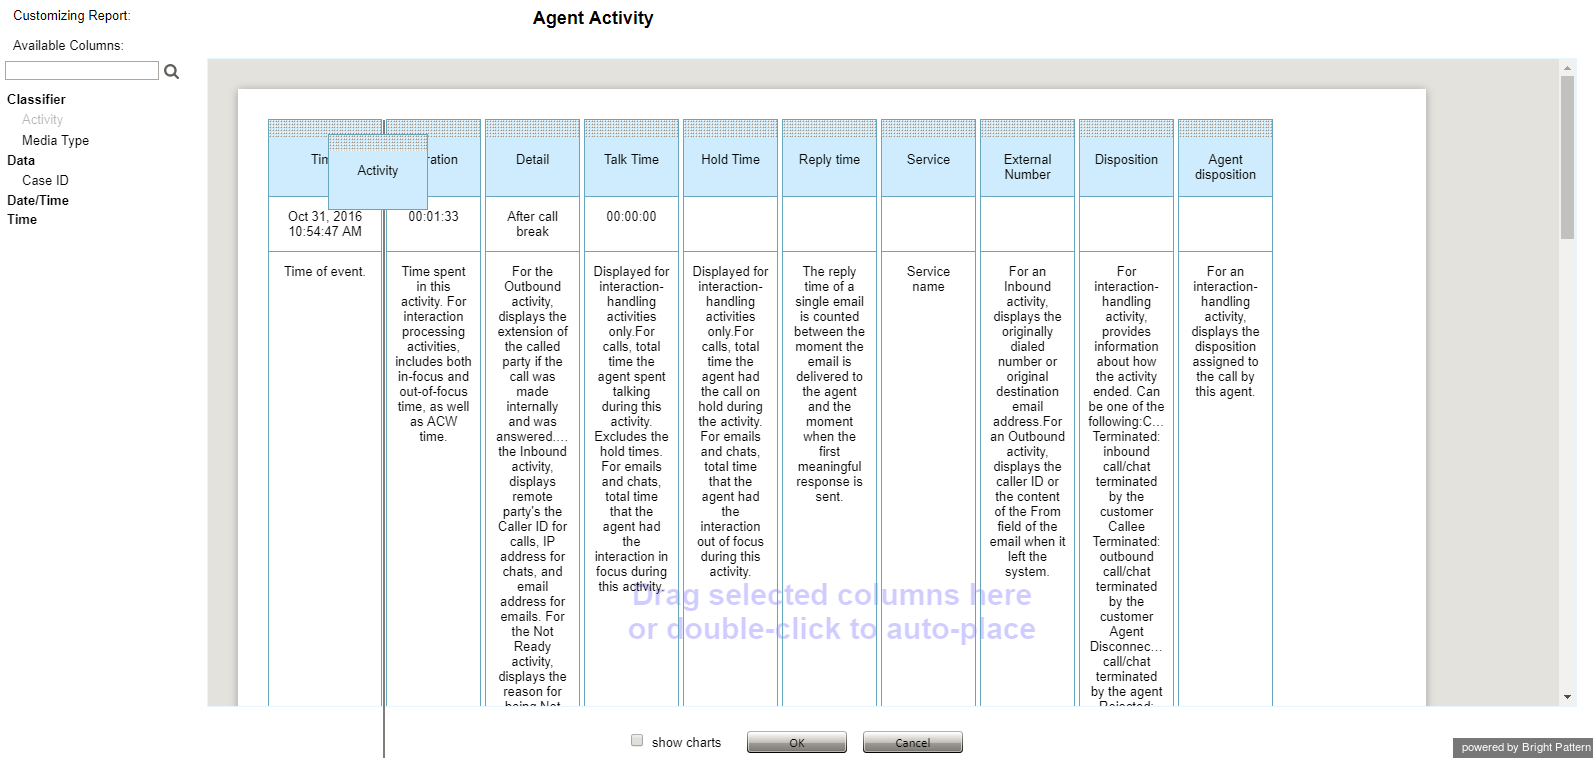
| − | * | + | * 列をレポートのマージンにドラッグして削除すること[[File:Removing-Columns-Report-50.png|800px|center]] |
| − | * | + | * 列をレポートのマージンからレポートのメイン画面にドラッグして追加すること[[File:Adding-Column-Reports-50.png|800px|center]] |
| − | * | + | * 列のタイトルをクリックして列の名前を変更すること[[File:Renaming-Columns-50.png|800px|center]] |
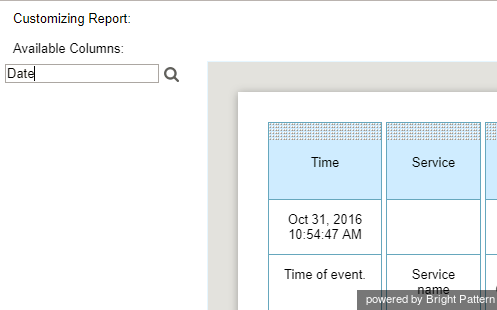
| − | * | + | * 特定のキーワードをレポート列で検索すること[[File:Search-Available-Columns-50.png|450px|center]] |
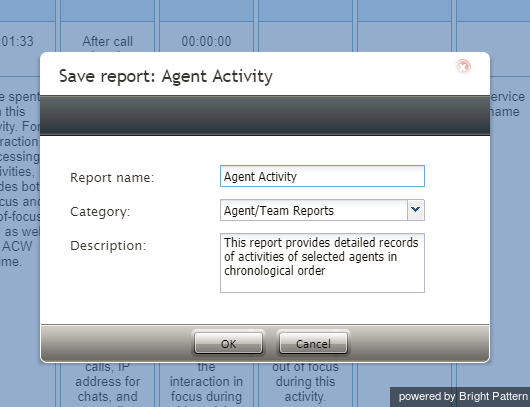
| − | * | + | * カスタマイズしたレポートに新しい名前と説明を付け保存すること[[File:Save-Customized-Report-50.png|450px|center]] |
| − | ==== | + | ==== その他のアクション ==== |
| − | * | + | *レポートで使用可能なチャートを表示するには、'''チャート表示'''チェックボックスを選択します。 |
| − | * | + | *カスタマイズしたレポートを保存するには、'''OK'''をクリックします。 |
| − | * | + | *カスタマイズをキャンセルしてレポートカスタマイザーを終了するには、'''キャンセル'''をクリックします。 |
| − | === | + | === レポートのスケジューリング === |
| − | + | また、レポートの自動生成と、電子メールの添付ファイルとして、またはFTP経由で指定された宛先への配信をスケジュールすることもできます。詳細については、 [[reporting-reference-guide/SchedulingReports|レポートのスケジューリング]]をご覧ください。 | |
Latest revision as of 14:56, 8 December 2019
レポートの生成
左側のメニューから レポートというオプションを選択すると、アプリケーションペインに利用可能なレポートのリストが表示されます。初期設定上、これらはBright Pattern コンタクトセンターで提供される事前定義済みのレポートです。以前にJaspersoft Studioを使っていくつかのカスタムレポートを作成し、その定義をシステムにアップロードした場合、それらのカスタムレポートもリストに表示されます。利用可能なレポートおよびカスタムレポート定義の詳しい情報については、コンタクトセンター管理者ガイドのレポートテンプレートをご覧ください。

レポートは、それらが記述するコンタクトセンターリソースのタイプ別にグループ化されます。各グループ内では、レポートは対応するレポート定義の名前に従ってアルファベット順にリストされます。各レポートの説明が提供されます。説明が画面に収まらない場合は、その上にカーソルを合わせて、ツールチップボックスに説明の全文を表示します。
リストからご希望のタイプのレポートを選択します。表示されるビューで、レポート生成フィルターを使って、レポートを生成するリソースを選択し、レポート間隔を指定します。レポートのタイプに応じて、複数のリソースの選択、追加のフィルターの適用が可能です。

エージェント選択オプション
エージェントドロップダウンセレクターが存在するレポートの場合、以下にご注意ください:
- 次のレポートでは複数のエージェントを選択できます:
- エージェントアクティビティ
- エージェントアクティビティ (CSV)
- エージェントメール
- 絵ジェントログイン/ログアウト
- エージェントパフォーマンス
- 内部チャット
- チーム内サービス別
- チーム内エージェント別パフォーマンス
- エージェントの名前は、ドロップダウンセレクターにアルファベット順にリストされます。センターで設定されている表示名フォーマットによって、姓または名の順で表示されます。
- センターの設定された名前表示に応じて、名前の最初の文字を入力して特定のエージェントを検索できます。

- 30日間以上非アクティブであるエージェントは、ドロップダウンセレクターから除外されます。検索期間前の30日以内にアクティビティがあったエージェントの名前は、灰色・斜体フォントで表示されます。

- さらに、ドロップダウンメニューから無効/削除されたエージェントの表示 というチェックボックスを選択すると、レポートから無効化および/または削除されたエージェントを自動的に含めることができます。エージェントにはレポートの時間枠内にアクティビティがあった場合でも、上記は適用されます。
レポートのクローン
レポートをコピーするには、クローンボタンをクリックします。

クローンするレポートは、レポート名のクローンの下にある利用可能なレポートのリストにあります。ここで、レポートの 名前変更 および カスタマイズ が可能です。

クローンされたレポートの削除
クローンされたレポートを前レポートのリストから削除するには、削除ボタンをクリックします。削除できるのは、クローンされたレポートのみです。選択したレポートは、コンタクトセンターで利用可能な全レポートリストから削除されます。

レポートの名前変更
レポートの名前変更を行うには、 名前変更ボタンをクリックします。レポートの新しい名前を入力するためのダイアログウィンドウが表示されます。選択したレポートに新しい名前が表示され、コンタクトセンターで利用可能な全レポートリストから利用できるようになります。

レポートの実行
レポートを生成するには、レポート詳細ペインの下部にある レポートの実行ボタンをクリックします。レポートの生成には少し時間がかかる場合があります。

レポートは別のブラウザータブ/ウィンドウに表示され、使用可能なブラウザーウィンドウスペース全体を占めるように拡大されます。したがって、ブラウザで複数のレポートを同時に開くことができます。生成されたレポートは、コンタクトセンター管理者アプリケーションを閉じた場合でも引き続き表示できます。データ量によっては、生成されたレポートが数ページで表示する場合があります。

生成されたレポートの表示と使用
生成されたレポートは、ブラウザーのタブ/ウィンドウ内にデータを含む静的テーブルとして表示されます。ナビゲーションとエクスポートに使用できるリンクは、ページの上部にあります。レポートを.XLSなどの形式にエクスポートする場合、他のスプレッドシートと同様に、データのフィルタリング、並べ替え、再フォーマット化ができます。
ナビゲーション
レポートのコンテンツをナビゲートするには、ページナビゲーション矢印を使うか、表示させたいページ番号を入力します。
メトリック
各レポートが提供するメトリックに関する詳しい情報は、詳細レポートと 集計レポートをご覧ください。
レポートのエクスポート
生成されたレポートをエクスポートするには、形式(PDF、XLS、CSV、またはTXT)を選択し、対応するリンクをクリックします。
レポートの再実行
別のリソース及び/または別のレポート間隔で同じレポートを実行するには、フィルター設定を変更し、レポートの実行 ボタンを再度クリックします。
レポートへ戻る
レポートのリストに戻るには、他のブラウザータブまたはウィンドウのコンタクトセンター管理者アプリケーションのレポートに戻ります。
レポートのカスタマイズ
レポートの表示をカスタマイズするには、カスタマイズ ボタンをクリックします。

レポートは、レポートカスタマイザアプリケーションの新しいブラウザタブまたはウィンドウで開きます。

このウェブアプリケーションでは、次のことができます:
- 列をクリックしてレポートの別の場所にドラッグすること
- 列の境界線をクリックとドラッグして列の幅を調整すること
- 列をレポートのマージンにドラッグして削除すること
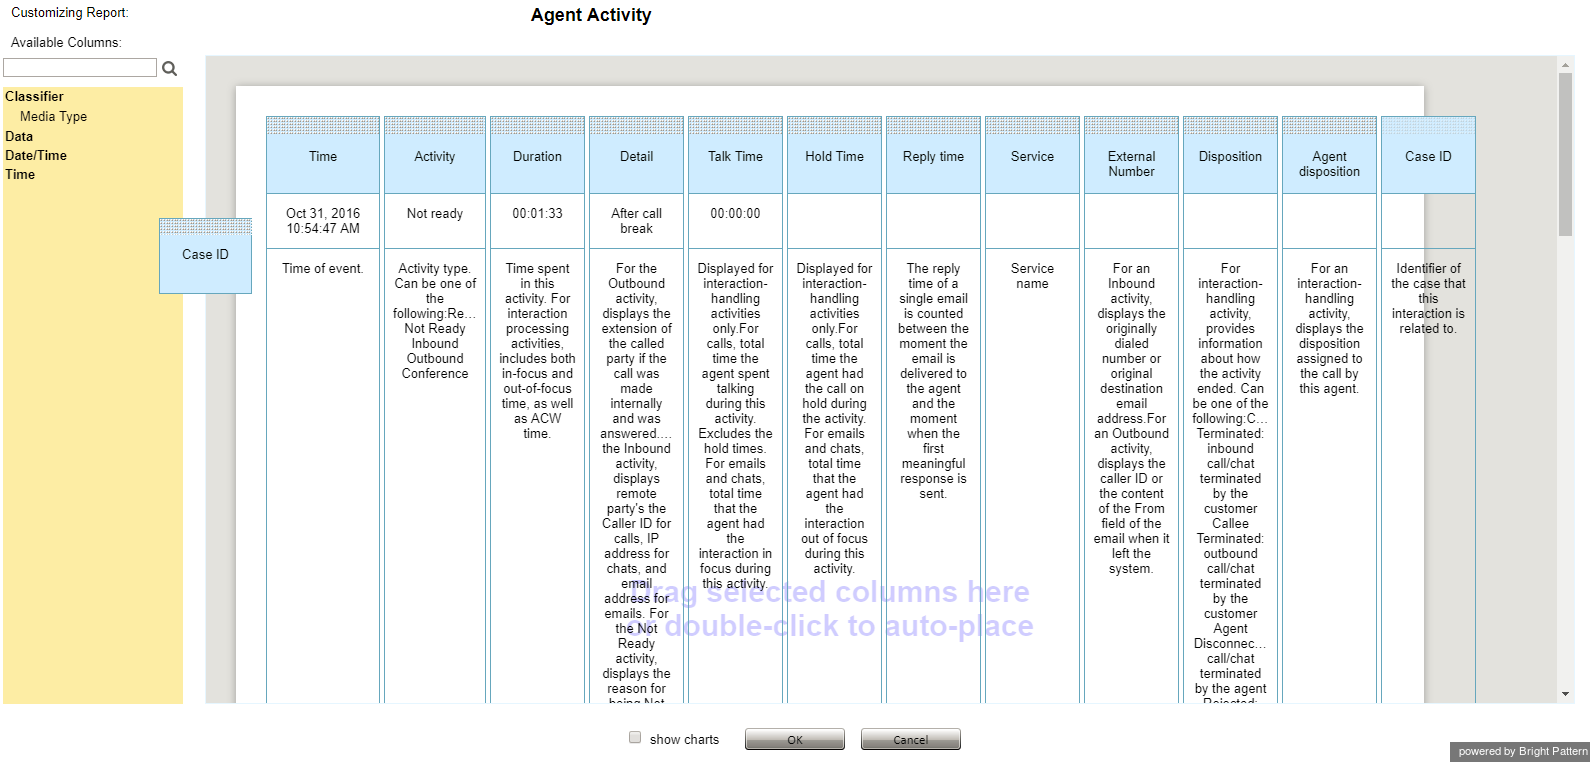
- 列をレポートのマージンからレポートのメイン画面にドラッグして追加すること
- 列のタイトルをクリックして列の名前を変更すること
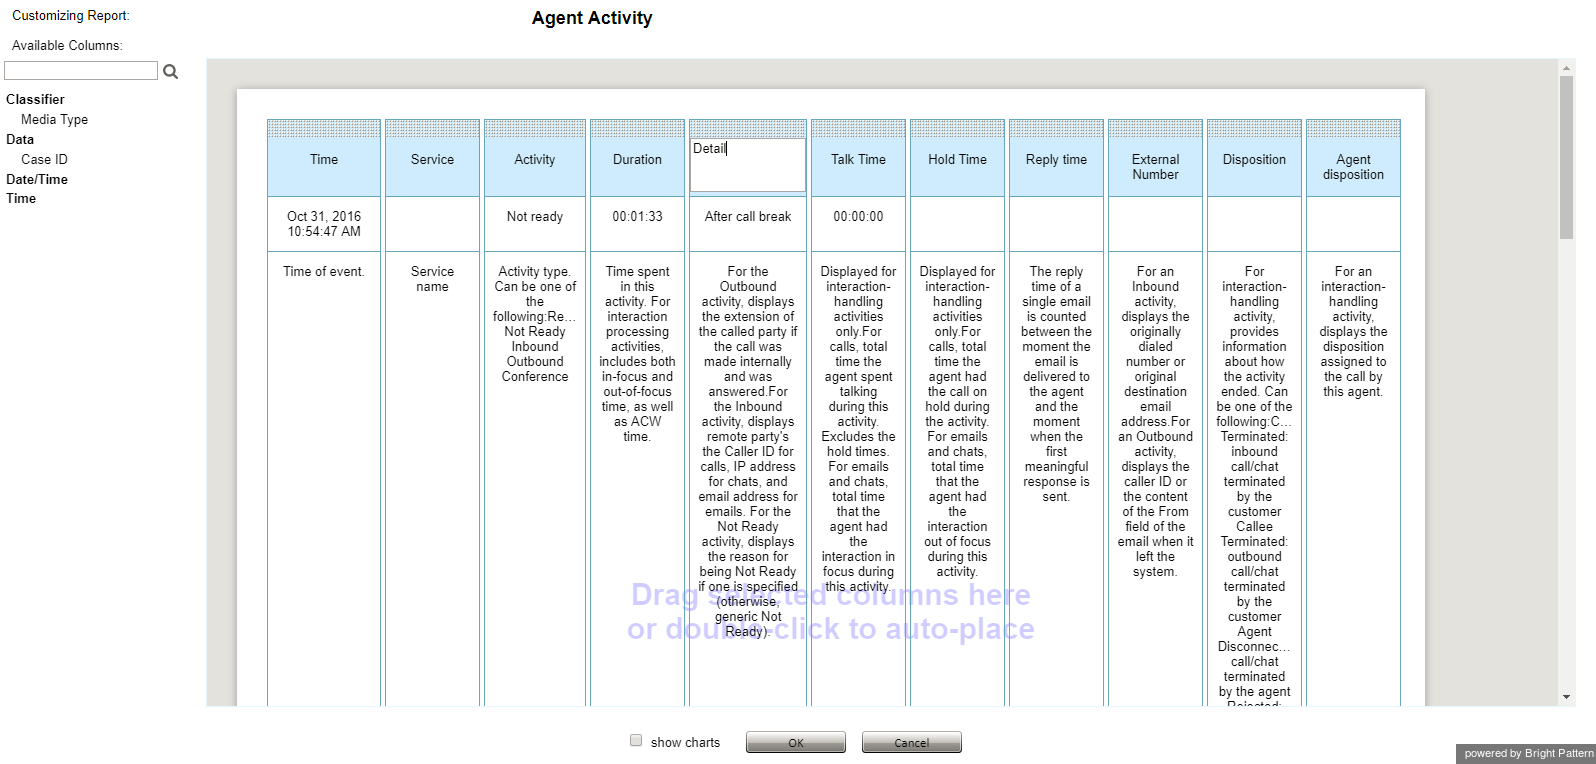
- 特定のキーワードをレポート列で検索すること
- カスタマイズしたレポートに新しい名前と説明を付け保存すること


その他のアクション
- レポートで使用可能なチャートを表示するには、チャート表示チェックボックスを選択します。
- カスタマイズしたレポートを保存するには、OKをクリックします。
- カスタマイズをキャンセルしてレポートカスタマイザーを終了するには、キャンセルをクリックします。
レポートのスケジューリング
また、レポートの自動生成と、電子メールの添付ファイルとして、またはFTP経由で指定された宛先への配信をスケジュールすることもできます。詳細については、 レポートのスケジューリングをご覧ください。