From Bright Pattern Documentation
Created page with "<translate>= Configure a Workflow with Zapier Blocks = Once your integration in Zapier Platform is confi..." |
Updated via BpDeleteTranslateTags script |
||
| Line 1: | Line 1: | ||
= Configure a Workflow with Zapier Blocks = | |||
Once your [[Zapier-integration-guide/Configuration/IntegrationinZapierPlatform|integration in Zapier Platform]] is configured, you will need to create a workflow that passes information to it. | Once your [[Zapier-integration-guide/Configuration/IntegrationinZapierPlatform|integration in Zapier Platform]] is configured, you will need to create a workflow that passes information to it. | ||
| Line 14: | Line 14: | ||
:::[[File:Zapier-10-54.PNG|800px|thumb|center|Assign your workflow to a service and configure the triggers]] | :::[[File:Zapier-10-54.PNG|800px|thumb|center|Assign your workflow to a service and configure the triggers]] | ||
Latest revision as of 04:04, 29 May 2024
Configure a Workflow with Zapier Blocks
Once your integration in Zapier Platform is configured, you will need to create a workflow that passes information to it.
Download
Click the following link to download our annotated example Zapier workflow. Media:Workflow_Example+Zapier+Workflow.zip
Steps
- In the Contact Center Administrator application, section Workflows, click + to launch the Workflow Builder application.
- In the application, there are two Zapier blocks: Zapier Invoke Zap and Zapier Select Account.
- The Zapier Select Account block may be included in your workflow if you have more than one Zapier account configured in Integration Accounts.
- In the Zapier Invoke Zap block’s Response in JSON field, you will enter the same JSON object you entered in the Sample Output field of your Zapier integration’s trigger.
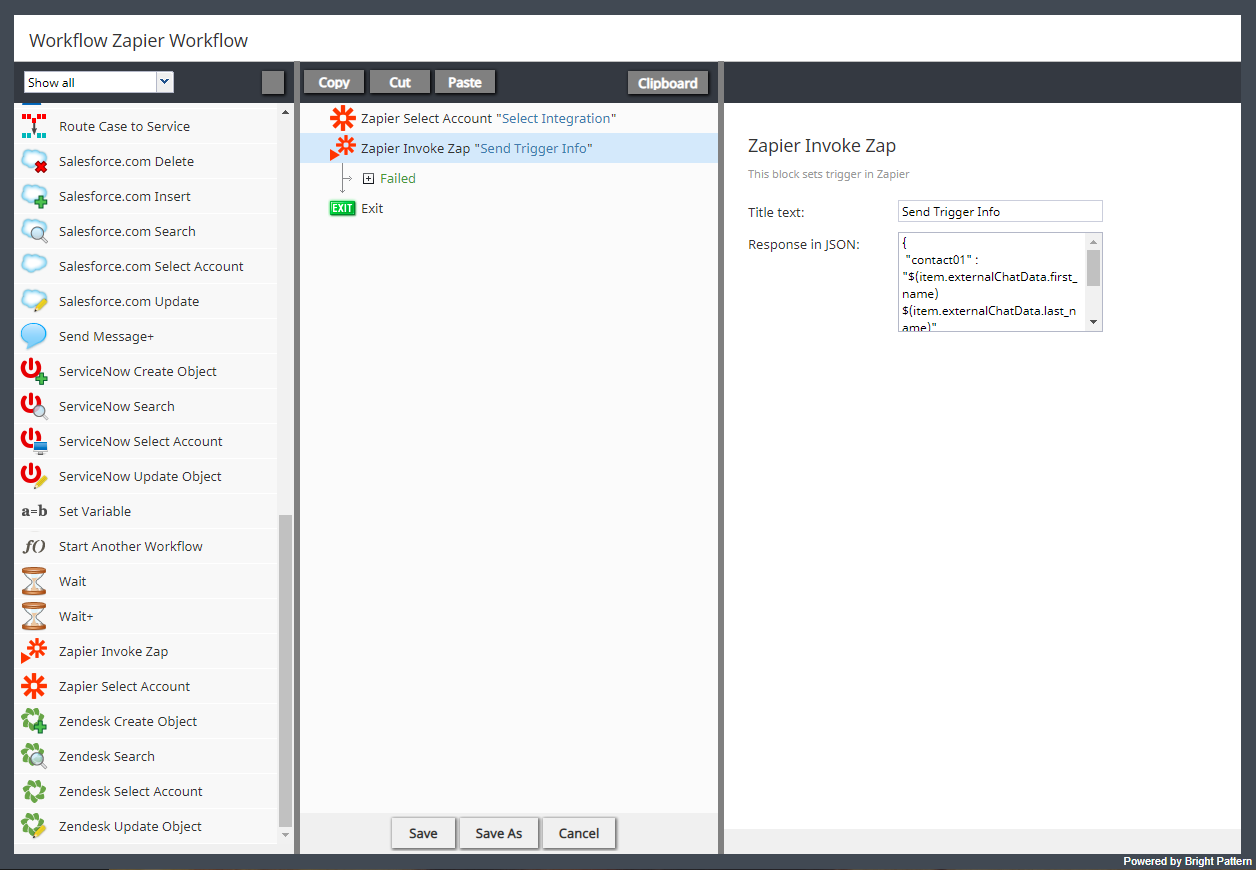
A workflow containing Zapier blocks
- After saving your workflow, you will need to assign it to a service and select the triggering disposition.

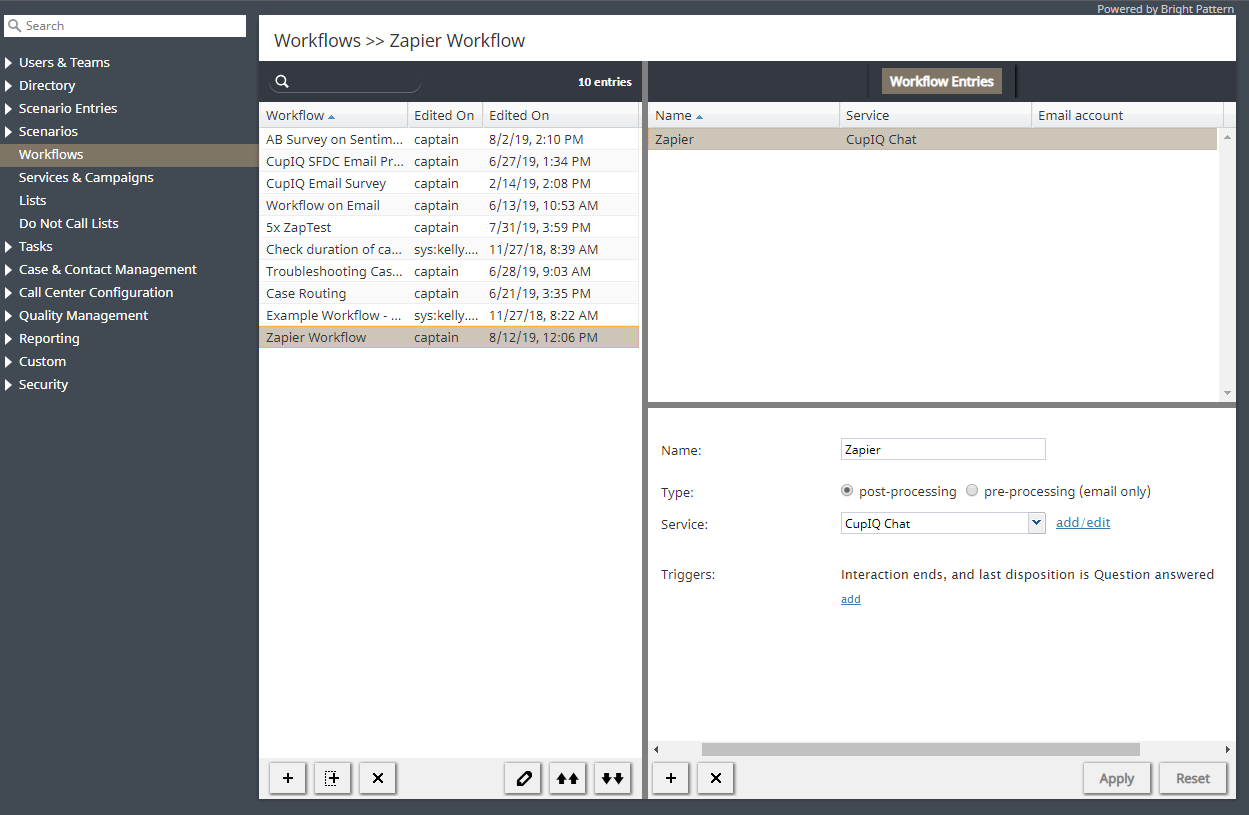
Assign your workflow to a service and configure the triggers < Previous | Next >
