How to Evaluate Interactions
Evaluations of agent interactions serve an important purpose. That is, they specifically provide agents and their supervisors the feedback needed for ensuring your contact center’s quality management goals are being met. So, it is ideal to have a process for conducting evaluations. The following process describes how evaluations may be conducted by quality evaluators using Omni QM features.
Procedure
1. Search for and select interactions
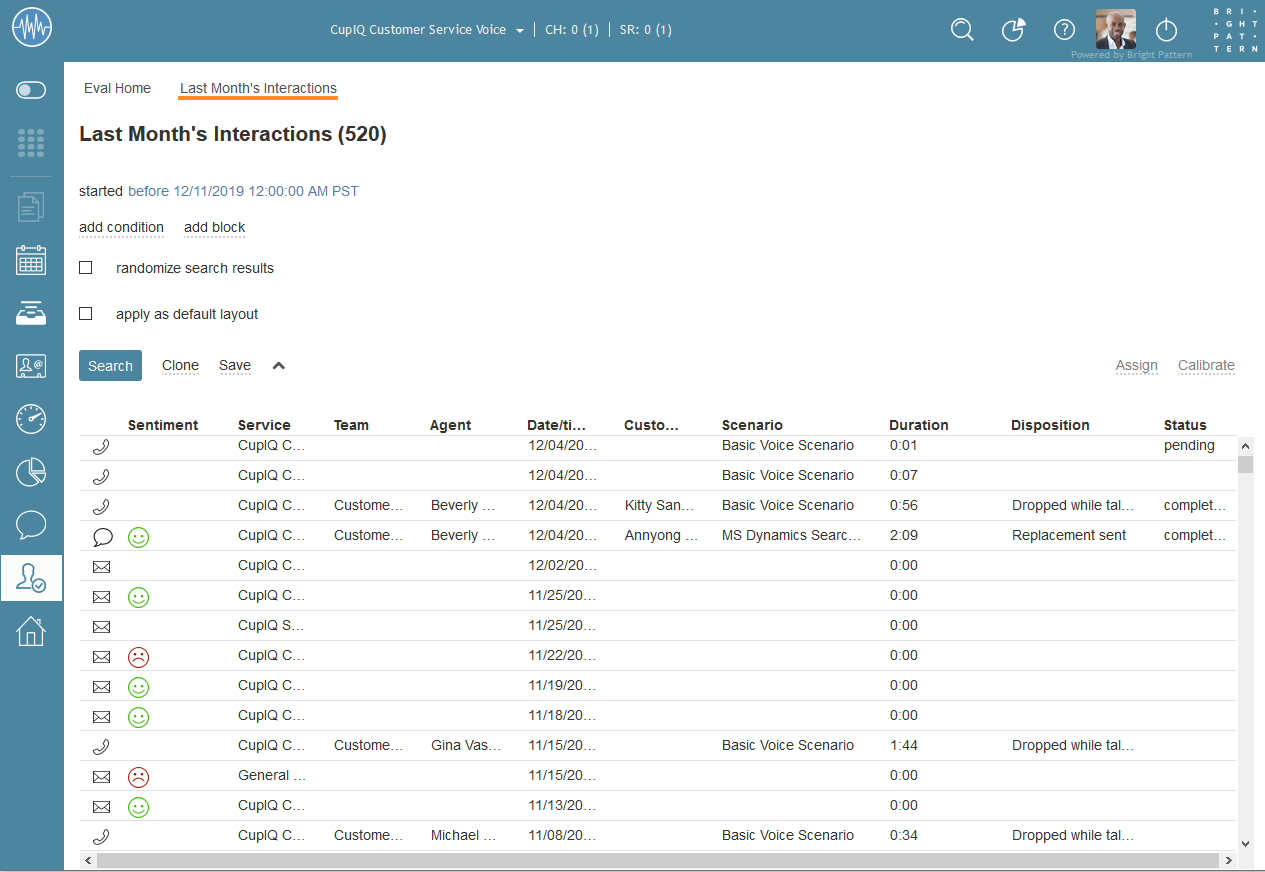
To find interactions to review, go to Eval Home and search for them using search preset buttons, saved searches, or generating your own searches. Note: Evaluations may be assigned to you by your quality evaluator admins; they can be accessed by selecting the Scheduled search preset button.
Because you will primarily search for interactions to review, you might wonder what is the best way to select ones to evaluate. A best practice for selecting interactions is to focus on outliers, that is, the conditions that make certain interactions stand apart from the rest. You may not be able to evaluate 100% of all interactions, so focusing on what is of interest in your contact center can be helpful.
One such outlier is sentiment. If Natural Language Understanding (NLU) is enabled in your contact center, you may want to focus on reviewing interactions where the sentiment was neutral or negative.
Another helpful search can be filtering interactions from the last 24 hours. Conducting prompt evaluations, then reviewing them with agents while the interactions are fresh in their minds, can help your evaluations be more effective.
Yet another recommended best practice is to randomize search results, which can help to avoid evaluation bias. Morning interactions may be assessed with a fresh mind while evening ones don’t get as much attention.
2. Review interactions
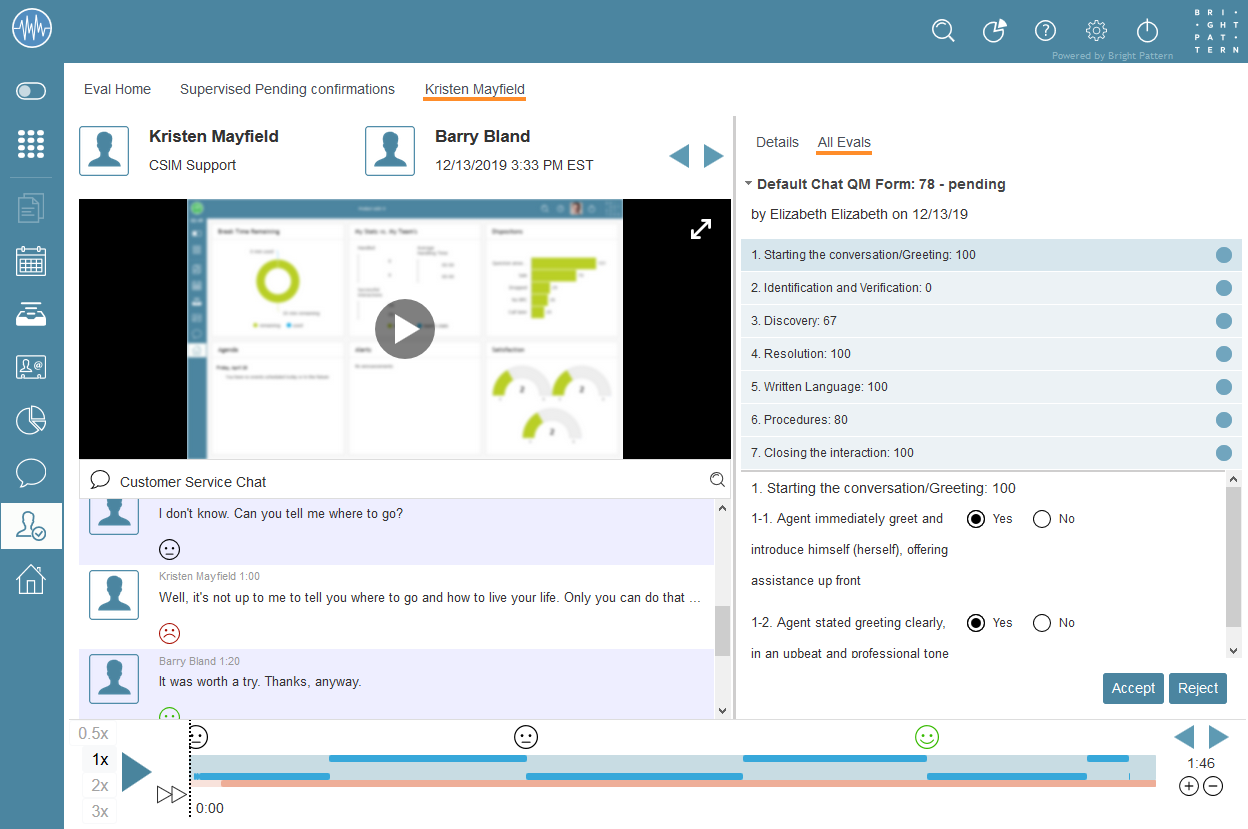
After selecting what you will evaluate, you will review the contents of the interactions by using all the tools available to you in Eval Console.
Tools include transcripts, voice recordings, screen recordings, being able to play through the interaction using the timeline control, and so forth. The timeline control allows you to speed up or slow down the interaction on playback, or even create playback loops for reviewing specific sections of the interaction. To browse through the interactions from a search results screen within Eval Console, you can select the navigation icons.
3. Evaluate interactions
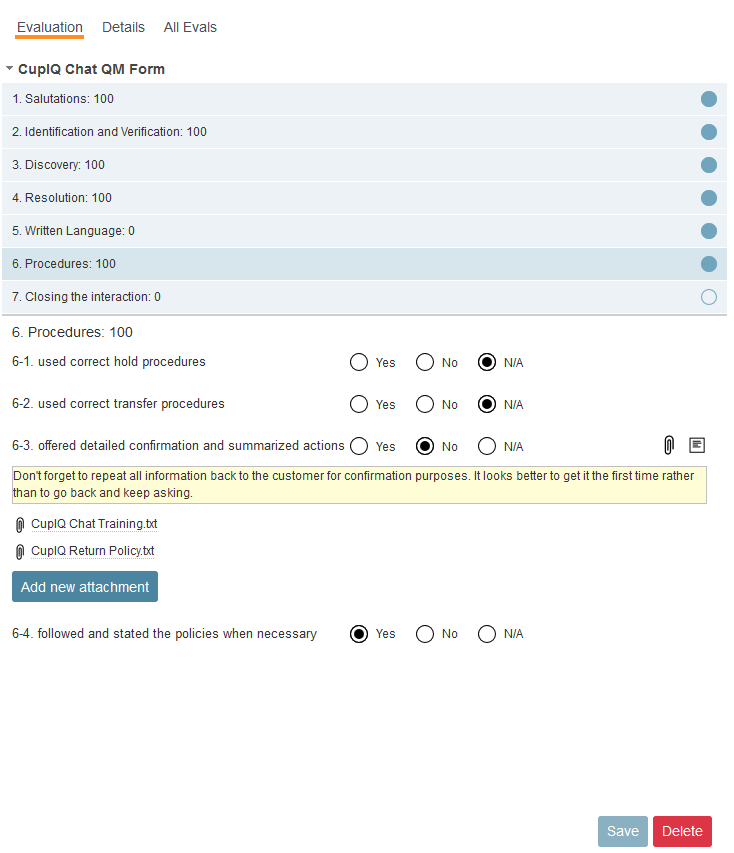
After reviewing a selected interaction, you will begin the evaluation process. On the right side of Eval Home, you will see the evaluation area. Under the Evaluation tab, select the appropriate evaluation form (if necessary), then begin answering all the questions in the available evaluation areas. When filling out an evaluation form, you can leave comments in the Details tab. Also, you can attach files or leave notes with every question for reference, as well as paste URLs to the relevant training materials. Note that you may save an evaluation in progress as a draft.
When you are finished answering all evaluation form questions, you will click the Submit button. From here, your evaluation will go to either agents or supervisors for confirmation.
Note: As an evaluator, you have the privilege to delete your own evaluations, which includes completed and confirmed evaluations.


