"伝言" チャットフォームを使うお客様に自動応答メールの送信
コンタクトセンターが営業時間内にチャットサービスを提供する場合、 伝言フォームオプションを使うことで、お客様はチャットウィジェット経由で営業時間外にメールメッセージを送信できます。
シナリオビルダーアプリケーションを使って、営業時間外メッセージを送信するお客様に対して自動メールを返信するように設定できます。これにより、コンタクトセンターの営業時間外でも、優れたカスタマーサービスを提供できます。
必須条件
おのシナリオを設定するのに、設定済みの チャットとメールサービス,設定済みの チャットとメールシナリオエントリー, 有効なSMTP設定が必要です。
営業時間がこのシナリオ例の重要な部分であるため、コンタクトセンターで営業時間の 設定方法について理解しなければなりません。また、$(item.externalChatData) 変数がチャットウィジェットのフィールドに直接関連しているため、それについても確認しておきましょう。
チャットウィジェットの設定に関する詳しい情報は、 管理者のチュートリアルの チャットおよび チャットウィジェット設定ガイドをご覧ください。
Scenario Example
Click the following link to download an annotated version of this chat scenario example.
File:App After-Hours Send an Email Reply to a Chat Customer.zip
For instructions on how to import this file into your contact center, see the Contact Center Administrator Guide, section Scenarios Overview > How to Export and Import Scenarios.
For general information about scenarios, refer to section Scenario Builder Overview.
Example Flow
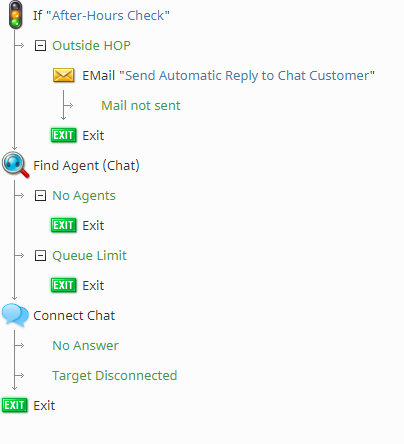
This example illustrates how to configure the Leave a Message form in the Chat Widget Configuration application, focusing on field variables. Then, in the Scenario Builder application, we configure an If block to perform an after-hours check. If messages are received outside of the configured hours of operation, we use the EMail block with the chat widget's field variables to send email replies to customers.
Designer's note: The same scenario blocks can be used to route the chat message directly to your contact center's email address, for troubleshooting purposes.
Note that this is an example scenario only and not intended for production use. All conditional exits should be defined with actions for production use.
Scenario Overview
The diagram shown illustrates what the complete scenario looks like when designed in the Scenario Builder application.
Action 1: Configure the "Leave a Message" Chat Form in the Chat Widget Configuration Application
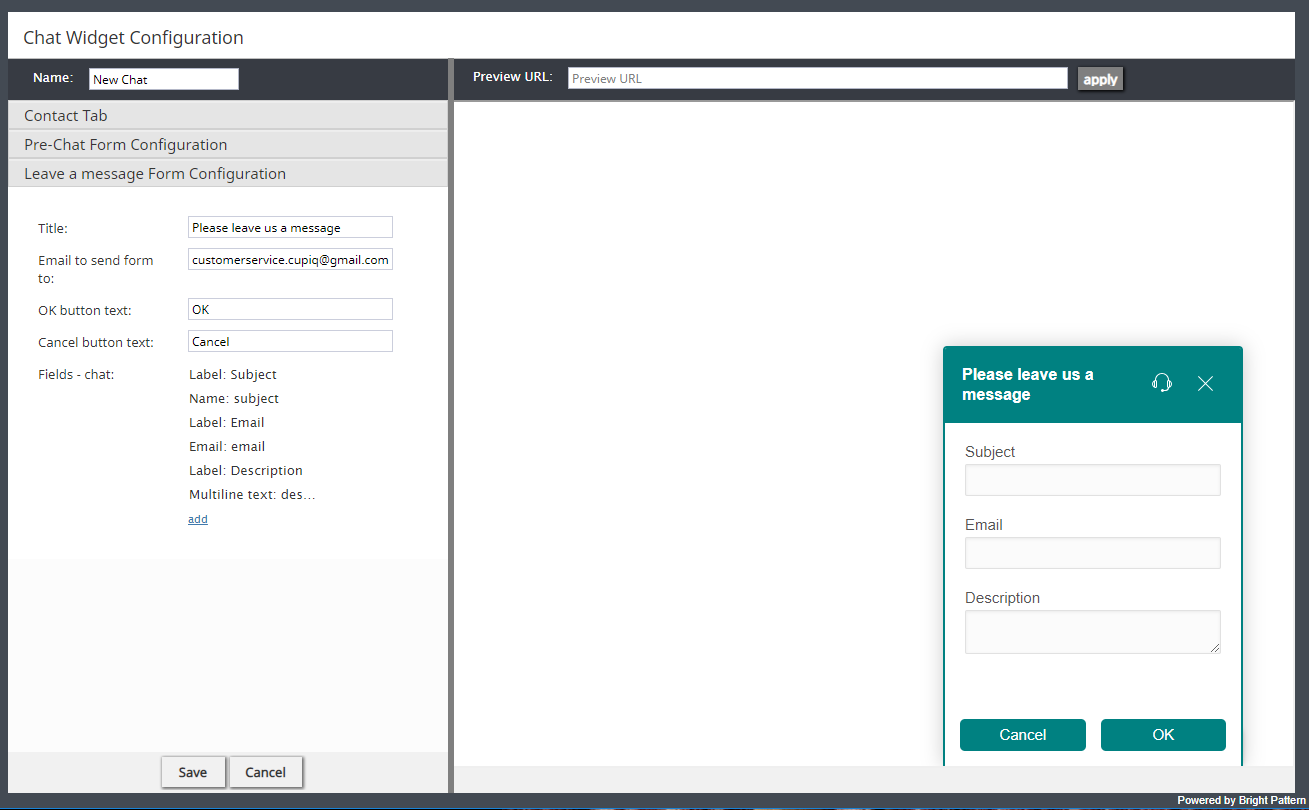
In order for our scenario to work, we must configure the Leave a Message form in the Chat Widget Configuration application first. To launch the application, in the Contact Center Administrator application, go to section Scenario Entries > Messaging/Chat > Chat Widget tab, and click add under Chat Initiation via Contact Tabs.
In the application, configure the fields you want your Leave a Message form to have. Note that the Email to send form to field should contain the email address you want to receive the results of these forms.
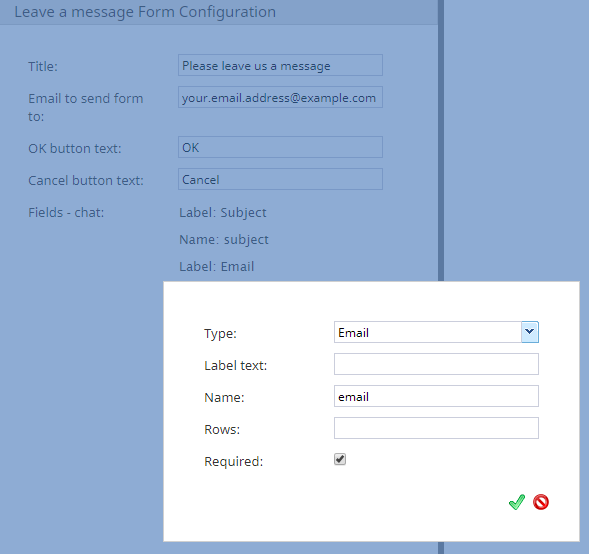
When adding fields to your form, note that the name can be added to the end of the variable $(item.externalChatData) as a way to reference back to a specific field (e.g., the field named subject can be added like so: $(item.externalChatData.subject)).
Action 2: Configure an If Block to Perform an After-Hours Check
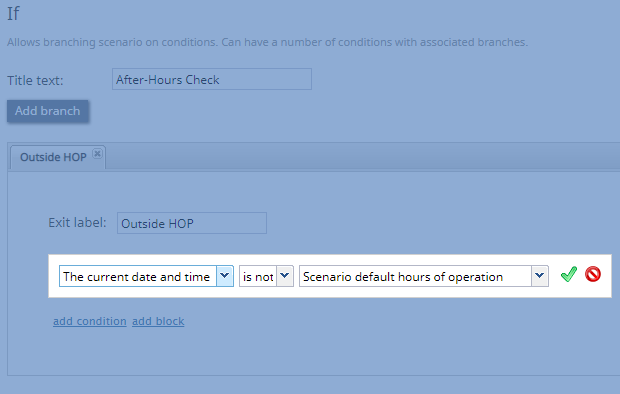
After configuring the chat form, in the Scenario Builder application, we want the system to check if the chat is received outside of the service's hours of operation. To do this, add an If block, add a new branch, enter an exit label, then add a condition that specifically looks at hours of operation. The condition is configured like so:
- "The current date and time"
- "is not"
- "Scenario default hours of operation"
Additionally, note that you may configure specific hours of operation entries in the final field.
Action 3: Add the EMail Block to the If Block's After-Hours Check Branch
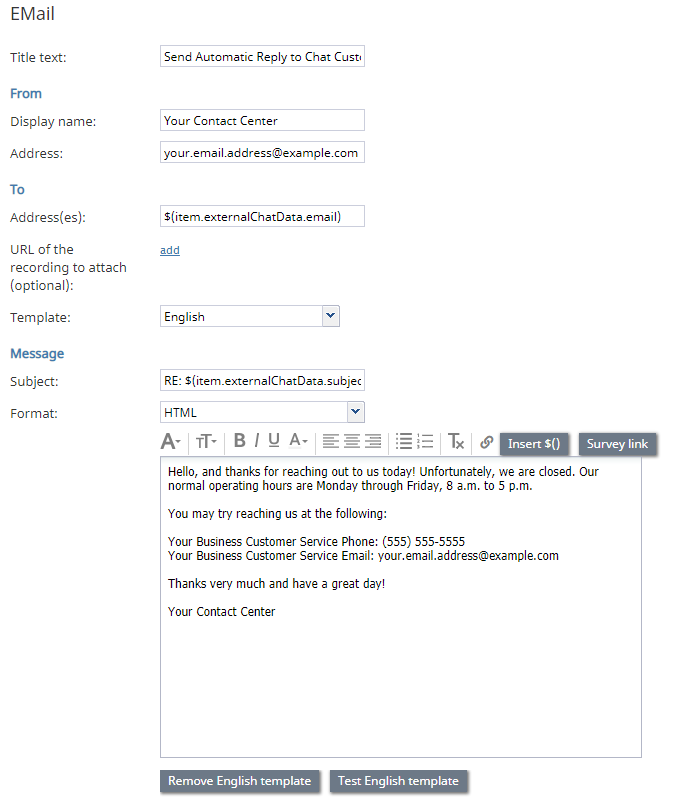
If the chat is received outside of the specified hours of operation, we want the system to send out an automatic email reply; this is done by adding the EMail block to the after-hours branch we created with the If block.
When configuring the EMail block, and to ensure the email populates with information the customer entered in the widget, use the variable $(item.externalChatData) where applicable.
The field names from the widget should be added to the end of the variable to pull the correct information, for example, if the widget's email field is named email, the variable would be $(item.externalChatData.email).
Action 4: Configure Find Agent / Connect Chat
If the chat is received during normal hours of operation, the customer will need to be connected to an agent. To do this, configure your scenario with the two most basic chat scenario blocks: Find Agent and Connect Chat. Find Agent is where the system finds the most appropriate agent to route the chat to; Connect Chat opens the chat channel between the found agent and the customer. All chat scenarios will contain the Find Agent block and Connect Chat block; note that they should be arranged in consecutive order.
For more information about these blocks, see How to Create a Basic Scenario. As a reminder, define all conditional exits.

