提供: Bright Pattern Documentation
< 5.19:Microsoft-dynamics-365-integration-guide | Configuration | EnableScenariosAccessDynamics365
• English
設定セクション A: シナリオおよびDynamics 365へのアクセスの有効化
ステップ 1: 新しく登録されたアプリを追加します。
新しく登録されたアプリを追加すると、Microsoft Azure アクティブディレクトリがDynamics 365を介してBright Pattern コンタクトセンターのソフトウェアへ接続できます。このステップではシナリオの統合も可能になります。
- Azure ポータル > Azure アクティブディレクトリ > アプリの登録で + 新規登録をクリックし新しく登録されたアプリを追加します。
- アプリに名前を付けます。
- 対応できるアカウントの種類でこのアプリケーションを使用できるまたはこのAPIにアクセスできるアカウントを選択します。この例では、“この組織ディレクトリに含まれるアカウントのみ”を選択します。

- リダイレクトで ウェブを選択して、コールバックファイルへのリンクを次の形式で追加します:
https://<tenant>/admin/msdynamicscallback.html
(e.g., "https://example.brightpattern.com/admin/msdynamicscallback.html")
- 登録をクリックします。
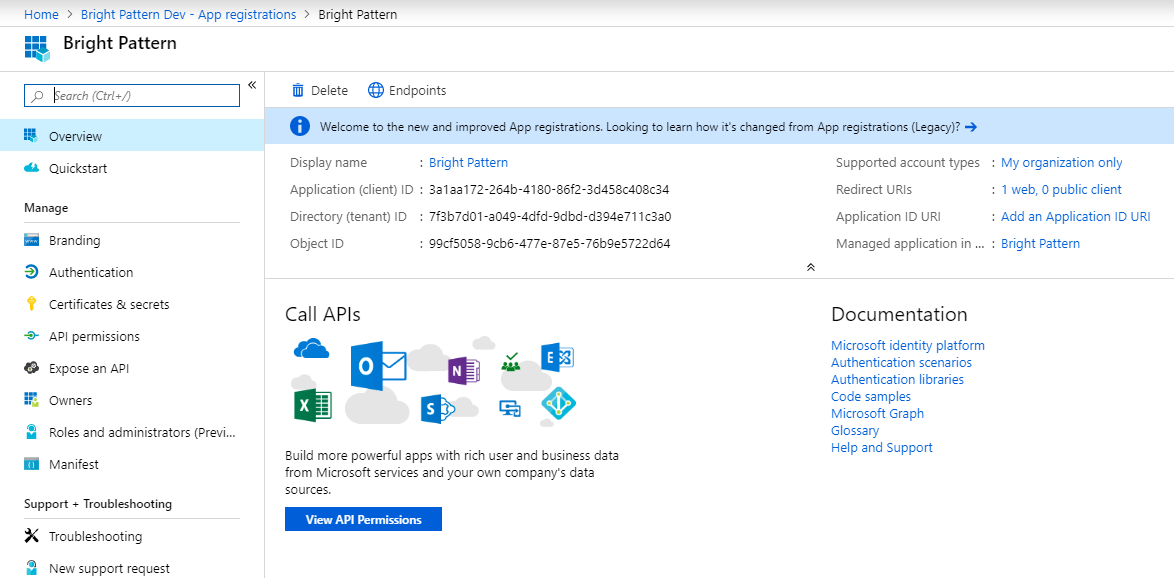
- 新しく登録されたアプリの 概要 ページが開きます。


ステップ 2: Bright PatternでDynamics 365統合アカウントを作成します。
この時点で、登録済みアプリから値をコピーして Bright Pattern Dynamics 365統合アカウントに貼り付けることによって、登録されたアプリをBright Pattern コンタクトセンターにリンクします。アプリ間で簡単にコピーおよび貼り付けをするには、Bright Pattern コンタクトセンターの管理者アプリケーションを別のブラウザタブで開いたままにすることをお勧めします。
- 新しいタブで、管理者として https://<tenant>.brightpattern.com/adminにログインします。
- コールセンターの設定 > 統合アカウント へ移動し、 +をクリックし、新しい統合アカウントを追加します。
- Microsoft Dynamics 365をアカウントタイプとして選択します。
- Microsoft Dynamics 365統合アカウントのプロパティが開きます。
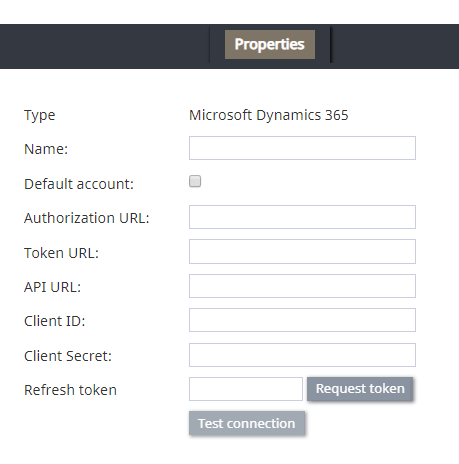
- プロパティウィンドウは、以降のステップでDynamics 365の値を貼り付ける場所なので、開いたままにしておきます。

ステップ 3: アプリケーション (クライアント) IDを取得します。
アプリケーションを作成した後、ユニークなアプリケーション(クライアント)IDが必要になります。
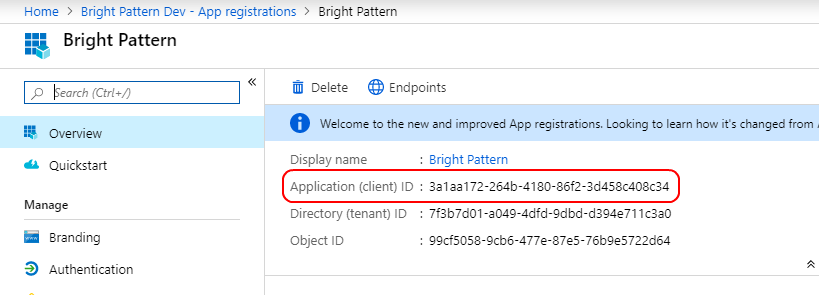
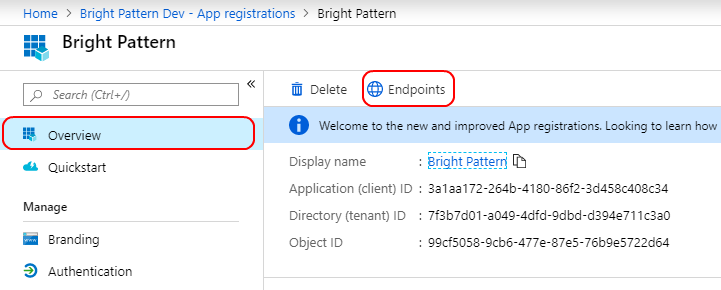
- Microsoft Azureポータルで登録されたアプリの 概要ページを表示します。
- アプリケーション (クライアント) IDを見つけてからこれの値をコピーします。
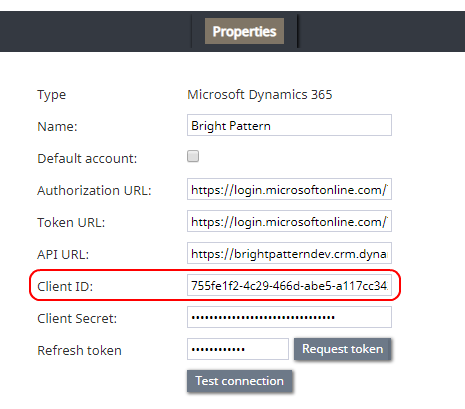
- Bright Patternコンタクトセンター > 統合アカウントプロパティのタブに移動します。
- クライアントIDのフィールドに、先ほどコピーされた値を貼り付けます。
- クライアントIDのフィールドに、先ほどコピーされた値を貼り付けます。


ステップ 4: クライアントシークレットを取得します。
クライアントシークレットは、登録されたアプリのキーです。
- Azureポータルの登録されたアプリで、管理 > 証明書 & シークレットに移動します。
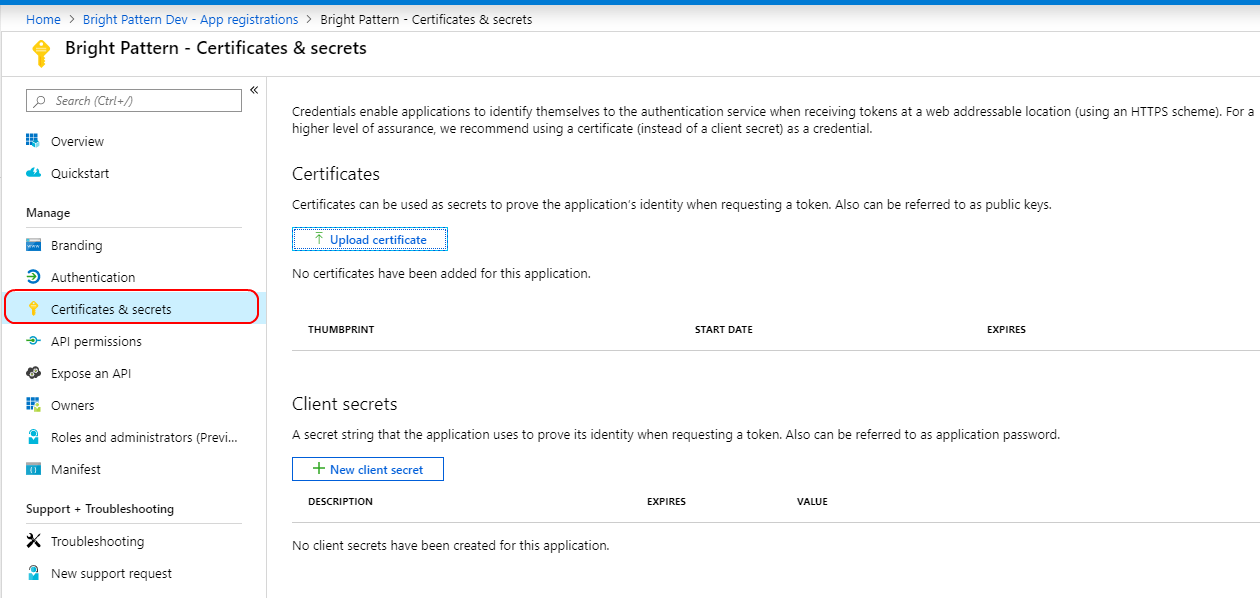
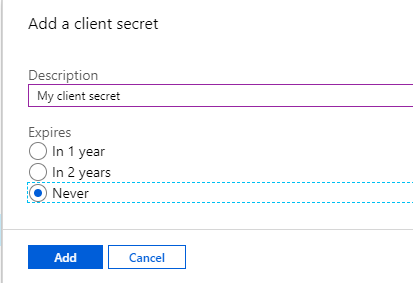
- 必須: + 新しいクライアントシークレットをクリックし、クライアントシークレットの追加ダイアログを開きます。
- 摘要に任意のテキストを入力します。
- 有効期限を 無しに設定します。
- 追加をクリックします。
- 摘要に任意のテキストを入力します。
- クライアントシークレットが作成され表示されます。表示されるのは今回のみで、必ずクライアントシークレットをこコピーしてください。
- Bright Patternコンタクトセンター > 統合アカウントプロパティのタブに移動します。
- クライアントシークレットというフィールドに、先ほどコピーした値を貼り付けます。
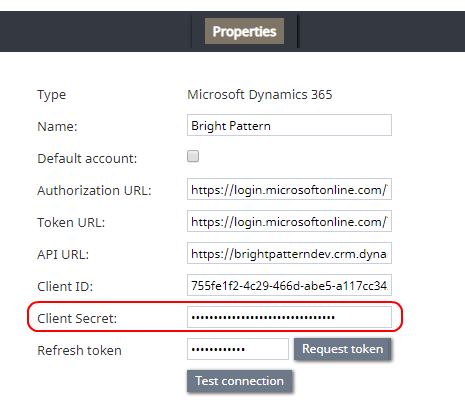
- クライアントシークレットというフィールドに、先ほどコピーした値を貼り付けます。
- オプション: 組織の証明書がお持ちの場合、証明書のアップロードをクリックして、証明書(公開キー)を .cer, .pem, .crt形式で追加します。追加は、Azureポータルの登録済みアプリの 管理 > 証明書 & シークレットで行われます。


ステップ 5: 認証 URL および OAuth 2.0 トークンを取得します。
- Azureポータルの登録済みアプリの 概要へ移動し、エンドポイントをクリックします。
- 開いたエンドポイントダイアログで、二つの値をコピーします。
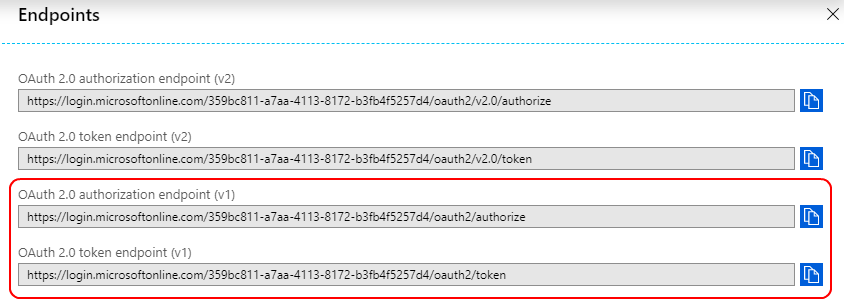
- 先ず、OAuth 2.0認証エンドポイントの値(v1)をコピーします。
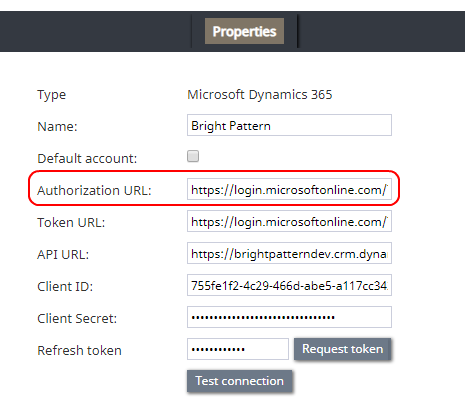
- Bright Patternコンタクトセンター >統合アカウントプロパティのタブに移動します。
- 認証URLというフィールドに先ほどコピーした値を貼り付けます。
- Bright Patternコンタクトセンター >統合アカウントプロパティのタブに移動します。
- 次に、 OAuth 2.0トークンエンドポイントの値 (v1)をコピーします。.
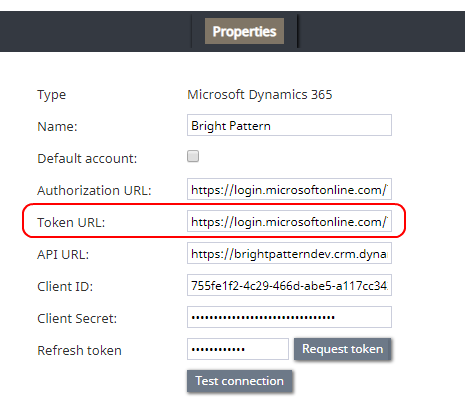
- Bright Patternコンタクトセンター >統合アカウントプロパティのタブに移動します。
- トークンURLというフィールドに先ほどコピーした値を貼り付けます。
- Bright Patternコンタクトセンター >統合アカウントプロパティのタブに移動します。


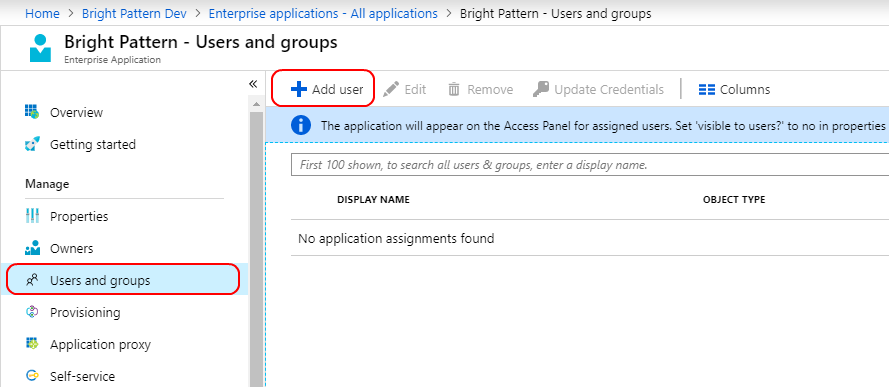
ステップ 6: アプリにユーザーを追加します。
Azureポータルで、このアプリケーションの使用を許可する権限のあるユーザー(つまり、DynamicsにログインしてMicrosoftのAPIを使うユーザー)を追加しなければなりません。システムユーザー、本人、および/または1人以上の管理者の追加をお勧めします(つまり、シナリオによる変更は、これらのユーザーの名前で行われます)。
- Azureポータルの登録されたアプリで、Azure アクティブディレクトリ > 企業専用のアプリケーション へ移動し、表示されたアプリケーションのリストから登録されたアプリを選択します。
- 次に、管理 > ユーザー & グループへ移動します。
- + ユーザーの追加をクリックし、自分をユーザーとしてアプリケーションに追加します。
- 画面の右側にある割り当ての追加で、このアプリケーションにアクセスできるユーザーとして自分の名前を選択します。
- ユーザーリストから自分の名前を選択します。
- デフォルトアクセスを選択して設定を完了します。シナリオによる変更は、このユーザーの名前で行われます。アクセスをカスタマイズしたい場合は、プロパティをクリックしてデフォルトアクセス以外のものを設定できます。
- ユーザーの 選択をクリックします。
- 割り当てをクリックします。

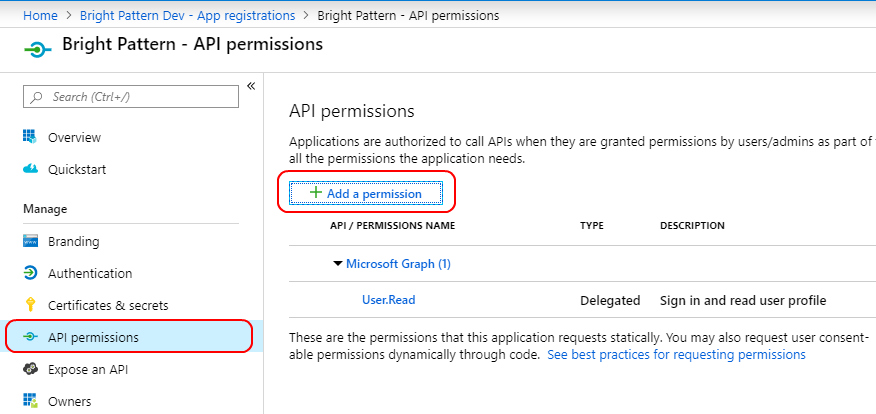
Step 7: Add API access
- Go to Azure Active Directory > App registrations and select your app name.
- Then select API permissions and click + Add a permission.
- In Request API permissions, click the tab called APIs my organization uses and search for “Common Data Service.”
- When it appears in the list, select Common Data Service.
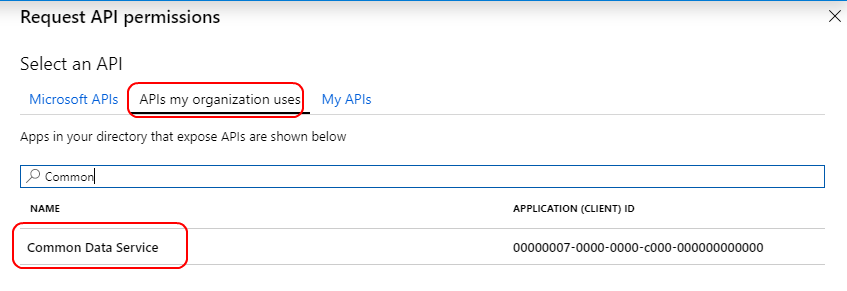
- Note: If you have more than one application using Common Data Service, make sure you select the Dynamics app and not the PowerApps app.
- Note: If you have more than one application using Common Data Service, make sure you select the Dynamics app and not the PowerApps app.
- In the next screen that opens:
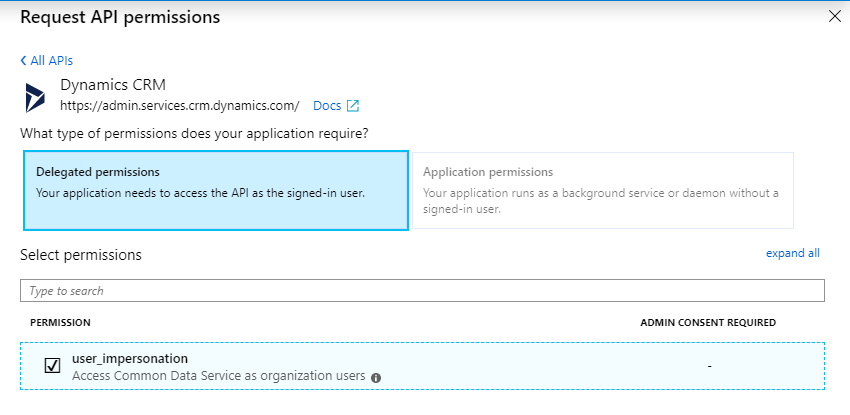
- Select Delegated permissions, which means your app has to access the API as a signed user.
- Check box for user_impersonation, which means you give permission to access the Common Data Services API.
- At bottom of screen, click Add permissions.
- Select Delegated permissions, which means your app has to access the API as a signed user.


Step 8: Complete integration account properties setup
- Tab over to Bright Pattern Contact Center > integration account properties.
- Name the integration account.
- Select checkbox for Default account if you will have multiple Dynamics 365 integration accounts and you want this one to be used as default.
- In API URL, set the URL in the following format:
https://<your-organization>.crm.dynamics.com/api/data/v9.0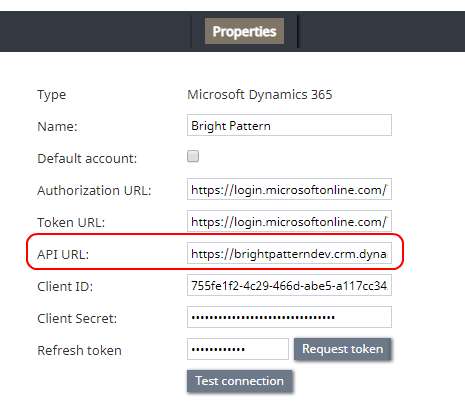
- Next to Refresh token, click Request token.
- In a pop-up dialog, you will be asked to authenticate your Microsoft account. Click consent on behalf of your organization.
- If all goes well, a dialog will show, “Connection is valid.” After this step is completed, you will be able to use Microsoft blocks in scenarios.
- Click Apply to save your integration account properties.

For more information, see section How to Add an Integration Account.
This part of configuration is now complete.