Call Center Setup
To configure a call center in Salesforce, you will need to define it using a call center definition file, which is used to support the integration of the Salesforce CRM call center with multiple CTI vendors. The first instance of a call center record for a particular CTI adapter must be defined by importing the adapter’s call center definition file.
Step 1: Set up your call centers
In Salesforce Classic's Setup view, go to Build > Customize > Call Center > Call Centers.
Note that it is possible to have multiple call centers in Salesforce. Existing call centers are listed on the Call Centers page.

Step 2: Save call center definition file
Copy the following and paste it into a text document. Save it as XML.
<callCenter>
<section sortOrder="0" name="reqGeneralInfo" label="General information">
<item sortOrder="0" name="reqInternalName" label="Internal name">CSIMIntegration</item>
<item sortOrder="1" name="reqDisplayName" label="Display name">CSIM Integration</item>
<item sortOrder="2" name="reqAdapterUrl" label="Agent Desktop URL"></item>
<item sortOrder="3" name="reqUseApi" label="Use CTI API">true</item>
<item sortOrder="4" name="reqSoftphoneHeight" label="Softphone height">300</item>
<item sortOrder="5" name="reqSoftphoneWidth" label="Softphone width">500</item>
<item sortOrder="6" name="custTenantUrl" label="Tenant URL (if different from AD URL)">example.com</item>
<item sortOrder="7" name="muteRecordingUrls" label="Mute Recording Urls"></item>
</section>

<section sortOrder="1" name="reqDialingOptions" label="Dialing Options">
<item sortOrder="0" name="reqOutsidePrefix" label="Outside Prefix">9</item>
<item sortOrder="1" name="reqLongDistPrefix" label="Long Distance Prefix">1</item>
<item sortOrder="2" name="reqInternationalPrefix" label="International Prefix">011</item>
</section>


</callCenter>
About This File
This call center definition file includes item muteRecordingUrls, which automatically mutes call recordings and pauses agents' screen recordings when those pages are visited. The muteRecordingUrls feature helps your contact center to be compliant when agents are receiving sensitive data (e.g., credit card numbers).
Step 3: Import the file to your call center
- Select the desired call center from the list (e.g., "BrightPattern Integration").
- Click the Import button.
- Click Choose file to select the definition file.
- Click Import again.

Note that if the import does not work, it could be because you already have a call center of the same type configured. To get the call center definition file imported properly, you may need to change the original internal name of your call center (e.g., "CSIMIntegration") to a different name. See reqInternalName in the call center definition file above.
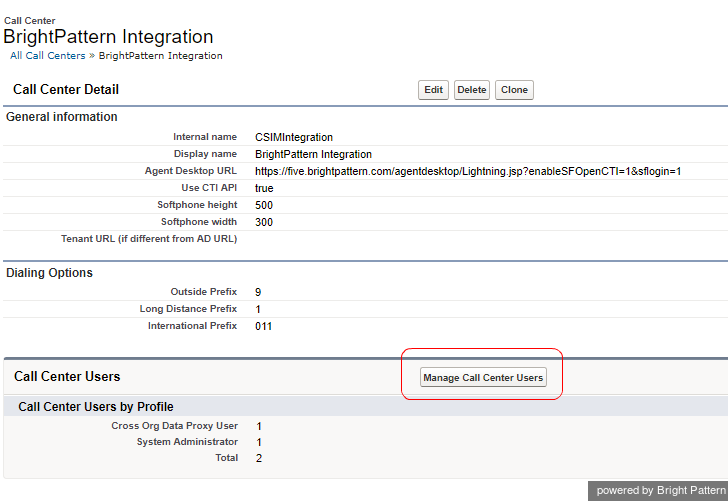
After you've imported the definition file to your call center, you will see the Call Center Detail page.

Step 3: Edit call center properties
Now that you have defined your call center, you can set up the call center parameters that will enable integration with Bright Pattern Contact Center.
- On the Call Center Detail page, click Edit. The Call Center Detail page opens.
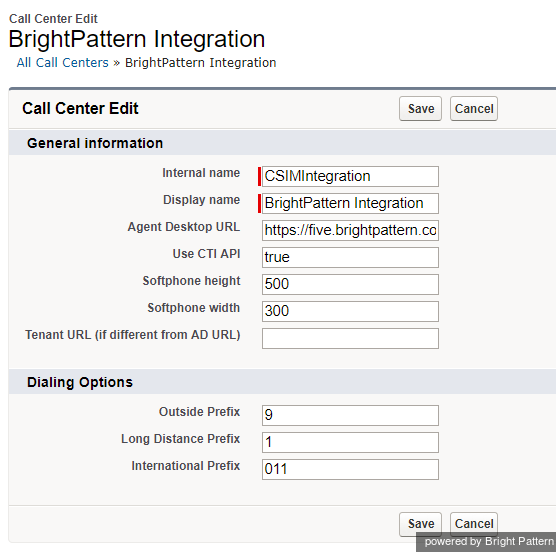
Edit call center details - In Agent Desktop URL, enter the following, being sure to replace <tenant-name> with your Bright Pattern Contact Center tenant access URL:
https://<tenant-name>.brightpattern.com/agentdesktop/SalesCloud.jsp?enableSFOpenCTI=1&sflogin=1&version=2
For example:
https://demo.brightpattern.com/agentdesktop/SalesCloud.jsp?enableSFOpenCTI=1&sflogin=1&version=2 - In Salesforce Compatibility Mode, enter Classic.
- Optional: adjust the size of the Agent Desktop call widget in Salesforce (appearing on the homepage in Classic view or on every page in Lightning view) by editing the Softphone height and Softphone width fields. The minimum widget height is 350 pixels and minimum width is 370 pixels.
- Click Save.

Step 4: (Optional) Update your Tenant URL if you have multiple call centers
If you have multiple tenants (i.e., call centers), you should update your Tenant URL information for the particular call center you are configuring. If you only have one call center, skip this step.
- In Tenant URL, enter the following, being sure to replace <tenant-name> with your actual Bright Pattern Contact Center name:
https://<tenant-name>.brightpattern.com/agentdesktop?enableSFOpenCTI=1&sflogin=1&apexClass=BrightPattern.CSIMIntegration - For example:
https://demo.brightpattern.com/agentdesktop?enableSFOpenCTI=1&sflogin=1&apexClass=BrightPattern.CSIMIntegration - Click Save.
Step 5: Check dialing options
In the Dialing Options section of call center parameters, you will see the fields Outside Prefix, Long Distance Prefix, and International Prefix. These fields were populated with values from the call center definition file. These values align with the phone number prefixes configured in your contact center's Dial-out entries. Prefixes are the numbers appended to phone numbers when they are dialed.
We recommend checking that the dialing options set in Salesforce match the dialing options set in Bright Pattern Contact Center.
- In the Contact Center Administrator application, go to Configuration > Directory > Dial-out Entries.
- Check that the prefixes set in dial-out entries match the following prefixes set in Salesforce:
- Outside Prefix - This number (e.g., "9") will be added by Salesforce to any phone number dialed using the “Click-To-Call” feature. If you do not such a dial-out entry configured, leave the "Outside Prefix" field empty in Salesforce.
- Long Distance Prefix - This number (e.g., "1" for US numbers) will be added by Salesforce to any long-distance phone number dialed using "Click-To-Call." If you do not such a dial-out entry configured, leave the "Long Distance Prefix" field empty in Salesforce.
- International Prefix - This number (e.g., "011") will be added by Salesforce to any international phone number dialed using "Click-To-Call." If you do not such a dial-out entry configured, leave the "International Prefix" field empty in Salesforce.
- Outside Prefix - This number (e.g., "9") will be added by Salesforce to any phone number dialed using the “Click-To-Call” feature. If you do not such a dial-out entry configured, leave the "Outside Prefix" field empty in Salesforce.
For more information on prefixes, see the Contact Center Administrator Guide, section Dial-Out Entries.

Step 6: Assign Salesforce users to the call center
- In the Call Center Users section, click Manage Call Center Users.
Manage Call Center Users - Click Add More Users.
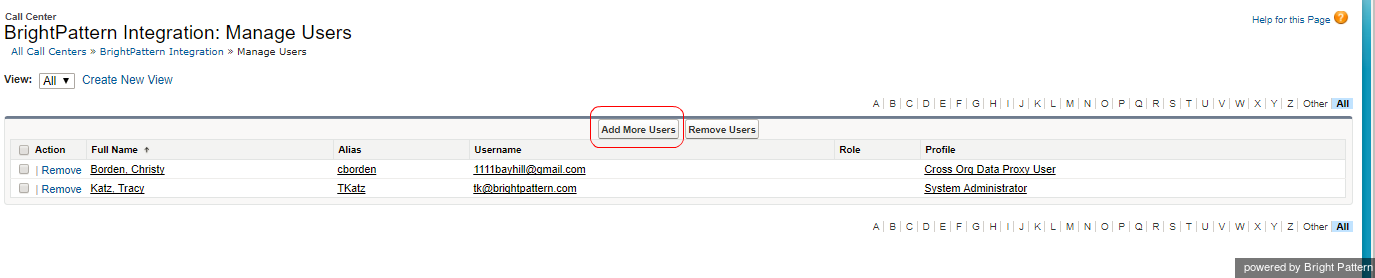
Add More Users - Specify criteria to find the users who should be assigned to the call center.
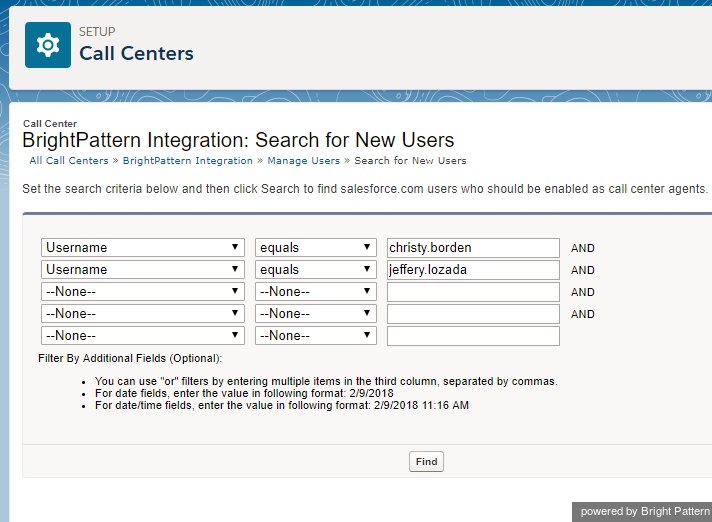
Select users - Click Find. Note that all users who already belong to a call center will be excluded from the search results because a user can be assigned to one call center at a time only.
- Select the checkbox next to each user who should be assigned to the call center, and click Add to Call Center.


Note: To reassign a user to another call center, first remove this user from the currently assigned call center and then add the user to the desired call center. You can view the currently assigned call center in the “User” detail page.
Step 7: Confirm that the new call center is correct
Exit Salesforce Setup by clicking on "Home" or any other page. You should see the Agent Desktop widget on every page within Salesforce.
