How to Create and Configure an AWS S3 Bucket
Bright Pattern Contact Center supports automatic export of audio and screen recordings to Amazon Web Services (AWS) S3 for storage and playback. Storing recordings on S3 can provide cost savings to your organization, while still allowing you to listen to or view recordings via interaction records on the Bright Pattern Contact Center platform.
This article describes how to create an S3 bucket and configure it for integration with Bright Pattern Contact Center for storing call recordings and/or screen recordings.
Prerequisites
- You must have an existing Amazon AWS account.
- You must be an IAM user with administrator access to the account.
Configuration Procedure
Step 1: Create an S3 bucket in the US
If you already have an S3 bucket, you may skip creating a new bucket and simply edit the bucket’s properties to match the following description.
- Sign in to your AWS account and then go to the AWS Management Console.
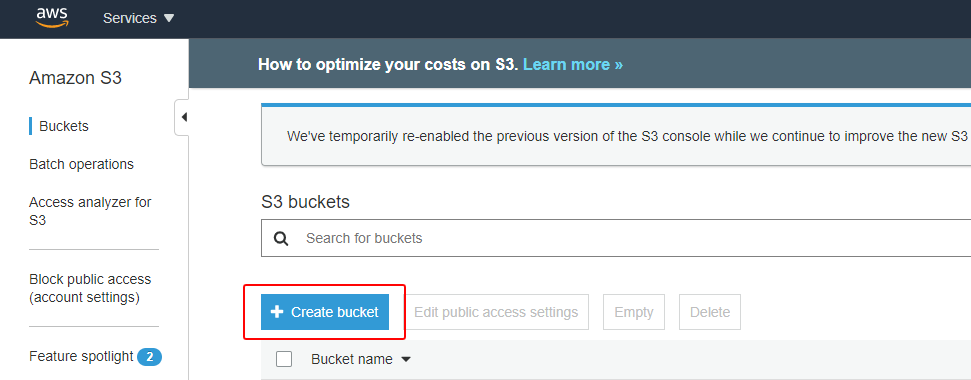
- Search the Services for Storage > S3 to get to the Amazon S3 Buckets dashboard. Click Create bucket.
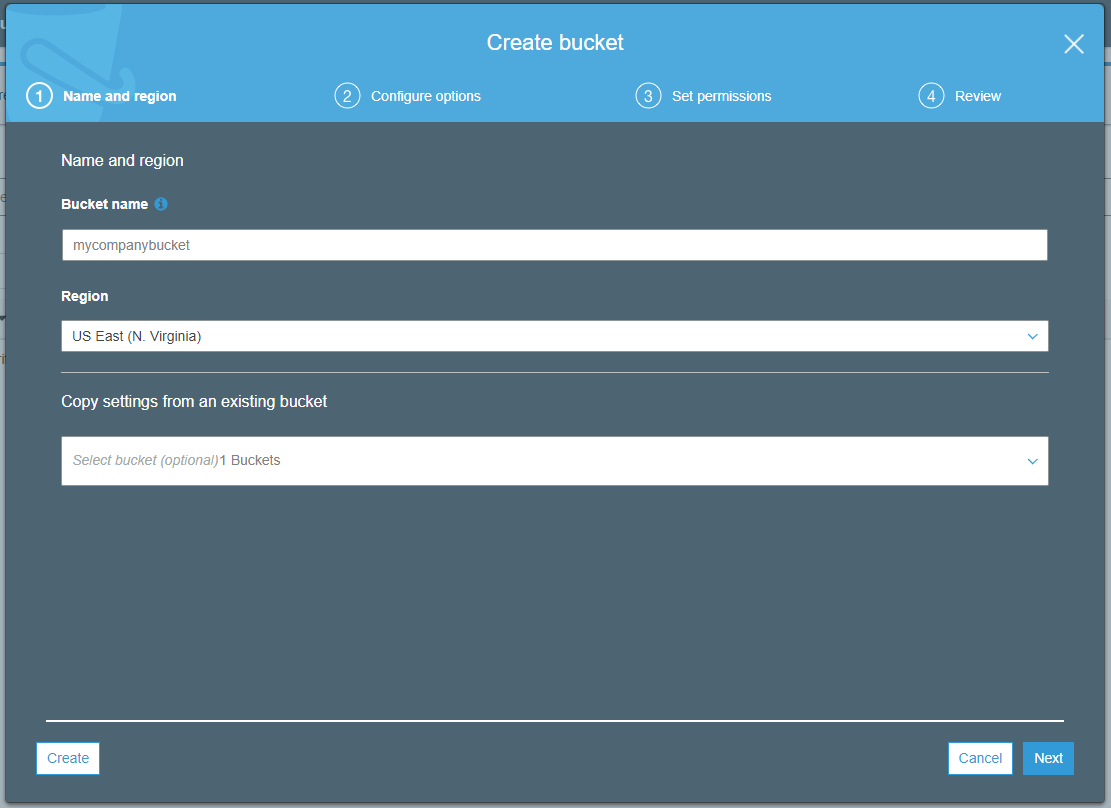
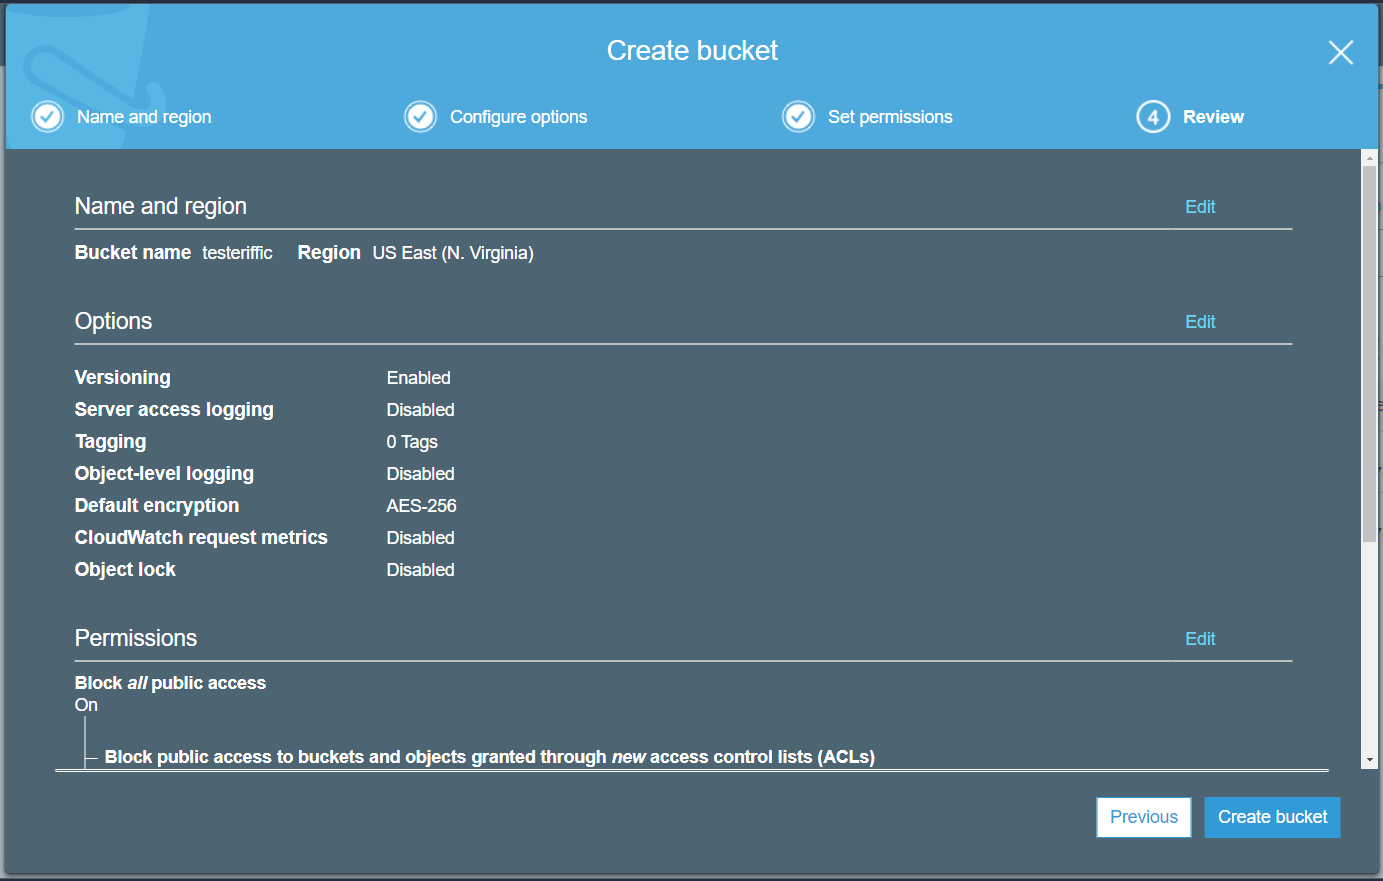
- Name the bucket and set the region.
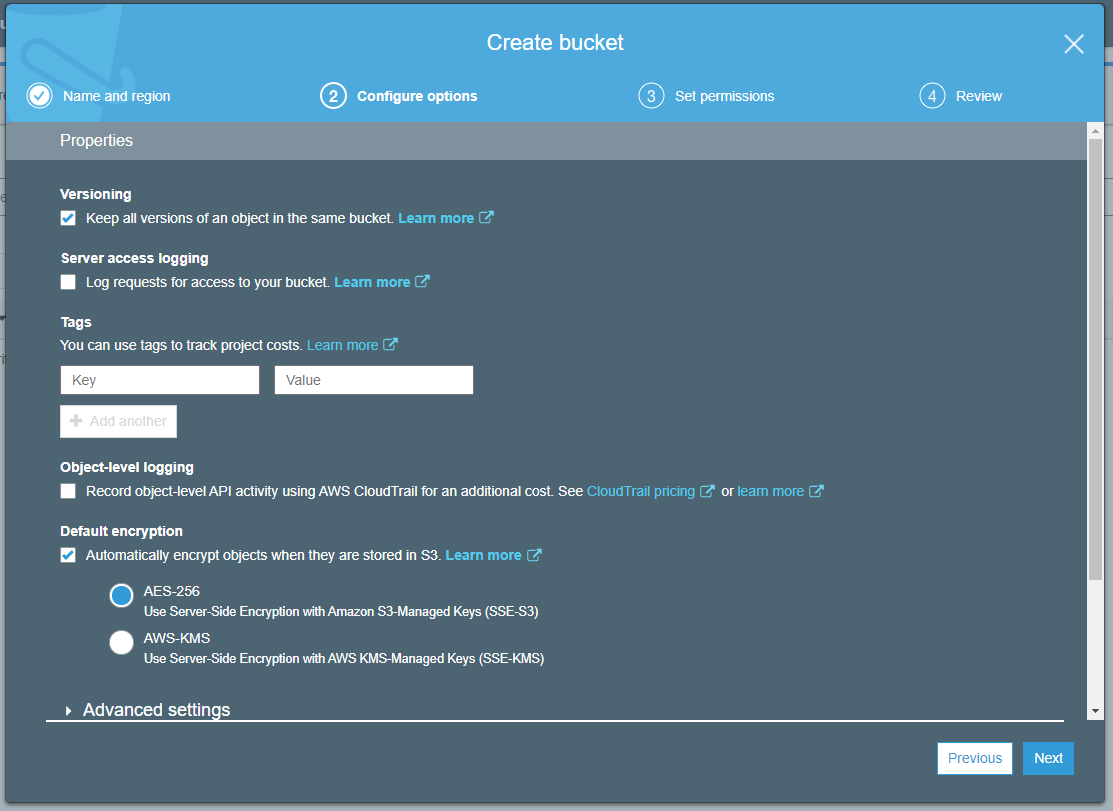
- Configure options for the bucket.
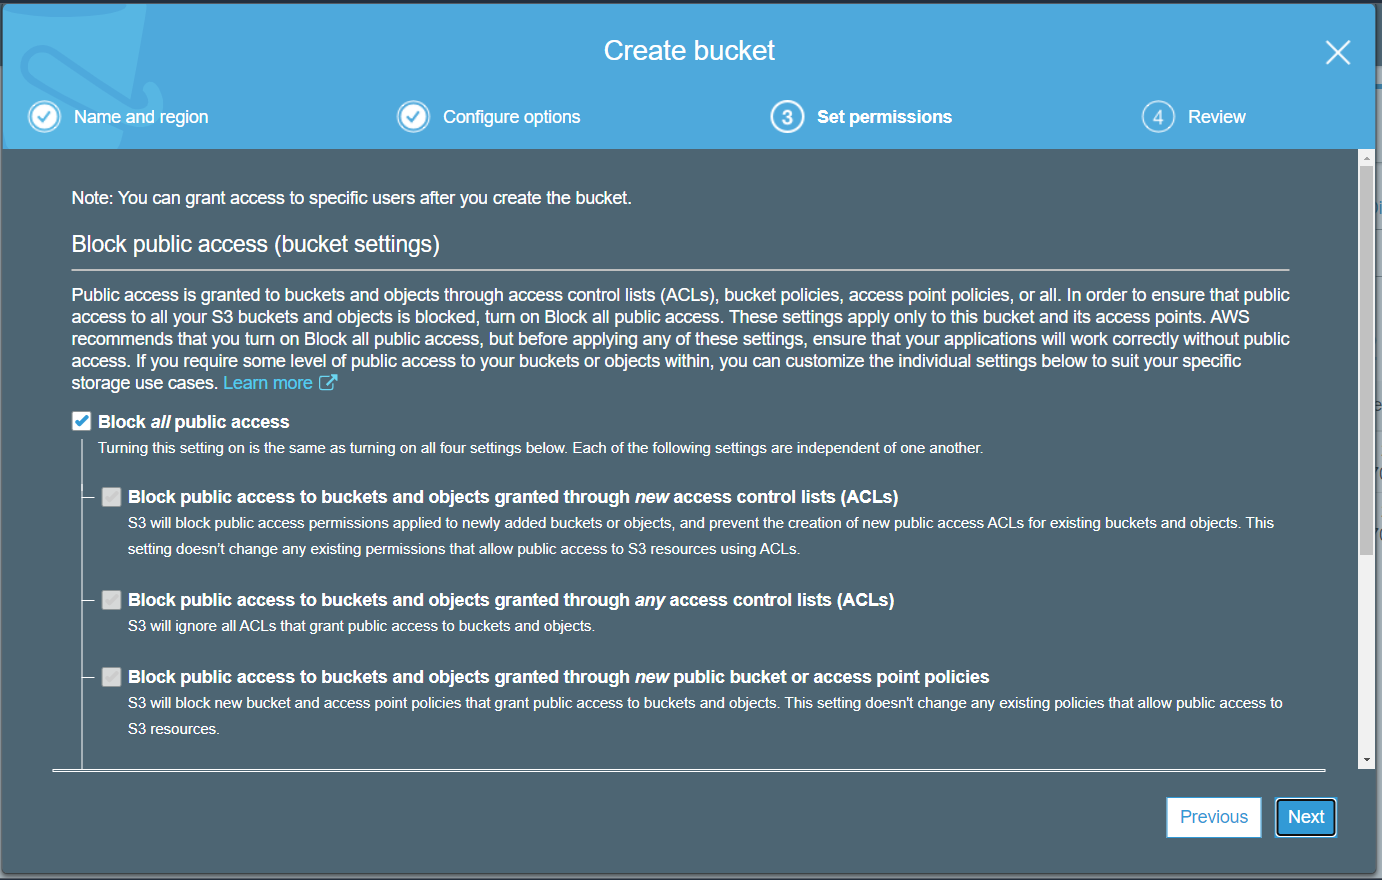
- Enable the option to block public access.
- Review and click Create bucket.
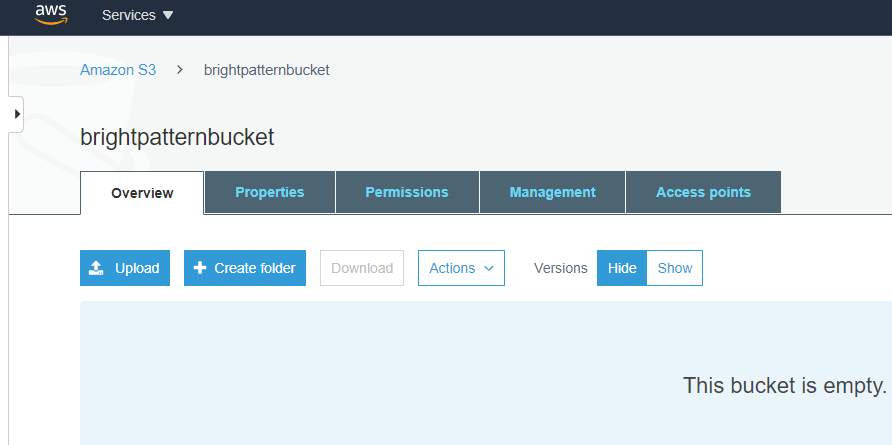
- Click into the bucket name and view its details. You have the option to add folders to the bucket in order to organize the bucket’s contents when exporting recordings into it later. This is not required.
Step 2: Get User ARN
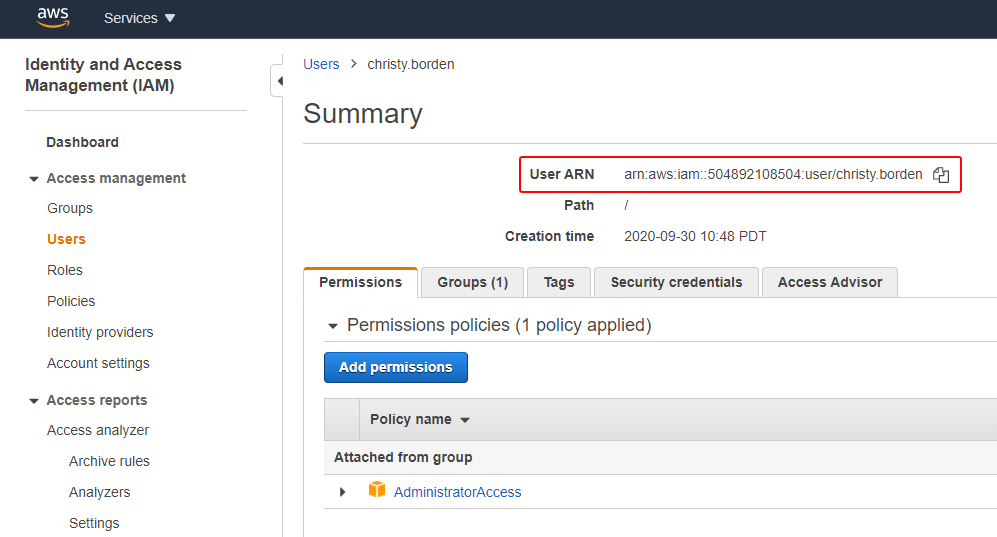
Search Amazon services for IAM, go to IAM Dashboard > Access management > Users, and copy an admin user’s User ARN. The User Amazon Resource Name (ARN) is the identifier of the user and you will need it for setting the S3 bucket’s policy later.
Step 3: Set permissions by editing Bucket Policy
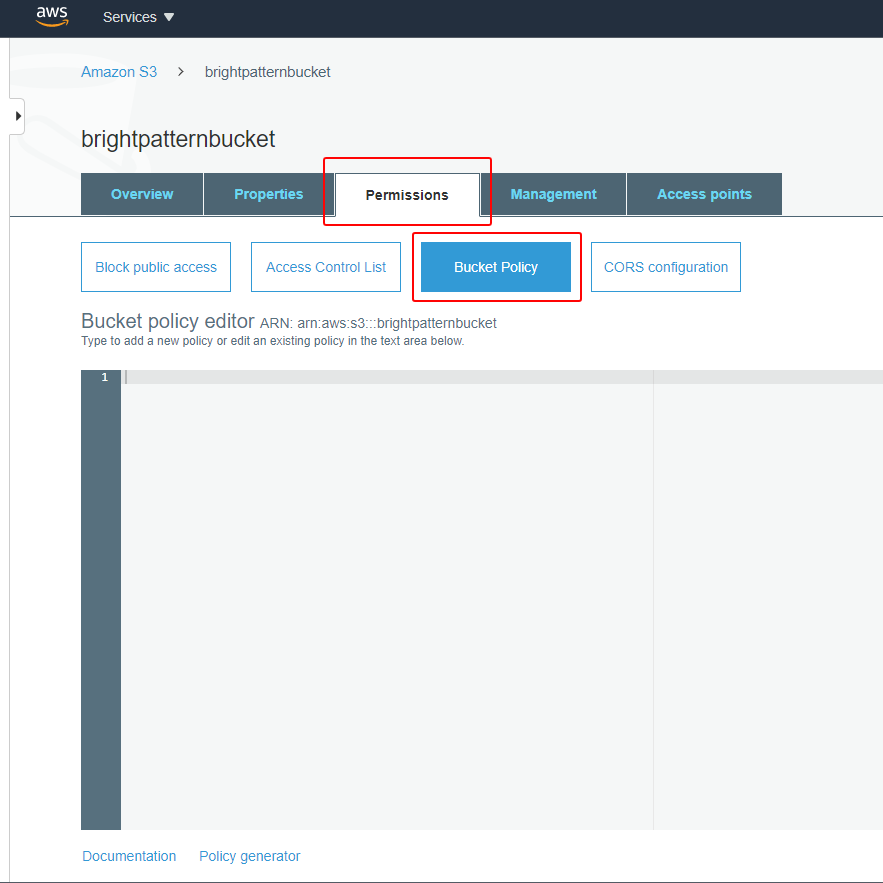
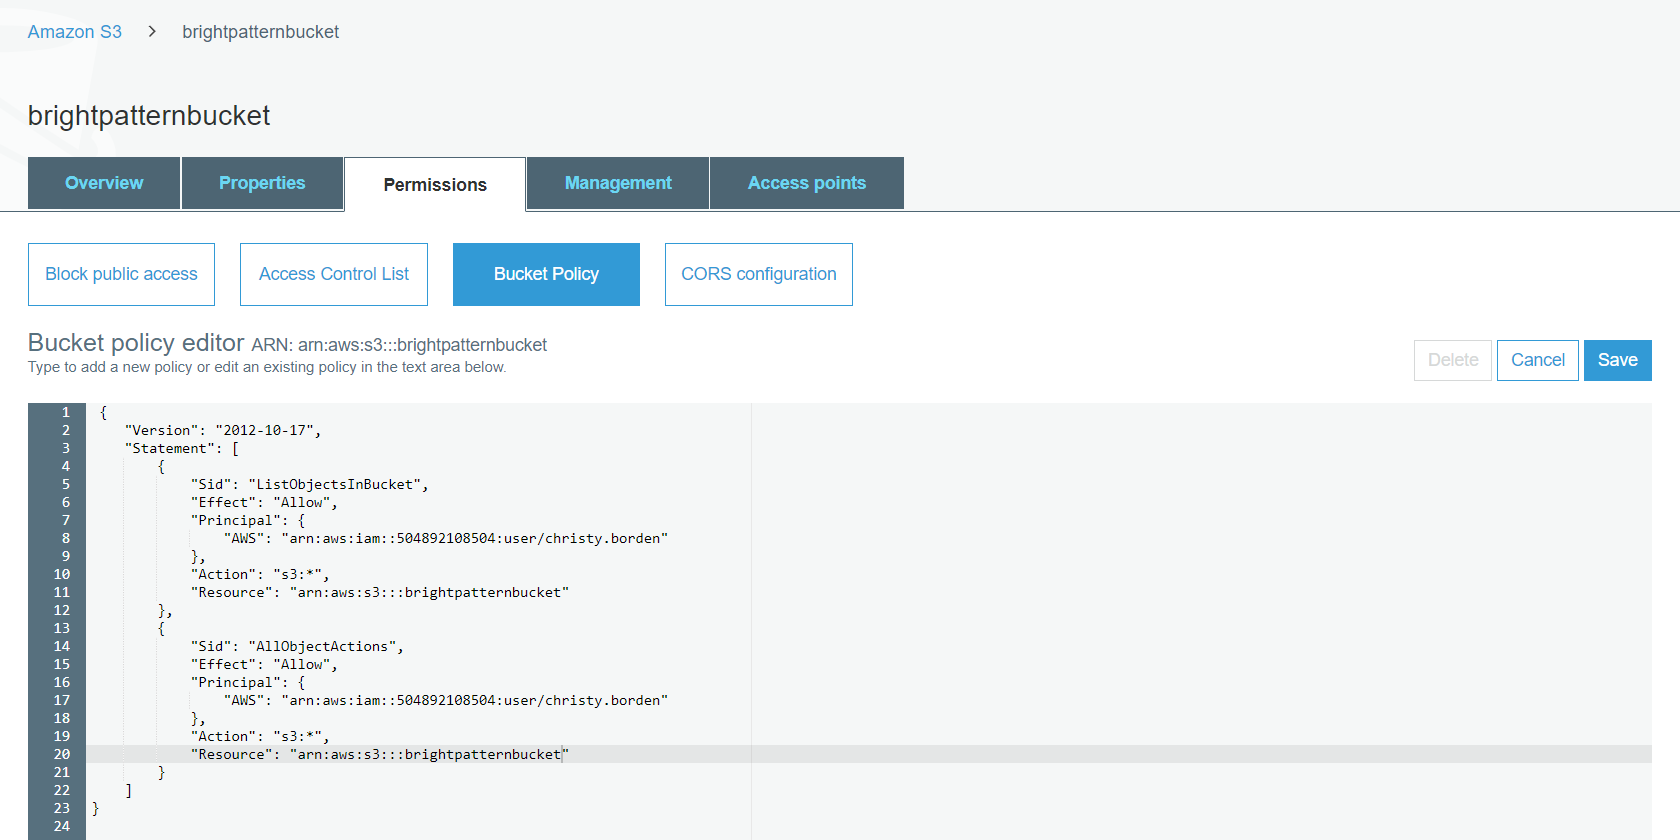
- Go back to the Amazon S3 section and view your S3 bucket’s details. Click on the bucket’s Permissions tab and then click Bucket policy to bring up the Bucket policy editor.
The bucket policy uses JSON-based access policy language to manage advanced permissions to your Amazon S3 resources. - Add the policy JSON by either clicking the Policy generator link at the bottom of the editor and completing the form, or copying and pasting the following sample policy JSON into the policy editor and editing the values for:
- <user_arn> - The Amazon Resource Name (ARN)/identifier of the admin user that you copied from the IAM Dashboard’s Users section.
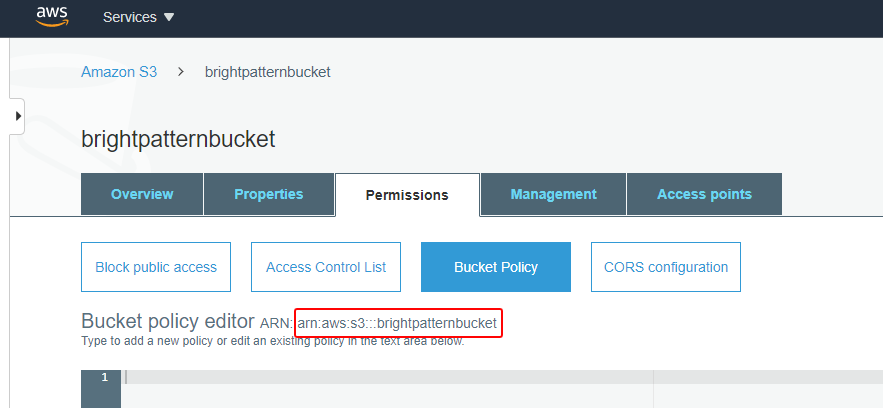
- <bucket_arn> - The ARN/identifier of your bucket. You can find the bucket ARN either in Amazon S3 Dashboard > the S3 bucket’s properties (see example shown) or at the top of the bucket policy editor (see example shown).
- <user_arn> - The Amazon Resource Name (ARN)/identifier of the admin user that you copied from the IAM Dashboard’s Users section.
Sample Policy (copy this):
{
    "Version": "2012-10-17",
    "Statement": [
        {
            "Sid": "ListObjectsInBucket",
            "Effect": "Allow",
            "Principal": {
                "AWS": "<user_arn>"
            },
            "Action": "s3:*",
            "Resource": "<bucket_arn>"
        },
        {
            "Sid": "AllObjectActions",
            "Effect": "Allow",
            "Principal": {
                "AWS": "<user_arn>"
            },
            "Action": "s3:*",
            "Resource": "<bucket_arn>"
        }
    ]
}
For example:
{
    "Version": "2012-10-17",
    "Statement": [
        {
            "Sid": "ListObjectsInBucket",
            "Effect": "Allow",
            "Principal": {
                "AWS": "arn:aws:iam::532998658301:user/christy.borden"
            },
            "Action": "s3:*",
            "Resource": "arn:aws:s3:::brightpatternbucket"
        },
        {
            "Sid": "AllObjectActions",
            "Effect": "Allow",
            "Principal": {
                "AWS": "arn:aws:iam::532998658301:user/christy.borden"
            },
            "Action": "s3:*",
            "Resource": "arn:aws:s3:::brightpatternbucket"
        }
    ]
}
Minimum bucket policy, in case you want to tighten things up:
{
	"Version": "2012-10-17",
	"Statement": [
		{
			"Sid": "Statement1",
			"Effect": "Allow",
			"Principal": {
				"AWS": "arn:aws:iam::[act_id]:user/[user_name]"
			},
			"Action": [
				"s3:ListBucket",
				"s3:PutObject",
				"s3:GetObject",
				"s3:DeleteObject"
			],
			"Resource": [
				"arn:aws:s3:::[bucket_name]/*",
				"arn:aws:s3:::[bucket_name"
			]
		}
	]
}
Specifically here is the list of bucket privileges that are not used (and can be denied, if needed):
- "s3:GetBucketNotification",
- "s3:GetBucketAcl",
- "s3:GetBucketLocation",
- "s3:GetBucketLogging",
- "s3:GetBucketPolicy",
- "s3:GetBucketOwnershipControls",
- "s3:PutBucketNotification",
- "s3:ListBucketMultipartUploads",
- "s3:ListBucketVersions",
- "s3:ListMultipartUploadParts",
- "s3:GetAccelerateConfiguration",
- "s3:GetBucketCORS",
- "s3:GetBucketVersioning",
- "s3:GetObjectAcl",
- "s3:GetObjectAttributes",
- "s3:GetObjectVersion",
- "s3:GetAnalyticsConfiguration",
- "s3:GetBucketObjectLockConfiguration",
- "s3:GetBucketPolicyStatus",
- "s3:GetBucketPublicAccessBlock",
- "s3:GetBucketWebsite",
- "s3:GetEncryptionConfiguration",
- "s3:GetInventoryConfiguration",
- "s3:GetMetricsConfiguration",
- "s3:GetObjectVersionAcl",
- "s3:GetObjectVersionAttributes",
- "s3:GetObjectVersionForReplication",
- "s3:GetReplicationConfiguration",
- "s3:AbortMultipartUpload",
- "s3:DeleteObjectVersion",
- "s3:InitiateReplication",
- "s3:PutBucketObjectLockConfiguration",
- "s3:PutBucketVersioning",
- "s3:PutEncryptionConfiguration",
- "s3:PutObjectRetention",
- "s3:ReplicateObject",
- "s3:PutObjectVersionAcl",
- "s3:PutObjectAcl"
3. After pasting the JSON, click Save. If any part of the policy is incorrect, you will not be able to save, and you will see an error message indicating that the policy is invalid. If all goes well, the policy will be saved and there will be no changes on the screen.
S3 Bucket configuration is now complete.

