Integration Configuration
When Bright Pattern Contact Center is integrated with Telegram, your Bright Pattern Agent Desktop environment is equipped to handle customer-initiated interactions from the Telegram app on a customer’s mobile phone, tablet, or computer. Incoming chat interactions are routed to the integrated Agent Desktop environment, where agents have direct access to the phone, live chat, email, SMS text, various other mobile messenger apps, customer and agent records, interaction details, and more.
Integration configuration involves linking your business’s Telegram bot to your Bright Pattern Contact Center tenant.
To configure Telegram integration, you will need system access to
- Your business’s Telegram bot
- Your tenant’s Contact Center Administrator application
The Telegram application contains the settings for your bot, webhook, and access token. Your Telegram account username is what is used as your organization’s identity. Messaging events for your Telegram account are sent securely to your webhook. Contact Center Administrator is where you add the Telegram integration account to your Bright Pattern tenant.
Configuration Procedure
Step 1: Sign in to your business’s Telegram account
Go to telegram.org, and create a Telegram account for your organization. If you have already have done this, skip this step and proceed to Step 2.
Note that for your Telegram account, you will additionally need to create a username for it. The username is what appears in your Telegram account’s URL, profile, and search results. A username enables Telegram users to search for your business by name (e.g., “Bright Pattern”) by typing the “@” symbol followed by your username into a search box (e.g., “@Brightpattern”). If you do not have a username, Telegram users must know your phone number in order to contact you.
You will need your username later in this configuration procedure. See Telegram’s F.A.Q. pages for more information.
Step 2: Create a bot
Telegram bots are third-party applications that run inside Telegram. They interact with users, performing complex tasks such as sending notifications, integrating with tools, social networking, and much more. As with all other Telegram bots, yours will be called a username with “bot” at the end of it (e.g., “brightpattern_bot”). You will use your bot to chat with users on Telegram. Refer to Telegram’s instructions for creating a new bot, which are summarized as follows:
- Sign in to your organization’s Telegram account.
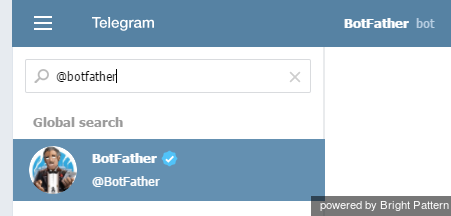
- In the Search box, search for the BotFather bot (“@BotFather”), select its username, and click Start to begin chatting with the bot.
- Type the command /newbot into the chat window with BotFather.
- Follow BotFather’s prompts for information, and provide:
- Name of your new bot
- Username of your new bot (must end with “bot”)
- Name of your new bot
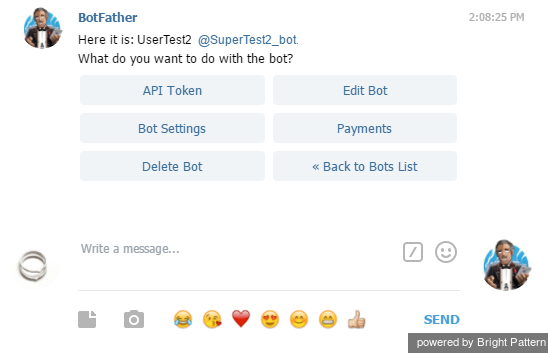
BotFather will provide information regarding your bot, including its URL, access token, and links to help pages. Type the command /mybots to edit your new bot. The menu that appears will include the following options to edit:
- API Token
- Bot Settings
- Delete Bot
- Edit Bot
- Payments
Step 3: Update your bot profile
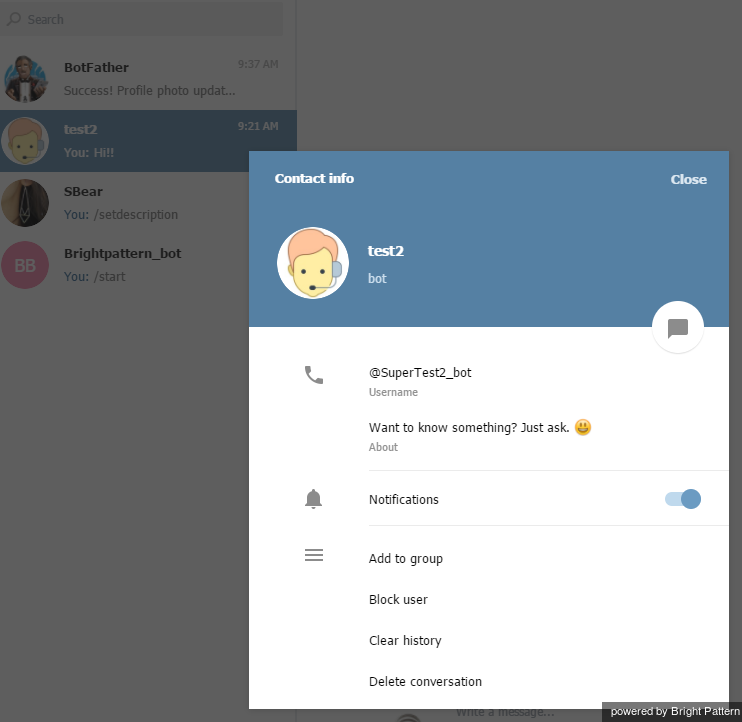
Click the Edit Bot button to update your bot profile. Your bot is your business’s main point of contact on Telegram. You should complete the following sections of your profile, so that other users will know who your bot is, what it does, and generally what your brand is about.
- Edit Name - The display name of your bot
- Edit About - The text shown on the bot's profile page, which will be sent together with a link to your bot when users share it with someone
- Edit Commands - The commands for your bot, given in list format
- Edit Description - The description of what the bot can do
- Edit Userpic - The photo that appears on the bot’s profile, which is seen by any user who visits the profile or chats with the bot.
Step 4: Get the access token
- Click the API Token button to get the API token to handle chat interactions. You will need this token to add a Telegram integration account in the Contact Center Administrator application.
- Select the entire token and copy it.
Step 5: Create a new integration account in Contact Center Administrator
- Log in as Admin to the Contact Center Administrator application.
- Navigate to Configuration > Integration Accounts.
- Click the Add + button to add a new account.
- In the Create integration account window that appears, select Messenger and click OK.
Step 6: Specify Telegram integration account properties
Using the credentials for your Telegram App, enter values for the following screen properties. (If you do not know your credentials, ask your system administrator.)
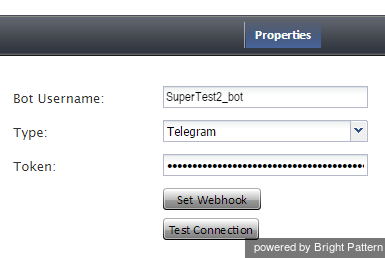
- Bot Username - The exact username of your Telegram bot
- Type - For this integration account, select Telegram as the type of integration.
- Token - The API token for your Telegram bot
- Set Webhook - Click this button to confirm that Telegram is the real server, which is needed for Telegram to send you a message from the customer. Note that you must get the token/webhook from Telegram; you cannot generate one here.
- Test Connection - This button tests the credentials and confirms whether the connection is valid.
Click Apply to save your changes.
Next Steps
Your integration account is now configured for Telegram. Next, you will tailor your chat scenario to handle chat interactions, as well as do a real test of your connection by responding to chat interactions from within the Agent Desktop application.


