LINE Call Plus Scenario Tutorial
If your contact center uses the LINE Call Plus service, and has LINE as a configured messenger integration, it is possible to let customers call your contact center via their LINE accounts by clicking special links located on your company’s website. From these links, it is possible to extract the opaque LINE user ID and any configured message information from the User-to-User headers.
The extracted information can be used to search your database for a matching contact or to pass specific messages/information to your contact center (e.g., The customer clicks a “Yes” button when presented with the question, “Does this page help you?”).
The following scenario describes how to:
- Use the replace function, regex, and the unhex function to convert the User-to-User header into an opaque LINE user ID, as well as any other configured message information passed in the User-to-User header.
- Use the opaque LINE user ID to locate the customer in your database and then add an activity history note to their file.
- Depending on what the configured message information is, play a system prompt that acknowledges the customer’s selection.
Notes:
- In order for this tutorial and LINE calls to work, you need to place LINE URLs on your website or in your chat flow.
- In order for this scenario to work, your service provider must add the following advanced option to your contact center's trunk: "pass_headers_to_scenario": ["User-To-User"]
- Additionally, your service provider must configure your contact center’s trunk to LINE and provision LINE phone numbers for your contact center’s account.
- This tutorial does not explain how to configure an incoming chat scenario. For more information about this topic, see Tutorials for Administrators, section Chat Service Configuration.
- If you want your agents to message back to customers via LINE, you must have a LINE messenger integration account configured.
Scenario Example
Click the following link to download an annotated version of this voice scenario example.
For instructions on how to import this file into your contact center, see the Contact Center Administrator Guide, section Scenarios Overview > How to Export and Import Scenarios.
For general information about scenarios, refer to the Scenario Builder Reference Guide, section Scenario Builder Overview.
Configuration
1. Extract the opaque LINE user ID and configured message information from the User-to-User header
- The first step is to use the replace function in a Set Variable block. This function will return a regex parsed value of the variable $(item.sip.headers.User-To-User); the value will be set as the new variable name cleanhex. Doing this allows the returned expression (i.e., passed as cleanhex) to be cleanly processed in the following Set Variable block's unhexed function.
Here is how the value of the variable $(item.sip.headers.User-To-User) is received by the system:
047b22757365724964223a22556137333561623733313430633535646434633830336463656665303762343565227d2c63616c6c65724e6f7465;encoding=hex
The regex we add to this replace function removes the “;encoding=hex” portion of the string, which allows it to be cleanly processed in the following scenario block.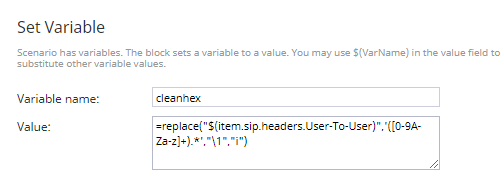
- In the next Set Variable block, we use the unhex function to decode the regex parsed User-to-User header (i.e., passed as cleanhex). The new variable is named unhexed. As a reminder, your service provider must add the following advanced option to your contact center's trunk: "pass_headers_to_scenario": ["User-To-User"]
Here is how the value of the $(cleanhex) variable looks:
047b22757365724964223a22556137333561623733313430633535646434633830336463656665303762343565227d2c63616c6c65724e6f7465
When unhexed, here is how it looks:
{"userId":"Ua735ab73140c55dd4c803dcefe07b45e"},callerNote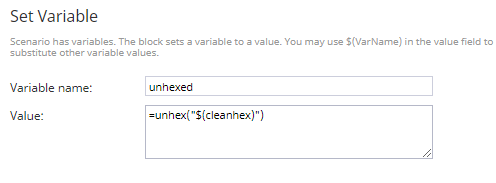
- For the next two Set Variable blocks, we use the replace function to replace the unhexed variable value with two different regex parsed versions.
- The first expression, which we set as the variable LINE_user_ID, returns the LINE user ID.
Here is what value of the $(unhexed) looks like:
{"userId":"Ua735ab73140c55dd4c803dcefe07b45e"},callerNote
The regex we add to this replace function removes everything but the actual opaque LINE user ID, which looks like this:
Ua735ab73140c55dd4c803dcefe07b45e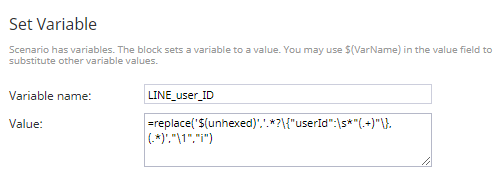
- The second expression, which we set as the variable Caller_Note, returns the value from the note that was passed in the User-to-User header.
Here is what value of the $(unhexed) looks like:
{"userId":"Ua735ab73140c55dd4c803dcefe07b45e"},callerNote
The regex we add to this replace function removes everything but value of the variable callerNote, which looks like this:
callerNote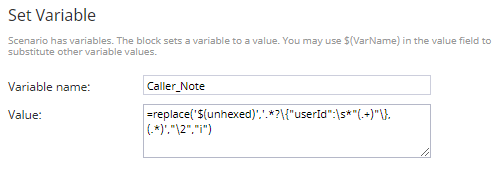
- The first expression, which we set as the variable LINE_user_ID, returns the LINE user ID.


2. Search the internal database for a matching LINE user
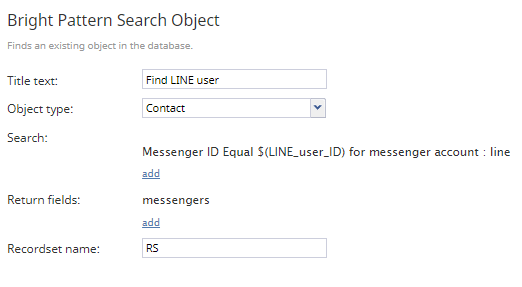
- Next, in a Bright Pattern Search Object block, we use the variable LINE_user_ID to search for a contact with matching information. Note that in this scenario, contacts are saved to the internal database. The search query is configured as:
- Messenger ID
- Equal
- $(LINE_user_ID)
- LINE
- For the return fields, we select messengers. For more information about returned fields, see section Standard Fields for CRM Objects. The results will be returned on the recordset name, which we set as RS.

3. Use an “If” block to determine what happens with the matching contact
- Depending on the results of the Bright Pattern Search Object block (i.e., was the LINE user located or not), you can dictate how the system responds to the results with an If block. In this example, we want to create an activity history note if the contact is found.
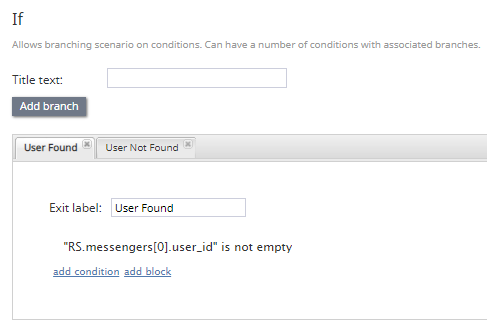
- So, we create two branches for the If block: one for a matching returned value (User Found) and one for a non-matching returned value (User Not Found).
- For the User Found branch, we create the following condition:
- Scenario variable (string)
- RS.messengers[0].user_id
- is
- not empty
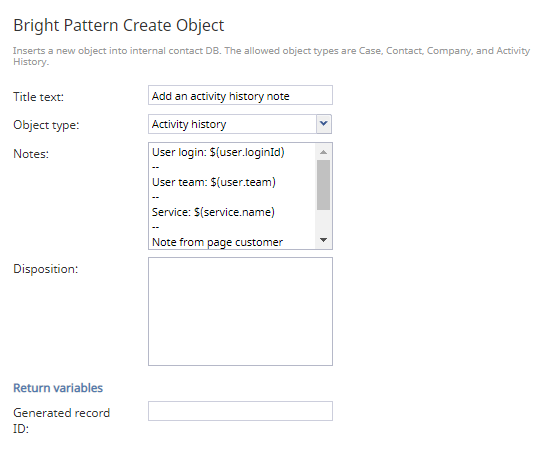
- This condition looks at the customer record located in the previous block for a matching LINE ID. If a match is found, the scenario will take this branch, which contains a Bright Pattern Create Object block configured to create an activity history note.
- As for the User Not Found branch, we configure an almost identical condition (i.e., the only difference is instead of not empty we select empty). If no matching LINE ID is located, the scenario will take this exit, which we have pointed to the following If block.


4. Use another “If” block to dictate how the system responds to the caller note
- Depending on the results of the Caller_Note variable, you can dictate how the system responds to the information using another If block. In this example, we want the system to respond to the caller based on the results of the Caller_Note variable.
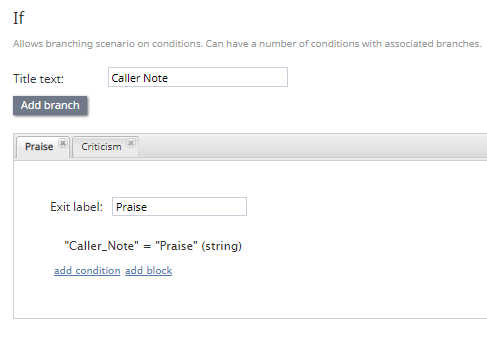
- So, we create two branches for the If block: one for the returned value Praise and one for the returned value Criticism.
- For the Praise branch, we create the following condition:
- Scenario variable (string)
- Caller_Note
- =
- Praise
- For the Criticism branch, we create the following condition:
- Scenario variable (string)
- Caller_Note
- =
- Criticism
- In either instance, when the value of the Caller_Note variable is received, a specifically configured Play Prompt block will execute, and then connect the call to the following Find Agent block.

Complete the scenario
- Finally, after extracting the desired information and processing it (or if none was found), we will complete the voice scenario with the two most basic blocks—Find Agent and Connect Call.
< Previous | Next >