Configuration Section B: Enable Agent Desktop Integration
Our integration uses Microsoft’s Channel Integration Framework for Dynamics 365 to embed Bright Pattern’s Agent Desktop widget into Dynamics 365 applications for real-time communications and access to Dynamics 365 data from a single screen.
This framework enables third-party channel providers like Bright Pattern to integrate with Dynamics 365 Unified Interface Apps[1] using a browser-based JavaScript API library, and in turn, provide communication experiences via a third-party communication widget like Agent Desktop.
The following instructions will show you how to configure your Bright Pattern Contact Center to be an active channel provider and interact with Dynamics 365 via the Agent Desktop widget.
1. Install Channel Integration Framework app
- Sign in to your Dynamics 365 instance. Note: You must be logged in as a user with admin privileges.
- Go to Home > AppSource, search for Channel Integration Framework, and click Get it now. This will begin the installation process. Note that the Channel Integration Framework is required for supporting the Bright Pattern application (see Step 2 below).
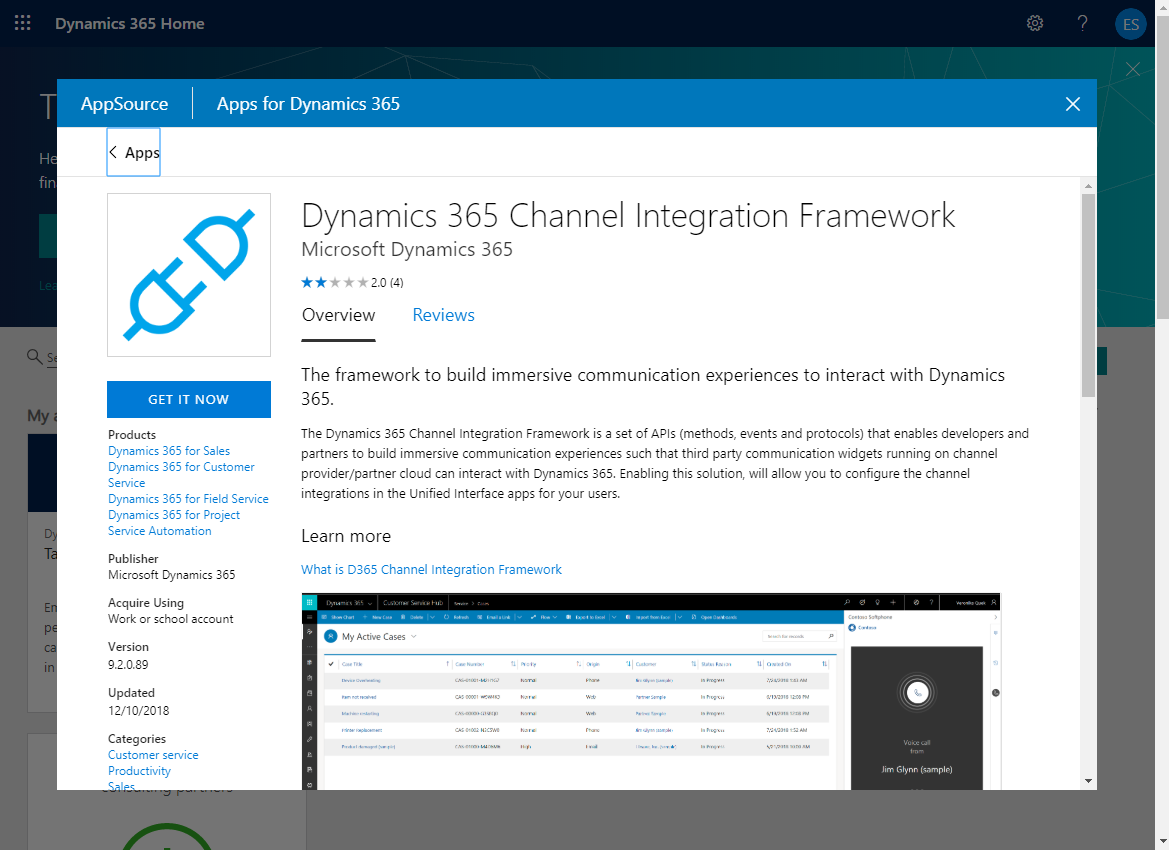
AppSource > Channel Integration Framework - Wait for installation to be complete. Depending on what region your Dynamics 365 instance is in, installation may take some time. You can check the progress of the installation by refreshing the Manage Solutions page.
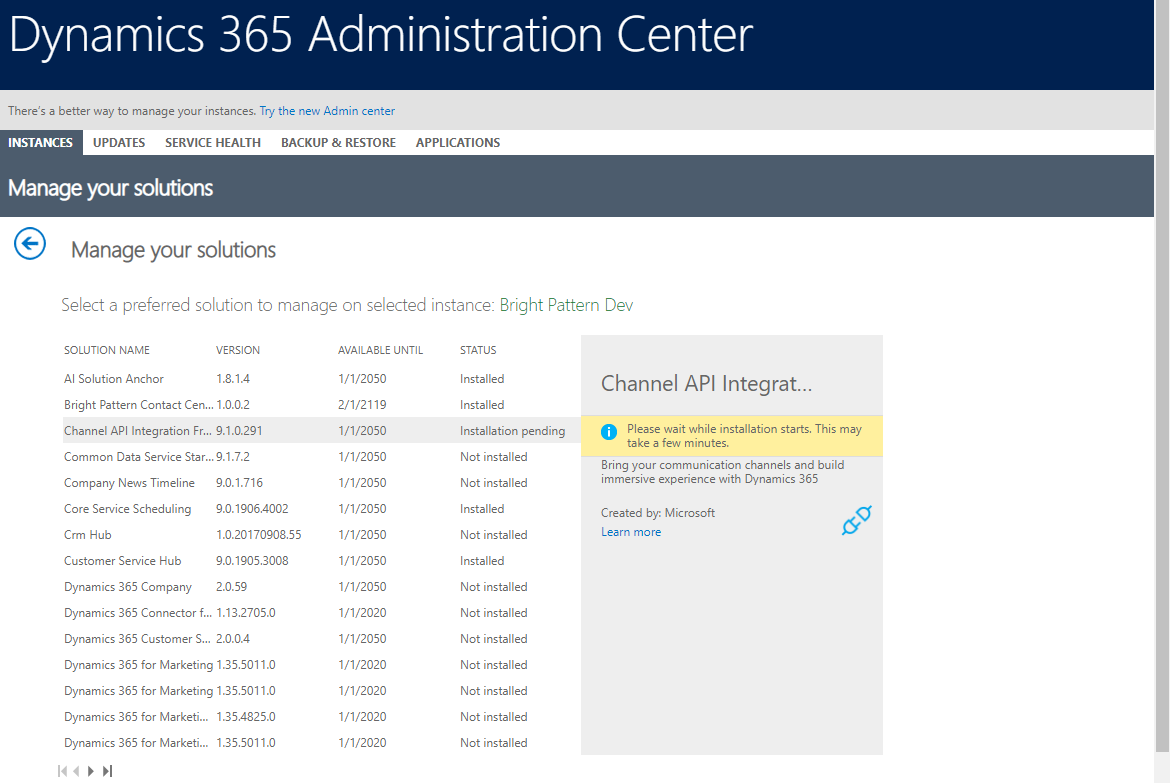
Manage your Solutions page


2. Install Bright Pattern Omnichannel Contact Center Solution app
Once the Channel Integration Framework app is installed and configured, you can install the Bright Pattern Omnichannel Contact Center Solution application. This app allows communication between Bright Pattern Contact Center and Microsoft Dynamics 365.
- In Microsoft’s AppSource, click Get More Apps, and search for “Bright Pattern Omnichannel Contact Center Solution.”
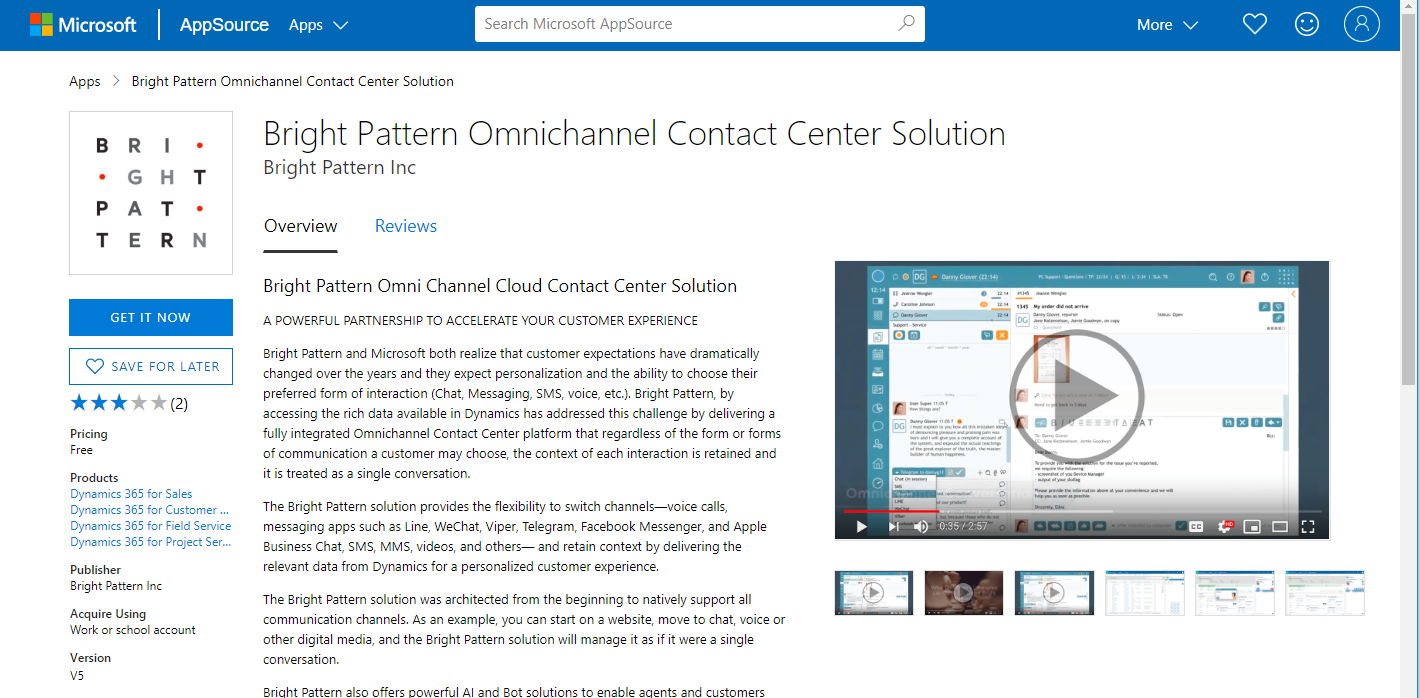
Bright Pattern Omnichannel Contact Center Solution app information - Click GET IT NOW to add the application to Dynamics 365. You can check the progress of the installation by refreshing the Manage Solutions page.
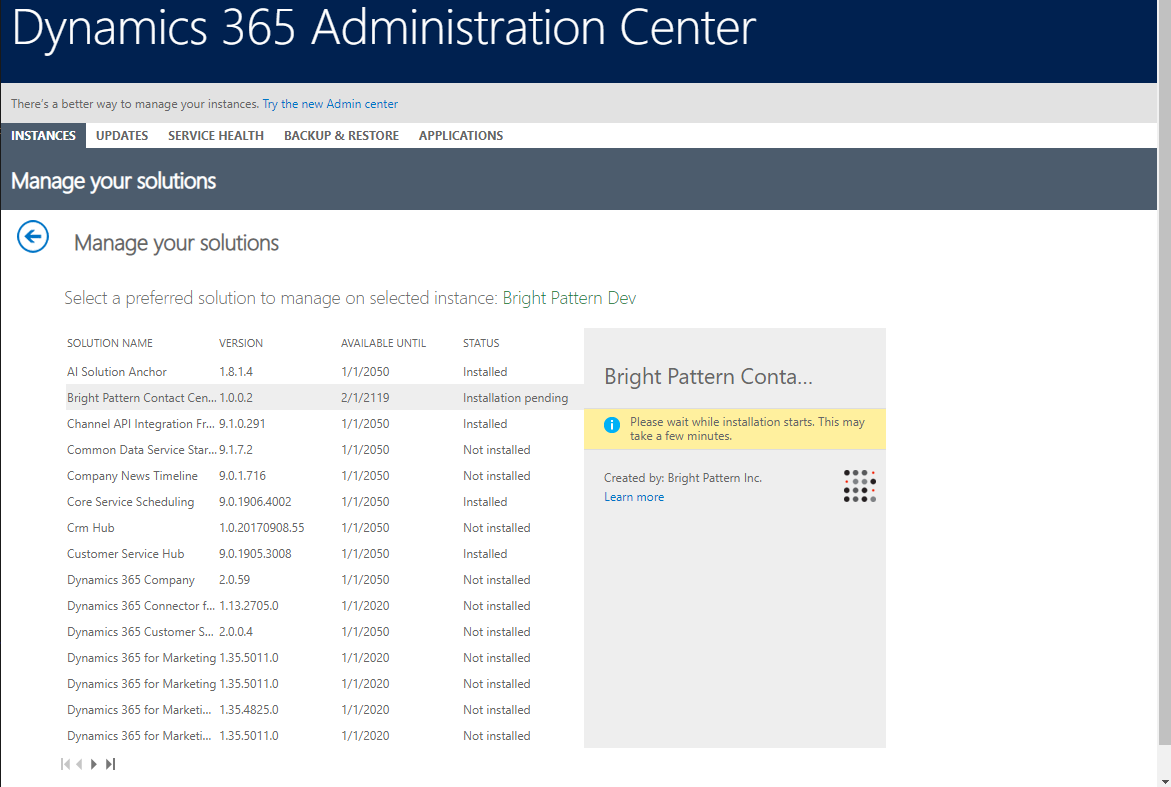
Installation of app


3. Configure Channel Integration Framework app
- In your Dynamics instance, from the side menu, select Channel Integration Framework.
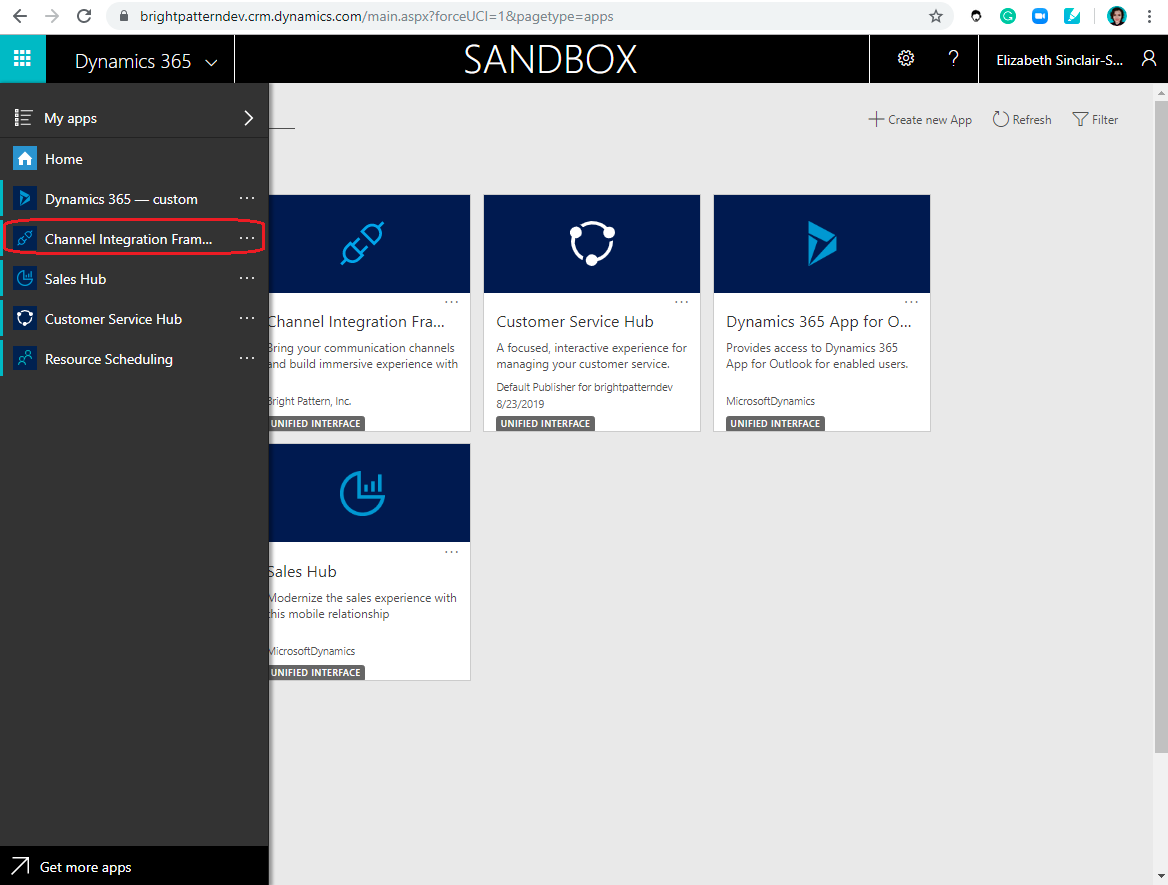
Channel Integration Framework app - On the Active Channel Providers page, click +New.
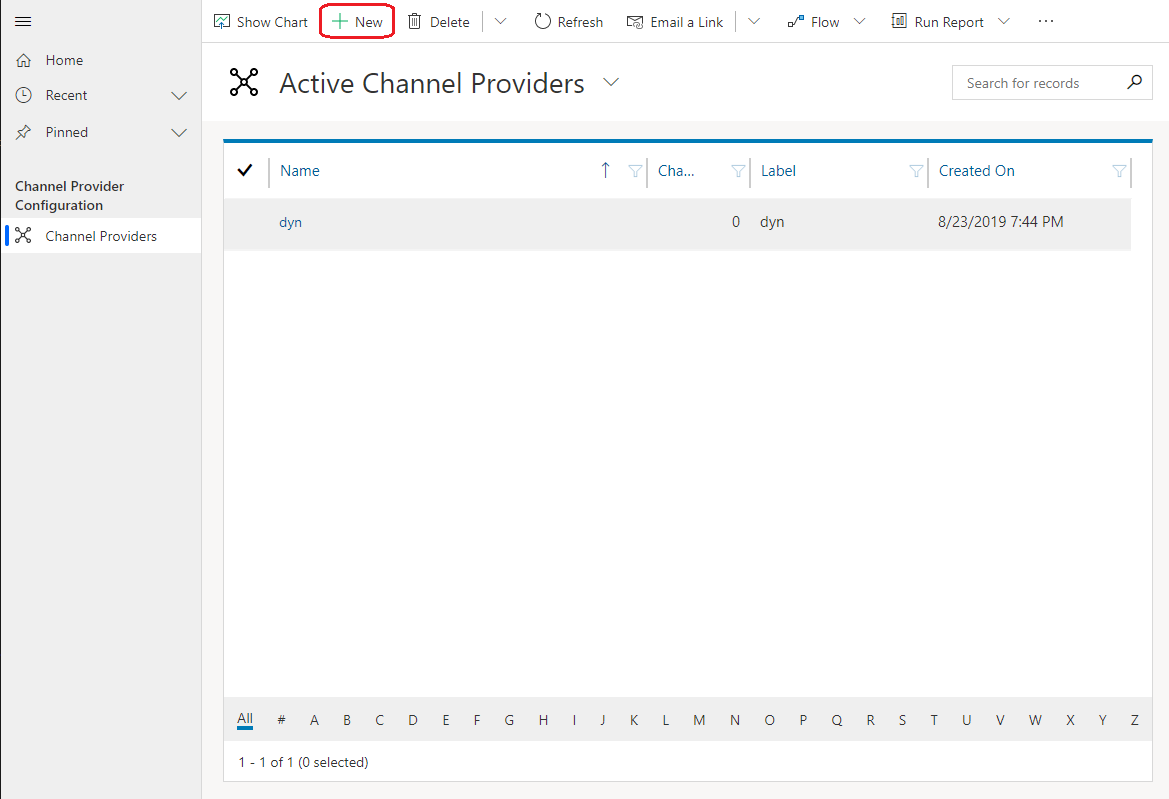
Add new active channel provider - On the New Channel Provider properties page, set the following:
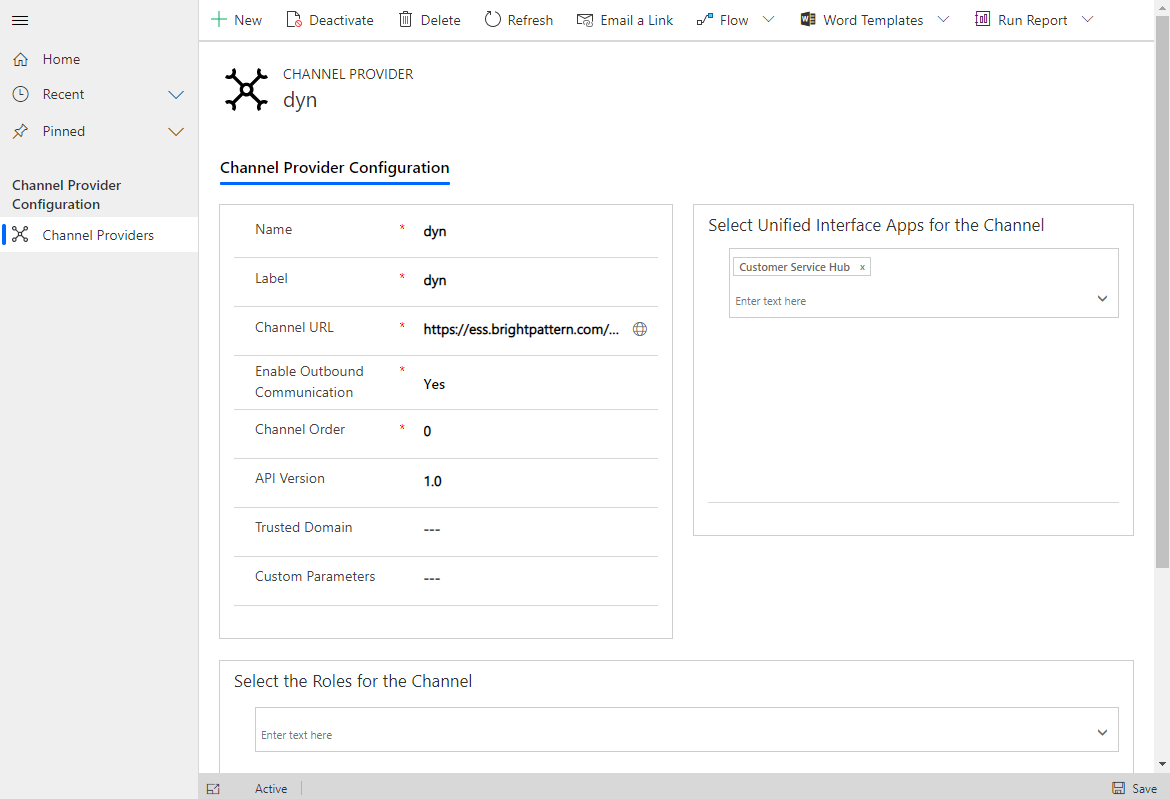
New channel provider properties


- Name - Any string (e.g., "Bright Pattern")
- Label - Any string (e.g., “My Bright Pattern integration)
- Channel URL - The Channel URL format varies depending on the widget type you wish to use: Universal Repeater or Communicator Widget. Refer to the formats below, where
{BPCC_HOSTNAME}is your contact center URL domain, and{MSDYN_INSTANCE_NAME}is your Dynamics 365 domain address, which matches the domain of the Dynamics 365 URL address field.- Universal Repeater:
https://{BPCC_HOSTNAME}/agentdesktop/MicrosoftD365.jsp?crmDomain={MSDYN_INSTANCE_NAME}.crm.dynamics.com - Communicator Widget:
https://{BPCC_HOSTNAME}/agent/communicator/adapters/msdyn365.html?crmDomain={MSDYN_INSTANCE_NAME}.crm.dynamics.com
- Universal Repeater:
- Enable Outbound Communication - Select “Yes” to enable click-to-call functionality
- Channel Order - Any integer (e.g., “0”)
- API Version - Select “1.0”
- Select Unified Interface Apps for the Channel - Select all the apps that will use this channel integration framework (i.e., the apps where Agent Desktop will be embedded)
- Select the Roles for the Channel - Select the desired security roles for accessing the integration.
- Click Save and Close to make the channel provider active. You should now you see yourself as an Active Channel Provider in the list.
- Make sure that the Agent Desktop widget is indeed embedded in your Dynamics 365 app.
- From the left-side menu, select a Dynamics 365 app that you have just configured to use Channel Integration Framework.
- You should see Agent Desktop login screen embedded as a frame. Try signing in!
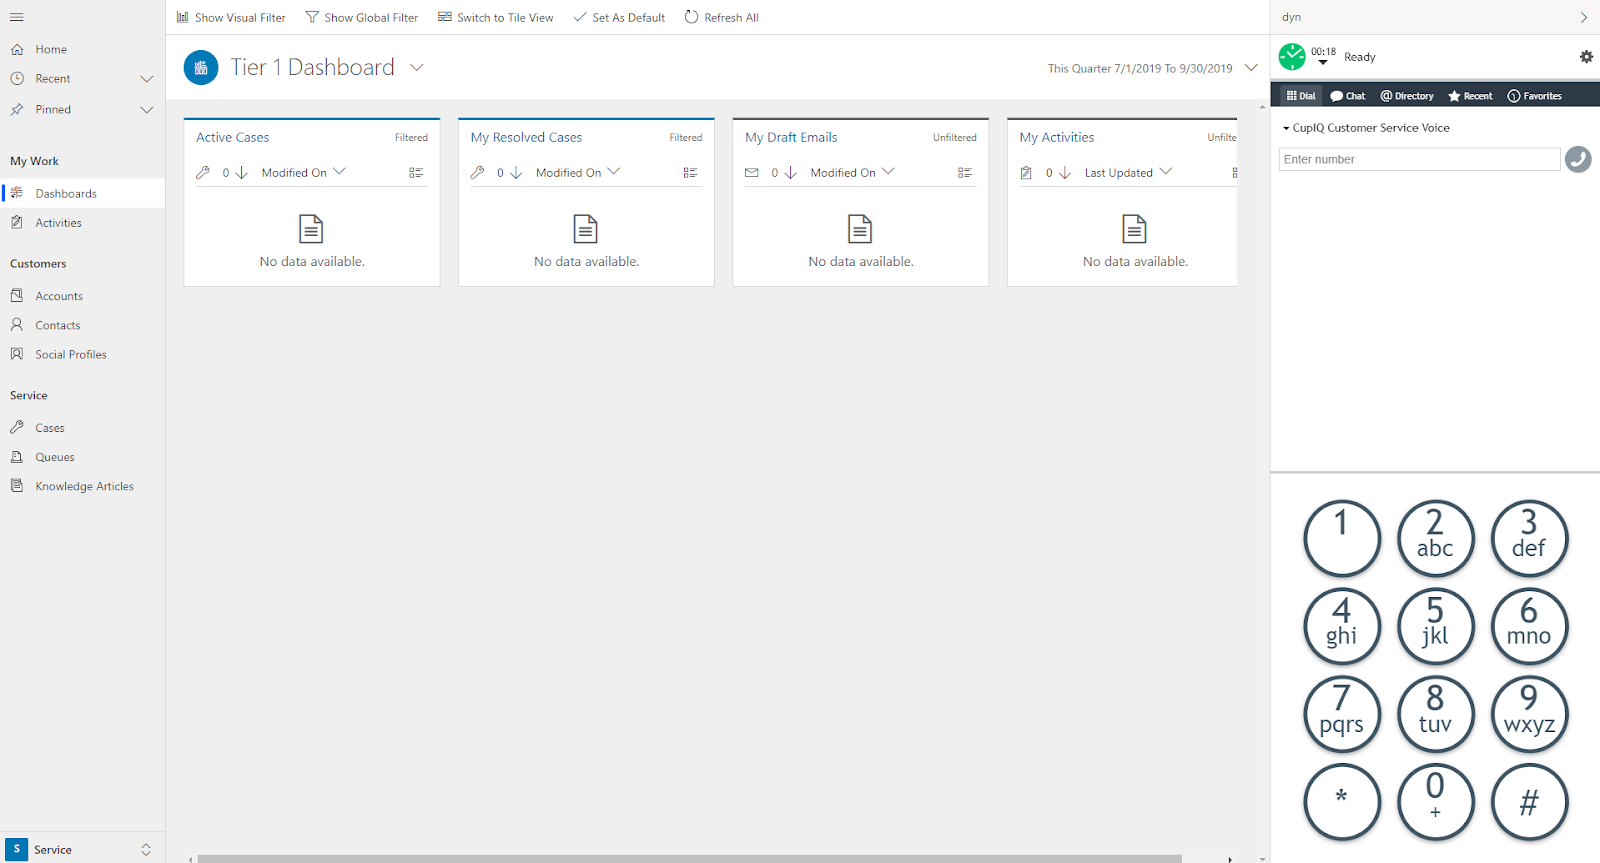
Dynamics 365 with embedded Agent Desktop

If you do not see Agent Desktop, go back to Active Channel Providers > Channel URL property and make sure that the URL includes the correct tenant name and CRM domain.
4. Configure Click-to-Call functionality (optional)
Click-to-call functionality allows you to dial outbound by simply clicking on a phone icon beside a contact’s name in your Dynamics 365 instance. Note that click-to-call must be enabled on every form that you will use in Dynamics 365.
Although very useful, click-to-call functionality is optional. If you do not wish to enable click-to-call in your Dynamics 365 environment, you can skip this step.
The following provides an example of how to enable click-to-call for the Contact form, which is associated with contact objects.
- In Dynamics 365, go to Settings (gear icon) > Advanced Settings and a new window will pop.
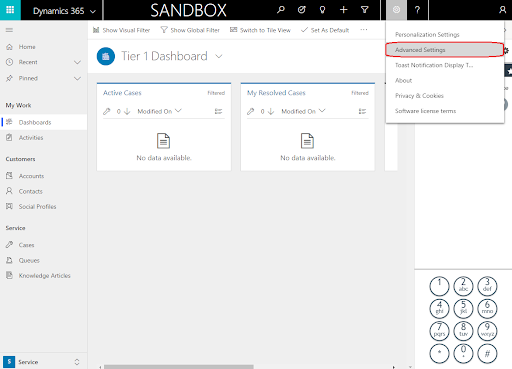
Settings > Advanced Settings - Go to Settings > Customizations and the Customizations menu will open.
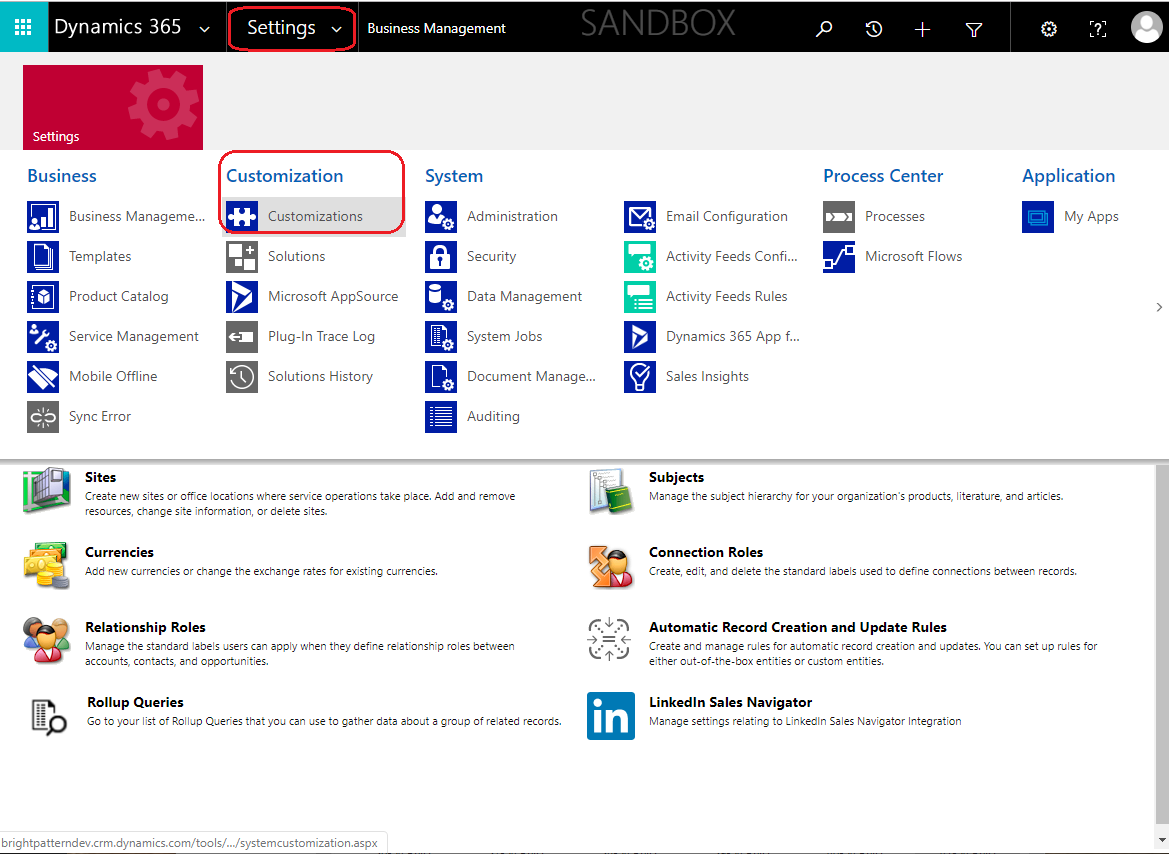
Settings > Customizations - Select Customize the System.

Click "Customize the System" - From here, the Power Apps service will launch.
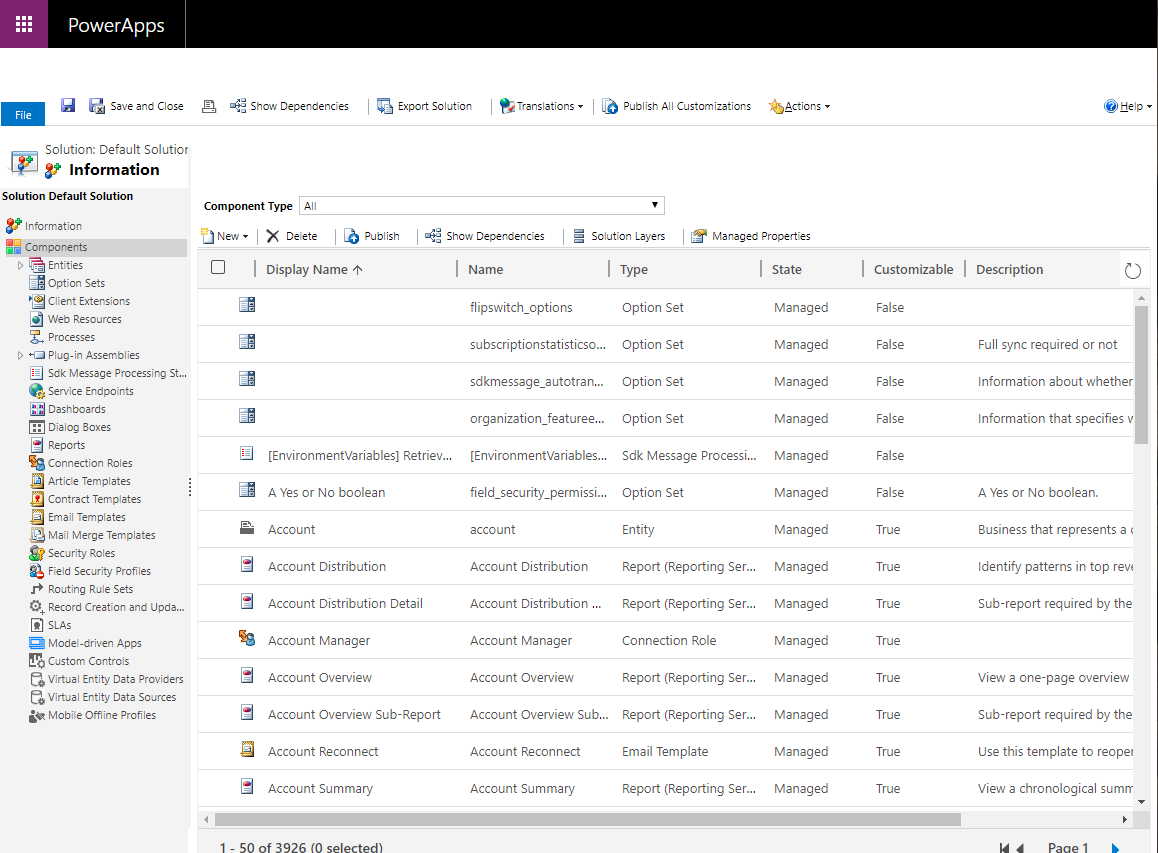
Power Apps service - In the Solution: Default Solution panel, go to Components > Entities > Contact > Forms.
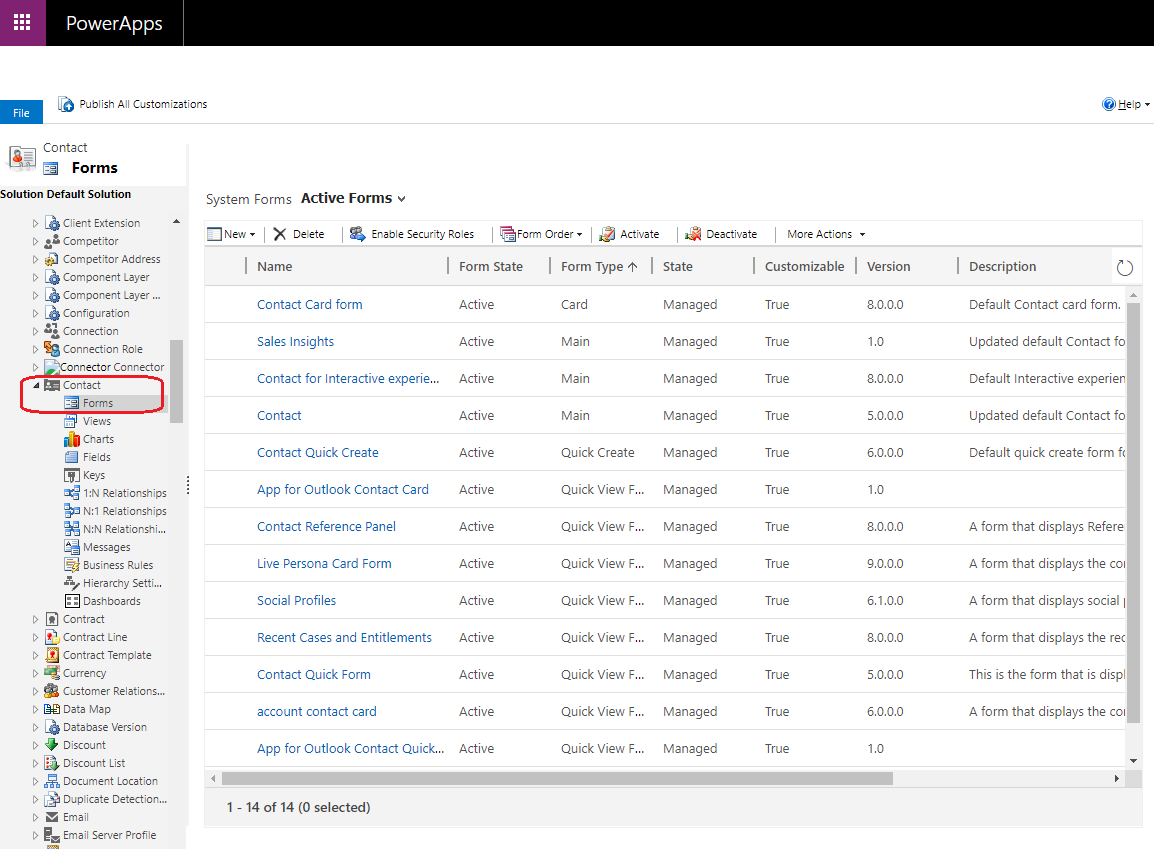
Go to "Components > Entities > Contact > Forms" - Select a form (in this example, “Contact” form) from the list of active form types; the form will pop in a new window.
- On this form, you will see the fields layout including all the types of phone fields. You will need to modify every phone field. To do this:
- Double-click on each phone field
- Go to Controls tab > Add Control > Channel Communication Control

Select "Channel Communication Control" - For every type of communication, select the corresponding radio button (i.e., web, phone, tablet).
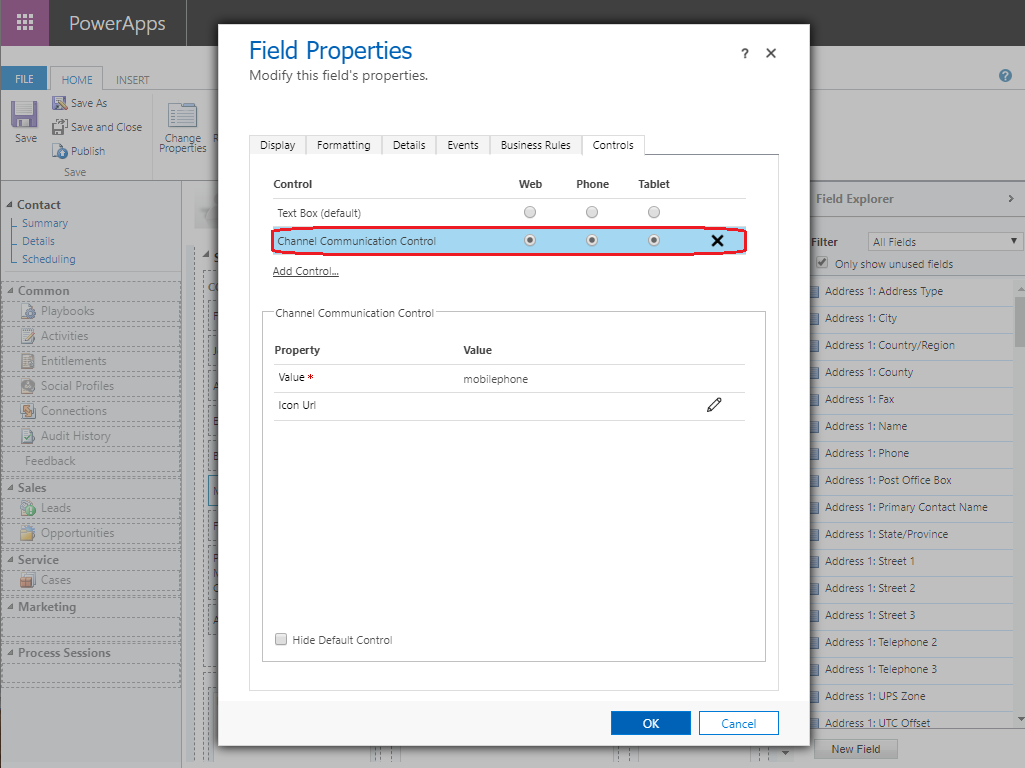
Select communication type(s) - Click OK.
- Click to Save the form.
- Click Publish.
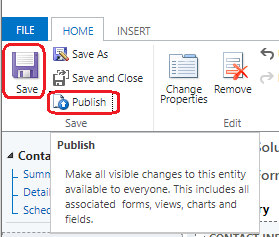
You must publish! - Optional: In the main Power Apps window, click Publish all Customizations. This step needed only if you edited multiple entities and simply saved changes rather than published them.
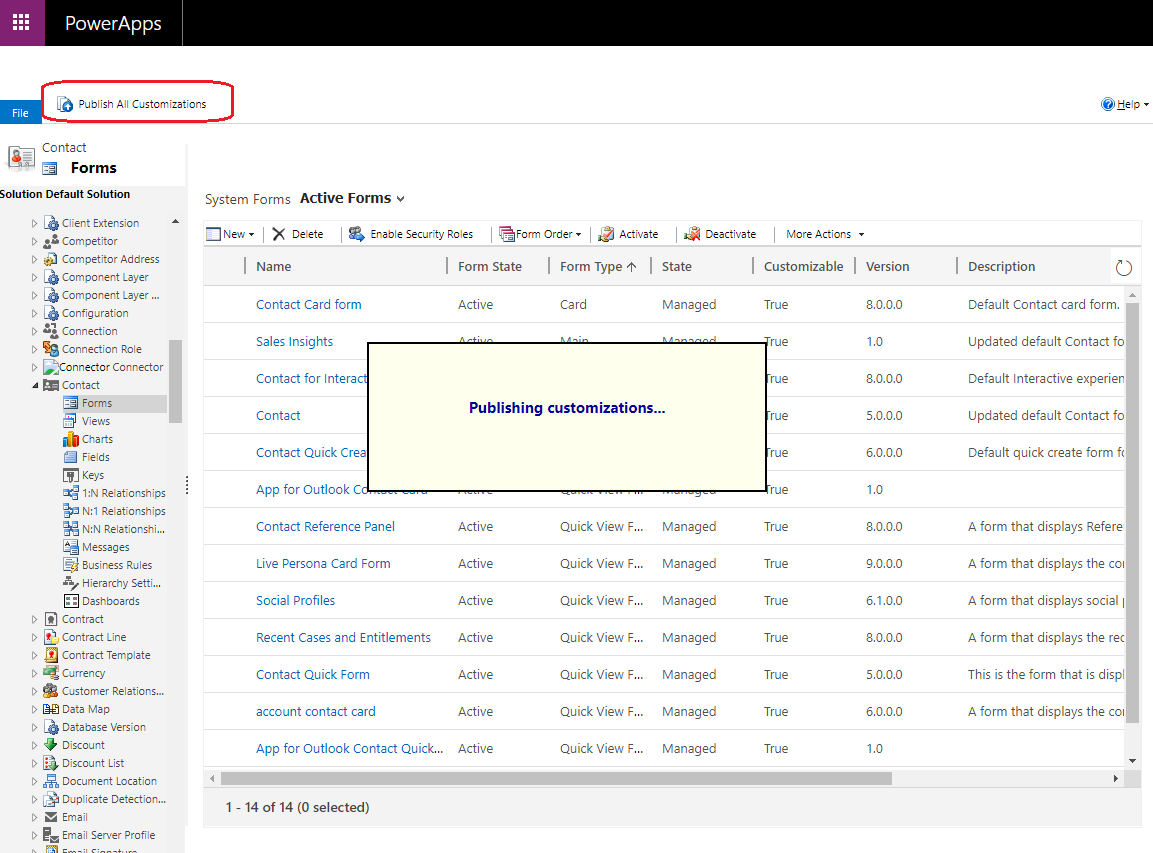
Optionally click "Publish all Customizations"
- Double-click on each phone field
- To verify the changes are made, return to the form page and refresh it. The old phone icons will be replaced with new ones. The new icons will work when you are logged into the Agent Desktop frame. Note: In order to see changes to your contact forms, you will need at least one contact in your Dynamics 365 environment.
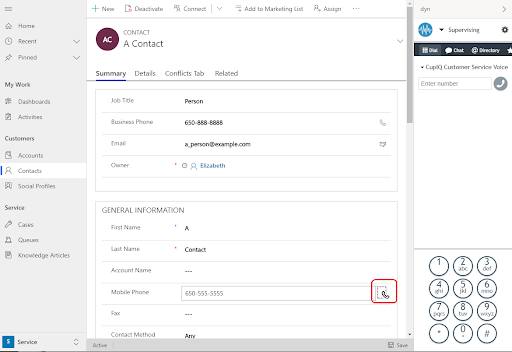
Dynamics 365 contact form with click-to-call icon


5. Add Bright Pattern activity history fields to forms (optional)
It is possible to edit your Dynamics 365 forms to include Bright Pattern activity history fields. This is helpful for passing information from your Bright Pattern environment to your Dynamics 365 environment.
Although very useful, adding Bright Pattern activity history fields is optional. If you do not wish to add these fields to your Dynamics 365 forms, you can skip this step.
- In Dynamics 365, go to Settings (gear icon) > Advanced Settings and a new window will pop.
Settings > Advanced Settings - Then, go to Settings > Customizations and the Customizations menu will open.
Settings > Customizations - Select Customize the System.
Click "Customize the System" - From here, the Power Apps service will launch.
Power Apps service - In the Solution: Default Solution panel, go to Components > Entities, and then:
- Select either the Phone Call object or the Messaging Session object (i.e., depending on whether the interaction will be for voice or chat. These objects contain Bright Pattern activity history fields)
- Select Forms
- Choose from the list of active forms; then a new Power Apps window will pop with the form
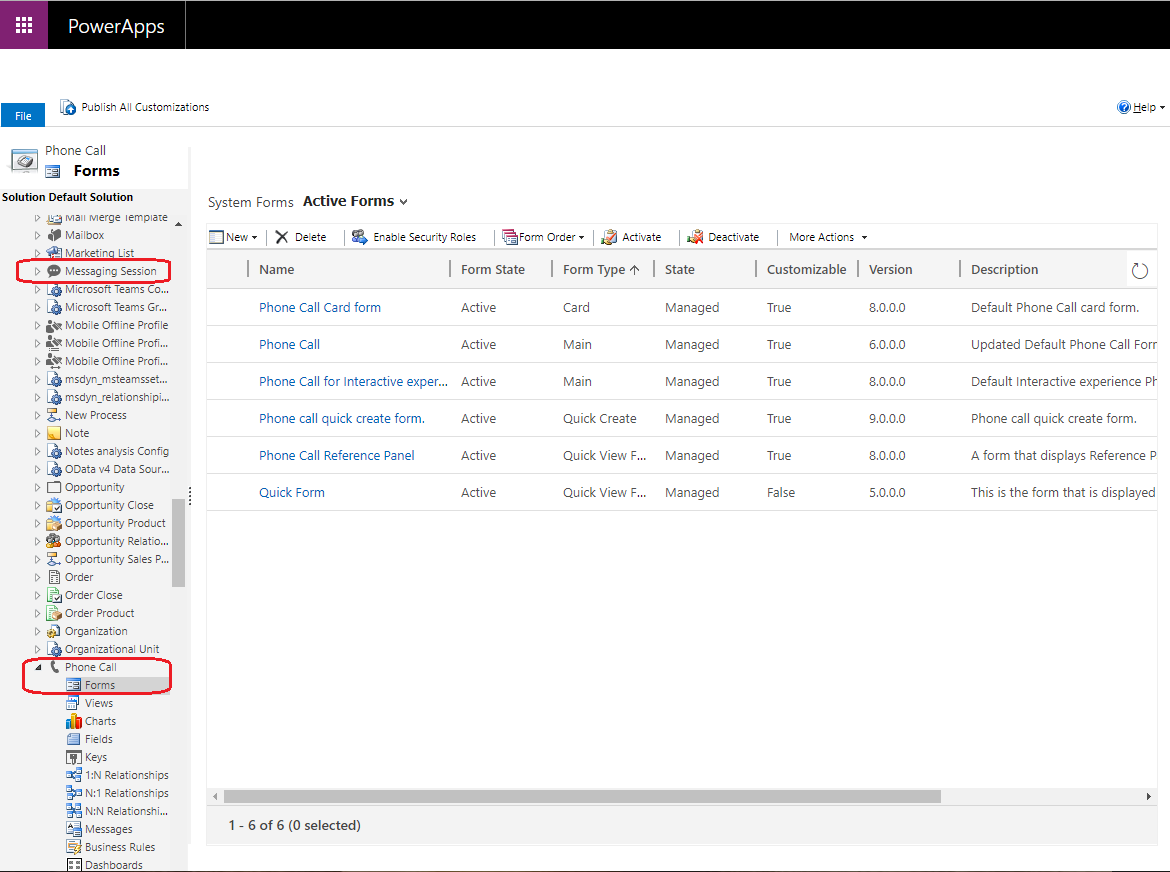
Power Apps service > form
- Choose from the list of active forms; then a new Power Apps window will pop with the form
- Select either the Phone Call object or the Messaging Session object (i.e., depending on whether the interaction will be for voice or chat. These objects contain Bright Pattern activity history fields)
- In the Field Explorer panel on the right, you will see all the available activity history fields, including Bright Pattern and Microsoft activity history fields. Add as many fields as you like to your form by dragging and dropping them from the panel onto your form.
- To reveal the name of the field, hover your cursor over the field; the name will begin with bpattern_.
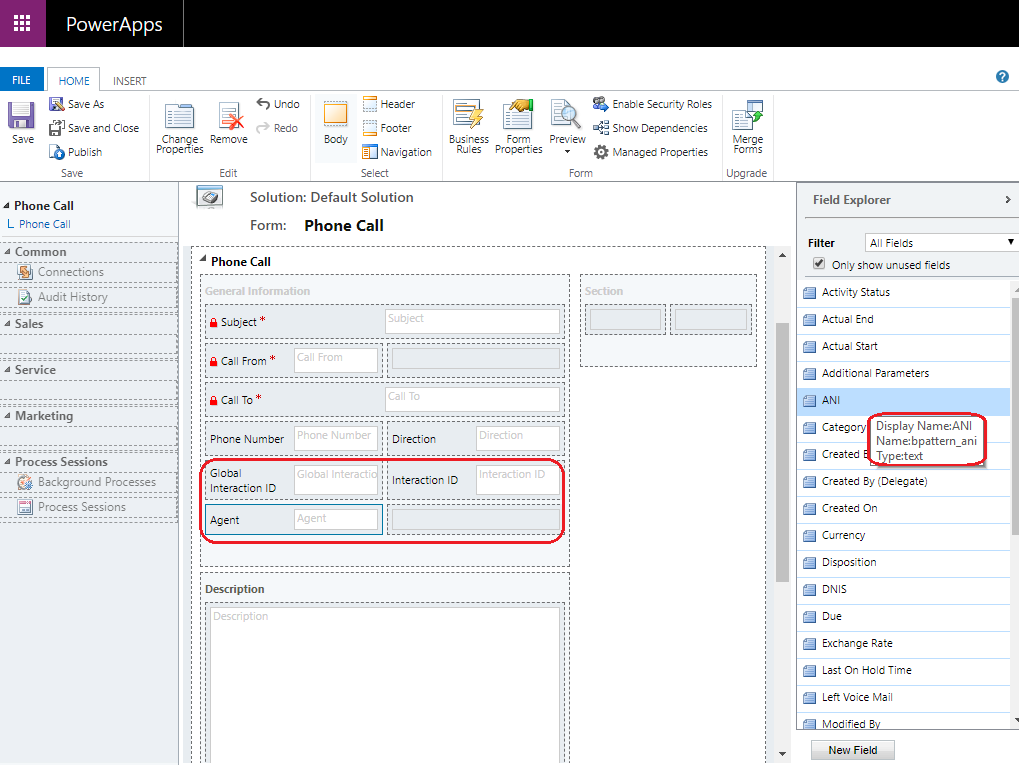
Hover over fields to reveal display names
- To reveal the name of the field, hover your cursor over the field; the name will begin with bpattern_.
- Click Save, and then click Publish.
Remember to Save and Publish - In the main Power Apps window, click Publish all Customizations.
Click "Publish all Customizations" - To verify the Activity History fields work, you will need to process a test interaction in your Dynamics 365 environment. Once completed, you will be able to go to My Work > Activities and view the record containing the fields.
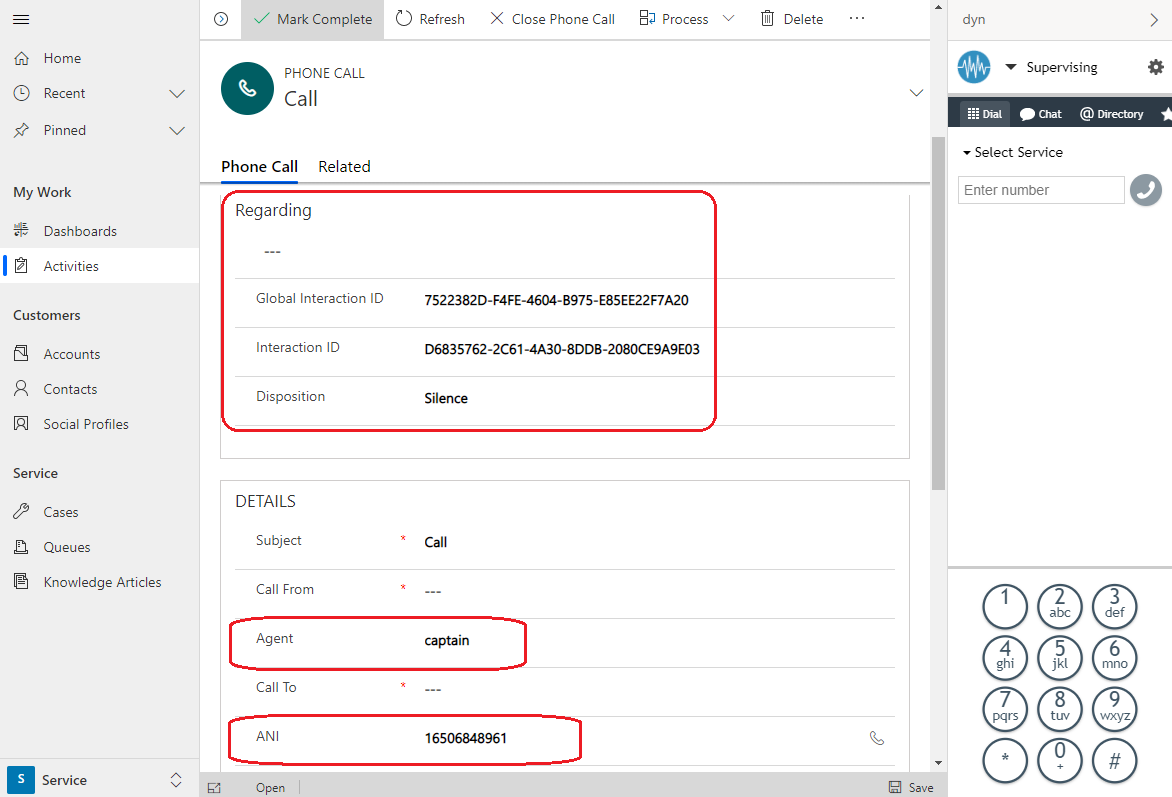
In "My Work > Activities", view the record containing the fields


- ↑ For your Dynamics 365 environment, note that the majority of sales and customer service core functionalities have moved to the Unified Interface client; other client types will be discontinued in 2020. We recommend switching to the Unified Interface client.