From Bright Pattern Documentation
(Created page with "<translate>= Create an Integration Account = After creating your app and a Twitter-integration-guide/Configuration/De...") |
|||
| Line 6: | Line 6: | ||
# From here, enter the following:<br>* The name of the integration account<br>* The [[Twitter-integration-guide/Configuration/CreateanApp#Keys_and_Tokens_Tab|Consumer API key]]<br>* The [[Twitter-integration-guide/Configuration/CreateanApp#Keys_and_Tokens_Tab|Consumer API key secret]]<br>* The [[Twitter-integration-guide/Configuration/CreateanApp#Keys_and_Tokens_Tab|Access Token]]<br>* The [[Twitter-integration-guide/Configuration/CreateanApp#Keys_and_Tokens_Tab|Access Token Secret]]<br>* The account type: ''Premium'' or ''Enterprise''<br>* If the account type is Premium, the name of the [[Twitter-integration-guide/Configuration/DevEnvironment|Dev environment label]]<br><br> | # From here, enter the following:<br>* The name of the integration account<br>* The [[Twitter-integration-guide/Configuration/CreateanApp#Keys_and_Tokens_Tab|Consumer API key]]<br>* The [[Twitter-integration-guide/Configuration/CreateanApp#Keys_and_Tokens_Tab|Consumer API key secret]]<br>* The [[Twitter-integration-guide/Configuration/CreateanApp#Keys_and_Tokens_Tab|Access Token]]<br>* The [[Twitter-integration-guide/Configuration/CreateanApp#Keys_and_Tokens_Tab|Access Token Secret]]<br>* The account type: ''Premium'' or ''Enterprise''<br>* If the account type is Premium, the name of the [[Twitter-integration-guide/Configuration/DevEnvironment|Dev environment label]]<br><br> | ||
# Click '''Apply''' to save the entered information, then click '''Test your connection'''; the results should pop the message, "Account credentials appear to be valid."<br><br> | # Click '''Apply''' to save the entered information, then click '''Test your connection'''; the results should pop the message, "Account credentials appear to be valid."<br><br> | ||
| − | # Next, click the '''Set Webhook''' button. This sets the name of your contact center as the webhook URL (e.g., your_contact_center.brightpattern.com). When set, the following message will pop: "Webhook is set successfully." '''Note''': This step should be done once for newly configured Twitter integration accounts or when there is a [[Twitter-integration-guide/Configuration/Troubleshooting|problem receiving messages from Twitter]].<br><br>[[File:Twitter-App-Creation-8-54.PNG|800px|thumb|center|Set the webhook]] | + | # Next, click the '''Set Webhook''' button. This sets the name of your contact center as the webhook URL (e.g., your_contact_center.brightpattern.com). When set, the following message will pop: "Webhook is set successfully." '''Note''': This step should be done once for newly configured Twitter integration accounts or when there is a [[Twitter-integration-guide/Configuration/Troubleshooting|problem receiving messages from Twitter]]. |
| + | # NOTE: this step does not work as of 2/18/2020 becasue of Twitter API issue. Please contact our support for workaround (soon to be published here). | ||
| + | <br><br>[[File:Twitter-App-Creation-8-54.PNG|800px|thumb|center|Set the webhook]] | ||
Revision as of 02:17, 19 February 2020
• 日本語
<translate>= Create an Integration Account = After creating your app and a dev environment for testing, you will need to connect the information from these to your Bright Pattern Contact Center environment with an integration account.
Steps
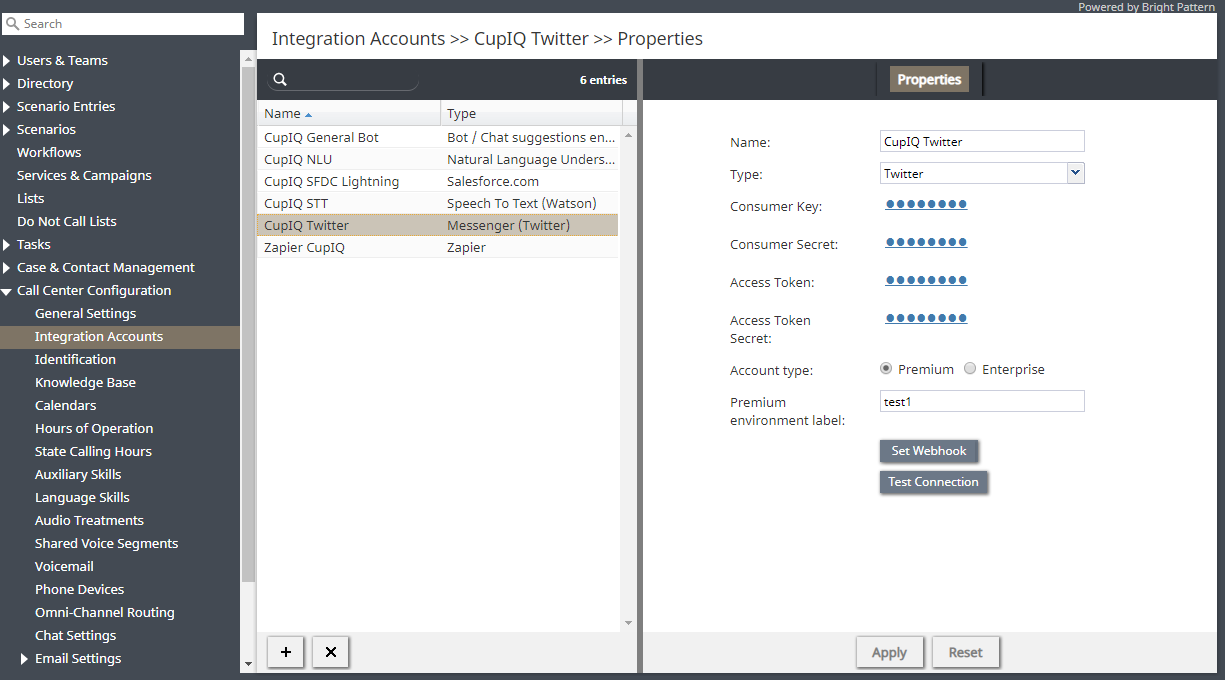
- In the Contact Center Administrator application, section Call Center Configuration > Integration Accounts click + to create a new integration; select Messenger then type Twitter from the drop-down menu.
- From here, enter the following:
* The name of the integration account
* The Consumer API key
* The Consumer API key secret
* The Access Token
* The Access Token Secret
* The account type: Premium or Enterprise
* If the account type is Premium, the name of the Dev environment label - Click Apply to save the entered information, then click Test your connection; the results should pop the message, "Account credentials appear to be valid."
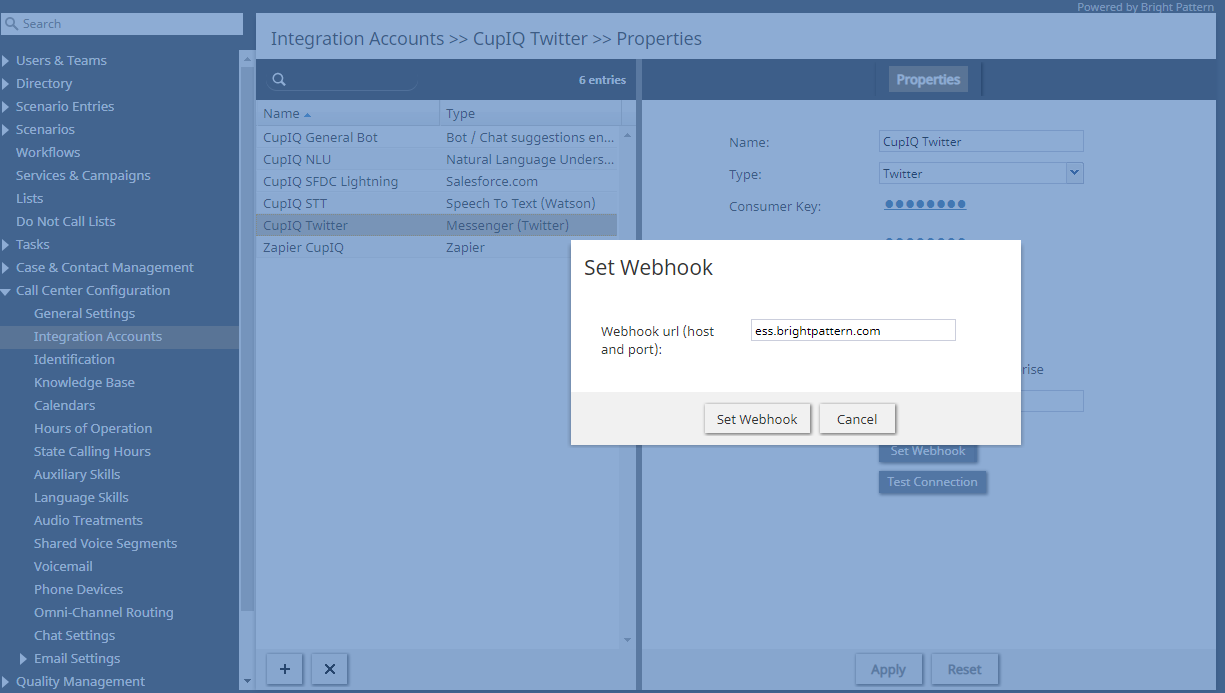
- Next, click the Set Webhook button. This sets the name of your contact center as the webhook URL (e.g., your_contact_center.brightpattern.com). When set, the following message will pop: "Webhook is set successfully." Note: This step should be done once for newly configured Twitter integration accounts or when there is a problem receiving messages from Twitter.
- NOTE: this step does not work as of 2/18/2020 becasue of Twitter API issue. Please contact our support for workaround (soon to be published here).
</translate>


