(Created page with "休日カレンダーをHOPエントリの条件として追加できます。ただし、その場合、営業時間を設定する代わりに、''' 営業外の時間 '''...") |
|||
| Line 30: | Line 30: | ||
| − | + | 休日カレンダーをHOPエントリの条件として追加できます。ただし、その場合、営業時間を設定する代わりに、''' 営業外の時間 '''オプションを選択します。 | |
Revision as of 20:00, 23 March 2020
営業時間 (HOP)の設定
営業時間 (HOP)の設定は、コンタクトセンターの設定を行うにあたって最も基本的かつ重要な事項の1つです。例えば、世界の各タイムゾーンや各地域にエージェントがいるコンタクトセンターの場合は、お客様に対して連絡できるおよび連絡できない時間帯を知らせなければなりません。
コンタクトセンター管理者アプリケーションでは、営業時間をグローバルに(つまり、コンタクトセンター全体に対して)設定し、サービスごとに調整し、さらにシナリオごとにも調整できます。HOPを設定する際に覚えておくべき最も重要なことは、階層構造があることです。つまり、HOPは特定の順序に基づきシステムによって読み取られ、追加されるHOP条件は前の条件より優先されます。
この記事では、最も基本的なHOP設定からスタートし、階層構造を経て進行します。
もう一つ重要なのは、必要以上に複雑にしないことです。複数のHOP状態を追跡することは困難であるため、基本的なグローバル設定がセンターのニーズを満たしている場合は、これをご利用ください。
1. コールセンターの設定> カレンダー
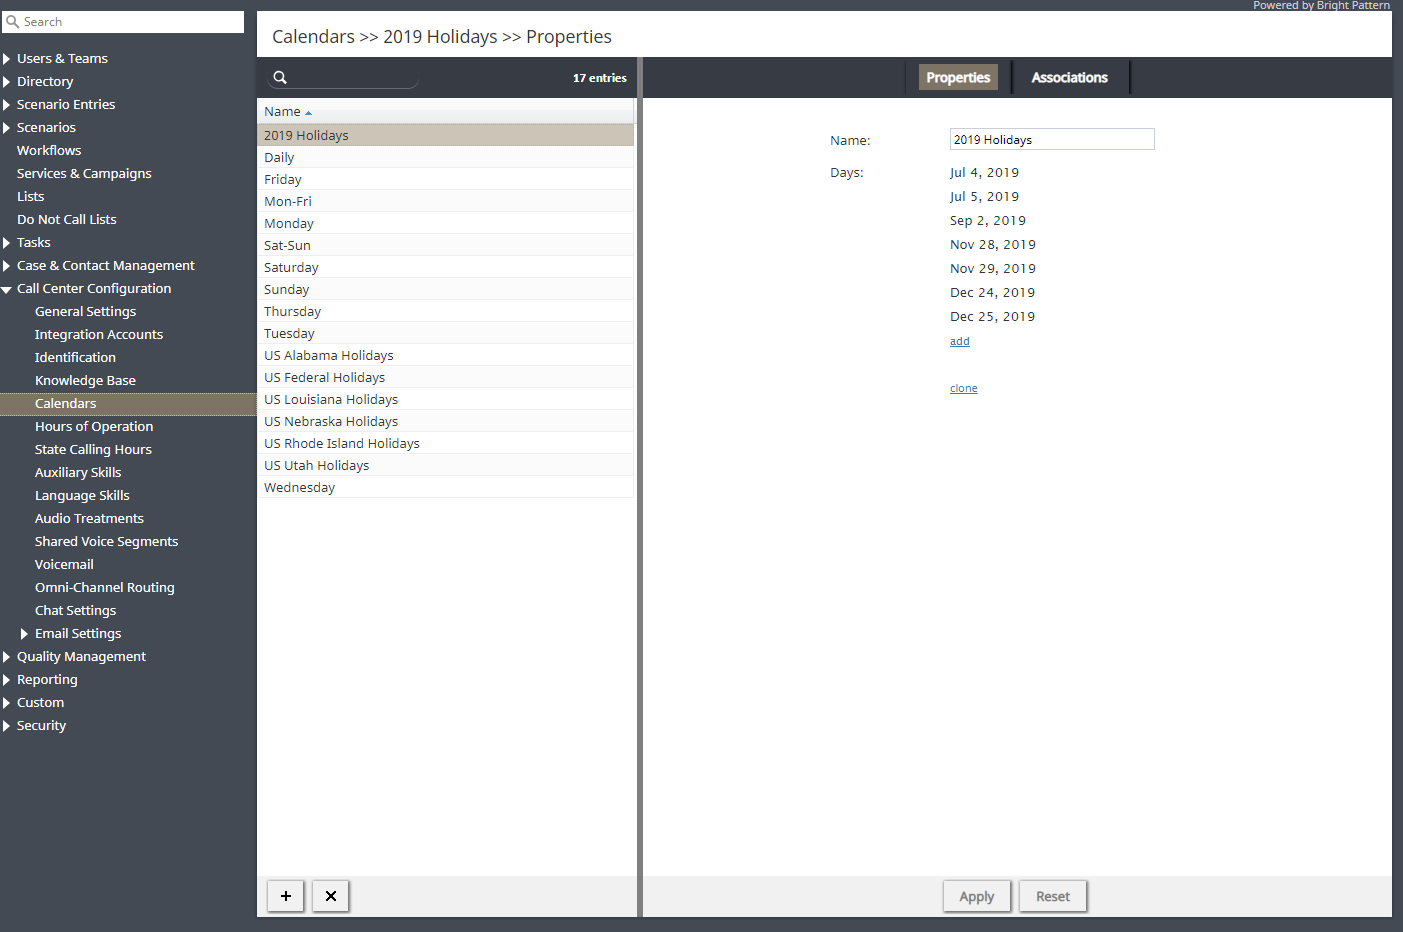
HOPを設定する前に、カレンダーと呼ばれる営業日数を決める必要があります。コールセンターの設定より、 カレンダーへ進みます。ここでは、使用可能な事前定義済みのカレンダーがいくつか表示されます。新しいカレンダーを作成する場合、または既存のカレンダーを編集する必要がある場合は、この操作を先に行います。これは、グローバルHOPエントリが営業日の日数に基づいて作成されるからです。
ご注意: コンタクトセンターの休日を最初に定義します。定義したら、それらはグローバルHOPエントリに追加できます。
2. コールセンターの設定 > 営業時間
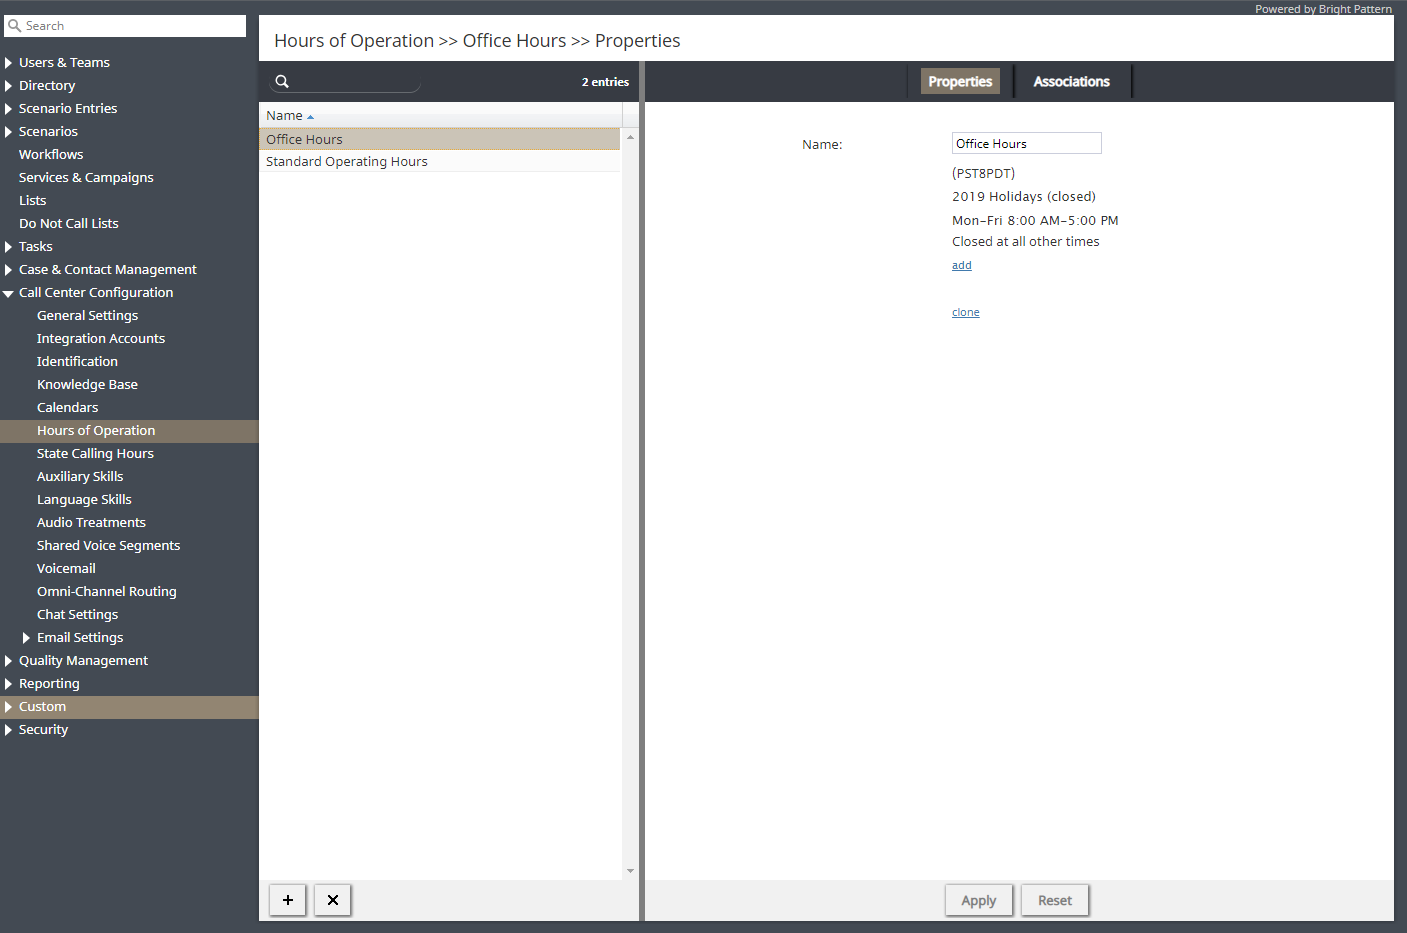
コールセンターの設定の 営業時間へ進みます。ここで、コンタクトセンターのグローバルHOPエントリを設定します。必要な数のHOPエントリを設定できます(例:平日、週末、休日など)。 関連タブより、特定のHOPエントリを使っているサービスを確認できます。
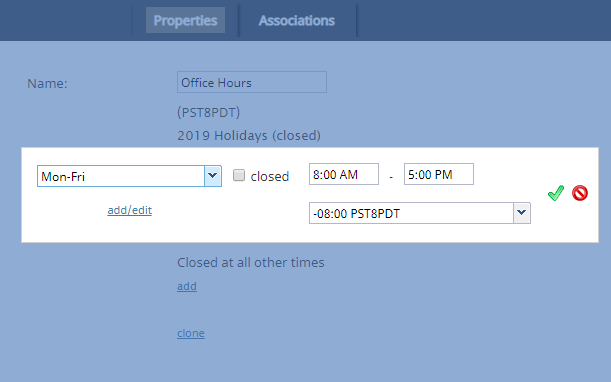
HOPエントリを作成するときは、最初にグローバルカレンダーを選択し、次に時間を定義し、最後にタイムゾーンを選択します。グローバルHOPエントリに必要な数の条件を追加できます。
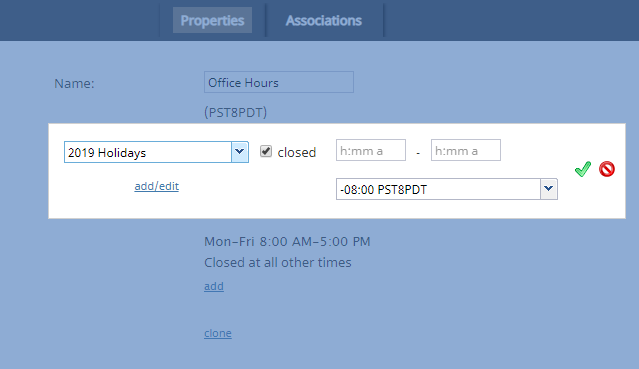
休日カレンダーをHOPエントリの条件として追加できます。ただし、その場合、営業時間を設定する代わりに、 営業外の時間 オプションを選択します。
3. Services & Campaigns
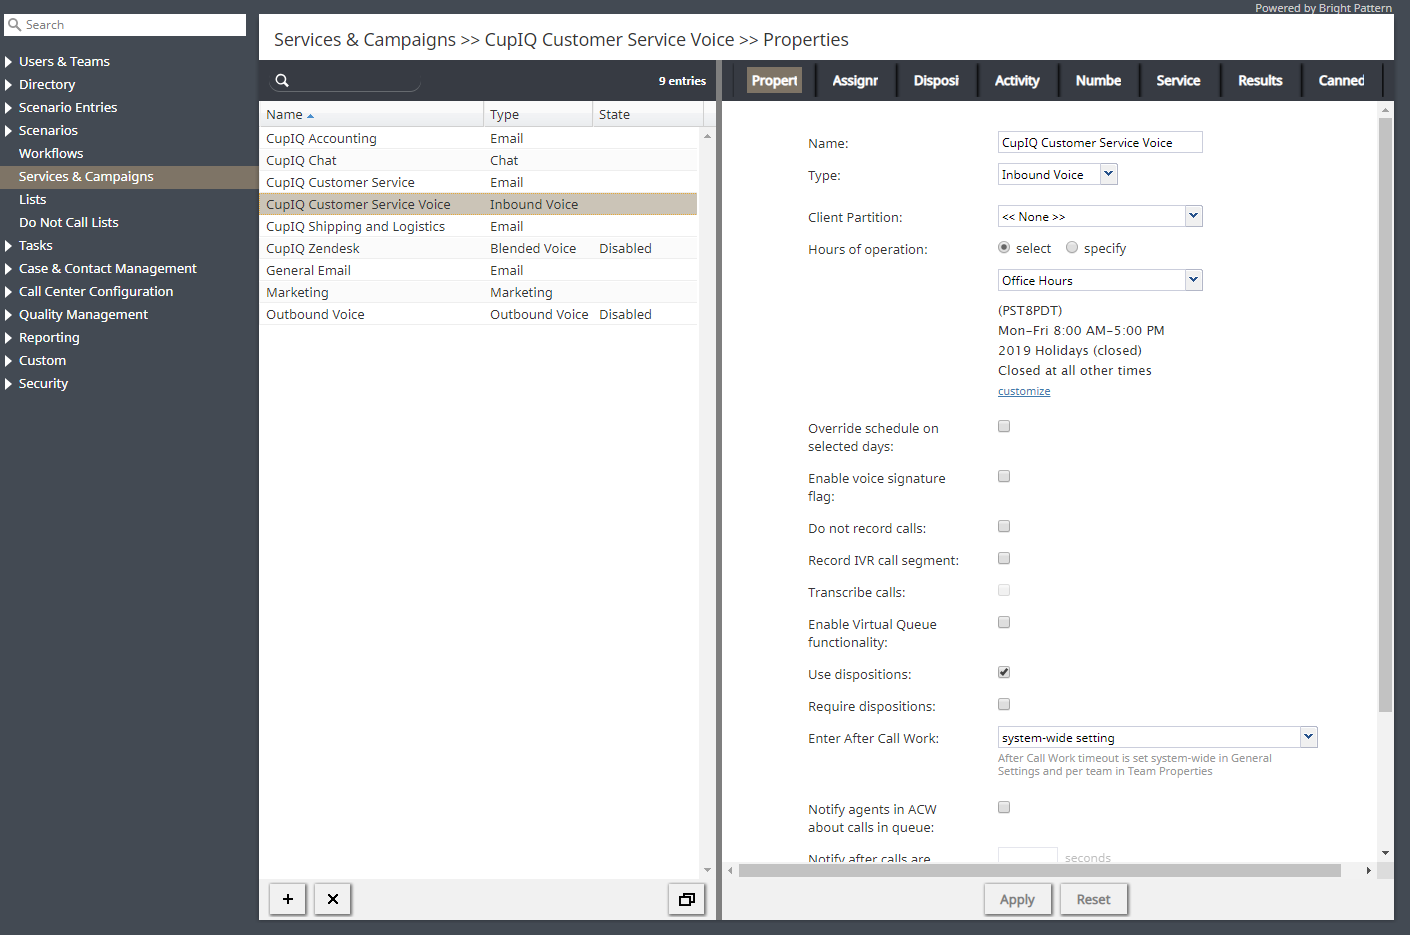
After defining a global HOP entry, you will need to assign it to a service or campaign. To do this, go to section Services & Campaigns > Properties tab. For each service or campaign, you can set unique hours of operation; this includes email services.
When configuring HOP for a specific service, you have two options: select and specify. Option select lets you select from your globally configured HOP. Should you desire, you have the ability to customize a selected global HOP entry; note that customized HOP override your global HOP. Option specify lets you create HOP from scratch, specifically for this service. To do this, click add, then configure the days and times you would like. Note that when specify is selected, the default option is Open 24/7.
4. Scenario Entries
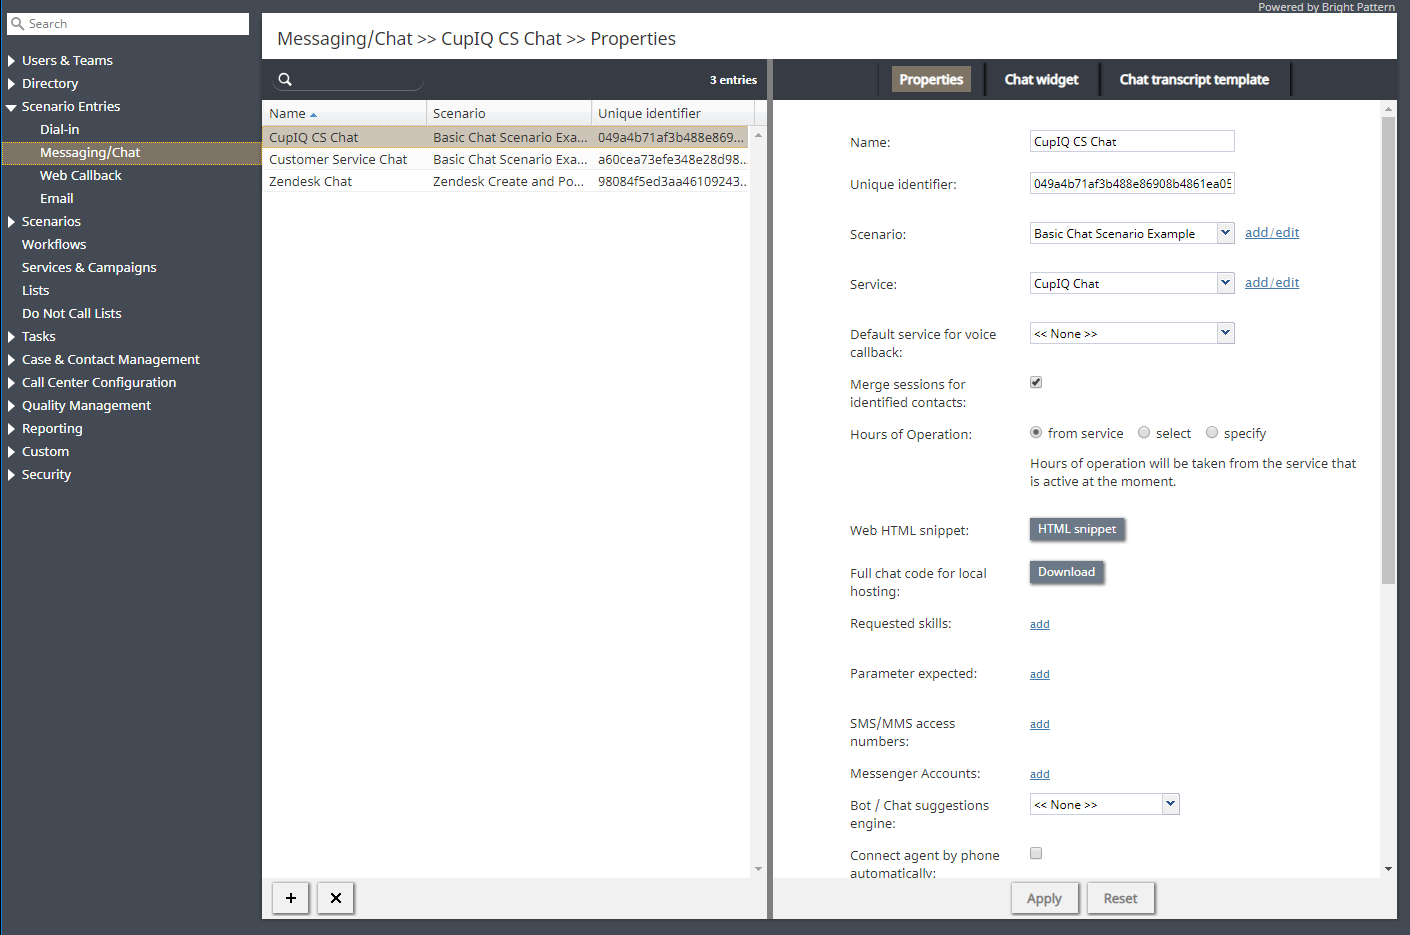
If you would like, you can continue to set further HOP conditions per scenario entry. To do this, go to section Scenario Entries. HOP conditions may be applied to all scenario entry types except email. Note that any unique HOP defined here override previous ones associated with service or global HOP.
When configuring HOP for scenario entries, like in section Services & Campaigns, you have the option to select a new global set of hours or specify ones unique to this specific scenario entry. Additionally, there is the option from service, which takes the hours of operation from the services that are active at the moment. If you do not need any additional HOP conditions added to your scenario the from service option should be selected.
5. Scenarios
Section Scenarios is the final place where you may define HOP conditions; they are set using the If block in the Scenario Builder application. Note that when defined in a scenario, HOP conditions override all previous ones.
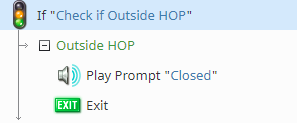
The most common use for invoking an HOP condition in an If block is to determine what happens to customers trying to reach your contact center outside your hours of operation, or an HOP check.
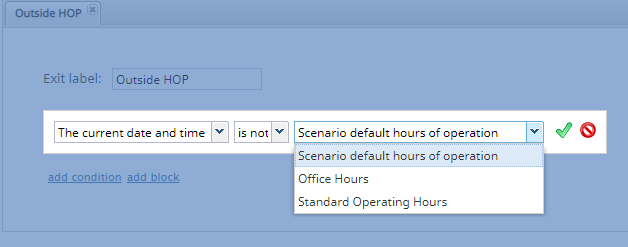
To configure an HOP check, add an If block to the top of your scenario and create a branch. On this branch, add a condition that uses the The current date and time option. From here, you may select a global HOP entry, and the "is not" option, the result being the scenario checks to see if the interaction is happening outside of the selected HOP entry. When configured correctly, your condition will look like this:
- The current date and time
- is not
- Selected HOP
Once the condition is configured, you then decide what to do with the interaction, such as sending a call to voicemail, a particularly skilled agent, routing the call to a third-party service, and so forth.

