Understanding Hours of Operation (HOP)
Setting up hours of operation (HOP) is one of the most basic and important things to consider when configuring your contact center. For example, your center may have agents in different timezones and regions of the world, and your customers should know when they can and can’t reach you.
In the Contact Center Administrator application, you configure hours of operation globally (i.e., for your entire contact center), then can refine them per service, and further can refine them per scenario. Noting this, the most important thing to remember when configuring HOP is there is a hierarchy. That is, HOP are read by the system in a particular order, and every added HOP condition will supersede the previous one.
In this article, we will explain how the HOP hierarchy works in Bright Pattern Contact Center software by examining some HOP configuration examples.
Finally, as a general reminder, don’t make things any more complicated than they need to be! Keeping track of multiple HOP conditions can be difficult, so, if a basic global configuration meets your center’s needs, stick with this.
1. Call Center Configuration > Calendars
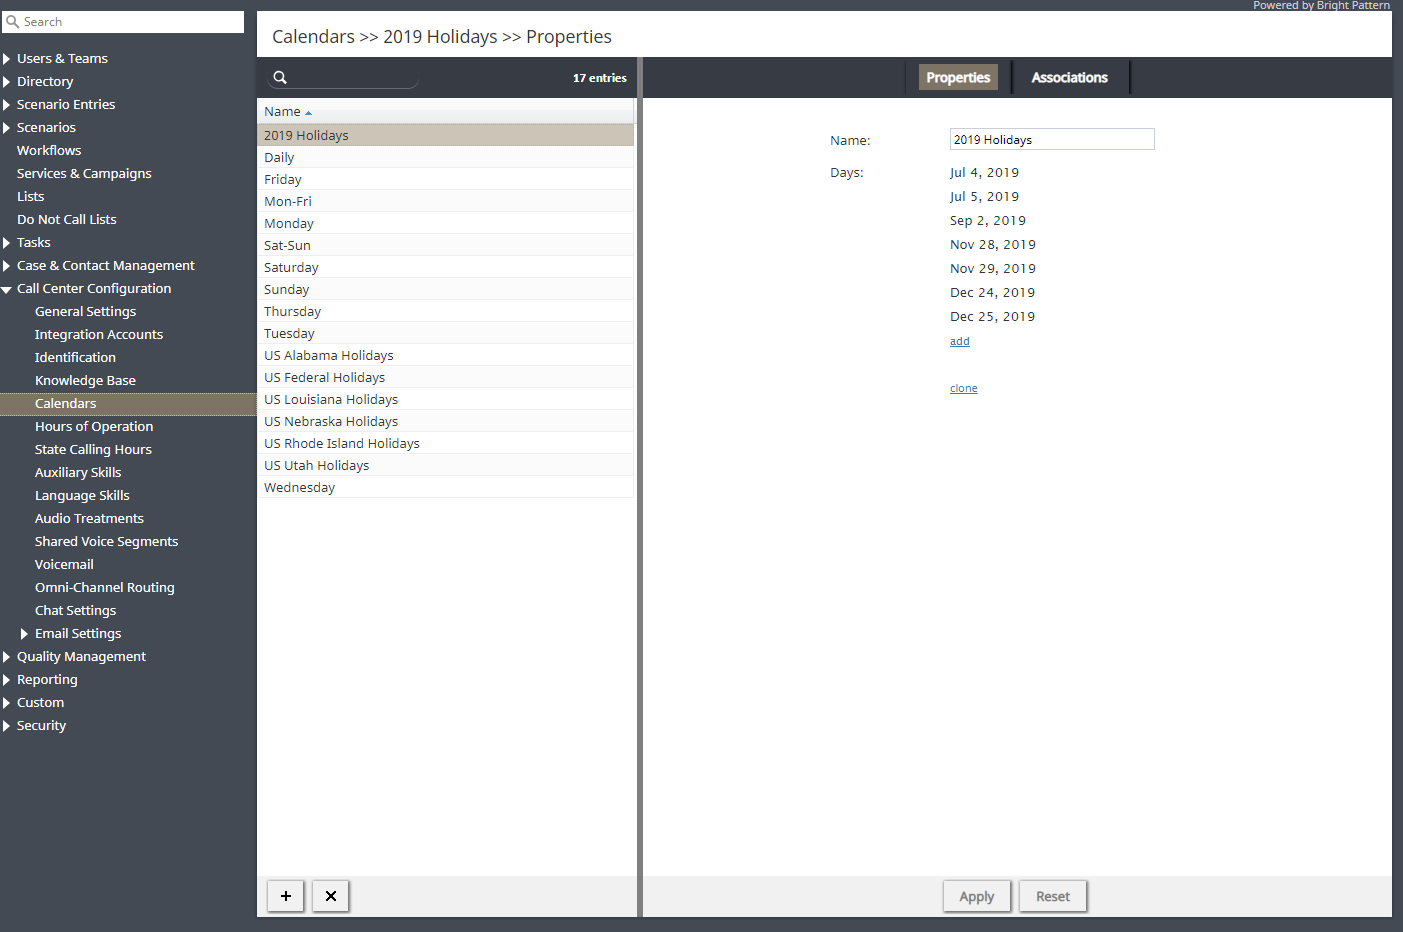
Before configuring your HOP, you should define your days of operation, known as calendars. Beginning in section Call Center Configuration, go to section Calendars. Here, you will see a number of predefined calendars available for use. If you need to create a new calendar or edit a pre-existing one, it should be done first. The reason for this is that when you define your global HOP entries, they are created based on days of operation.
Note: Your contact center's holidays should be defined here first; once defined, they may be added to a global HOP entry.
2. Call Center Configuration > Hours of Operation
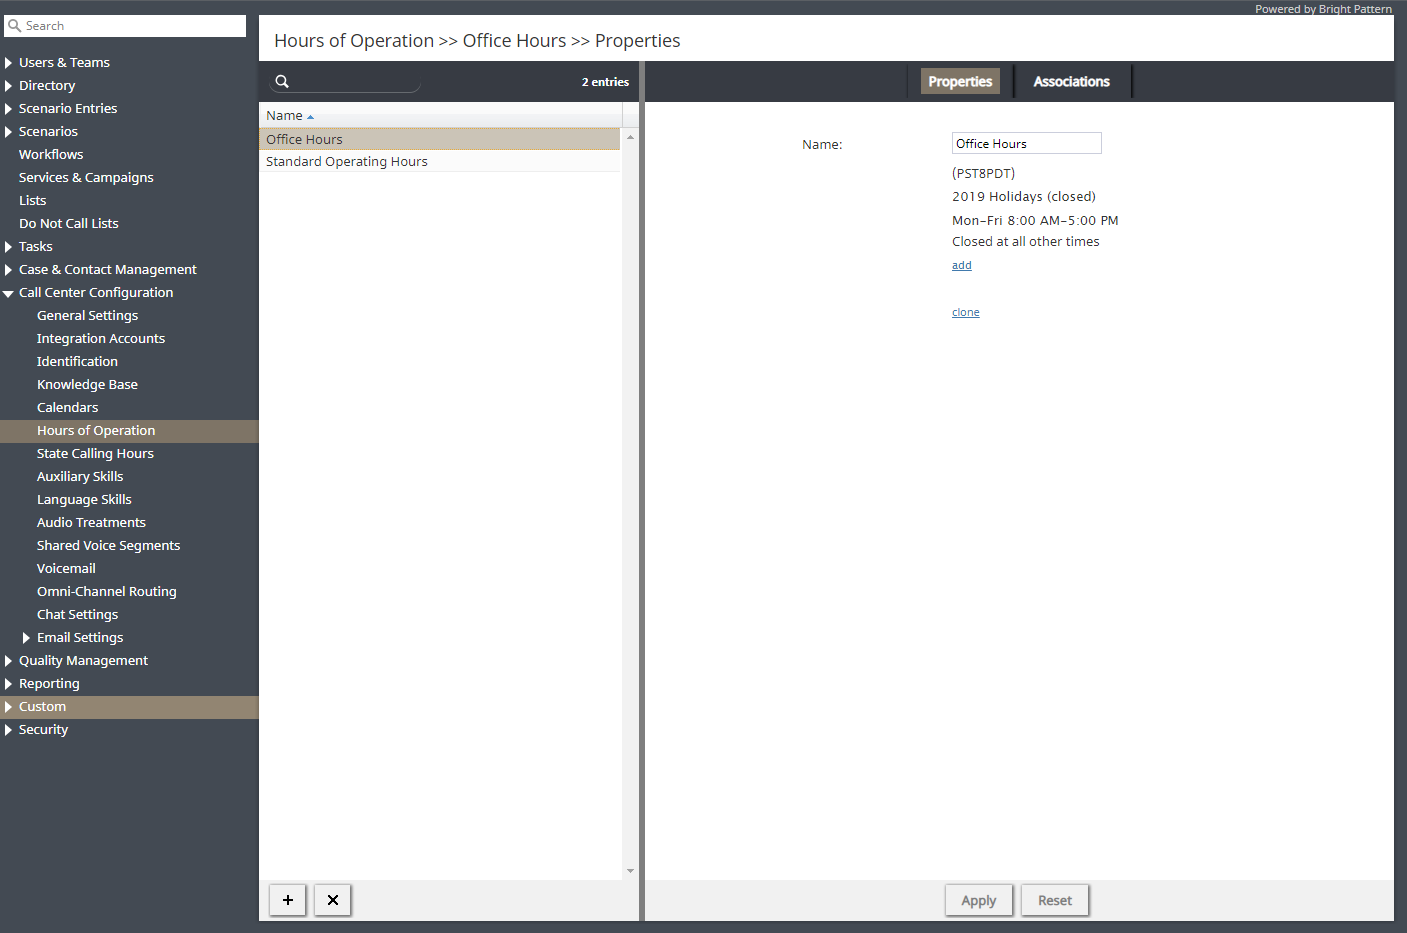
Continuing in section Call Center Configuration, go to section Hours of Operation. This is where you configure your contact center’s global HOP entries. You can configure as many different HOP entries as you need (e.g., weekday, weekend, holiday, etc.). Note that from the Associations tab, you can see what services use a specific HOP entry.
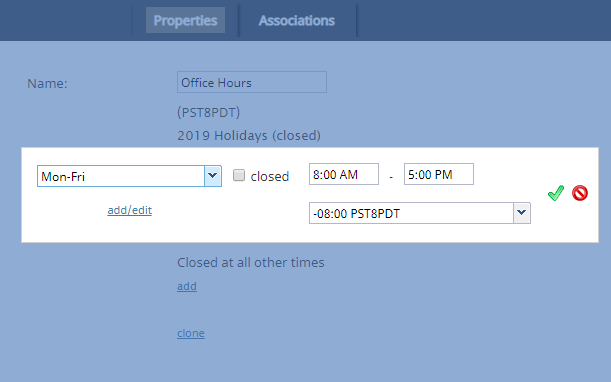
When creating an HOP entry, you will select a global Calendar first, then define the hours, and finally, select the timezone. Note that you may add as many conditions as you need to a global HOP entry.
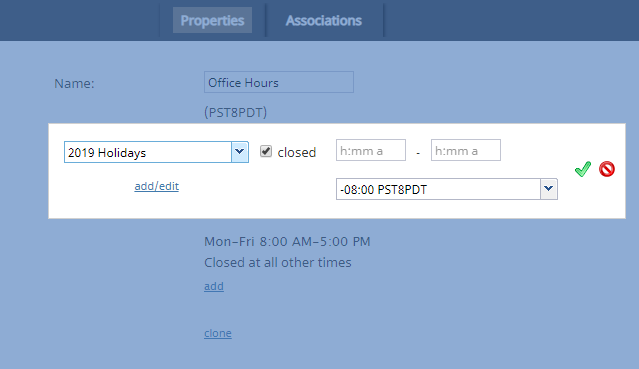
As a reminder, holiday calendars may be added as a condition to an HOP entry; however, instead of defining hours of operation, you will select the closed option.
3. Services & Campaigns
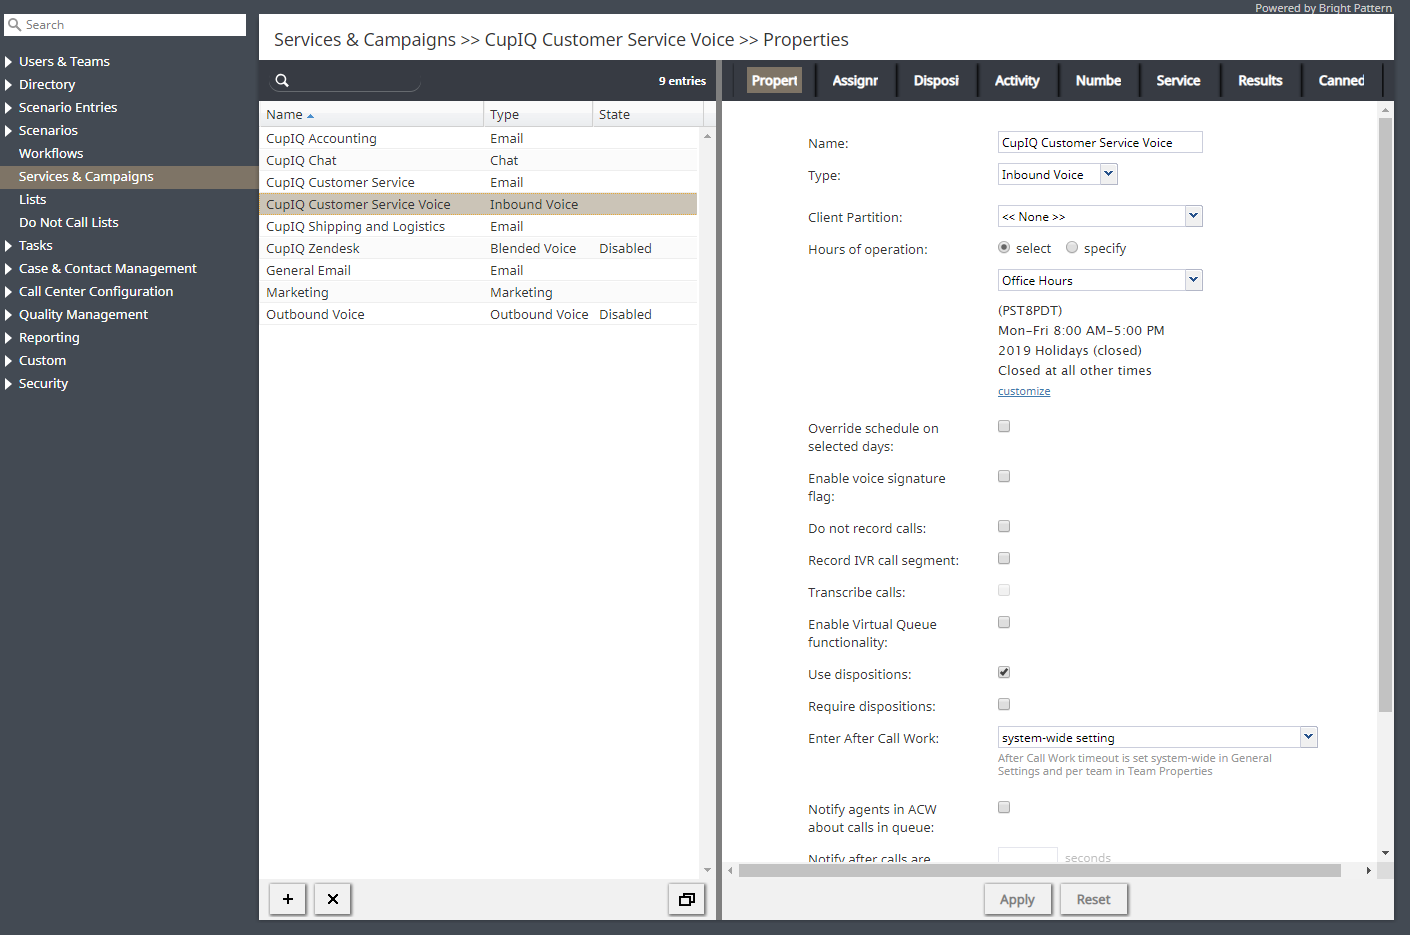
After defining a global HOP entry, you will need to assign it to a service or campaign. To do this, go to section Services & Campaigns > Properties tab. For each service or campaign, you can set unique hours of operation; this includes email services.
When configuring HOP for a specific service, you have two options: select and specify. Option select lets you select from your globally configured HOP. Should you desire, you have the ability to customize a selected global HOP entry; note that customized HOP override your global HOP. Option specify lets you create HOP from scratch, specifically for this service. To do this, click add, then configure the days and times you would like. Note that when specify is selected, the default option is Open 24/7.
4. Scenario Entries
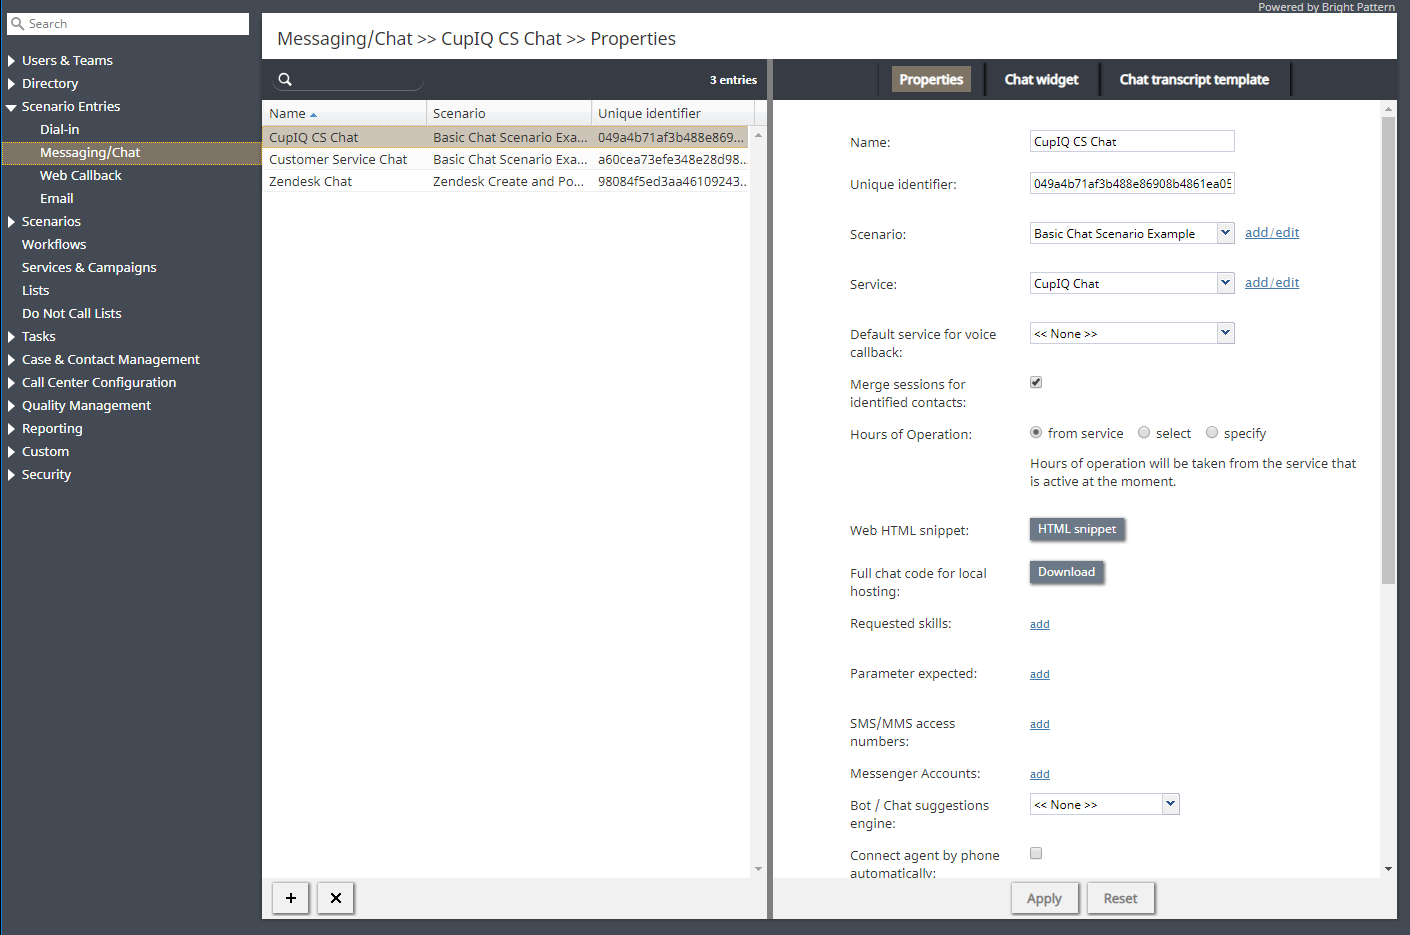
If you would like, you can continue to set further HOP conditions per scenario entry. To do this, go to section Scenario Entries. HOP conditions may be applied to all scenario entry types except email. Note that any unique HOP defined here override previous ones associated with service or global HOP.
When configuring HOP for scenario entries, like in section Services & Campaigns, you have the option to select a new global set of hours or specify ones unique to this specific scenario entry. Additionally, there is the option from service, which takes the hours of operation from the services that are active at the moment. If you do not need any additional HOP conditions added to your scenario the from service option should be selected.
5. Scenarios
Section Scenarios is the final place where you may define HOP conditions; they are set using the If block in the Scenario Builder application. Note that when defined in a scenario, HOP conditions override all previous ones.
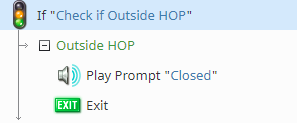
The most common use for invoking an HOP condition in an If block is to determine what happens to customers trying to reach your contact center outside your hours of operation, or an HOP check.
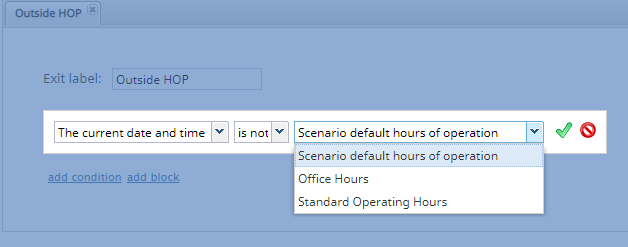
To configure an HOP check, add an If block to the top of your scenario and create a branch. On this branch, add a condition that uses the The current date and time option. From here, you may select a global HOP entry, and the "is not" option, the result being the scenario checks to see if the interaction is happening outside of the selected HOP entry. When configured correctly, your condition will look like this:
- The current date and time
- is not
- Selected HOP
Once the condition is configured, you then decide what to do with the interaction, such as sending a call to voicemail, a particularly skilled agent, routing the call to a third-party service, and so forth.

